Four Wheeler Price Guide: How Much Does An ATV Cost?
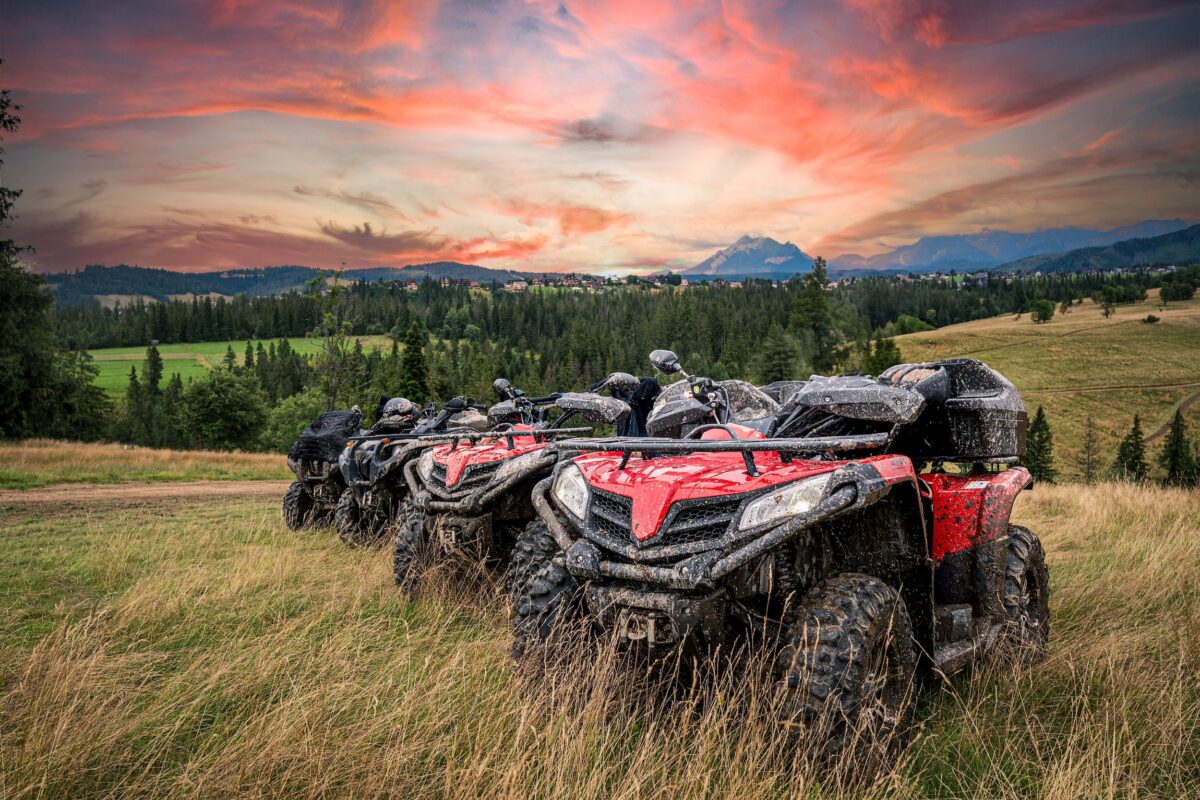
If you’ve spent any time searching how much an ATV (also known as a four wheeler or quad) can cost, you’ve probably noticed the numbers are all over the map. That’s because ATV price genuinely depends on a handful of specific factors, and once you know what they are, it’s a lot easier to land on a number that makes sense for your situation.
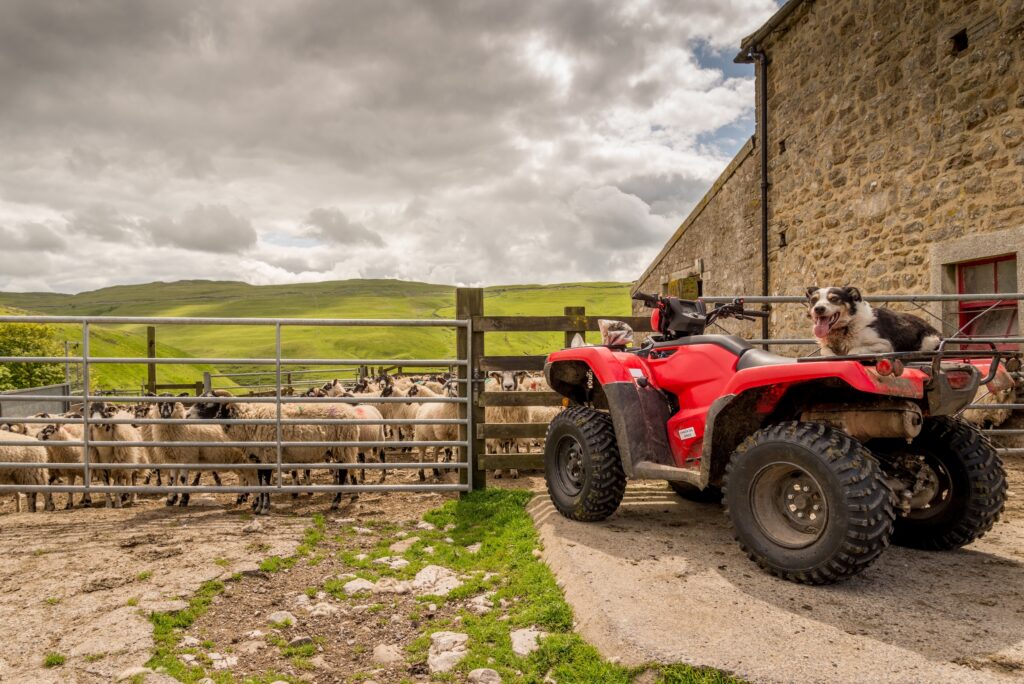
Maybe you’re outfitting a working ranch and need something that can handle a full day of fence checking and feeding. Maybe you’re gearing up for trail season with the family. Or maybe you’re just ready to have your own quad instead of borrowing your neighbor’s every time a job comes up. Whatever brings you here, we want to give you a genuinely comprehensive answer on ATV cost, including the ownership costs that come after the purchase, what actually drives that number up or down, and how to land on a fair price for the way you plan to use your four wheeler.
That’s why we’ve written this ATV pricing guide. Hayden Outdoors has been rooted in the world of ranch, farm, and recreational land since 1976, and that family-owned, hands-on background is exactly why we’re a trusted resource here. We connect buyers and sellers of ranch, farm, and recreational equipment directly, with no fees or commissions on either side, so we see what real ATVs are actually listed and sold for across the market. We’re not here to sell you a specific machine. We’re here to help you understand that market so you walk into a purchase knowing what you’re actually looking at.
Table Of Contents
Factors That Impact How Much An ATV Is Going To Cost
Before you can pin down an accurate ATV cost picture for your own situation, it helps to know what’s actually moving the number behind the scenes. Four wheeler cost calculations aren’t random, and they aren’t determined by one single thing. They’re built from a handful of specific pricing variables, and once you know them, the wide ATV cost range starts to break down into something you can actually work with.
New vs Used: How Much Is An ATV Going To Cost Depending On Condition?
One of the biggest factors in determining how much an ATV can cost you is whether you’re buying a new or used four wheeler. A new quad carries the full manufacturer’s price tag, the newest features, and typically a warranty backing it up. A used ATV can cost a fraction of that new price, especially if it’s a few model years old with a reasonable number of hours on the engine. This is usually the first fork in the road for anyone asking how much an ATV will cost them, because the gap between new and used pricing is often larger than any other factor on the list.
The condition of the ATV you’re looking at also matters substantially. Two ATVs from the same model year can carry very different price tags depending on how they were stored, how hard they were ridden, and how well they were maintained. A machine that spent its life in a barn and got regular oil changes is going to hold more value than one that sat outside through a few rough winters. When you’re figuring out how much an ATV is going to cost you and comparing various quad listings, don’t just look at the year. Look at the hours, the maintenance records for the ATV (if the seller has them), and the overall condition of the tires, brakes, and body of the four wheeler.
What Engine Size And Type Mean For Your Budget
Engine size and drivetrain type play a direct role in how much a four wheeler costs. Small displacement, single-cylinder engines built for light recreational ATV use or younger riders sit at the lower end of the price scale. Larger displacement engines, four-wheel drive systems, and higher-performance ATV builds push the price up because they cost more to manufacture and tend to hold more value on resale down the road.
If you’re comparing how much a quad built for casual trail riding costs against one built for heavy work or higher speed, engine size is usually where that price gap starts to show up. It’s worth being honest with yourself about what you actually need here. A bigger engine isn’t automatically the better buy if most of your riding is light trail use or slow work around a property. Matching the engine to the job is one of the simplest ways to avoid overpaying for capability you won’t use.
How Where You Buy Your ATV Changes The Cost Story
The same ATV can carry a very different price tag depending on where it’s purchased, and price is only part of what changes. A dealership sticker price for a four wheeler often includes dealer fees, freight charges, and ATV setup costs included in the base price. But that price also typically comes with a warranty, an ATV that’s been inspected and serviced before sale, and someone to call if something goes wrong with your four wheeler shortly after you buy it. For buyers who want that safety net when buying an ATV, the dealership route has some clear benefits.
Buying your ATV directly from a private seller or through an equipment marketplace tends to remove a good bit of that markup from the four wheeler cost equation. That’s a big part of why the used four wheeler market, bought direct, often has some cost benefits. The trade-off is that a private ATV sale typically comes as-is, with no warranty and no recourse if the seller left something out or wasn’t fully upfront about the quad’s condition. The responsibility for verifying condition, service history, and any mechanical issues falls on you as the buyer of the quad.
Where you buy your quad also affects how much room you have to negotiate the price. A dealership price is usually more fixed. A private sale or marketplace listing often has more price flexibility built in, especially if the seller of the ATV wants a straightforward transaction. But that same flexibility means there’s typically no dealership backing up the deal after it’s done.
None of this means one path is right for everyone. A dealership can be worth the added cost for a buyer who wants a warranty and a fully vetted ATV. A private sale or marketplace listing can be worth the savings for a buyer who’s comfortable inspecting the four wheeler closely, asking the right questions, and taking on that responsibility themselves. It’s worth weighing that trade-off (and not just the sticker price) before deciding what a fair four wheeler cost looks like for the ATV you want.
The Hidden Cost Of Depreciation: How ATV Price Changes Over Time
This is an often-forgotten piece of the puzzle when determining how much an ATV can and should cost, but it’s quite possibly one of the most important price considerations you need to take into account. Every ATV loses value over time, but the rate at which it loses that value isn’t steady. Knowing the shape of that curve can help you time a purchase (or a sale) a lot smarter.
Why Depreciation Hits Hardest Early
According to ATV Trader, most four wheelers hold their value fairly well for roughly the first three years of ownership. After that point, the depreciation of your quad picks up, typically running between 10 and 25 percent annually. Essentially, a newer ATV tends to hold steady in value early on, then loses ground more noticeably once it’s a few years old.
This explains why two ATVs only a couple of years apart in age can sometimes carry surprisingly similar price tags early on, while the gap widens more once one of the four wheelers passes that three-year mark. It also means the calculus on new versus used isn’t as simple as “newer always costs more.” Where a four wheeler sits relative to that three-year point is often just as important as its age alone in the price calculation.
How To Find The Depreciation Sweet Spot
If you’re trying to get the most machine for your money, the sweet spot in used ATV price tends to show up once a four wheeler is a few years past new, after that initial depreciation has already run its course, but before it’s racked up enough hours or wear to start needing bigger repairs. Buying your quad in that window means someone else absorbed the steepest part of the value drop, and you get to buy in at a more stable, more predictable price.
This is also useful information if you’re planning to sell your quad down the road. A well-maintained ATV with clean service records tends to hold its position on that stabilized part of the curve much better than one that’s been neglected, which is one more reason maintenance isn’t just about keeping your four wheeler running. It’s about protecting what it’s worth.
Indirect ATV Costs You Should Consider When Assessing Price
Beyond the machine itself, where it’s purchased, and how far along it is on the depreciation curve, there’s a second layer of factors that shape what you’ll actually spend on an ATV, and just as important, what you’ll keep spending after the purchase is done.
Weighing A Lower ATV Price Against Higher Upkeep Costs
Here’s where a lot of buyers get tripped up chasing the lowest possible price for their ATV. A rundown, high-hour four wheeler might look like a bargain sitting on the lot or in a listing photo, but it often comes with a trade-off. More frequent repairs. Worn tires and brakes that need replacing right away. A higher chance of a bigger mechanical bill waiting just down the road.
Something as routine as a clutch job can run anywhere from $150 to $500, depending on what’s involved, and a full tune-up can run anywhere from $100 to $400. Those costs add up fast on an ATV that was already showing its age at the time of purchase. General annual upkeep can put you at roughly 10 to 15 percent of the vehicle’s purchase price under normal conditions, climbing higher for four wheelers ridden hard on rough terrain, like rocky trails or heavily wooded ground.
That doesn’t mean every used ATV is a bad buy. Plenty of them are excellent value. It means the real cost of an inexpensively priced four wheeler isn’t always the price tag you see up front; it’s also the corresponding maintenance and upkeep required. An ATV priced a bit higher but sold in solid mechanical condition, with service records to back it up, can often work out to a better overall price value than one that looked like a steal until the repair estimates started rolling in. When you’re weighing how much an ATV costs against another option, always ask what kind of shape the machine is actually in, not just what number is on the price tag.
Typical ATV Price Ranges By Type
With all these factors in mind, here’s how ATV cost typically breaks down by category. These are ranges, not exact figures, since condition, hours, region, and how far along the depreciation curve a four wheeler sits will all shift the final cost number.
Entry-level ATVs, the kind built for younger riders or light recreational use, sit at the bottom of the four wheeler cost scale. These are simpler builds with smaller engines, fewer features, and less overall capability, which keeps the price accessible for first-time buyers or families getting a young rider started. ATV models typically start in the $3,000 to $7,000 price range, with basic features like disc brakes and automatic transmission included as standard.
Mid-range ATVs make up the bulk of the market, and honestly, the bulk of searches into how much an ATV can cost. New mid-range ATVs generally fall in the $7,000 to $10,000 price range. These are the quads built for regular trail riding, hunting trips, or general ranch and property work, carrying a larger engine, more capable suspension, and often four-wheel drive, which puts them solidly above entry-level four wheeler pricing while still staying reasonable for everyday use.
High-performance and heavy-duty ATVs sit at the top of the price range, generally starting around $10,000 and climbing to $15,000 or more for fully loaded models with upgraded suspension, electric start, and towing packages built in from the factory. These four wheelers are built for serious work, serious trail speed, or both, and naturally, that added capability comes at a higher cost.
Where in these price ranges your own ATV purchase lands across these tiers comes down to what you actually need your four wheeler to do day to day. A weekend trail rider and a rancher checking fence lines every morning are shopping two very different corners of the same market, even if they typed the exact same question to get started in their search.
Elements That Impact The Total Lifetime Cost Of An ATV

The ATV purchase price is only part of the full cost picture. A handful of ongoing costs, and a few one-time costs that rarely get mentioned, factor into the true lifetime cost of buying and owning a four wheeler.
Insurance, Registration, Fuel, And Maintenance
Insurance is one of the more overlooked pieces of the ATV cost equation. Liability-only coverage averages around $88 a year, while full coverage averages closer to $327 a year, though your actual rate depends on the machine’s value, where you ride, and your driving history. Factors like engine size, location, how often you ride, and your riding experience all shift that number up or down, and you can often get discounts for bundling with an existing auto or home policy.
Routine ATV maintenance is the other recurring cost worth budgeting for at the start. Oil changes typically run $30 to $55, and tire replacement runs roughly $20 to $250 per tire, depending on what you choose (this is before installation). While none of these numbers is a dealbreaker on its own, stacked together over a full riding season, they need to be a part of the calculation of how much cost you’ll be taking on when buying your ATV.
Registration fees and fuel costs round out the recurring list, and both vary quite a bit by state and by how much you actually ride. Neither tends to be a major expense on its own, but building them into your budget up front means fewer surprises waiting for you after the sale is done.
ATV Gear, Hauling, And Storage Costs
There are a few other additional costs you’ll want to consider when investing in an ATV. These are the little, easy to forget items, but they’re a critical part of your gear lineup.
- Riding gear is the first piece. A helmet, boots, gloves, and basic riding apparel aren’t optional if you’re serious about safety. Factor this into your budget when looking into the total price you want to pay for an ATV and its associated gear.
- Hauling is the second element. Unless you’re only ever riding on the property where the machine lives, you’ll need a way to move it, whether that’s a trailer, a truck bed ramp setup, or a hitch-mounted hauler. This is a cost that a lot of first-time ATV buyers don’t think about until after they purchase their four wheeler.
- Storage is the third piece. An ATV left out in the elements year-round is going to show wear faster and lose value faster than one kept under cover, whether that’s a garage, a barn, or a dedicated storage unit. If you don’t already have covered space, that’s a cost worth factoring in before you buy your ATV.
How To Find An ATV At The Right Price Point For Your Budget

Once you know what drives ATV price, how that price changes over time, and what it costs to keep one running, the last question is the simplest one: where do you actually go to find a fair deal?
Why The Used Market Often Has The Best ATV Price
For most buyers, the used market is where the best ATV at the best cost is hiding. A well-maintained used four wheeler, especially one bought after the steepest part of its depreciation curve, gives you most of the capability of a new one at a meaningfully lower price. If you know what to look for in terms of hours, condition, and maintenance history, you can avoid the “inexpensive now, expensive later” trap we covered earlier in this guide. This is especially true if you’re buying for ranch or work use rather than needing the latest features on a brand new model straight off the line.
Shopping used also gives you room to negotiate price in a way that isn’t always possible when buying new. Private sellers and equipment marketplaces often have more flexibility than a showroom sticker price, especially if you’re paying cash or coming in with your own arrangements already made.
How Hayden Outdoors Connects You With The Right Four Wheeler
This is exactly the market Hayden Outdoors was built for. We connect buyers and sellers of ranch, farm, and recreational equipment directly, with no fees and no commissions standing between you and a fair deal on an ATV. You deal with the seller, they deal with you, and we stay out of the transaction entirely.
If you’re ready to find a four wheeler priced right for your budget, take a look at our current ATV listings and start the conversation directly with the seller to find the quad that matches your needs and your land.
View Available ATVs
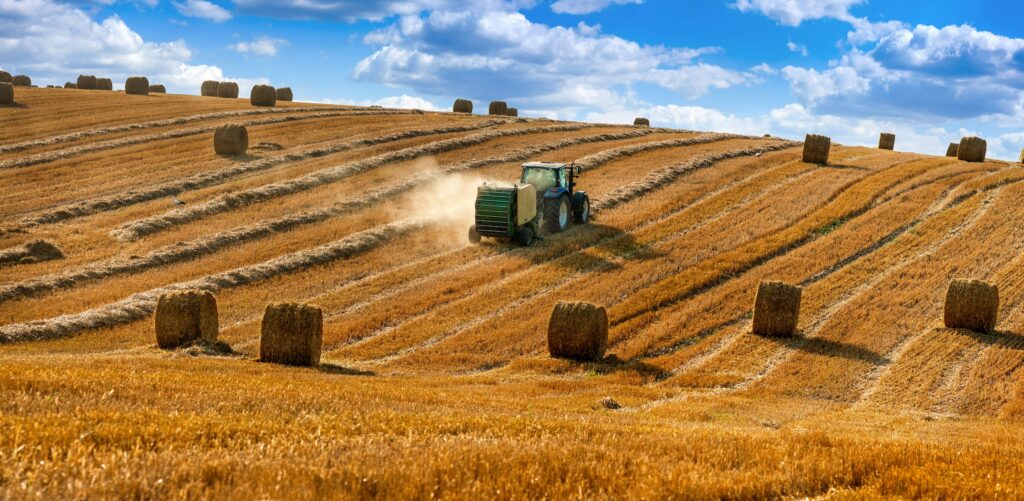
The Farming Guide For How To Grow And Make Hay

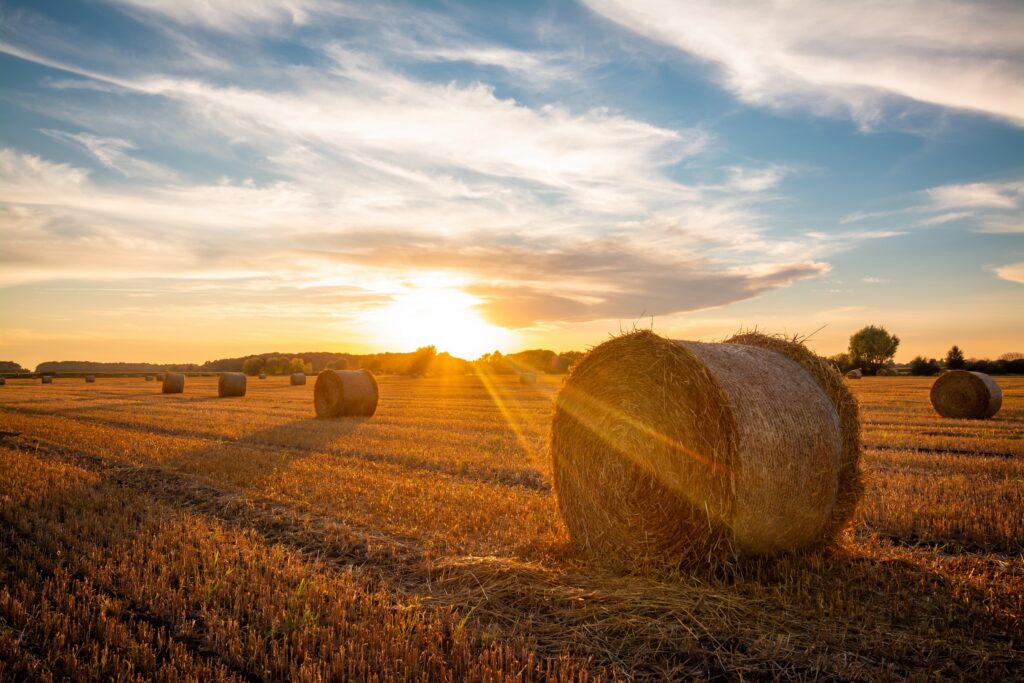
There’s a reason so many landowners eventually end up asking the same question: how do you make hay? Maybe it’s watching your kids run through a field your grandparents once worked, and wanting to put that ground back to use the way it was always meant to be used. Maybe it’s a neighbor’s stacked bales catching the evening light, and the pride you can already imagine feeling looking out at your own. Hay farming has a way of connecting a family to their land in a way few other things do. It cuts your feed bill. It puts open acreage to work. For a lot of families, it becomes a tradition passed down right alongside the land itself.
But if you’ve never done it, the whole hay farming process can feel like it’s got too many moving parts. What grass do you plant? When do you cut it? What in the world do you actually need to buy? Fair questions, all of them, and they’re really just different ways of asking how to make hay in the first place.
That’s what this guide is for. We’re going to walk through hay farming from the ground up: the grasses worth growing, the regions where each one shines, the equipment that makes the work manageable, and the actual step-by-step of how hay is made, from a bare field to a stacked barn. At Hayden Outdoors, we work with farm and ranch families every day who are either starting a hay farming operation from scratch or looking to upgrade the equipment they already run. We get a firsthand look at the equipment, practices, and properties that support successful hay operations.
A quick word before we dig in. Hay farming isn’t complicated once you’ve done it a season or two. It just has a lot of small decisions that add up: crop, climate, equipment, timing. Get familiar with each piece and the whole process starts to feel a lot less like guesswork and a lot more like routine.
Table Of Contents
Farming Fundamentals: Understanding The Types Of Grass You Can Grow To Make Hay
Before anything else, you need to pick a crop. This is the decision everything downstream in hay farming gets built on, so it’s worth slowing down here rather than grabbing whatever seed is cheapest at the co-op. The right grass makes every later step of hay farming easier. The wrong one just means fighting your field all season.
- Alfalfa: The high-protein standard when it comes to hay farming. Dairy operations lean on it, horse owners like it, and goats do well on it. It also fixes its own nitrogen in the soil, which is a nice bonus down the line. It wants well-drained ground and steady water, so it tends to do best where you can irrigate.
- Timothy: The go-to for horses, mostly because it’s lower in protein and sugar than alfalfa, which matters more than people expect for equine diets. It cures easily and holds up in storage, and there’s a solid market for it if you ever want to sell the hay you grow.
- Orchard Grass: Palatable, quick to get established, and one of the few hay grasses that tolerates a little shade. Works fine on its own or blended with clover.
- Clover: When it comes to hay farming, clover is rarely grown solo. It’s mixed into a grass stand, it adds protein and fixes nitrogen for the whole field, not just itself.
- Bermuda Grass: The workhorse of Southern hay farming. It handles heat and drought better than almost anything else on this list, and with the right fertilizer program, it’ll give you several cuttings in a season.
- Brome Grass: Solid fiber-to-protein ratio, handles cold winters well, and pairs nicely with alfalfa in a mixed stand.
- Bird’s Foot Trefoil: A legume that doesn’t mind wet ground the way alfalfa does. Worth a look if you’ve got a field that stays soggy longer than you’d like.
- Fescue: Tough, forgiving, easy to establish. A common pick for operations that split a field between hay and grazing.
- Bahia Grass: Sandy soil, hot climate, low input. Common across the Deep South and Gulf Coast for exactly those reasons.
Not sure how to decide which type of hay you should grow? That call usually comes down to three things: your climate, your soil, and what you’re feeding. Let’s get into it.
Climates And Regions That Are Ideal For Hay Farming

Hay farming works in just about every corner of the country. What changes is which crop makes sense to grow where. Here’s the regional hay farming breakdown.
Upper Midwest and Northeast Hay Farming: Cool-season grasses and legumes run the show, with timothy and alfalfa especially. You’re usually looking at two to three cuttings a season before growth tapers off in the fall, so timing each cut matters more here than in longer-season climates.
Southeast Hay Farming: This is Bermuda and bahia country. The hay growing season stretches long and hot, and it’s not unusual to get four or more cuttings a year. If you’re thinking about hay farming as a volume business, this region has real advantages.
Plains and Mountain West Hay Farming: It all comes down to water. With irrigation, alfalfa thrives and produces some of the best quality hay grown anywhere in the country. Without it, you’re generally better off with native or drought-tolerant grasses, and plenty of operations here run both, depending on the field.
Pacific Northwest Hay Farming: Orchard grass and other cool-season options do well thanks to steady rainfall, but that same rainfall means you’ve got to watch your windows closely. Hay farming here rewards patience and weather monitoring.
Southwest Hay Farming: Almost entirely dependent on irrigation. Alfalfa is still the popular choice for hay here, since it can turn multiple high-quality cuttings when the water is there to support it.
No matter where your land sits, there’s a type of hay you can grow. The trick is choosing a crop that plays to your region’s strengths instead of fighting it. Trying to force a crop that simply doesn’t belong in your climate rarely ends up being worth the extra effort. Work with your region, and hay farming gets a whole lot easier.
Farming Equipment Needed To Make And Harvest Hay
Once you know what type of grass you’re growing and where, the next question is what it actually takes to get that hay cut, dried, and baled. This is where hay farming stops being theoretical and starts being about horsepower and hours in the field.
The Core Gear Lineup For Successful Hay Farming
Five acres or five hundred, most hay farming operations lean on some version of this lineup:
- Tractor: Everything else on this list runs off it.
- Mower or Cutter: Cuts the standing crop. Could be a basic sickle mower, or a haybine that cuts, crimps, and windrows in a single pass.
- Tedder: Fluffs and spreads the cut hay so both sides dry evenly, which shaves real time off your curing window.
- Rake: Pulls dried hay into windrows so the baler can pick it up cleanly.
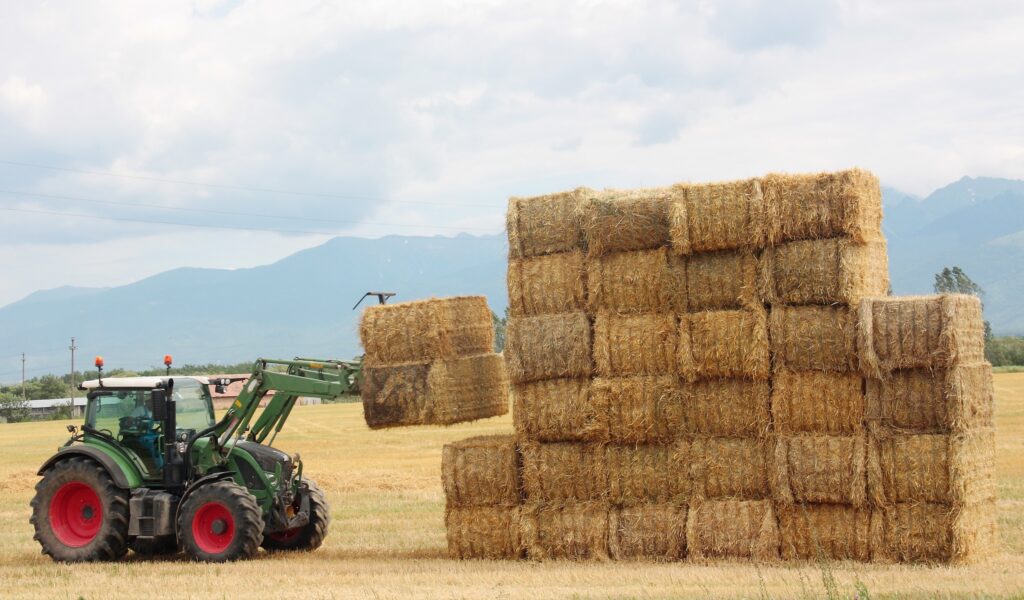
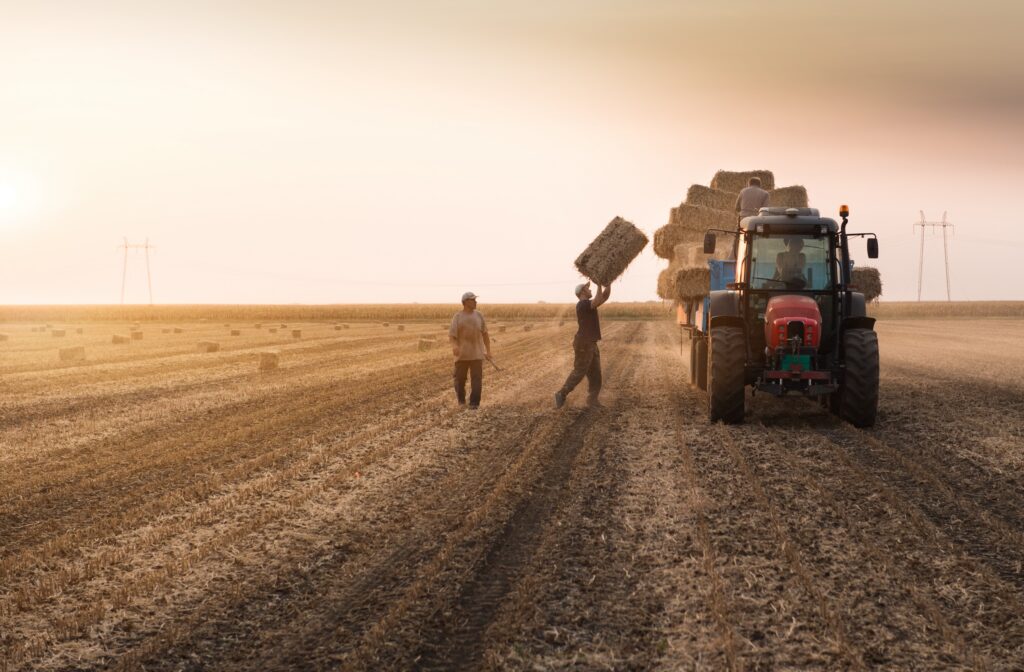
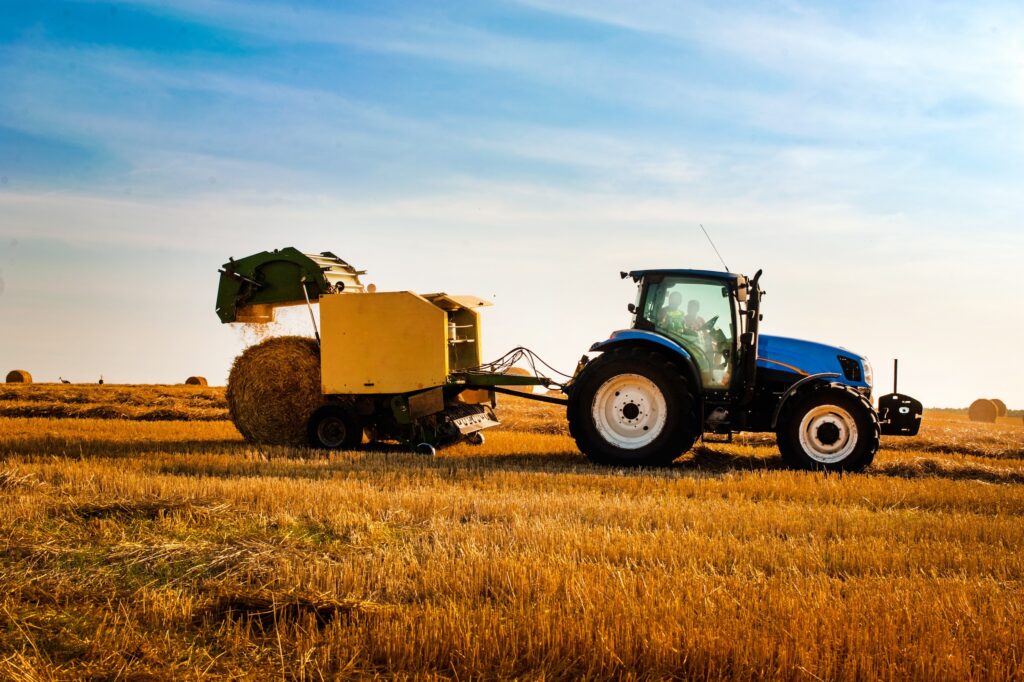
- Baler: Compresses hay into round or square bales. Round hay bales suit bigger operations and outdoor storage better. Square hay bales stack more easily and are usually the better call for smaller setups or hand feeding.
- Seed drills, broadcast seeders, and cultipackers are the primary items you’ll need for seed dispersal.
Choosing The Right Essentials For Your Hay Farming Operation
Match the necessary hay farming gear to your acreage, not the other way around.
- Under 10 Acres: A compact tractor, a small sickle mower, a hand or small ground-driven rake, and either a small square baler or a hand-baling setup will cover you. Plenty of small hay farming setups skip the baler entirely and just store loose hay or tie small bales by hand.
- 10 to 75 Acres: This is where most family hay farming operations sit. Mid-size tractor, disc mower or haybine, a tedder, a wheel rake, small square or round baler.
- 75 Acres and Up: Bigger horsepower, a wider haybine, a rotary rake, and a large round or square baler to keep pace when the weather window is tight and the acreage is not.
Tools And Accessories That Make Hay Farming Easier
A few smaller items pull more weight than their price tag suggests. A hay moisture tester takes the guesswork out of the single most important decision you’ll make each cutting: when to bale. Twine or net wrap keeps bales together for handling. A bale spear or grapple on your tractor turns moving and stacking finished bales from a half-day job into an afternoon. Keep a few spare knotter parts and belts on hand for your baler, too. A part that’s twenty minutes away by truck can still cost you your whole drying window if you don’t have it on the shelf.
What Hay Farming Actually Takes In Time And Labor
It’s worth knowing this part going in. Hay farming rewards flexibility as much as horsepower, since a cutting season means long, full days once the weather window opens and the work follows the weather more than the clock. Smaller operations often run fine with just one or two people handling everything from mowing to stacking. Larger ones tend to bring in extra hands during the busiest stretch, once several fields need cutting close together. Planning your equipment and your calendar with that rhythm in mind sets you up for a season that runs smoothly from the first cutting to the last.
New Versus Used Hay Farming Equipment: What To Look For
A lot of successful hay farming operations run on used equipment, and there’s nothing wrong with that. Buying smart here frees up cash for the acres and inputs that actually grow your crop.
On a used mower, check the cutting bar or discs and make sure the guards are all still there. On a rake, look at the spring tines for wear. On a baler, check the knotters, belts, and pickup teeth first, since those take the brunt of the work. And on any tractor, ask about hours and maintenance history, and whether it was run for hay farming specifically. That last detail tells you a lot about how hard it’s been used.
Getting gear that fits your acreage and runs well from day one means less time fixing things and more time in the field, which is really the whole point. Hayden Outdoors lists farm and ranch equipment for every stage of a hay farming operation, from a starter setup to a full production lineup, so finding the right match for your land doesn’t have to be a project of its own.
The Step-By-Step Guide For How To Grow Hay
Growing good hay starts well before the first cutting during harvest season. Here’s the process, start to finish.
- Test and prepare your soil. Growing good hay starts with good soil, full stop. Most hay crops want a pH somewhere between 6.0 and 7.0, so a soil test up front tells you whether you need lime or other amendments before anything goes in the ground. Get this step right before you grow your hay, and you’ll see it pay off in root strength and regrowth for every season of hay farming that field sees after.
- Choose and plant your crop. Match your seed choice to your region and your goals. Cool-season grasses generally go in during early spring or late summer, while warm-season grasses wait until after the last frost. Stick close to the recommended seeding rate. Too heavy and the stand crowds itself out. Too light and you’re leaving yield on the table.
- Fertilize to support growth. Every cutting pulls nutrients out of the ground, so build a fertility plan off your soil test and stick with it season over season. Legumes like alfalfa and clover need less nitrogen since they make their own. Grasses lean on it more.
- Manage competing weeds. Weeds compete for the same sunlight, water, and nutrients your hay crop needs, so staying ahead of them matters. Mow before they go to seed, and apply a targeted herbicide where it’s needed. A clean stand is a productive stand.
- Water consistently. Most hay crops want about one to one and a half inches of water a week during the growing season, whether that comes from the sky or an irrigation line on the farm. This matters most in the early going, while a new stand is still finding its footing.
- Monitor growth toward your first cutting. A new stand typically needs a full growing season before its first real hay harvest, though a partial cutting is sometimes possible sooner if conditions cooperate. Watch for early flowering or bud stage. That’s your signal that the crop is nearing peak quality for hay farming.
Every one of those steps is building toward one thing: a stand that’s ready to cut. Which brings us to the part most first-timers are really asking about.
How To Harvest Hay After You Grow It
This is where everything you’ve put into your hay farming operation either pays off or doesn’t, and it’s usually what people are picturing when they ask how is hay made, start to finish. Get the timing, technique, and moisture right, and you protect both the quality of the hay and everything you invested to grow it.
Timing Your Cut For Peak Hay Quality
Timing is one of the most powerful levers you have over hay quality. Cut grass hay in the early flowering stage. Cut legumes like alfalfa in the bud stage or at early bloom. It’ll feel early. It’s supposed to. Cutting sooner than instinct tells you protects protein content and keeps the stems from getting woody. Most hay farming operations also wait for a three-four day dry stretch before they start, since hay needs that field time to cure right.
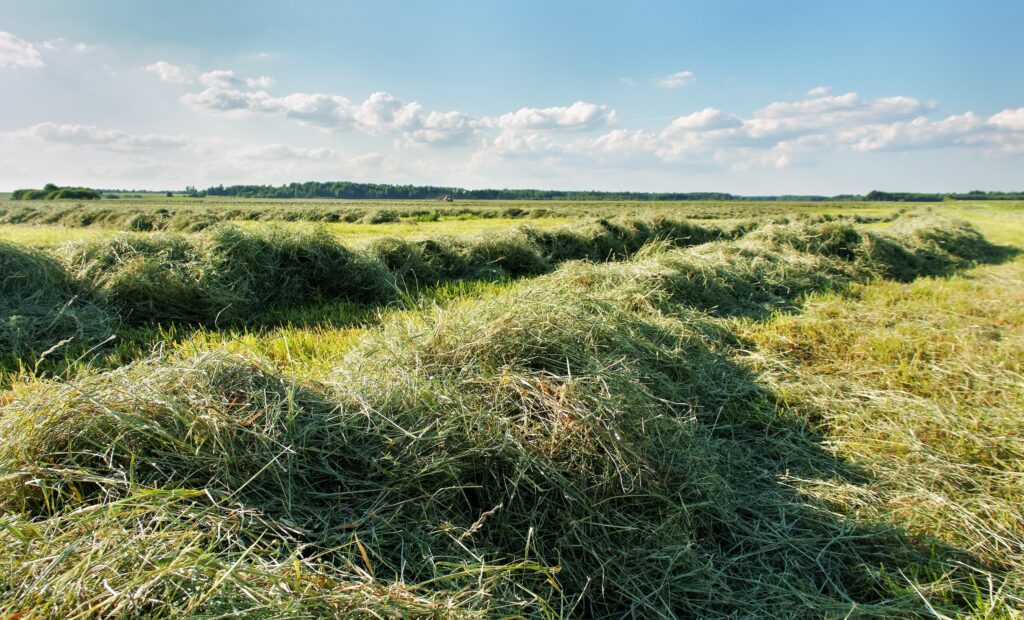
Cutting, Tedding, And Raking
Mow, leaving one to two inches of stubble so the field bounces back quickly and the cut hay sits just off the ground where air can move under it. Once it’s down, run the tedder to fluff and spread it, which gets sun and air to both sides and speeds drying. When the hay feels crunchy rather than bendy, rake it into windrows, keeping the rake set high enough to leave the dirt in the field where it belongs.
Testing Moisture And Baling Your Hay
Moisture makes or breaks whether hay stores well, so this step deserves attention. Before baling, small square bales should be down around 18 to 22 percent moisture, and large round or square bales closer to 16 to 18 percent, since a denser bale holds heat and moisture longer. Twist a handful of stems and feel for dampness as a rough field check, or use a hay moisture tester for a precise reading, which takes the guesswork out of hay farming.
From there, pick your bale type. Round bales work well for bigger operations and shed rain better outdoors. Square bales are lighter, stack more easily, and tend to win out for smaller feeding setups. Cut, dry, rake, bale. That’s really the whole answer to how to make hay, on any size operation.
Planning Around The Weather When Hay Farming
Weather is the one part of hay farming and harvesting you don’t get to control, so planning around it is one of the best habits you can build. Watch the extended forecast before you cut, and hold off for that three-four day dry window rather than rushing. A lot of experienced operations build a little slack into their schedule for exactly this reason. It’s not about being cautious. It’s about giving your hay the best shot at curing right the first time.
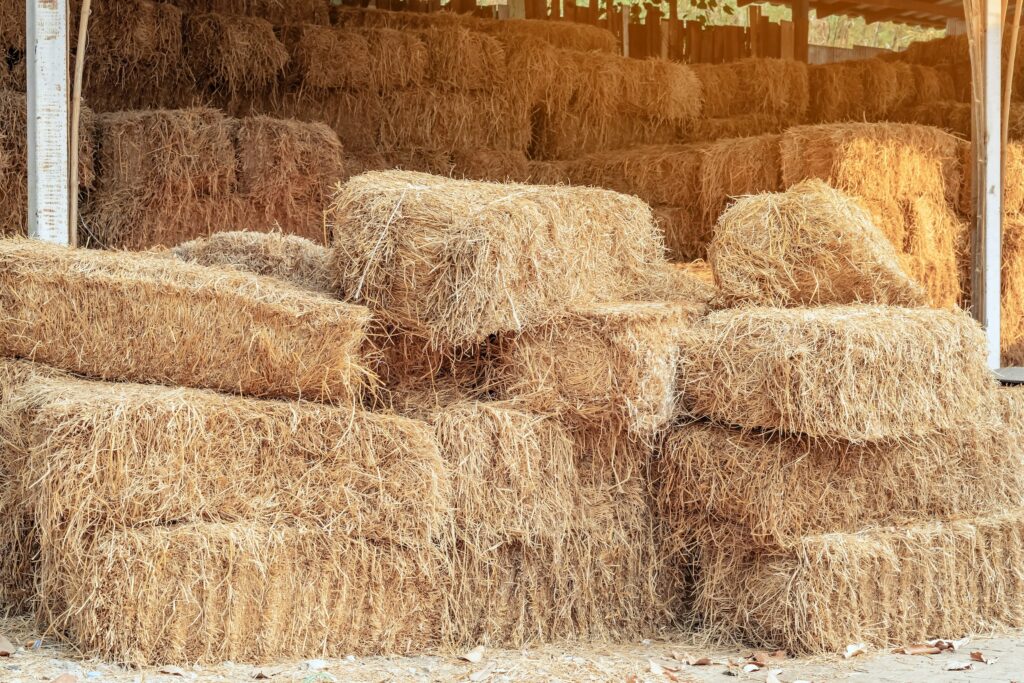
Storing Your Hay To Protect Your Investment
Storage is where you protect everything the season’s work went into. Keep hay off the ground on pallets, poles, or a gravel pad so moisture doesn’t wick up into the bottom of the stack, and give it airflow, whether that’s spacing bales outdoors or keeping a barn properly ventilated, according to the Cornell Cooperative Extension. Check on fresh hay bales through the first several weeks of storage. It’s a normal part of good hay farming, and it buys you peace of mind while everything finishes curing.
Pro Tip: Aim to store bales at 20 percent moisture or less, since keeping moisture in check is one of the simplest ways to prevent hay fires and reduce spoilage. A quick check with a moisture tester before stacking is a small hay farming habit that pays off both in hay quality and risk reduction.
Getting The Most Value From Your Hay Farming Harvest
A good hay farming season is more than bales stacked in the barn. It’s understanding what you actually grew and getting full value out of it during harvest season, whether that’s feeding your own herd or selling to someone else’s.
If you’re selling, or you just want a clear picture of what you’re feeding, get a forage test done on your hay. A lab sample gives you real numbers on protein and quality, which helps you price fairly or match hay to the right animal. Buyers notice when a seller can back up their hay with actual data instead of just a handshake.
Yield rewards good management too. Hay fields that get fertilized properly and cut at the right stage consistently outproduce fields left to fend for themselves, and the market tends to pay more for hay that’s clearly been managed well. Equipment plays into this more than people think. A mower, tedder, and baler that are actually matched to your fields mean less hay left behind and less quality lost to delays, and that adds up fast across a full season of hay farming.
Keep simple records while you’re at it. Yield per acre, cutting dates, what you spent on inputs. It sounds like overkill until you look back after a few seasons of hay farming and harvesting and realize you can actually see what’s working and what isn’t. A lot of the long-time hay farming families we work with point to exactly this kind of record keeping as what took them from a few acres to a real operation.
At the end of the day, it comes down to a handful of things done consistently: healthy soil, the right crop, good timing, and equipment you can count on. That’s the difference between a hay farming operation that just gets by and one that actually thrives.
What To Expect Your First Season Of Hay Farming
Your first year of hay farming is really about getting to know your land. Every field has its own personality, its own microclimate, its own quirks, and the more seasons you put in, the better you get at reading it. That learning curve is part of what makes this journey so satisfying. There’s real pride in watching your timing and instincts sharpen year over year.
A few things can help that first season of hay farming go smoothly. Start with an acreage you can comfortably manage, so you’re building confidence rather than stretching thin. Lean on your local extension office for soil testing and crop guidance specific to your area, since regional knowledge beats generic advice every time. And talk to a neighbor who’s been growing and harvesting longer than you have. Most farmers are glad to share what they know, and a good conversation can hand you years of experience in an afternoon.
By your second or third season, the rhythm of hay farming starts to feel familiar. You’ll know your fields, your gear, and your own timing well enough that the whole process runs on instinct.
Find The Right Hay Farming Equipment For Your Harvesting Operation
Hay farming is one of the better things you can do with productive land. It brings your feed costs down, puts you in control of what your animals are eating, and for plenty of farms, it turns into a real revenue stream. Pick the right crop for your region, follow a solid plan for growing and harvesting, and get equipment that actually fits your acreage, and hay farming is well within reach, wherever you’re starting from.
That last piece, the equipment, is where Hayden Outdoors can help. Our farm and ranch listings help you fill in the gaps in your operation and find equipment that works for your acreage. Browse our current equipment listings and get your season started right.
View Available Hay Farming Essentials
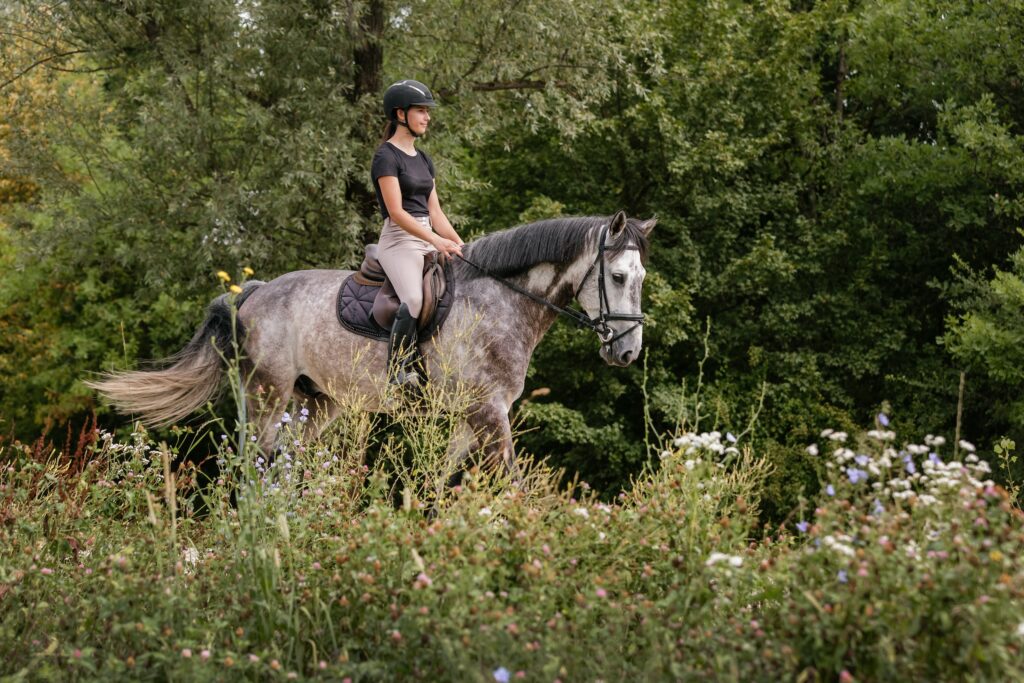
The Complete List Of Essential Horse Riding Equipment And Gear
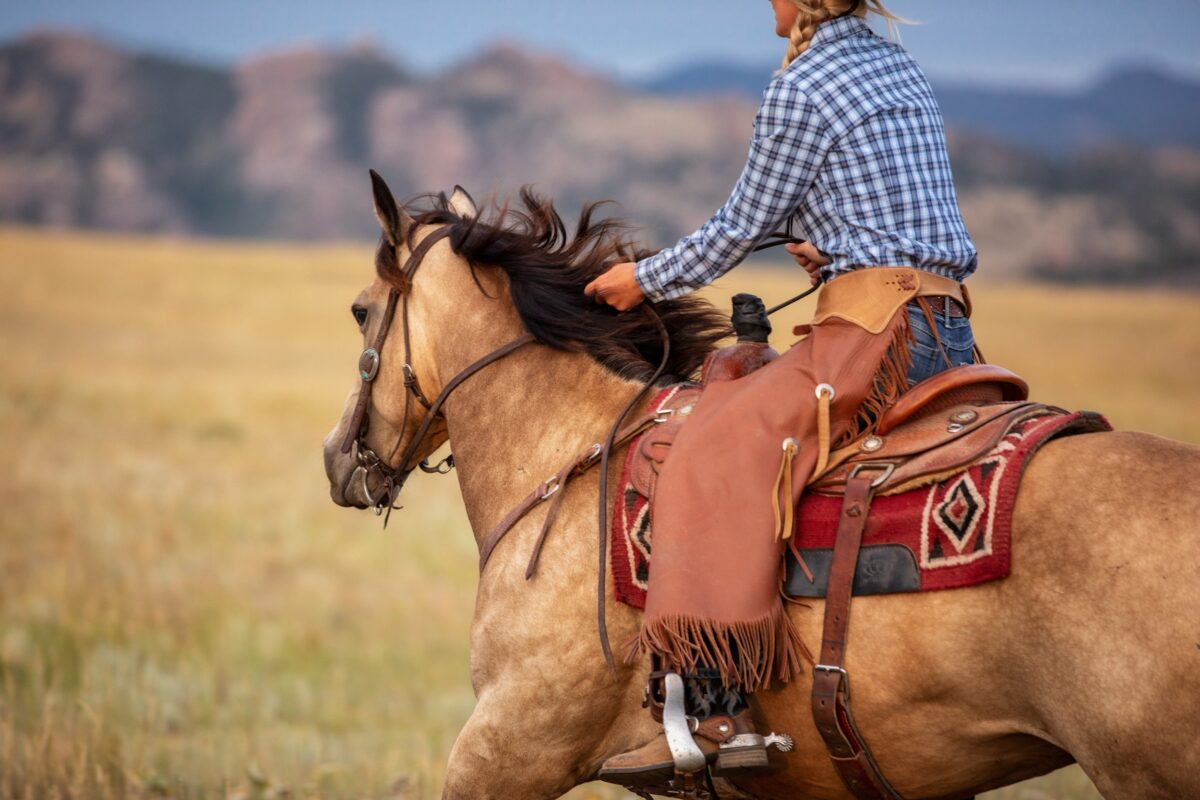
Few things in life compare to a full day on horseback with good country ahead of you. There’s a connection that’s crafted over time between horse and rider, across miles of trail and hours in the saddle, and the right horseback riding equipment and gear is what makes all of that possible from day one.
Get the horseback riding gear right, and your horse moves comfortably, communicates clearly, and stays sound. You ride with confidence, stay safe in situations that would otherwise catch you off guard, and spend your energy on the ride instead of managing problems that the right horseback riding equipment would have prevented.
Most horse riding gear lists hand you an equipment checklist and call it a day. We’re going to go a bit deeper. We cover every essential item, explain what each piece actually does, and give special attention to the trail and outdoor gear that most horse riding equipment guides leave out entirely. We’ll also tell you what to prioritize first, what a good fit looks like, and how to care for your equipment so it lasts.
Pro Tip: If you’re still in the process of selecting your horse, our guide to buying your first horse is worth reading before you build out your riding gear list.
Table Of Contents
Why Getting The Right Horse Riding Equipment Matters
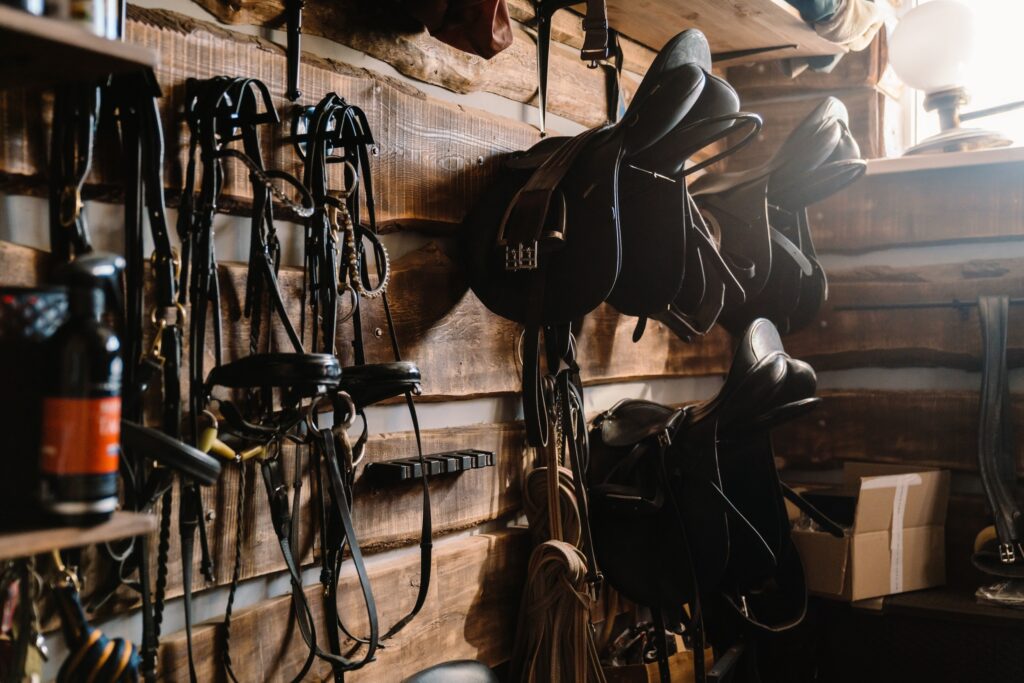
We can really break horse riding equipment and gear into two core categories:
- Tack is all the riding gear and equipment that goes on the horse: saddle, pad, bridle, bit, halter, and all the hardware connecting those pieces.
- Rider gear is what you wear and carry.
Both sides of that list matter, and both have real consequences when something is wrong.
A saddle that doesn’t fit causes pain. A horse in pain acts out. A helmet that isn’t properly certified offers less protection than it looks like it does. Boots without the right heel can trap your foot in a stirrup. These aren’t abstract concerns. They’re the practical reasons why understanding your horse riding gear before you buy it is worth the time.
Horse riding gear and equipment also vary by discipline. English and Western tack are different. Trail and outdoor riders have needs that arena-focused horseback riding equipment guides rarely touch on. Our guide covers all of it, with particular depth on the trail and backcountry horseback riding equipment that tends to get left off other gear lists entirely.
Safety-Focused Horse Riding Equipment List

Safety gear is the first stop on any honest horse riding equipment list. This is where fit and quality matter most, and where cutting corners tends to have the most serious consequences.
Helmet: Your helmet is the most important piece of horse riding equipment you own. Look for ASTM F1163 certification and the SEI mark, which tells you the helmet has been independently tested to that standard. A bike helmet doesn’t qualify. The impact forces around horses are different from cycling falls, and an equestrian helmet is built around those specific dynamics.
Fit is just as important as certification. The helmet should sit level, roughly two finger-widths above your eyebrows, and should not shift when you push against it in any direction. Get it fitted by someone who knows what they’re looking at, and replace it after any significant impact, even if the shell looks fine. The foam inside can be compromised without showing visible damage.
Body Protector And Air Vest: Body protectors and air vests are pieces of horse riding equipment that both protect your torso in a fall, but they work differently. A body protector is a foam-padded vest that absorbs and distributes impact on contact. It’s always on and always working. An air vest inflates automatically with CO2 when the tether connecting it to the saddle pulls free during a fall, and it wraps the rider in cushioning in the moment it’s needed most.
A lot of serious trail and backcountry horseback riders wear both pieces of equipment. If you’re choosing just one to start, a body protector rated to BETA Level 3 or higher covers most situations well.
Reflective Equipment And Gear: This one gets left off most horse riding equipment lists, but it belongs in your gear lineup if you ride early mornings, at dusk, or on trails that run near roads. Reflective vest overlays for riders and reflective strips for horses are inexpensive additions to your horseback riding equipment setup and can prevent the kind of accidents that have nothing to do with horsemanship at all.
Riding Boots: When it comes to essential horse riding gear, it’s worth noting that a standard work boot or hiking boot isn’t a substitute for a riding boot. The defining feature of purpose-built horseback riding boots is the heel, typically at least one inch, which prevents your foot from sliding through the stirrup and getting caught in a fall. That’s one of the most important design elements in this piece of horse riding gear.
Tall boots are traditional for English riding and offer more leg coverage. Paddock boots paired with half chaps are common in Western and trail contexts where you spend more time moving around on foot. Either way, fit snug through the heel with room to flex through the ankle.
Breeches And Riding Pants: Riding-specific pants are cut to remove the inseam bulk that causes friction where your leg contacts the saddle. Full-seat breeches add a grippy panel for stability. Western riders typically reach for riding jeans, which accomplish the same thing with a different look. Whatever you choose, loose fabric at the inner leg is the enemy. It creates chafing fast and gets uncomfortable even faster.
Gloves: Riding gloves protect your hands from blisters on longer rides, improve grip on the reins, and keep your hands working in cold weather. A well-fitted glove lets you feel what the reins are doing while taking the wear off your skin. It’s a small piece of horse riding gear, but you’ll notice when you don’t have them.
Weather-Appropriate Horseback Riding Outerwear: Horseback riders who spend time riding on the trails need to think about outdoor-appropriate outerwear gear more seriously than arena riders do. A packable rain shell, layering pieces for cold mornings, and UV-protective tops for summer riding all earn a spot on a complete horseback riding equipment list. Weather moves fast in open country, and being caught unprepared on horseback is a different problem than being caught on foot.
List Of Essential Riding Equipment For Your Horse
Tack is where the majority of your horse riding equipment budget goes, and where the gear decisions you make have the most direct effect on how the horse moves, responds, and stays healthy over time.
The List Of Core Horse Riding Equipment Every Rider Needs
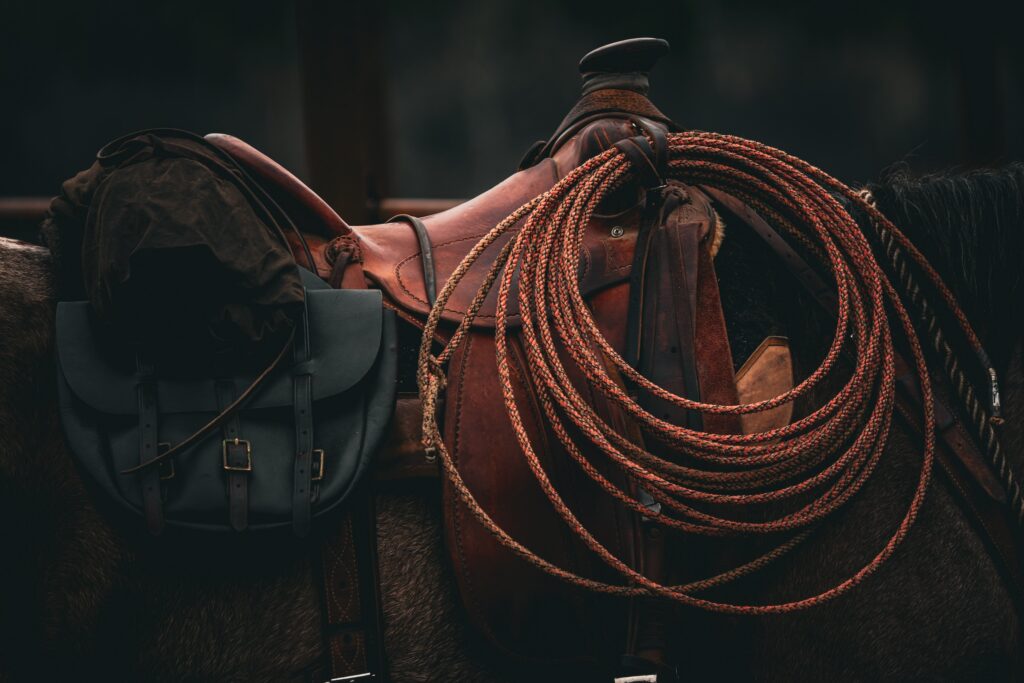
Saddle: The saddle is the foundation of any solid horse riding equipment list. A well-fitted saddle distributes weight evenly across the horse’s back, allows the shoulders to move freely, and sits level without rocking.
There are two things to understand when evaluating saddle fit: tree width and gullet clearance. The tree is the internal frame of the saddle, and it needs to match the width of your horse’s back. If it’s narrower than it should be, it can pinch the withers. If it’s too wide, the saddle drops forward and loads the spine. The gullet is the channel along the underside of the saddle, and it needs to clear the horse’s spine completely from front to back. If you’re not sure, a professional saddle fitter is worth investing in. Getting saddle fit wrong costs you in the horse’s soundness and behavior over time.
Saddle Pad: Every ride starts with a saddle pad layered under the saddle, cushioning the contact point between the tree and your horse’s back. It cushions contact, pulls sweat away, protects the saddle from dirt and oils, and helps manage heat. A good pad doesn’t fix a poorly fitted saddle, but it’s still an important part of a complete horse riding equipment setup.
Pad thickness and material depend on discipline and climate. Contoured pads work better for horses with high withers. Wool pads breathe well and handle moisture in variable conditions. Check the underside regularly for embedded grit and debris. Even through padding, that material creates pressure points.
Girth Or Cinch: When it comes to horse riding equipment, the girth in English riding and the cinch in Western riding do the same job: wrapping around the horse’s barrel to hold the saddle in place. It’s a straightforward piece of horse riding equipment with a job that matters.
Check the fit every time you tack up. A loose girth allows the saddle to shift. Overtightening too fast can cause discomfort and defensive behavior. Tighten gradually, walk the horse for a few minutes, then check and adjust again.
Bridle, Bit, And Reins: The bridle is a piece of riding equipment that fits over the horse’s head and holds the bit and reins in place, connecting you to your horse through the most direct communication channel in riding. English bridles and Western headstalls are built differently, and bitless options like hackamores serve specific horses and training situations.
Bit selection is its own deep topic, but the practical starting point for most riders building their first horseback riding equipment setup is a simple, softer bit suited to where the horse is in its training. If you’re unsure, ask a trainer or an experienced tack shop staff member rather than guessing.
Reins come in leather, rubber, and synthetic materials. Longer split reins are standard for Western and trail riding. Shorter loop reins are more common in English contexts. Whatever style suits your riding, the reins need to be long enough to give relief when the horse needs it and short enough to maintain real contact when you want it.
Halter And Lead Rope: The halter and lead rope come before everything else on the horse riding equipment list. Before the saddle is on, before the bridle is fitted, you need a way to catch, lead, and tie your horse safely. A well-fitted halter gives you that control on the ground. Bring a halter and lead rope on trail rides, too. There are plenty of situations out on the trail where having them accessible is not optional.
Horse Riding Gear List For Leg And Body Protection
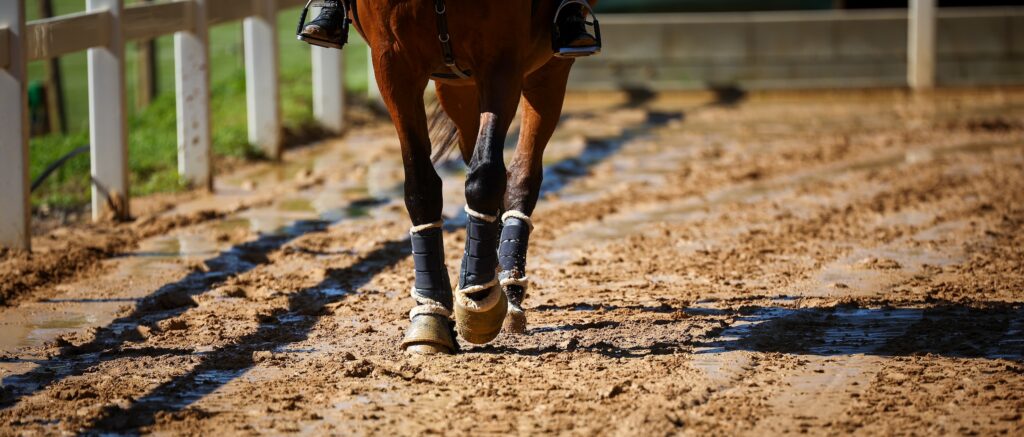
Bell Boots: Bell boots fit over your horse’s hoof and protect the heel bulbs from overreach injuries, which happen when a hind foot strikes the back of a front foot during movement. Horses with long strides, horses working on uneven terrain, and horses in any kind of active work benefit from this piece of gear.
Splint Boots And Sport Boots: Splint boots protect the cannon bone and fetlock from interference strikes, where one leg contacts another during movement. Sport boots add support alongside protection and are common in disciplines that demand lateral movement and quick direction changes. For trail riders, a lightweight protective boot gives a practical middle ground without the bulk of full competition gear.
Leg Wraps: Leg wraps cover some of the same ground as boots and are also used for shipping, stall rest, and therapeutic support. They require more skill to apply correctly than boots do. An improperly applied wrap creates pressure problems instead of preventing them. For most recreational and trail horseback riders, boots are the more practical gear choice. Leg wraps become more relevant as your horsemanship develops and you have specific support needs to address.
Trail And Outdoor Horse Riding Equipment List

If you ride off property or in the backcountry at all, this section of the horse riding equipment list is where the standard guides fall short. Arena-focused horseback riding equipment guides simply don’t address what happens when you’re five miles from the trailer and something goes sideways. This gear does.
Saddlebags And Horn Bags: Saddlebags are essential horse riding equipment the moment you leave your starting point for anything more than a short trek. They carry water, food, a first aid kit, rain gear, a hoof pick, and whatever else the day might require. Horn bags attach to the saddle horn for quick-access items you want to reach while still mounted. Cantle bags handle heavier loads at the rear. A good saddlebag system sits balanced and secure at a trot and over uneven ground.
Breastcollar And Crupper: On flat arena ground, a saddle stays put with the girth alone. Add any real terrain, and that can change. A breastcollar connects the front of the saddle to the girth and keeps the saddle from sliding back on uphills. A crupper runs from the back of the saddle under the tail and prevents it from sliding forward on descents. Both are standard horse riding equipment for anyone riding in hilly or mountainous terrain. If your horse rides include elevation change, a breastcollar at a minimum belongs on your horseback riding equipment list.
Trail First Aid Kit: A purpose-built trail first aid kit is horse riding gear you pack, hoping you never open it. The kit should cover wound care for the horse (antiseptic, gauze, self-adhesive bandage wrap), basic rider care (bandages, pain reliever, emergency contacts), and a hoof pick for debris issues mid-ride. A compact, dedicated kit beats improvising from whatever happens to be in your saddlebag.
Hoof Pick: A hoof pick lives in the barn, and it’s a piece of gear that also needs to live on your horse or in your saddlebag every time you leave the property to go riding. Rocks and packed debris lodge in the hoof during trail rides. A horse that picks up a stone and goes unaddressed can end up lame miles from the trailer. This is one of the smallest but most impactful pieces of horse riding equipment on this list.
Rain Gear And Layering: Weather in open country can shift rapidly, and being caught on horseback in a cold downpour without rain gear can become quite the mess. A packable waterproof shell that fits over your riding clothes is non-negotiable horse riding equipment. Add layering pieces for cold mornings and a lightweight base layer for summer riding, and you’re covered for most of what the outdoors throws at you.
Trail Tools: Riders in timbered country should think seriously about carrying a compact folding saw or hand axe as a part of their horse riding gear lineup. This is specialized horse riding equipment that rarely makes it onto standard gear lists, but experienced backcountry riders carry it as a matter of course. A downed tree across a narrow trail with a horse is not a minor inconvenience.
Headlamp Or Helmet Light: If your ride has any chance of extending past daylight or starting before sunrise, a headlamp or helmet-mounted light is practical horse riding gear. It keeps you visible to others, helps you navigate terrain safely, and gives you light to handle the horse and check tack in low-light conditions. Clip-on lights designed for equestrian helmets are a clean solution that doesn’t interfere with your riding.
Priority Gear List: What Horse Riding Equipment To Buy First

Must-Have Horse Riding Equipment Before Your First Ride
You won’t want to get in the saddle without these.
- ASTM/SEI-certified riding helmet, properly fitted
- Riding boots with at least a one-inch heel
- Halter and lead rope
- Properly fitted saddle with matching saddle pad
- Girth or cinch
- Bridle, appropriate bit, and reins
- First aid kits (for you and the horse you’re riding)
Horse Riding Gear To Add In Your First Season
Once the essentials are in place, this horseback riding equipment rounds out your setup.
- Riding gloves
- Body protector or air vest
- Bell boots and leg protection for the horse
- Basic grooming kit (curry comb, stiff brush, soft brush, hoof pick)
- Saddlebags for trail riding
- Weather-appropriate outerwear
Nice-To-Have Horse Riding Equipment As You Progress
This tier of horse riding gear and equipment becomes relevant as your riding develops and your needs get more specific.
- Air vest (upgrade from body protector)
- Breastcollar and crupper for trail and mountain riding
- Specialty bits suited to your horse’s training stage
- Trail tools (folding saw, hand axe)
- Reflective gear for horse and rider (higher priority if you venture off-property)
- Helmet light for low-light riding
How To Know If Your Horse Riding Equipment Fits Correctly

Even if you have the right horse riding equipment and gear, the wrong fit creates its own set of problems. Here’s what to look for across the pieces that matter most:
- Saddle Fit Red Flags: A saddle that rocks forward and back when you sit in it has a tree fit problem. Check for bridging by pressing firmly along the length of the pad after a ride and looking for dry spots in the middle zone where the saddle contacts the horse at the front and rear but gaps in the center. The gullet should never touch the spine. If your horse pins its ears, wrings its tail, or gets difficult when being tacked up, saddle fit is the first place to look. A certified saddle fitter can assess the situation objectively and tell you whether you need an adjustment or a different saddle entirely.
- Bridle And Bit Fit: The bit should sit in the corners of the mouth with one or two light wrinkles, not pulling tight. A noseband, if your bridle has one, should allow two fingers of clearance. The browband and crownpiece should not pinch the ears or pull the headstall out of position. Recheck bridle fit any time the horse’s weight changes significantly through the year.
- Rider Helmet Fit: Place two fingers flat against your forehead just above your eyebrows. The helmet brim should rest on those fingers when the helmet is properly positioned. Push against the helmet from the front, back, and sides. It should not move. If it passes all of that but still does not feel right, get it professionally fitted. This is the piece of horse riding equipment where improper fit has the most direct consequences.
How To Care For Your Horse Riding Equipment
Quality horse riding gear and equipment lasts for years when it’s taken care of. Neglect it and the timeline shortens, potentially creating safety problems before creating visible ones.
Leather Tack Care
Leather saddles, bridles, and girths need regular cleaning and conditioning. Wipe down leather with a lightly damp sponge and a pH-balanced cleaner after a few rides or whenever it is visibly dusty or sweated through. Follow with a conditioner to keep the leather supple. Dry leather cracks and gets brittle, and brittle leather fails. Every six months, do a more thorough cleaning and inspect every stitched joint, buckle, and billet strap for wear.
Saddle Pad Care
Saddle pads pick up sweat, hair, and dried dirt from every ride. That buildup becomes abrasive against the horse’s back over time. Shake or brush pads out after each ride and wash them on a regular schedule according to the manufacturer’s instructions. Dry them completely before storage. A damp pad in a closed tack trunk develops mildew fast, and that’s problematic for both the material and the horse.
Hardware Inspection
Buckles, snaps, D-rings, stirrup leathers, and billets are the structural connection points of your horse riding equipment. Check them regularly for corrosion, deformation, and cracking. A buckle with a hairline fracture in the frame looks fine until it doesn’t. Replace anything that shows structural wear.
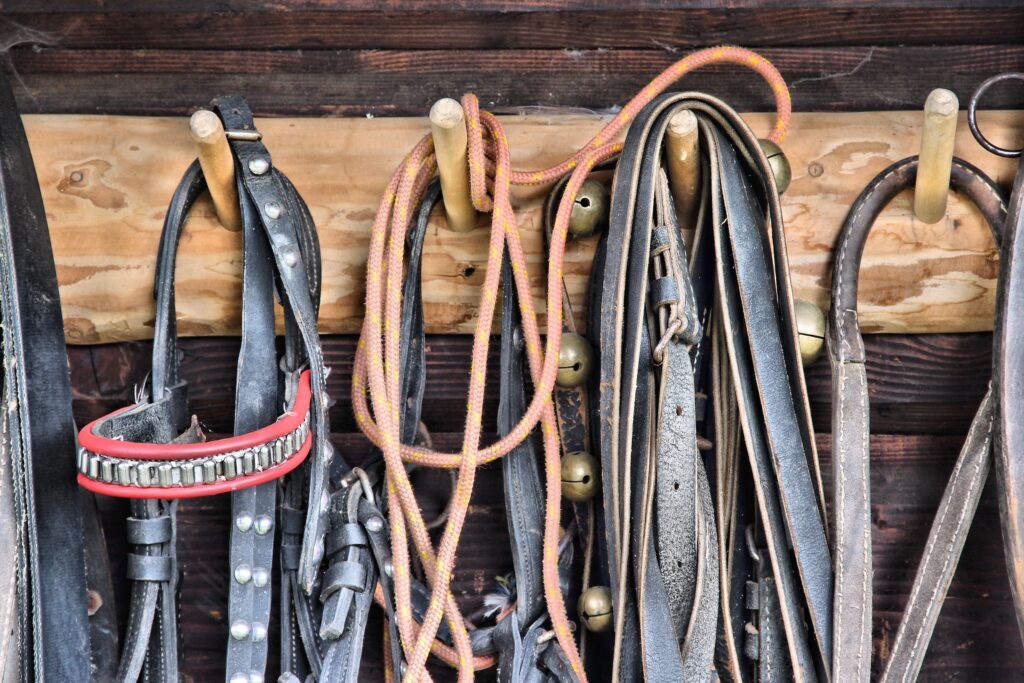
Storage
Saddles belong on proper saddle racks that support the tree and keep it off the ground. Bridles hang best from rounded pegs that hold the leather in shape. Keep your tack room dry, out of direct sunlight, and at a reasonably stable temperature to protect your horse riding equipment. Heat and moisture break down leather and delaminate synthetic materials quickly.
The Right Gear Deserves The Right Land
Once your horse riding equipment is dialed in and you have the right horse to adventure with, the next move is finding land that’s worth riding on. Room to move. Established trails. Pasture and infrastructure that makes keeping horses practical, rather than a constant logistical challenge.
That kind of equestrian property exists across the country, and here at Hayden Outdoors, we know where to find it. From working ranch land with existing horse facilities to private acreage with direct trail access, our agents understand what makes a property genuinely suitable for horses, beyond just the square footage.
Browse our current equestrian property listings and find land that matches the investment you have already made in your horseback riding.
View Available Equestrian Properties
The Sustainable Farmer’s Guide To No Till Farming Equipment

There’s a quiet revolution happening across American farmland. Farmers who once measured their success by how thoroughly they turned the soil are rethinking everything, reaching instead for no till farming equipment as a path toward a more productive, more resilient, and more sustainable operation.
Input costs are climbing. Soil quality on intensively tilled ground is declining over time. And the pressure on farmers to produce consistently, year after year, without degrading the land beneath their feet, has never been greater. If you’ve been asking whether there’s a better way, no till farming equipment is worth looking into.
This guide covers what no till farming is, which farming operations are best suited for it, the honest pros and cons, the core equipment involved, how to acquire and adapt that equipment, and what it takes to keep it running well.
Whether you’re a seasoned farmer exploring a transition or a land buyer evaluating a property’s agricultural potential, we’ll give you a grounded, practical understanding of no till farm equipment and what it means for the land you work.
Table Of Contents
What Is No Till Farming And Why Does It Matter?
No till farming, sometimes called zero tillage or direct seeding, is an approach to crop production that eliminates the need to mechanically disturb the soil before planting.
In a conventional system, farmers plow, disc, and work the ground repeatedly to prepare a seedbed, kill existing weeds, and incorporate residue from the previous crop. No till farming skips those passes entirely. Instead, specialized no till farming equipment places seeds directly into undisturbed soil, cutting through crop residue and surface material with minimal ground disturbance.
The idea isn’t new. No till farming gained significant momentum in the United States starting in the 1970s, when broad-spectrum herbicides became widely available and gave farmers an alternative tool for weed control that didn’t rely on tillage. Since then, adoption has grown substantially.
Today, roughly a quarter of US cropland is managed using zero tillage methods and equipment, and the practice has been described in agricultural literature as one of the most significant shifts in modern farming.
How No Till Farm Equipment Differs From Conventional Tillage Tools
The equipment that makes no till farming possible is purpose-built for a very different task than conventional tillage tools. In conventional farming, a plow, disc harrow, or field cultivator is designed to aggressively disturb the soil across a wide swath.
No till farm equipment, by contrast, is engineered to do the opposite: open a precise, narrow slot in undisturbed ground, place seed at the correct depth, and close the furrow behind it, all while leaving the surrounding soil structure intact.
This fundamental difference in purpose drives every design decision. No till drills and planters are heavier than their conventional farming equipment counterparts because they must push through crop residue and firm, untilled soil. Their coulters, openers, and press wheels are built to take on tougher conditions than machines designed for a freshly worked seedbed.
And the way these pieces of no till farming equipment interact with the land is categorically different. Where a conventional tillage tool is meant to destroy existing structure, no till farming equipment is built to work with it.
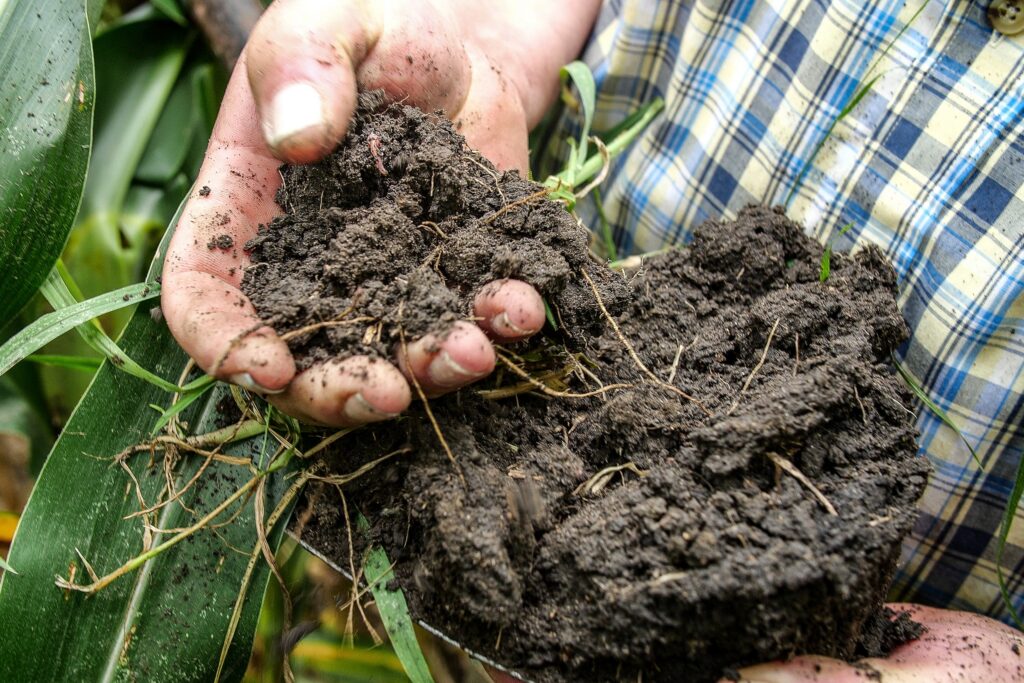
This difference is important because the structure of undisturbed soil is one of its most valuable assets. When soil is tilled repeatedly, it loses the network of pores, channels, and aggregates that allow water to move through it, oxygen to reach plant roots, and microorganisms to do their work. No till farm equipment preserves that structure season after season, which is a central reason why the long-term trajectory of zero tillage fields tends to look very different from conventionally tilled ground.
The soil health and land value benefits of no till farming are well-documented. Fields managed over several years with zero tillage equipment generally develop higher water-holding capacity than conventionally tilled fields, which matters enormously in drought-prone regions where water availability is tied directly to crop survival.
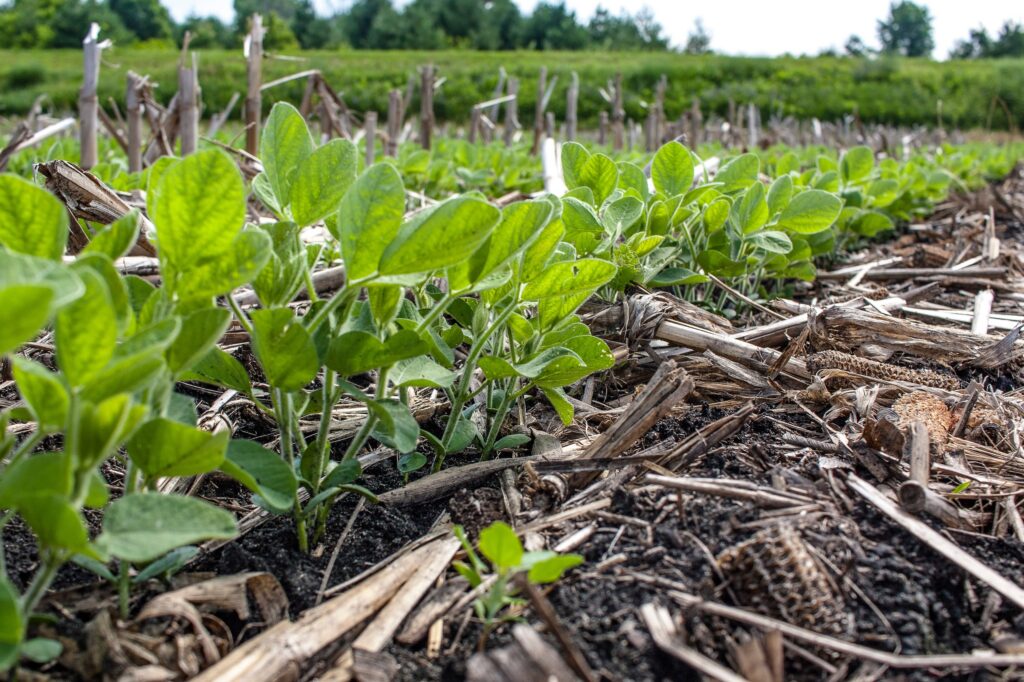
No till farming and the equipment that’s used for it can also reduce soil erosion, which helps keep sediment out of nearby waterways and protects water quality. Organic matter from previous crops stays on and in the soil rather than being buried or dispersed, feeding microbial life and building long-term fertility.
For landowners and hunters, the wildlife habitat benefits of no till farming are quite compelling. The residue and cover left on the soil surface by no till farming systems provide year-round habitat for birds, beneficial insects, and small mammals. Research has found that zero tillage fields support significantly more bird species and earthworm populations than conventionally tilled ground, making no till farm equipment a genuine tool for land stewardship, not just crop production.
Types Of Farms That Are Best Suited For No Till Farming Equipment
No till farming equipment is not a universal fit for every operation, and understanding where it performs best will help you determine whether it makes sense to implement zero tillage on your land.
Soil type plays a significant role. Well-drained soils with good natural structure tend to transition to no till farming systems more smoothly than heavy clay soils that are prone to compaction and slow to drain. That said, no till farming equipment has been successfully implemented across a wide range of soil types when managed carefully. In clay-heavy ground, the transition to zero tillage may require more patience and a stronger emphasis on cover crops to build the biological activity needed to maintain pore structure without mechanical intervention.
Crop rotation is another key factor. No till farming equipment performs well in diverse rotations that break pest and disease cycles and reduce weed pressure over time. Corn and soybean rotations, small grains like wheat and barley, and forage crops are all commonly grown with no till farm equipment. Monoculture systems, on the other hand, can make weed and residue management more challenging without tillage as a reset tool.
Terrain matters too. Sloped, erosion-prone ground is often where no till farming equipment provides the most visible benefits, since the residue cover and undisturbed soil structure dramatically reduce the movement of soil and nutrients during rain events. Flat, highly productive ground may see subtler benefits from no till farming equipment use in the short term, but still gains in the long run through the improved soil health of a zero tillage process. Extremely rocky or irregular terrain can create challenges for some types of zero tillage equipment, particularly equipment with rigid coulter or opener configurations that struggle to follow uneven ground closely.
Farm scale is less of a limiting factor than many assume. No till farm equipment is available in configurations suited to small operations, mid-size family farms, and large commercial producers. Smaller operations may find that renting no till farming equipment or working with a custom hire operator is a practical entry point, while larger operations may justify dedicated equipment more quickly. The key is matching the equipment’s capacity and configuration to your specific acreage, row spacing requirements, and the crops you grow.
Finally, consider your willingness to manage a transition period to zero tillage. No till farming does not always deliver its full benefits immediately. In the first one to three years after switching to zero tillage, some farmers see modest yield reductions as soil biology adjusts to the new system and management practices evolve. This is a normal part of the transition to no till farming equipment and should be factored into any decision to adopt a zero tillage approach.
Pros And Cons Of No Till Farming Equipment
The Real Advantages
The case for no till farm equipment is built on a foundation of well-documented, long-term benefits that compound over time.
Fuel and labor savings are among the most immediate and tangible benefits of zero tillage. Conventional tillage requires multiple passes over a field before planting, each one burning fuel and logging hours on equipment. No till farming equipment eliminates most or all of those passes. The USDA has noted that continuous no till requires a fraction of the diesel fuel per acre compared to conventional tillage systems, and that labor savings from eliminating pre-plant tillage passes can be substantial on large acreage operations.
Soil health improvement is the most consequential long-term advantage of using no till farming equipment. No till farming preserves soil structure, reduces erosion, and builds organic matter over time. Fields that have been managed with no till farm equipment for years tend to have greater water-holding capacity, better infiltration, higher levels of biological activity, and more earthworm populations than tilled fields. This translates into greater resilience during drought, better nutrient cycling, and a more productive soil ecosystem over the long run.
From a land value standpoint, well-managed no till fields with improving soil health are increasingly attractive to buyers. As awareness of soil health’s role in long-term land productivity grows among agricultural land investors and farmers alike, a documented history of using no till farming equipment and improving soil organic matter can be a meaningful asset.
For landowners with wildlife and hunting interests, the habitat benefits of no till farming practices and equipment usage add another layer of value. The surface residue and cover that zero tillage equipment leaves behind creates food and shelter for game birds, pollinators, and the full range of wildlife that makes a property thrive.
The Honest Challenges Of Zero Tillage Equipment
Any thorough guide to no till farming equipment requires diving into the challenges and obstacles.
The upfront equipment investment is one of the most commonly cited barriers to implementing zero tillage. Quality no till farming equipment is typically more expensive than conventional planting equipment because of the heavier construction, more complex opener systems, and additional components required to handle residue and undisturbed soil. Farmers who already own conventional planters may find that converting or adding components is a cost-effective option, but those starting from scratch should expect a substantial equipment investment choosing no till farming.
Weed management becomes more complex without tillage as a tool. Tillage has historically served as a primary method of weed control, physically destroying germinating weeds and disrupting seed banks. No till farming replaces that function with a combination of crop rotation, cover crops (e.g., cereals, grasses, and legumes), and herbicide programs. Managing herbicide-resistant weeds is one of the most significant challenges in no till systems, and it requires active, thoughtful management rather than a set-it-and-forget-it approach.
Residue management can also add complexity, particularly in high-yield corn systems where stalk residue is heavy and dense. Too much residue can interfere with seed placement, slow soil warming in spring, and create slug-friendly conditions. Row cleaners on no till farming equipment help address this, but residue management remains an ongoing consideration that influences both equipment selection and agronomic decisions.
Lastly, there’s the transition period. Yields in the first one to three years after switching to no till farm equipment can dip modestly as the soil adjusts. Farmers who enter the transition expecting immediate gains from adopting a zero tillage approach may be disappointed, while those who understand the longer arc of the system tend to stick with it and reap the rewards.
Core Types Of No Till Farming Equipment
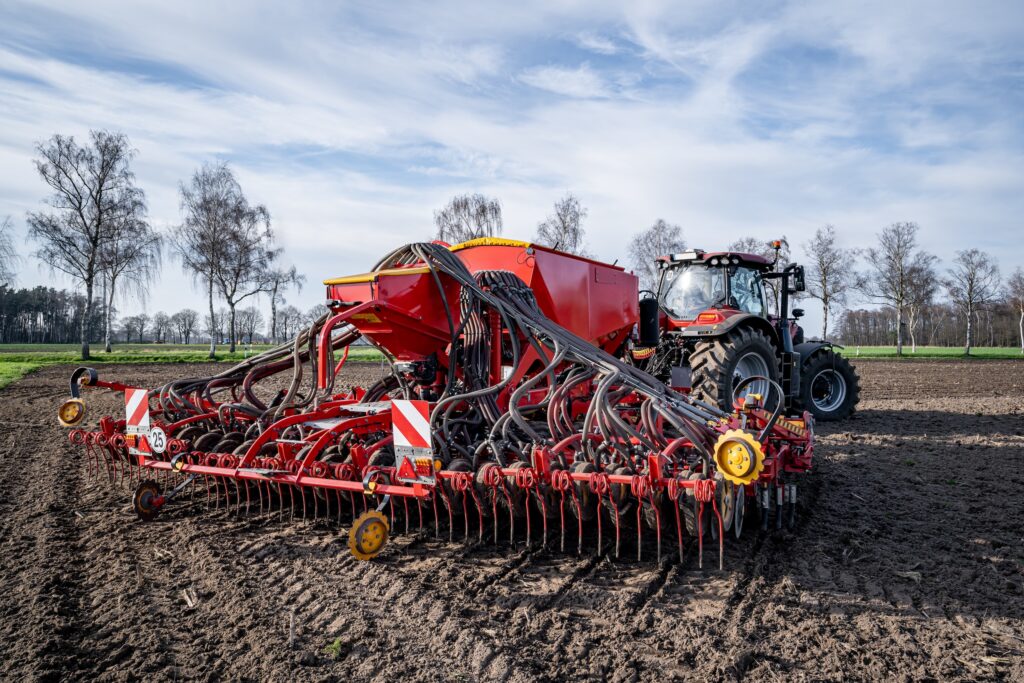
No Till Drills And Planters
Ask any farmer who has made the switch to no till farming equipment and they’ll tell you the same thing: the drill or planter is where it all starts. Get that piece of no till farming equipment right, and everything else becomes manageable. Get it wrong, and you will be fighting the system all season.
A no till drill is the go-to choice for small grains like wheat, oats, barley, and rye, as well as cover crops and forage species. It works in closely spaced rows, covering a wide swath of ground in a single pass.
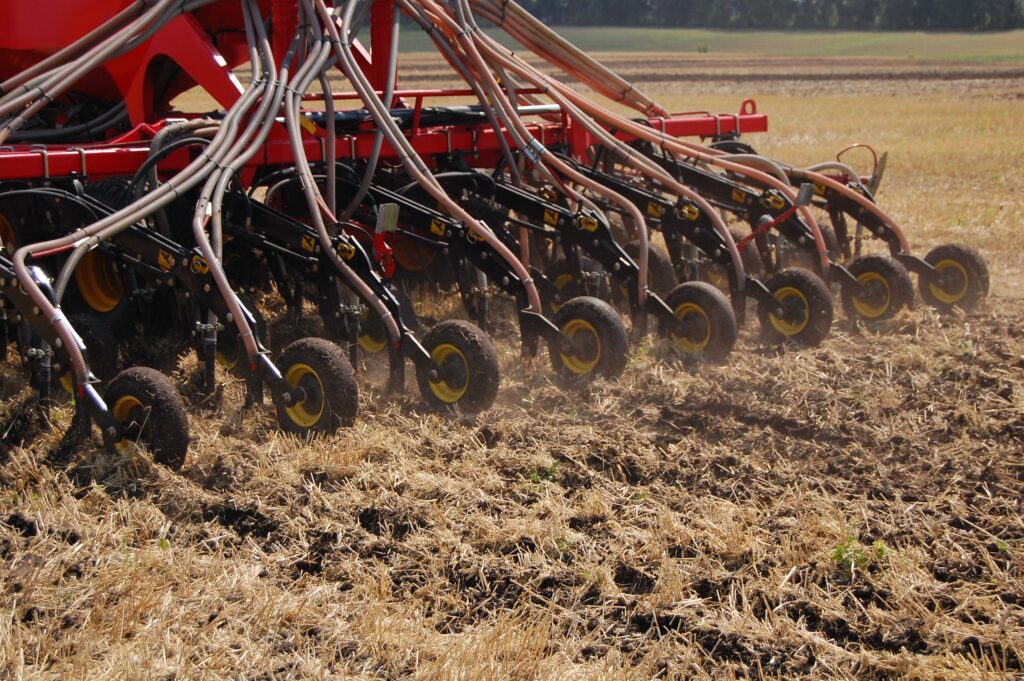
What sets a no till drill apart from a conventional grain drill is what happens at the front of this piece of farming equipment. In heavy residue conditions, aggressive coulters lead the way, slicing through last year’s crop material before the seed opener ever touches the soil. The sequence matters more than most people realize. The coulter opens a path, the disc opener places the seed at the right depth, and the press wheel or closing wheel seals everything behind it. If you get the order wrong or run worn-down components, you’re planting into a mess instead of a clean furrow.
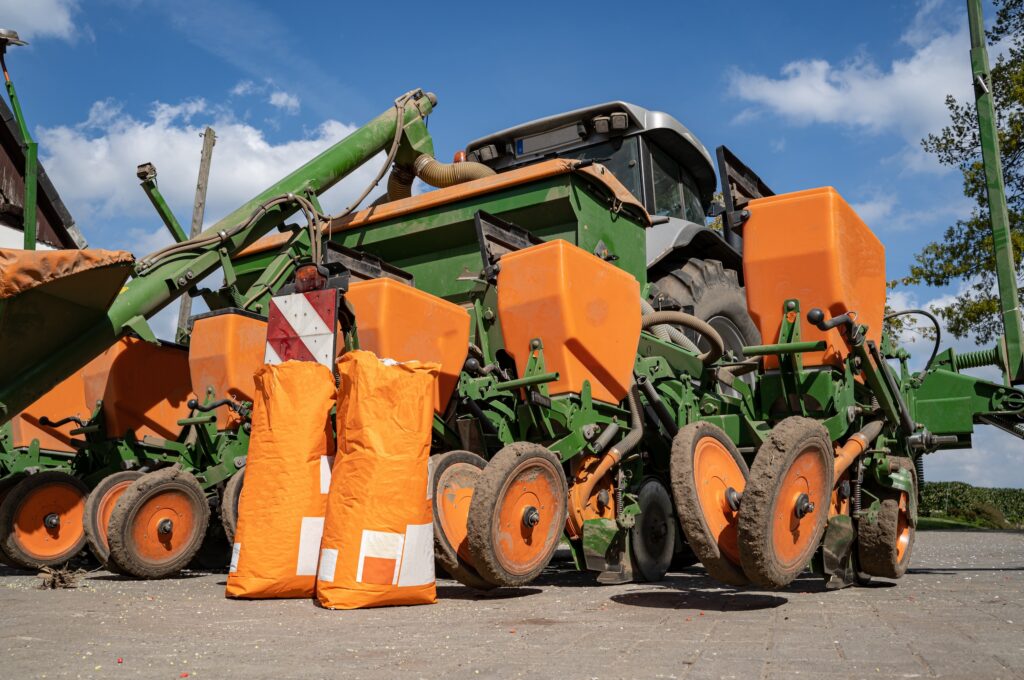
No till planting equipment works differently because farming row crops like corn and soybeans demand a different approach. Each row unit operates on its own, placing individual seeds at precise spacing and depth.
In a no till system, those row units are heavier and carry stronger down-pressure systems than what you would find on a conventional planter. They have to be. Firm, undisturbed ground doesn’t give way easily, and consistent planting depth is critical when it comes to emergence. Most no till planters also run row cleaners ahead of each unit to move residue out of the path before the opener gets there, which makes a noticeable difference in heavy corn stalks or thick cover crop biomass.
Calibration is where experience pays off with any no till farming equipment. Seed depth, down pressure, row cleaner aggressiveness, closing wheel tension, all of it shifts depending on soil conditions, residue levels, and what you’re planting. Dialing in those settings takes time, and frankly, it takes a few seasons of paying close attention to what the ground is telling you.
No Till Farm Equipment For Residue And Cover Crop Management
A no till drill or planter gets the seed in the ground, but the rest of your farm equipment lineup is what keeps the system working throughout the year.
Row cleaners are a good example. They mount ahead of each row unit on the planter and do the unglamorous work of sweeping residue out of the planting zone before the opener arrives. In a corn-on-corn rotation or after a high-yield year with heavy stalks, a row cleaner is not an optional piece of equipment in a no till farming lineup. Without one, you’re asking the opener to fight through material it was not designed to handle, which leads to skips, hairpinning, and uneven emergence. The design varies, from finger-style units to basket-style to coulter-based, and the right fit depends on your residue, your soil, and the specific planter you’re running.
Cover crop seeding equipment has become a bigger part of the zero tillage conversation as more farmers pair cover crops with their no till systems. The combination makes sense. Cover crops suppress weeds, hold soil in place over winter, add organic matter, and, in the case of legumes, fix nitrogen from the air. They can be seeded with a dedicated drill, broadcast from a high-clearance applicator into a standing cash crop, or interseeded between rows during the growing season. Each approach has its own timing considerations and establishment trade-offs, and most farmers end up finding what works through some trial and error. Terminating those cover crops before planting is its own equipment question. Herbicide is still the most common method, but roller-crimpers have drawn real interest in recent years.
A roller-crimper lays the cover crop flat and crimps the stems, killing the plant and leaving a thick mat of biomass on the surface that suppresses weeds and holds moisture. For farmers moving toward organic or reduced-input systems, it is a compelling option worth understanding.
Rounding out the no till farm equipment picture is the sprayer. Herbicide does more heavy lifting in a no till system than in a conventional one, because tillage equipment is no longer there to serve as a mechanical weed control pass.
Whether you’re running a pull-type sprayer or a self-propelled unit, calibration and timing matter. A late or off-target application in a no till system can set weed pressure back weeks, and in a bad year, that pressure is hard to recover from without reaching for the tillage tool you’re trying to avoid.
Buying, Adapting, Or Renting No Till Farming Equipment

Getting into no till farming doesn’t have to require writing a big check on day one. There are a few different ways to get access to the no till equipment you need, and the right approach depends less on what is ideal and more on what fits your farm right now.
The most common no till starting point for farmers who already have a planter is adapting the farming equipment they already own for a zero tillage approach. Adding row cleaners, upgrading to heavier down-pressure springs, and bolting on a no till coulter package can make a conventional planter functional in lighter residue conditions without a full equipment replacement.
It’s not a perfect solution, and experienced no till farmers will be quick to tell you that a converted planter is not the same as a purpose-built machine. In heavy corn stalks or very hard, dry ground in late spring, a converted planter will have some limitations. But it gets you started, it lets you learn the system, and it keeps the entry cost manageable.
Buying dedicated no till farming equipment, whether new or used, is the right call for farmers who are committed to the zero tillage approach and farming enough acres to justify it. Purpose-built zero tillage equipment is engineered from the frame up for undisturbed soil, with heavier construction, more aggressive coulter systems, and down-pressure mechanisms that conventional machines simply don’t have.
New no till farming equipment comes with current technology and dealer support. Used no till farm equipment can be a smart buy, especially if you’re buying equipment that’s already experienced a substantial amount of its depreciation. Pay attention to coulter diameter and condition, the wear on disc openers, the integrity of press wheels and closing wheels, and the overall condition of seed tubes and the frame. Those are the components of no till farming equipment that take the hardest beating and the ones most likely to need attention on a used zero tillage machine.
For smaller operations, landowners farming limited acreage, or anyone who wants to test no till on part of their ground before going all in, renting farming equipment or hiring a custom operator is worth considering.
Equipment rental arrangements through co-operatives or dealers, and custom hire operators who will come in and do the planting for a per-acre fee, lower the barrier to entry considerably. Plenty of farmers have planted no till for years through custom hire while they build experience with the system and decide whether full equipment ownership makes sense for their situation.
Maintaining Your No Till Farm Equipment
No till farming equipment takes a beating that most conventional tillage tools typically don’t see. Coulters, disc openers, row cleaners, and closing wheels are working through undisturbed ground and heavy residue every single pass, and the wear can add up. The farmers who get the most out of their no till equipment are the ones who treat pre-season maintenance as seriously as planting day itself.
Coulters are the first to experience some wear. They hit the soil before anything else does, slicing through residue and opening the initial slot. When a coulter wears down past its serviceable diameter, it stops cutting and starts pushing. That means residue getting folded into the seed furrow instead of being cut away from it, inconsistent slot depth, and the hairpinning problem that causes seeds to germinate in a pocket of plant material rather than soil. Pull a tape measure on your coulters before the season starts. If they’re worn below spec, replace them. It’s one of the highest-return equipment maintenance calls you can make on a no till drill or farming planter.
Disc openers are next. They wear gradually with every acre, and once they drop below their minimum diameter, they stop forming a clean V-slot. The result is variable seed depth and poor seed-to-soil contact, two things that could cost you in the stand and in your yield. Many farmers check opener disc diameter as a routine pre-season task, the same way they check tire pressure and grease fittings, and replace or adjust as needed before the first field.
Row cleaners, press wheels, and closing wheels all belong on the same inspection checklist. Worn row cleaner fingers lose their ability to move residue cleanly and start leaving material in the path of the opener. Damaged or misaligned closing wheels leave the seed furrow open instead of sealed, which affects emergence in both wet and dry conditions. These are not glamorous parts of the machine, but their condition shows up directly in your stand.
Beyond the components that contact the soil, the rest of the maintenance picture for no till farming equipment is straightforward: grease everything on schedule, check gauge wheel and transport tire pressure, inspect seed tubes for blockages or wear, calibrate seed meters before you plant, and store the equipment somewhere dry where rodents can’t get to the wiring and plastic tubes over winter.
One thing worth calling out specifically for no till equipment is coulter-to-opener alignment. These components need to track in line with one another for the system to work the way it was designed. If the opener is not following the slot the coulter cut, you lose the whole benefit of having a coulter out front. It’s a quick check before the season and the kind of thing that’s easy to overlook until you’re trying to figure out why emergence is uneven across the field.
The Economics Of No Till Farming Equipment Over Time
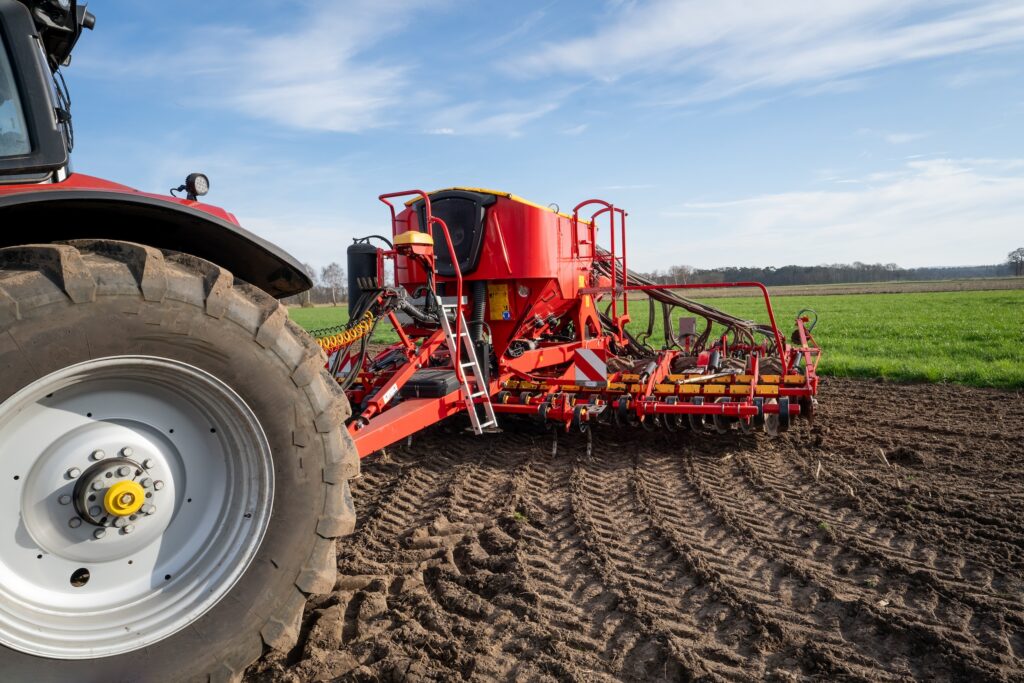
Anyone who tells you no till farming equipment pays for itself in year one isn’t presenting the full picture. The honest version of this conversation starts with acknowledging that the upfront costs are real, the transition takes time, and the payoff is not linear.
Purpose-built no till drills and planters cost more than comparable conventional seeding equipment, and there’s a reason for that. They’re heavier, more complex, and built to work in conditions that would stop a conventional planter in its tracks. Farmers who adapt existing equipment lower that initial cost, and those who start with rental or custom hire arrangements lower it further. But for anyone committed to no till farming as a long-term management approach, equipment investment is part of the picture.
What makes zero tillage farming equipment worth that investment over time is what stops happening when you go no till. Pre-plant tillage passes disappear from the schedule, which means less fuel burned, fewer hours logged on aging tractors, and less maintenance on the plows and cultivators that no longer need to run. The USDA has documented that continuous no till farming requires significantly less fuel per acre than conventional tillage, and those eliminated tillage passes also free up meaningful labor hours during the busiest stretch of the year.
Soil health is where the economics of no till farming equipment get interesting in ways that are harder to see at first. No till farm equipment, used consistently over the years, builds water-holding capacity, organic matter, and biological activity in the soil. Those improvements translate to greater yield stability during dry years, reduced inputs as soil fertility improves, and land that holds its productivity over the long run. For farmers who own their ground, that has real bearing on land value too. Agricultural land buyers increasingly pay attention to soil health, and a documented history of no till management is not invisible to the market.
The transition period is where farmers sometimes lose faith in the system before it has had a chance to show what it can do. A modest yield dip in the first season or two after switching to no till farming equipment is common. The soil is adjusting, management practices are evolving, and the full biological benefit of undisturbed ground takes time to develop. Farmers who stick with it past that window are typically the ones who look back years later and wonder why they waited so long to make the switch.
Ready To Buy Or Sell Your No Till Farming Equipment?
The farmers who get no till farming right are not necessarily the ones with the newest equipment or the most acres. They’re the ones who found the right tools, learned their ground, and stayed with the zero tillage system long enough to see what it can do.
Getting there starts with getting your hands on the right no till farming equipment, whether that means buying, selling, or finding the right connection to make it happen.
Here at Hayden Outdoors, we work with farmers, landowners, and agricultural land buyers across the country. Our equipment marketplace is built to connect people who have quality no till equipment with the people who need it, and to make that transaction straightforward on both ends. If you’re looking to buy no till farm equipment, you’ll find listings from real sellers. If you have no till equipment to move, we can help you find the right buyer.
Browse current farming equipment listings or get your tools in front of the right audience. The land is worth farming well. We’re here to help make that possible.
Learn More About The Hayden Outdoors Equipment Marketplace
UTV vs ATV: What’s The Difference And How To Choose The Right One
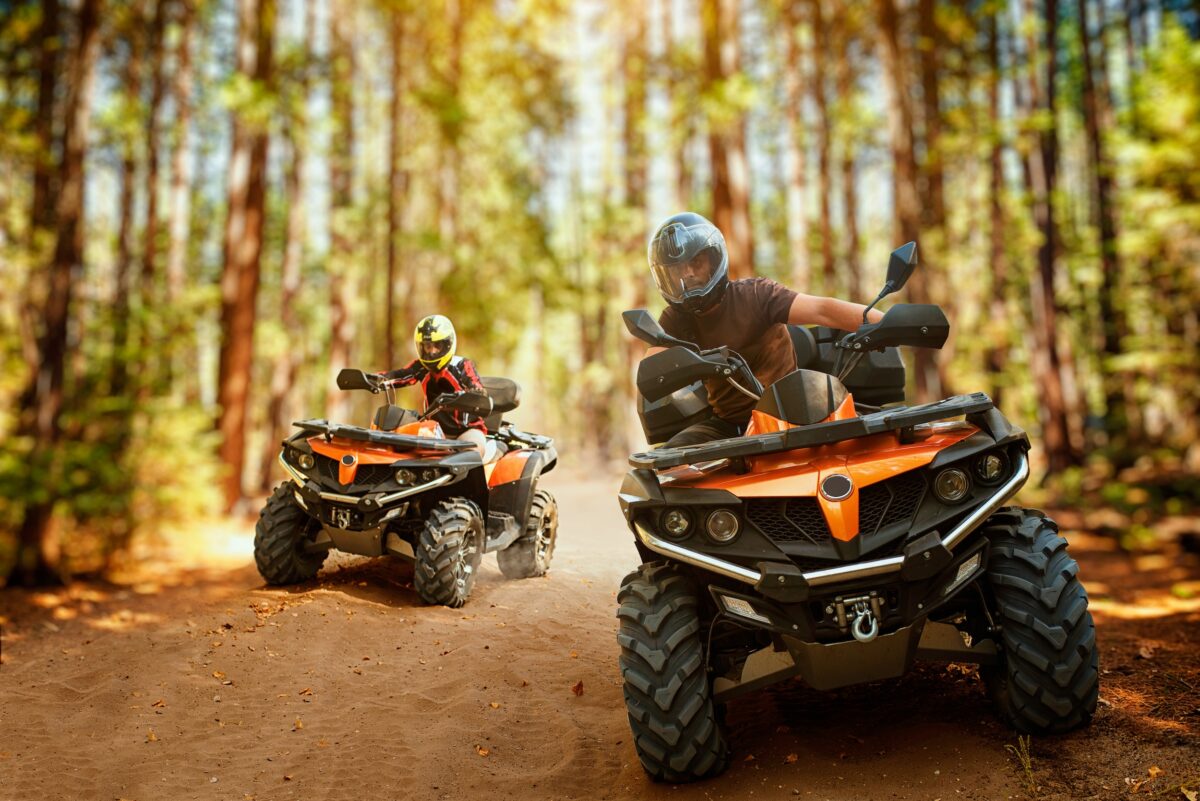
Our agents at Hayden Outdoors don’t just sell land. They work it. They check fence lines before sunrise, run feed out to pastures in the dark, and pack into elk country on machines that need to perform under real pressure. When a buyer asks us about the UTV vs ATV decision, we’re not guessing. These are the tools we depend on, and we know from firsthand experience that picking the right one comes down to one thing: how you actually use it.
We’ve written this ATV vs UTV guide to help you make that call confidently. Whether you’re farming, ranching, hunting, off-roading, or just trying to get more out of your property, the ATV vs UTV choice matters. Pick the right machine, and it pays for itself in time and capability. Pick the wrong one, and you’ll feel that mismatch every time you fire it up.
Here’s how we’ll help you figure it out:
- We’ll help you understand what each machine actually is
- We’ll guide you to match the machine to your lifestyle and land
- We’ll give you the insights to get out there with confidence
Table Of Contents
Let’s Define A Few Things
People use “ATV” and “UTV” (also referred to as a side-by-side) interchangeably all the time, and that’s where a lot of buyer regret starts. These are two genuinely different machines built around different purposes. Understanding the difference between a UTV vs an ATV is step one.
What Is A UTV?

A UTV, short for Utility Task Vehicle, is an off-road machine where riders sit side-by-side, which is exactly why “side-by-side” has become the go-to nickname for them in the field. You’ve got a steering wheel, bucket seats, a roll cage, and on most models, a rear cargo bed. It feels less like a traditional off-road vehicle and more like a stripped-down truck that happens to go places trucks can’t.
Most UTVs seat two to six people and are built to haul, tow, and carry. They range from no-nonsense farm workhorses to high-performance sport machines. If the job involves carrying gear, moving people, or working the land day in and day out, the UTV was built with that in mind.
What Is An ATV?

An ATV, short for All-Terrain Vehicle, is a straddle-seat off-road machine with handlebars, most often built for one rider. Quads, four-wheelers: same thing, different name. ATVs are lighter, narrower, and more nimble than UTVs, which makes them a natural fit for tight trails, dense timber, and anywhere that maneuverability matters more than carrying capacity.
Some ATVs are built purely for sport. Others come loaded with utility features: racks, 4WD, tow hitches, and real-world capability. If the work is solo and the terrain is tight, an ATV is built for that.
Factors To Consider When Deciding Between A UTV vs An ATV

The ATV vs UTV decision is not a specs debate; it’s a lifestyle and land-use question. Understanding the real UTV vs ATV difference means looking at the full picture before you buy. Here’s what actually moves the needle:
Terrain and trail access. This one can make a difference before you even set foot in a dealership. Many public lands, state parks, and trail systems have width restrictions that rule out UTVs entirely. Before you commit, check the specific trail systems and access points you plan to use. Because of their narrower profile, ATVs can reach terrain that a UTV/side-by-side simply cannot.
Intended use. Are you working the land, riding for recreation, hunting, or some combination? Each use case has a machine that fits better than the other. We’ll break that down in the lifestyle section below.
Passengers. Riding with family, a partner, or a crew regularly? Passenger capacity is one of the most practical parts of the UTV vs ATV difference. UTVs are built for multiple riders vs ATVs that are primarily solo machines.
Cargo and towing. UTVs come with rear cargo beds and stronger tow ratings. If you’re moving feed, gear, or equipment on a regular basis, the side-by-side wins this comparison hands down. ATVs can pull small trailers, but they’re not built for heavy hauling like UTVs are.
2WD vs 4WD. Both recreation vehicle types come in 2WD and 4WD configurations, but the ATV vs UTV difference in how those systems are engineered is worth noting. Most ATV 4WD systems engage manually and perform well in mud and loose ground. UTV 4WD systems on higher-end models tend to be more sophisticated, with electronic engagement and front differentials that handle more demanding terrain more consistently.
Seasonal and weather use. If you need a machine that works twelve months a year, including through snow and cold, the side-by-side vs ATV comparison tilts in favor of the UTV. Cab enclosures, windshields, and heater kits make UTVs genuinely adaptable to year-round work. ATVs handle snow, but unlike UTVs, there’s no cab to hide behind when it’s fifteen degrees and blowing.
Land access rules. Worth repeating because it catches buyers off guard: local ordinances, HOA rules, and public land regulations can restrict which machines are allowed and where. Know your rules before you buy an ATV or UTV.
Budget. When assessing a UTV vs an ATV, sticker price is just the start. Factor in insurance, tires, fuel, maintenance, and transport. We’ll dive into those details a bit more when we discuss pricing.
Storage and transport. An ATV fits in most standard truck beds, while a UTV typically needs a trailer and takes up more dedicated storage space. If you’re working with limited space or towing capacity, that matters.
Lifestyle Needs: Which Lifestyles Warrant A UTV vs ATV?

The best way to work through the ATV vs UTV question isn’t by reading a spec sheet. It’s by being honest about how you spend your time outdoors. Let’s break down the difference between a UTV vs an ATV when looking at lifestyle use cases.
Trail riding and sport: ATVs win here. If single-track trails, technical terrain, and the pure experience of riding are your main goals, an ATV delivers a level of responsiveness and agility that a side-by-side can’t match. The lighter weight and narrower footprint of an ATV lets you go places a UTV won’t follow.
Farm and ranch work: UTVs win here. Hauling feed, moving implements, towing equipment across large acreage, carrying a crew from one end of a property to the other: this is what side-by-sides are built for. The cargo bed alone makes the UTV vs ATV difference obvious for working-land applications.
Hunting: This one earns a more nuanced answer in any honest UTV vs ATV comparison. ATVs have long been the favorite for hunters going deep into tight timber. A quad slips through places a side-by-side can’t touch. On the other hand, UTVs are hard to beat for hauling game out of the field or running a full camp’s worth of gear into a remote spike camp. Electric UTVs are becoming a real consideration here, too, given how quiet they run. The right side-by-side vs ATV call for hunters depends on terrain, hunting style, and how far you’re packing in.
Family and group recreation: UTVs win here, and it’s not particularly close. If you’re riding with family, the side-by-side is the right call. Everyone is seated and strapped in, the ride is comfortable for varying ages and skill levels, and you’re not asking inexperienced riders to manage a machine that demands active balance.
Solo adventure riding: ATVs win here. For the rider who wants to move independently, explore unpredictable terrain, and keep the setup simple, an ATV is the natural fit. Easier to load, easier to manage, and purpose-built for one.
Snow and winter use: UTVs win here. With a plow blade, a cab enclosure, and the right tires, a side-by-side works as a capable year-round machine. ATVs can push snow, but extended cold-weather riding without a cab is a hard ask for most people, which is why UTVs win out here.
Older riders or those with physical limitations: UTVs are the winner in this case. The seated, strapped-in ride of a side-by-side asks a lot less of your body than actively balancing an ATV. For riders dealing with back issues, joint problems, or reduced physical stamina, the UTV vs ATV difference in comfort over time is significant.
Flexibility: Do UTVs or ATVs Offer More Versatility?

When the conversation turns to long-term value, flexibility is one of the most underrated parts of the UTV vs ATV comparison.
UTVs have a deep aftermarket ecosystem. Doors, windshields, roofs, heaters, cargo bed extensions, winches, light bars, stereos: the list of available add-ons is long, and most of them are genuinely useful. A UTV bought for farm work can be outfitted for hunting season, winterized for snow removal, and configured for a family ride without buying a new machine. In the side-by-side vs ATV comparison on versatility, the side-by-side carries a clear advantage for buyers whose needs change with the seasons.
ATVs aren’t short on accessories either. Winches, front and rear racks, sprayers, plows, and cargo bags are all widely available. But the nature of the machine puts a practical ceiling on how much you can layer on before the setup gets awkward.
The honest answer to the ATV vs UTV flexibility question is that UTVs scale better as your needs evolve. If your uses shift seasonally or multiple people in your household will use the machine differently, a side-by-side gives you more room to grow.
An ATV is harder to outgrow if solo riding is your primary and ongoing use. It’s a machine that’s genuinely excellent at what it’s built to do.
One factor that often gets left out of the UTV vs ATV conversation: portability. An ATV loads into most standard truck beds without a trailer, which means you’re not tied to a trailer every time you want to ride somewhere new. For buyers who move their vehicle around regularly, that kind of mobility has real everyday value.
Safety Considerations Between ATVs and UTVs
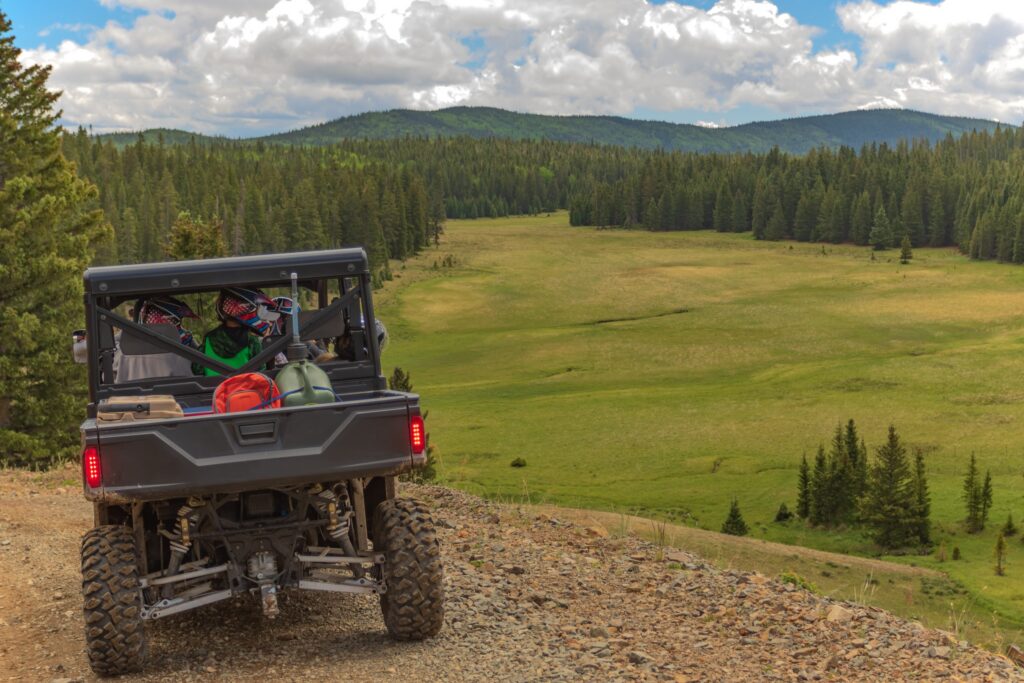
Both machines are safe when they’re matched to the right rider and used responsibly. That said, there are real differences in the ATV vs UTV safety picture worth knowing before you commit.
UTVs come with built-in structural safety advantages: roll cages, three-point seatbelts, and doors on many models. Those features matter in the event of a tip or rollover, which is why side-by-sides are generally considered the more approachable option for beginners and the better fit when kids are part of the equation.
ATVs require active input from the rider. Steering, balance, and body positioning all play a role in keeping the machine stable, especially on slopes and uneven terrain. That’s not a knock against the ATV in the side-by-side vs ATV safety comparison. Riders who take the time to learn their machine and respect the terrain ride ATVs safely every day. The ATV Safety Institute offers training courses that are well worth the time for anyone new to the machine.
Practical safety notes that apply to both sides of the UTV vs ATV comparison:
- Always wear a helmet. For UTVs, pair that with a seatbelt as your baseline.
- Match the machine to the rider’s experience level and physical capability.
- Never carry passengers on an ATV that isn’t rated for it.
- Know your terrain before you ride it.
Recovery is another area where the ATV vs UTV difference shows up in a practical way. UTVs are heavier, which means getting one unstuck usually requires a winch or another vehicle. ATVs are lighter and can sometimes be moved manually in a pinch. That said, a quality winch is worth adding to either machine if you’re riding in remote areas.
Price Point Differences Between A UTV vs An ATV

Most buyers lock in on the sticker price first. That’s just one piece of the real cost picture in the UTV vs ATV decision.
Purchase price. New ATVs typically run between $5,000 and $12,000, depending on brand, engine size, and how it’s equipped. New UTVs start around $10,000 for basic utility models and climb well past $30,000 for performance or fully-loaded configurations. The ATV vs UTV price gap can get quite large, and so is the capability gap on the upper end. Used machines in both categories are widely available and can represent solid value.
Insurance. UTVs generally cost more to insure than ATVs. The gap is driven largely by higher replacement value and passenger liability. Rates vary significantly based on state, intended use, and whether the machine stays on private land or rides public trails. Get actual quotes before you lock in a budget.
Tires and maintenance. UTVs are heavier and tend to burn through tires faster under hard use. Routine maintenance is generally comparable across both sides of the ATV vs UTV equation, though UTVs with more complex drivetrain setups can carry higher service costs over time.
Resale value. Brand matters here, but condition, maintenance history, and mileage are the main drivers regardless of which side of the UTV vs ATV fence you land on.
A note on buying used UTVs. A used side-by-side that’s been rolled or involved in a hard impact can have a compromised cage, and that damage isn’t always visible from the outside. If you’re shopping used, inspect the roll cage closely for bends, welds, and any sign of structural repair. When in doubt, have a mechanic look it over before you hand over a check.
Total cost of ownership. Add up purchase price, insurance, fuel, tires, storage, and maintenance over several years, and the gap between owning an ATV vs a UTV is real. For buyers working within a tighter budget, an ATV delivers strong capability at a meaningfully lower overall cost. For buyers who genuinely need what a UTV offers, the investment tends to pay off through utility and versatility over time.
Questions To Ask Yourself When Deciding Between An ATV And UTV

Before you pull the trigger on either machine, run through these questions. The answers tend to cut through the noise quickly when deciding between a UTV vs an ATV:
- How many people will typically ride with me? If the answer is regularly more than one, a UTV may be the better fit. Passenger capacity is one of the clearest dividing lines in the side-by-side vs ATV comparison.
- What is my primary use? Solo sport riding and hunting tight trails are great for ATVs. Farm work, family riding, and regular hauling make UTVs a great option.
- What terrain and trail systems will I use most? If your trails are narrow or have width restrictions, the terrain may settle the UTV vs ATV question for you before anything else.
- Do local access rules restrict vehicle width? Look into this before committing. This is especially relevant for anyone riding public land or hunting in managed areas.
- What is my total realistic budget, including gear and ongoing costs? One of the biggest differences between an ATV vs a UTV is the up-front and lifetime costs of ownership.
- Will I need to haul or tow equipment regularly? If yes, the UTV’s cargo bed and tow rating will earn their keep fast. This is one area of the UTV vs ATV difference that’s hard to argue against for working-land buyers.
- Do I feel comfortable actively balancing a machine? If balance, core strength, or joint issues factor into your daily life, the seated ride of a side-by-side is a real quality-of-life advantage in the ATV vs UTV comparison.
- Have I taken the time to test ride both options? A demo ride should be a part of your buying decision. Many dealerships or resellers will let you get seat time before you buy. Take them up on it. No amount of reading replaces actually riding the machine.
Whatever Your Adventure, Hayden Has The Equipment You’re Looking For

The right machine opens up more of the land you love. At Hayden Outdoors, we understand what it means to put equipment to real use, because that’s how our team operates every day.
Browse our current ATV and UTV listings and find the vehicle that fits your land, your life, and your next adventure.
View Available UTVs and ATVs
Best Gardening Essentials: Must Have Supplies And Tools For Beginners
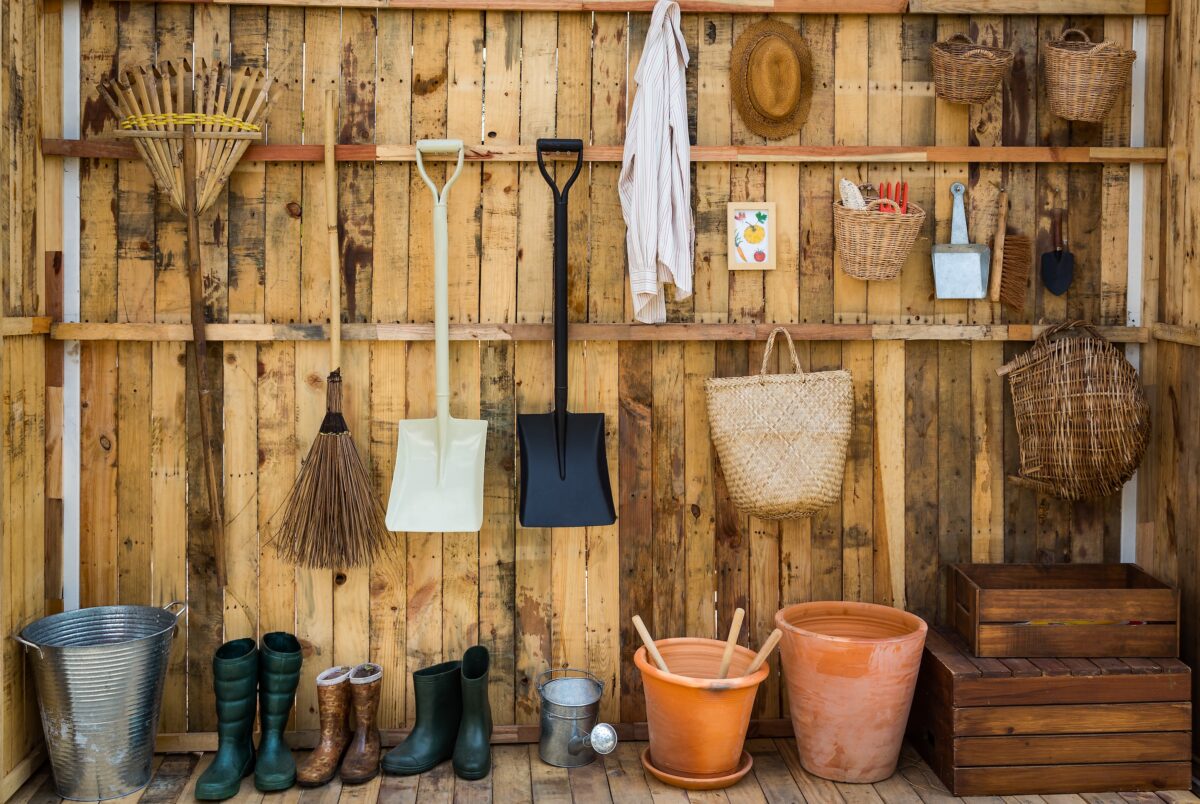
Picture this: you walk into a garden center for the first time, cart in hand, ready to begin your growing journey. Within ten minutes you’ve got a broadfork, a three-piece cultivator set, a soil blocker, and a specialty dibber in your cart, and you haven’t even found the seeds yet. This is the trap most beginner gardeners fall into, and it starts with the same problem: nobody told them which gardening tools for beginners actually matter before they opened their wallets.
Our gardening must haves list does exactly that. Whether you’re planning a few raised beds out back or turning over a plot of ground for the very first time, we’ll walk you through the gardening essentials, tools, and supplies that genuinely move the needle, and the ones that can wait.
We’ve organized everything by stage, because that’s how gardening actually works: you plant, you tend, you harvest. As a beginner, the best way you can invest in gardening tools is to follow that same sequence.
By the time you finish reading, you’ll know what gardening tools are best to buy first, what to skip entirely, and how to build a kit with supplies for beginners that grows with you season by season.
Table Of Contents
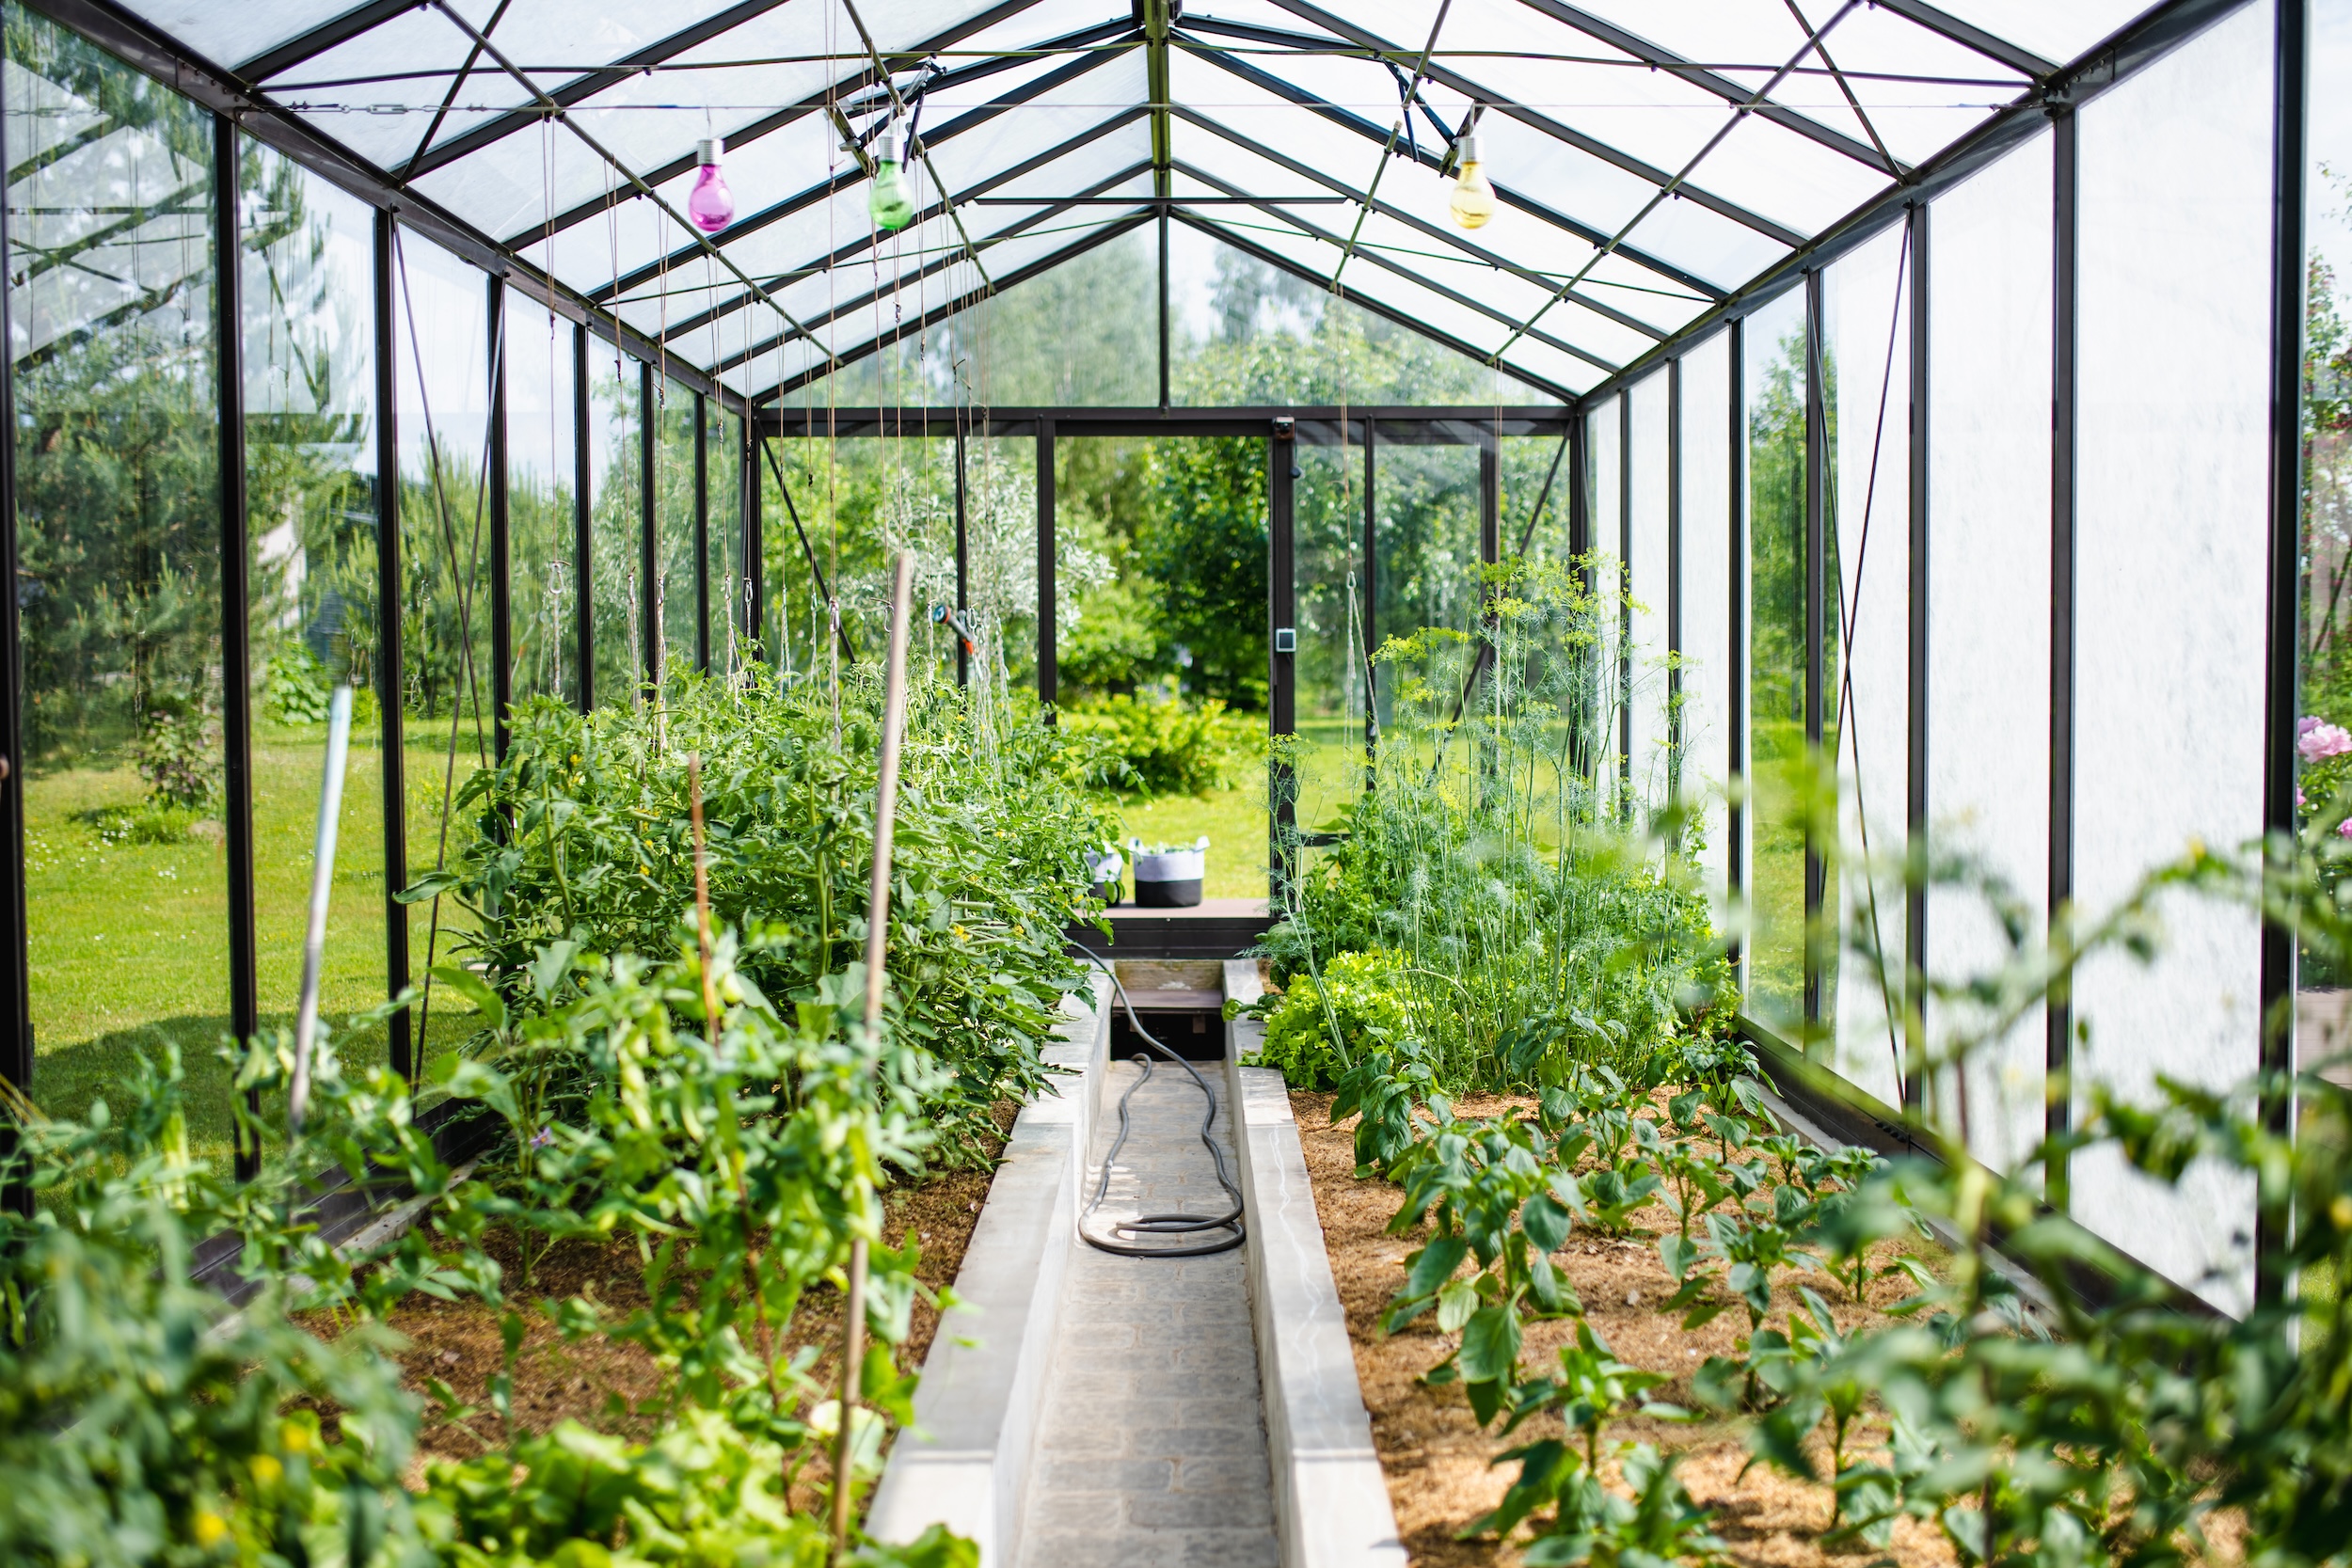
As a beginner, before you spend a dollar on any gardening supplies or tools, it helps to have a filter. Not every tool that shows up in a beginner gardening list is essential.
Some are genuinely useful. Some are useful only for specific situations. And some are solutions to problems you won’t have until you’re further into your gardening journey.
Here’s a three-question test you can apply to any gardening tool before you buy it:
- Do you plan to use that particular gardening tool or supply several times throughout the season? If the answer is no, it probably doesn’t belong in a first-year beginners gardening tools and supplies kit.
- Can you accomplish the same task well with something you already own? A chopstick makes a perfectly adequate dibber for transplanting seedlings. A kitchen knife handles plenty of tasks that a dedicated harvest knife would cover. Yes, there are advantages to upgrading your tools, but when you’re a beginner just getting into gardening, you want to be intentional about what essentials and supplies you invest in and which ones you hold off on.
- Are you buying it before you know whether you enjoy gardening? The first season is a trial run. Buy the minimum, see what you actually reach for, and fill in from there.
That filter alone can save most gardening beginners a couple of hundred dollars in tools and supplies that aren’t essential at this point.
Beyond those three questions, scale matters more than most gardening blogs admit. The best gardening tools for a 4×4 raised bed look almost nothing like the best gardening tools for a 20×20 in-ground plot.
A hand trowel and a watering can are gardening essentials that can cover roughly 80% of tasks in a small raised bed setup. That same hand trowel becomes an afterthought if you’re breaking ground on a large in-ground vegetable garden, where a full-size spade and a garden fork earn their keep every single week.
Think about your gardening setup in three tiers:
- A micro garden (e.g., containers, window boxes, or one or two small raised beds) needs very little in the way of ground-breaking gardening equipment. Most of the best gardening tools at this beginner scale fit in a single canvas tote.
- A starter garden (covering three to six raised beds or a modest in-ground plot) opens up the need for a few more gardening tools and supplies, particularly for weeding and watering at scale.
- An ambitious first-year garden (anything larger and especially in-ground) calls for a more complete set of gardening essentials from the start, including soil-working tools that smaller setups simply don’t require.
One more thing worth mentioning before we get into our list must have gardening essentials recommendations: start with renting before buying for large, one-time tasks. This will help you narrow down which equipment really works for you in your garden before you fully invest.

The single biggest gap in most beginner gardening guides is this: they hand you a generic list of tools and supplies without asking what you’re actually growing. The planting tools list for someone growing container herbs on a patio is inevitably different from the gardening tools a beginner needs for root vegetables in clay-heavy ground.
Before we get into stage-by-stage recommendations, here is how garden type shapes your tool decisions.
Essentials For Container And Patio Gardens

For beginners growing in pots, window boxes, or a small collection of containers, your list of essential gardening supplies and tools is quite short. The work is small-scale and precision-driven. You need a hand trowel, a watering can with a fine rose head, a small pair of pruning snips, and a potting scoop. That’s genuinely close to the full list.
Tools you don’t need: a full-size spade, a garden fork, a wheel hoe, or a tiller. None of those gardening tools have a job to do in a container setup.
Essentials For Raised Garden Beds
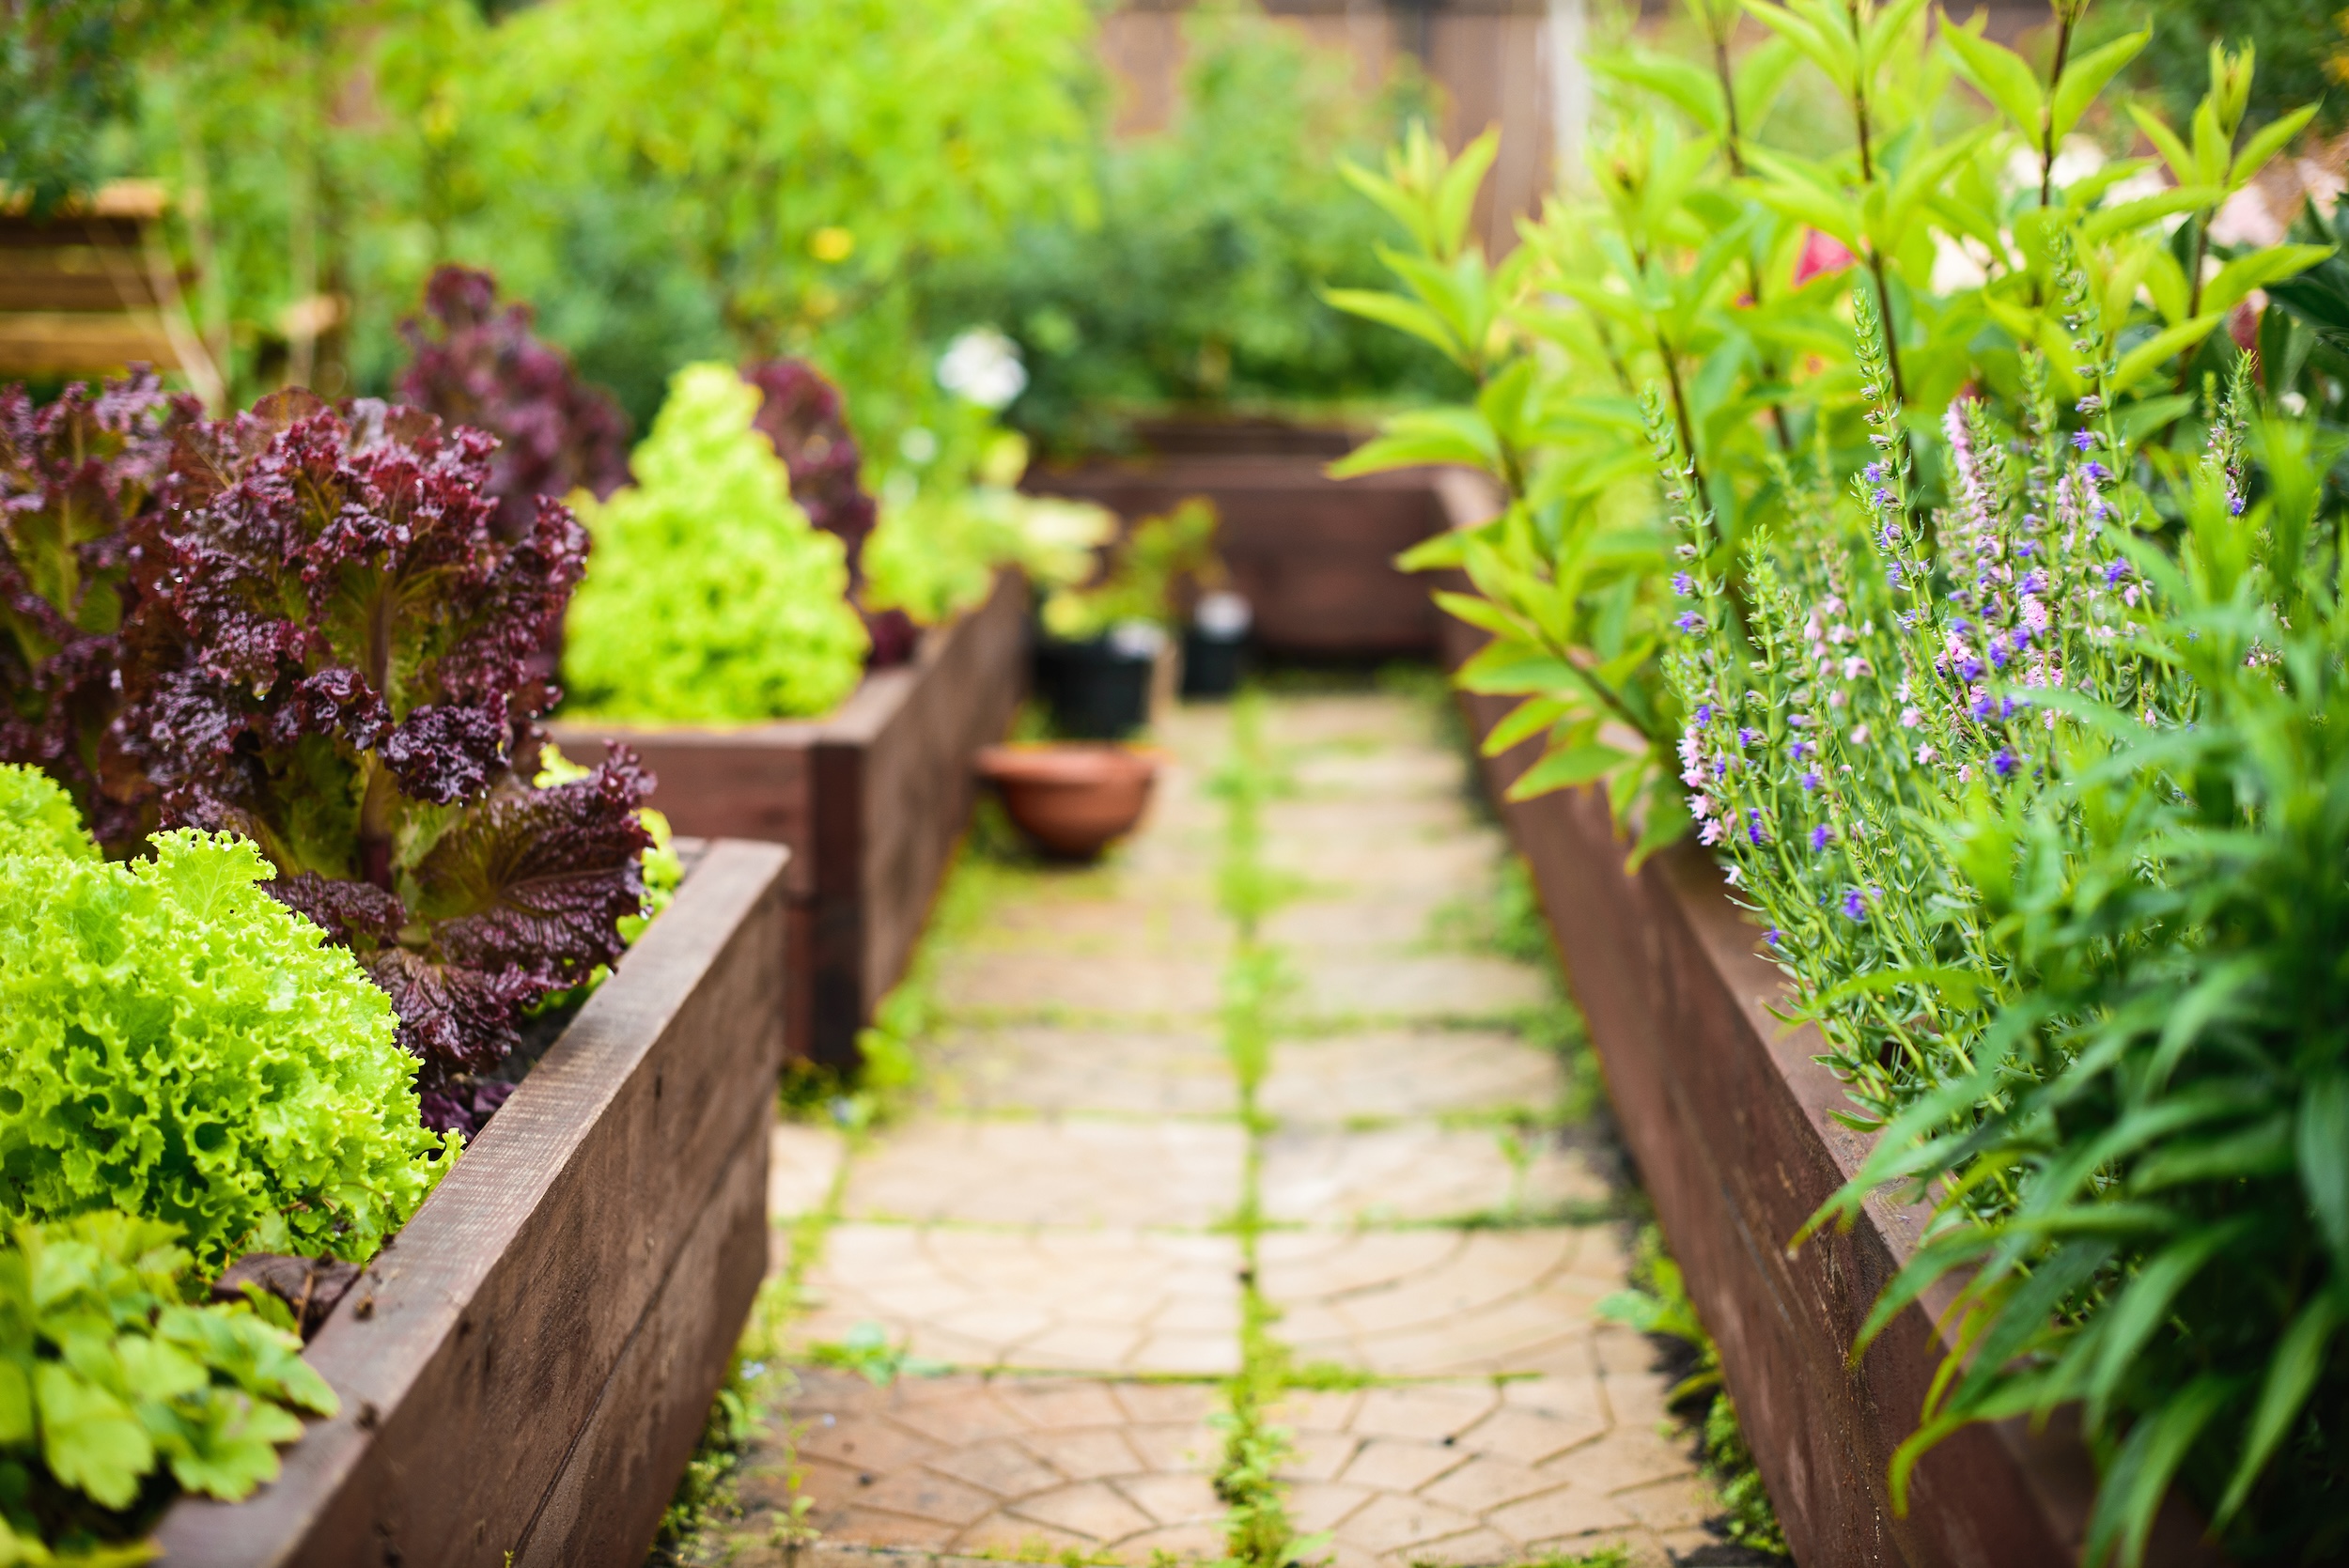
Raised beds are the most forgiving setup for beginner gardeners, and they’re also the gardening setup where your soil investment matters more than the tools you invest in. If your beds are filled with quality amended soil, loose, well-draining, and rich in organic matter, most of the work happens with your hands and a basic hand trowel.
The best gardening tools in a raised bed setup are a long-handled stirrup hoe for weeding between rows, a watering wand with a shutoff valve for reaching across beds without leaning, and a basic drip or soaker irrigation setup if you’re managing more than two or three beds.
Essentials For In-Ground Vegetable Gardens
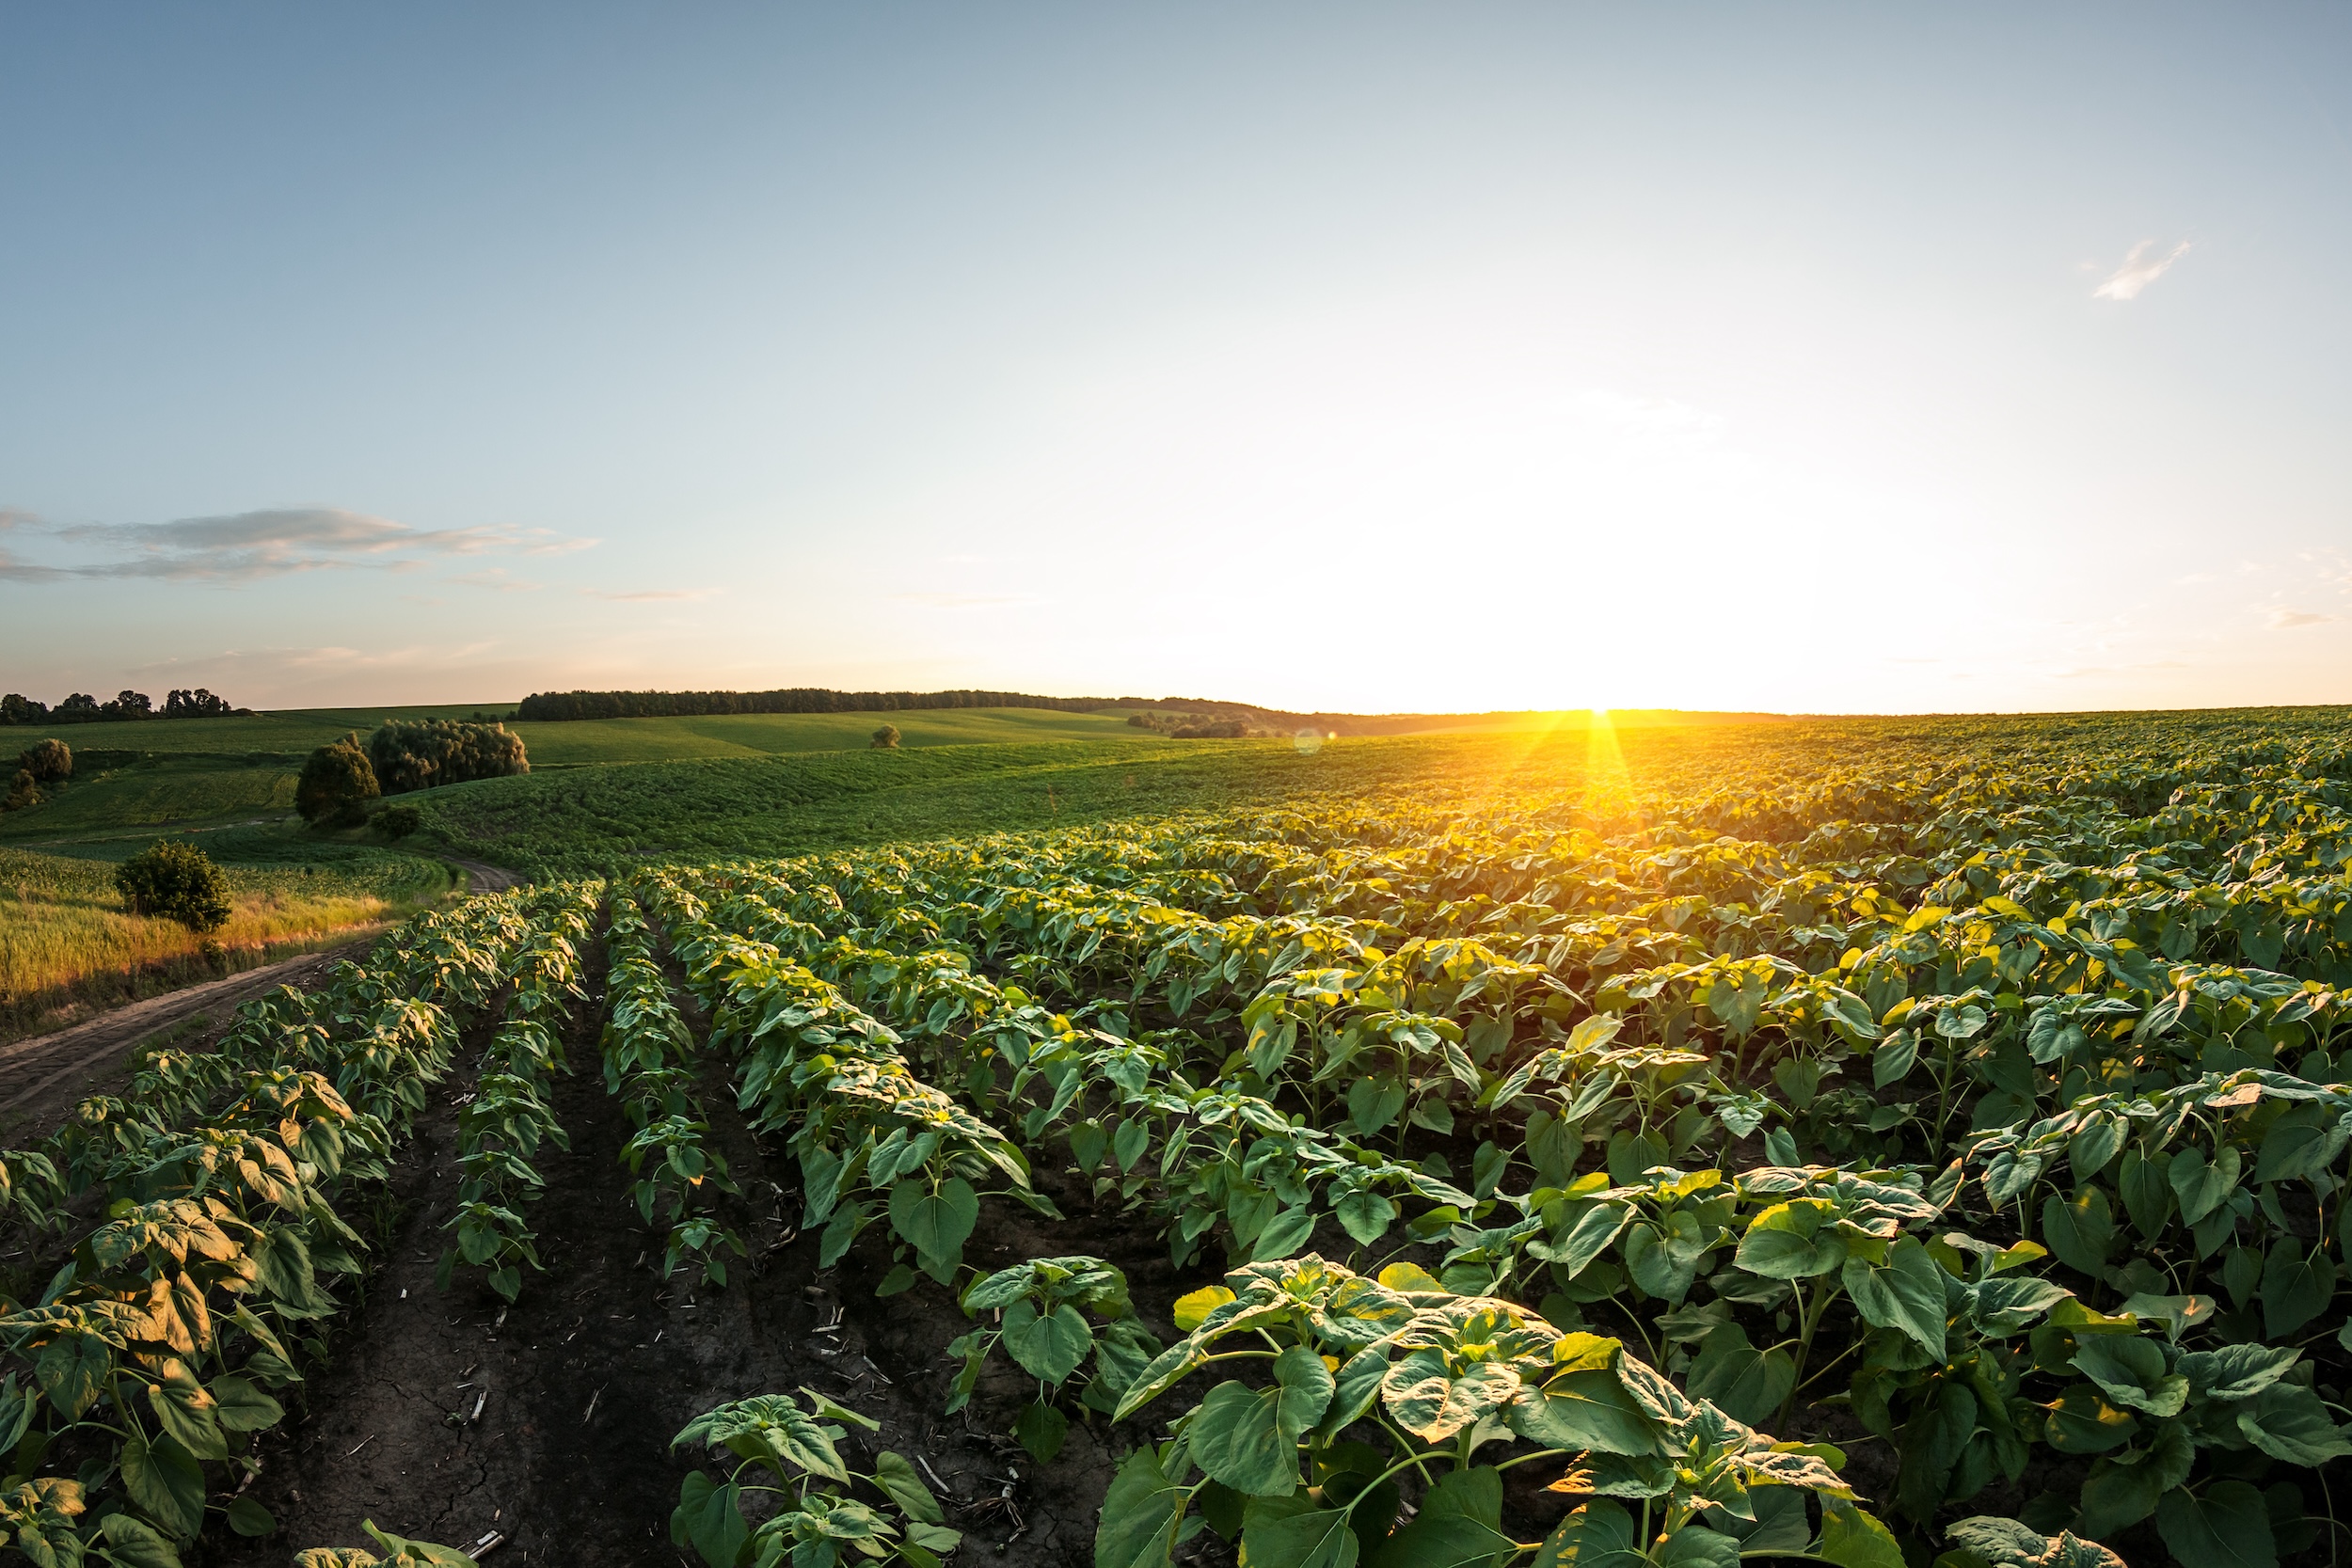
An in-ground garden is where your planting tools list expands a good bit. You’ll need gardening tools for initially breaking and amending soil, tools for sustained weed pressure, and implements that can handle the physical demands of working real ground rather than a contained bed.
Here’s something most beginner guides skip entirely: your soil type changes which specific gardening tools you need. Clay-heavy soil requires a heavy-duty spading fork and a flat spade that can cut through compacted ground. Sandy loam is far more forgiving and works with almost any standard tool.
Pro Tip: If you’re not sure what your soil is made of, try the ribbon test: take a handful of moist soil and squeeze it into a ribbon between your thumb and forefinger. If it ribbons out smoothly past two inches, you’ve got significant clay content. If it falls apart immediately, you’re working with sandy soil. Knowing this before you buy any gardening tools and supplies can save you from buying the wrong equipment.
Essentials For Herb And Pollinator Gardens

Herb gardens and pollinator plantings are usually compact, border-style, or tucked into tight spaces. They call for precision over power. A narrow hand trowel or a hori hori knife, a small pair of snips, and a compact watering can are the best gardening tools for this setup.
What You Plan To Grow In Your Garden Changes Which Tools Are Essential
Beyond garden type, the specific crops you’re planting in your garden shift your gardening essentials list in ways worth knowing upfront.
Root vegetables like carrots, beets, and parsnips need deep, loose, stone-free soil to develop properly. A garden fork becomes an essential gardening tool at harvest time for loosening soil without slicing through roots, and it’s also useful during bed prep if your ground has any compaction at all.
Vining crops like cucumbers, squash, and pole beans need vertical support. Most beginner gardening guides label staking and trellising as optional extras, but if you’re growing vining crops, support structures are functionally required supplies for a healthy harvest and absolutely should make it on any list of best gardening tools.
Heavy feeders like tomatoes, peppers, and corn benefit enormously from a soil test kit. Most beginner gardeners skip soil testing and wonder later why their plants plateau. A basic soil test kit from a garden center or your local cooperative extension service comes at a pretty low cost and tells you exactly what amendments your soil needs before you plant.
Leafy greens are the crop that generally requires very little in the way of gardening tools. Lettuce, spinach, kale, and arugula are forgiving, fast-growing, and don’t ask much of either your soil or your tool kit. A hand trowel and a pair of scissors are the tools that cover most of what you’ll do with leafy greens in your garden.
One must have gardening tool worth singling out here, regardless of what you’re growing, is the hori hori knife. This Japanese soil knife does the job of a hand trowel, a weeder, a transplanting tool, and a soil probe all in one.
It has a serrated edge on one side, a smooth edge on the other, and depth markings on the blade. It’s one of the most versatile tools in beginner and experienced gardener tool kits alike, and it’s consistently overlooked in North American beginner guides simply because it’s less common on big-box retail shelves.
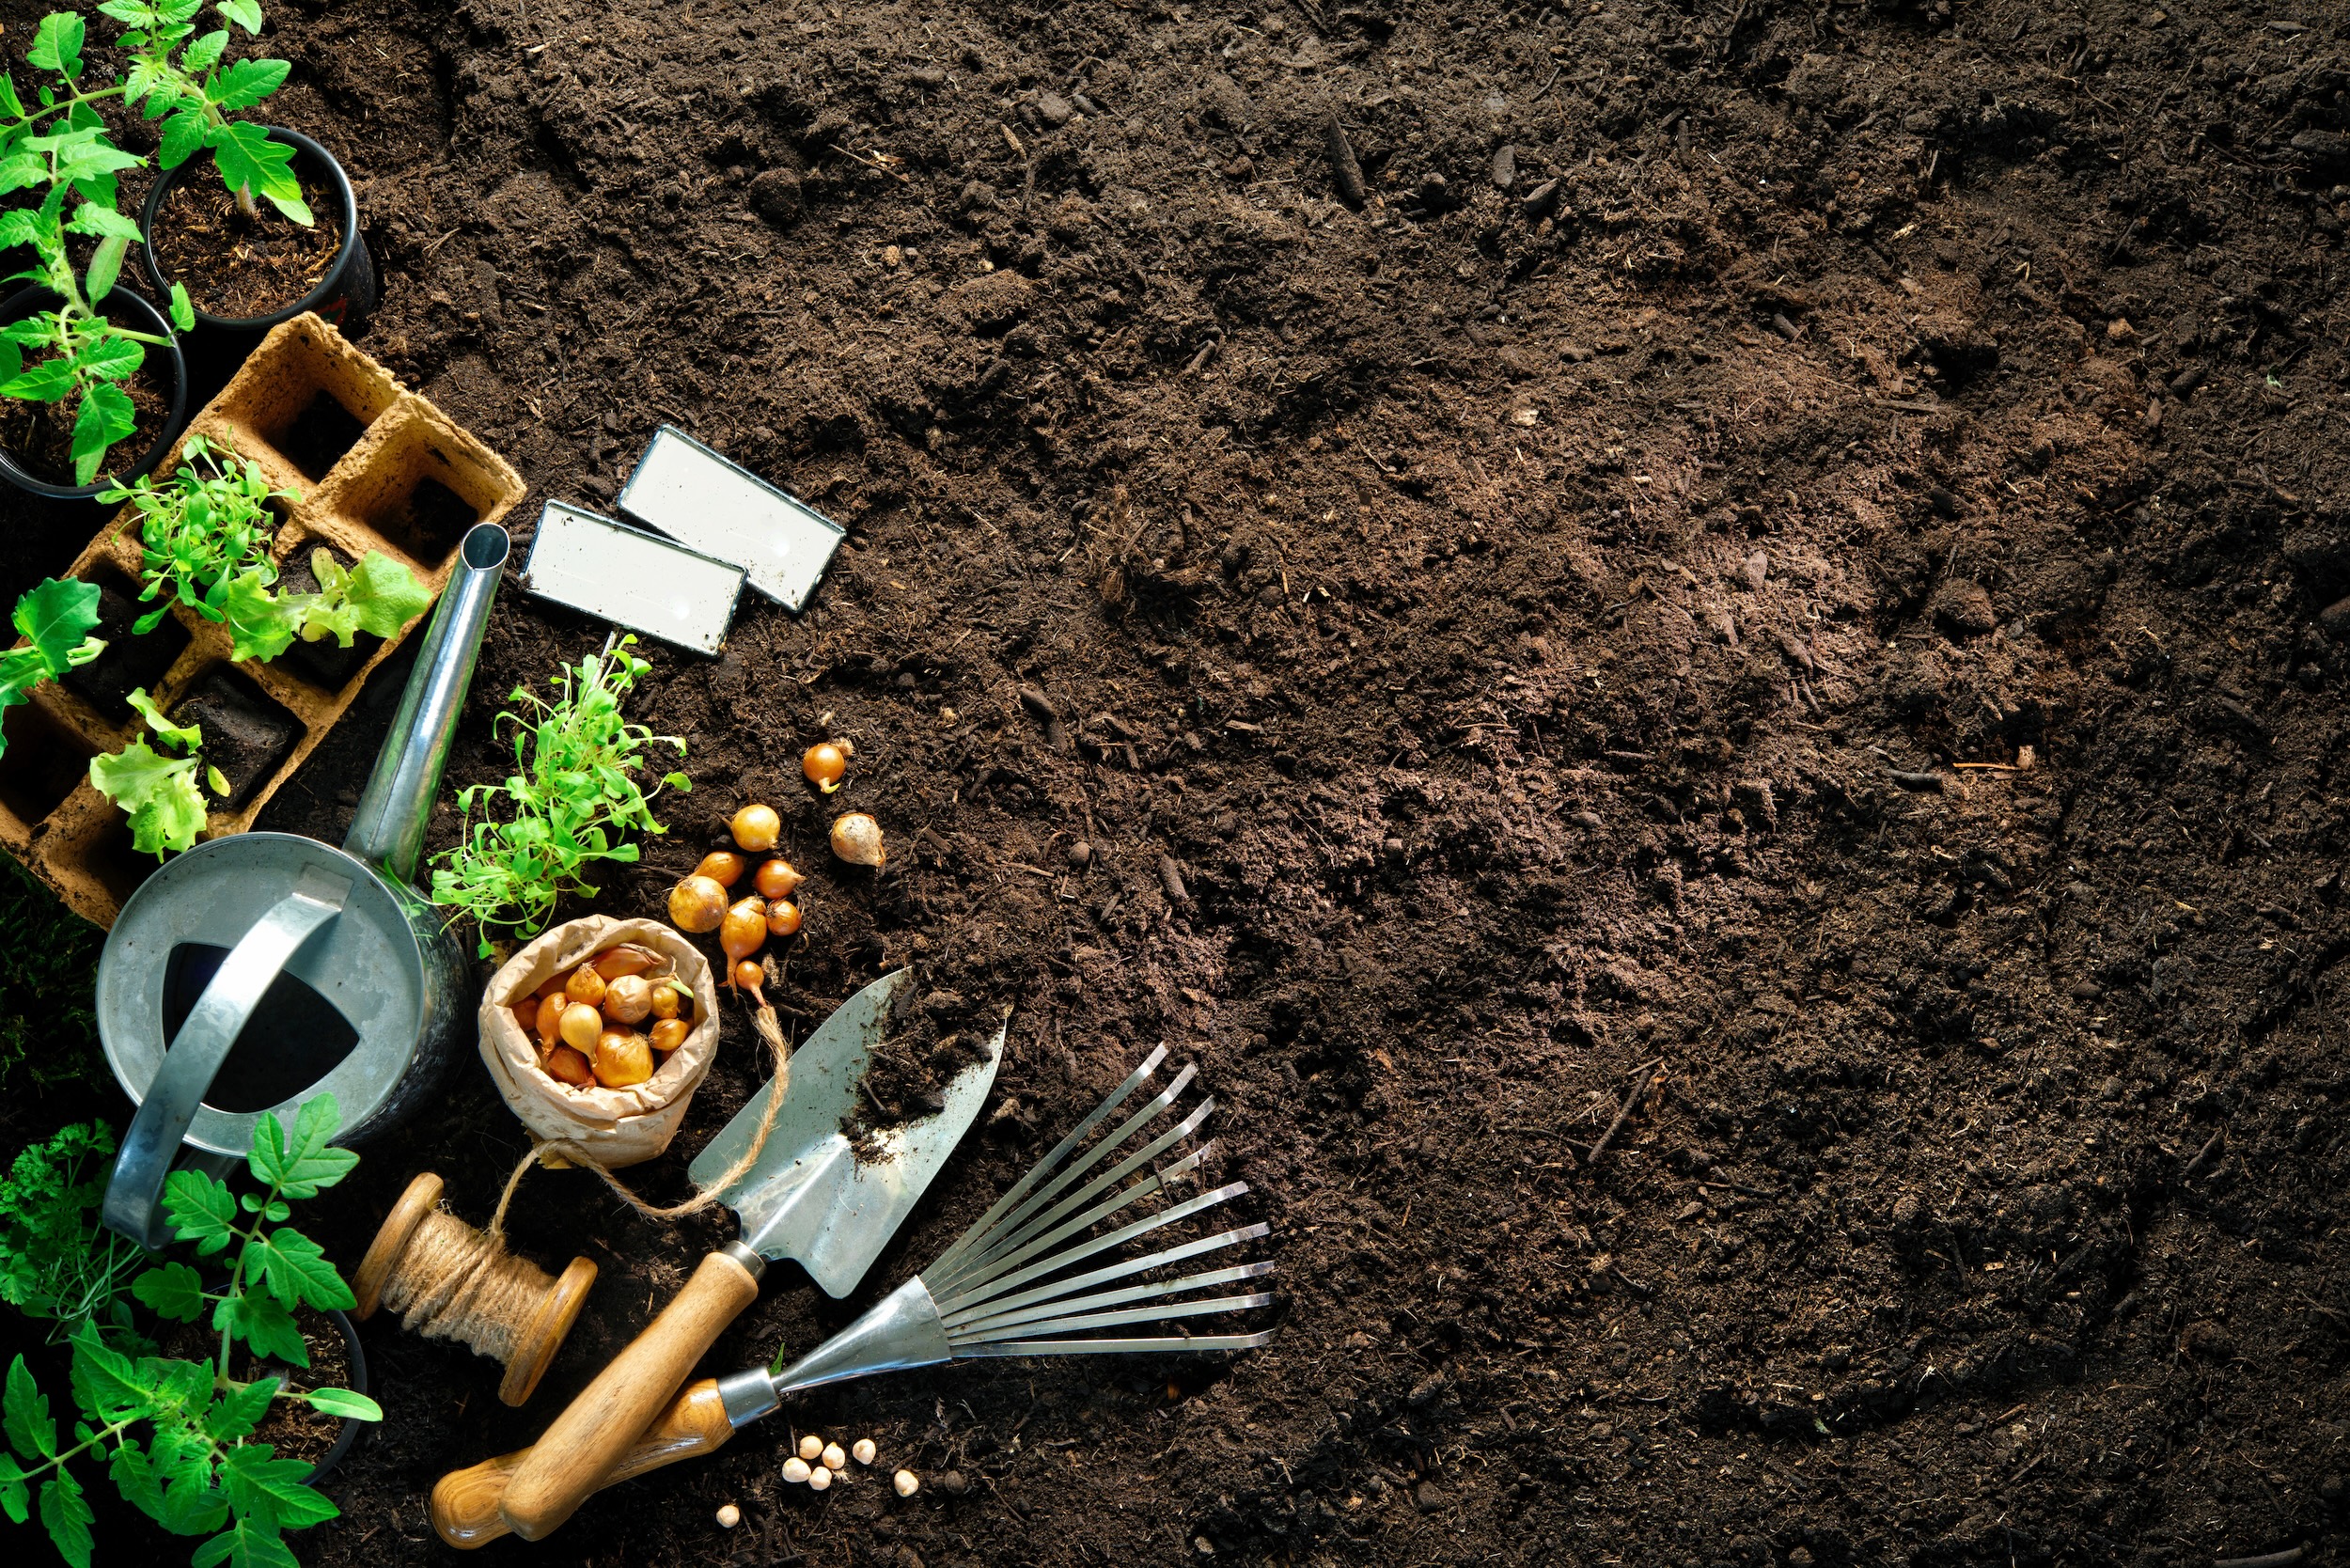
Most beginner gardening guides dump every tool recommendation into a single list, which means you either feel like you have to buy everything at once or don’t know where to start. We’ve organized our tool recommendations by stage instead, because gardening is sequential, and your supply purchases can be too.
Start with the seeding and planting essentials. Add maintenance tools as your garden gets established. Wait on harvest tools until you’re actually close to harvest. This approach keeps upfront costs manageable and means every tool you buy has an immediate job.
Here’s what actually belongs in each stage.
Best Gardening Tools And Supplies For Seeding And Planting

These are the gardening tools you need before anything goes into the ground. Get this stage right and the rest of the season runs more smoothly.
Hand trowel: The hand trowel is hands-down one of the best and single most-used gardening tools in most beginner gardens (and frankly, in most experienced gardens, too). Look for one with depth markings stamped into the blade (genuinely useful for planting at the right depth), a comfortable ergonomic grip, and a stainless steel or carbon steel head rather than aluminum (which can bend under pressure).
Garden spade or digging fork (for in-ground gardens): If you’re working in in-ground garden beds, a full-size spade or digging fork is an essential part of your core gardening equipment list. A spade is for cutting, edging, and moving soil. A fork is for loosening and aerating without fully turning the soil over, which is better for preserving soil structure and for breaking up clods after initial digging. If you can only buy one, a digging fork is your best bet; it’s the gardening tool that handles more tasks in a vegetable garden context.
Hori hori knife: As mentioned above, this is one of the best gardening tools that most beginner guides miss. A good hori hori handles transplanting, weeding, dividing, and soil probing in one.
Seed starting trays and dome lids: If you’re starting seeds indoors before your last frost date, which is the right move for tomatoes, peppers, eggplants, and most brassicas, you need seed starting trays with clear dome lids. The domes hold humidity during germination and lift off once seedlings are established. For most home gardeners, 6-cell or 12-cell trays strike the right balance between space and root room. Avoid very small cell sizes, like 72-cell plug trays, for large-seeded crops. Roots get crowded fast.
Seed starting mix: This is one of the most misunderstood distinctions in beginner gardening, and getting it wrong is one of the most common reasons germination fails. Seed starting mix, potting mix, and garden soil are three different products for three different purposes. Seed starting mix is fine-textured, lightweight, and low in nutrients. It’s designed to hold moisture without compacting around delicate emerging roots. Potting mix is coarser, nutrient-rich, and designed for established plants in containers. Garden soil is typically too heavy and poorly draining for either container or seed starting use. Seeds started in the wrong medium have a much harder time emerging. Use seed starting mix for germination, then transplant into potting mix or your amended garden bed once seedlings have their first true leaves.
Soil thermometer: Most beginner gardeners plant by calendar date, which leads to planting too early in cold soil or too late in warm climates. Soil temperature is what actually drives germination. Tomatoes, for example, germinate poorly below 60 degrees Fahrenheit and ideally want soil at 70 degrees or above. According to the Old Farmer’s Almanac, many beginner gardeners lose weeks of growing time by relying on calendar dates alone, which is why having tools like a soil thermometer on your gardening essentials list is a worthwhile move.
Plant markers and labels: Every variety looks the same after a week underground. Tomato seedlings don’t announce which cultivar they are. Buy a pack of plastic or wooden plant markers and label everything you start. This becomes even more important if you’re starting multiple tomato or pepper varieties, which is almost impossible to track visually once they’re in trays.
Measuring tape: Spacing errors are among the most common and consequential mistakes beginner gardeners make. Overcrowded plants compete for light, water, and nutrients, and they’re far more susceptible to disease. Seed packets list spacing requirements for good reason.
What tools and supplies to skip at this stage of gardening: heat mats (useful for peppers and eggplants but not essential for most crops), soil blockers (an advanced technique with a learning curve that doesn’t help beginners just getting into gardening), and specialty dibbers (a pencil or your finger works perfectly well).
Recommended Maintenance Gardening Tools And Supply Essentials

Once your seeds are in the ground or your transplants are settled, the work shifts to protecting your investment through the growing season. These are the essential gardening tools you’ll reach for most consistently from planting through pre-harvest.
Stirrup or oscillating hoe: The hoe is one of the most underestimated tools in a beginner gardening kit. Most gardeners picture the flat-headed garden hoe, which works fine but requires more effort. The stirrup hoe, also called an oscillating hoe or hula hoe, cuts on both the push and the pull stroke, slicing weed seedlings just below the soil surface with significantly less effort. Cultivation timing is one of the most important factors in weed management: the goal is to disturb weed seeds in the top inch of soil before they establish root systems. A stirrup hoe is the right tool for that job and one of the best gardening tools a beginner can own for ongoing season maintenance.
Watering can with a rose head: For seedlings and recent transplants, a garden hose on even a gentle setting delivers too much force. A watering can with a fine rose head, the perforated cap that breaks the flow into a soft spray, gives you precise, gentle control over how much water hits the soil and where. This is a genuine gardening essential in the early weeks after planting.
Garden hose with a watering wand: Once plants are established, a watering wand attached to your garden hose becomes one of the most practical tools in your gardening kit. The wand’s extended reach lets you water at soil level, which is where you want water to go, without leaning awkwardly over raised beds or straining across a wide in-ground garden. Look for a wand with a shutoff valve at the handle, so you’re not fighting the hose every time you move between beds.
Drip irrigation or soaker hose: This is consistently framed as an upgrade or luxury item in beginner gardening tool guides and lists. We’d push back on that. Consistent soil moisture is one of the single most important factors in healthy plant development, and it’s one of the hardest things to maintain manually if you have more than two or three garden beds or a schedule that doesn’t allow for daily watering. Not only can drip irrigation reduce water use, but it can also deliver moisture more consistently to plants when compared to overhead watering.
Hand pruners: A quality pair of bypass hand pruners, the type where two curved blades pass each other like scissors, rather than an anvil design where a blade crushes against a flat surface, handles deadheading, stem trimming, harvesting, and general shaping all season long. Bypass pruners make cleaner cuts that heal faster and reduce disease entry points, making them an essential gardening tool.
Well-fitted garden gloves: Garden gloves sound simple until you’ve used a pair that fits badly. Loose, one-size gloves are one of the most common beginner frustrations. They reduce dexterity, bunch at the fingers, and make precise work feel clumsy. Look for fitted gloves with nitrile-coated fingertips, which give you grip and sensitivity without sacrificing protection. A well-fitted pair makes every gardening task more comfortable and more precise, which is why it’s on our list of best gardening tools.
Knee pads or a garden kneeler: This one is almost never mentioned in lists of the best beginner gardening essentials and tools, and that’s a real gap. Back and knee discomfort are some of the top reasons beginners cut sessions short or stop gardening altogether before the season ends. They make a meaningful difference in how long and how comfortably you can work in the garden.
Organic mulch: Mulch is technically a supply rather than a tool, but it belongs on any honest list of maintenance gardening essentials because its impact is outsized relative to its cost. A two to three-inch layer of organic mulch, straw, wood chips, or shredded leaves suppresses weed germination, retains soil moisture, moderates soil temperature, and breaks down over time to feed soil biology.
A basic fertilizer system: Beginners take note: soil fertility is the invisible gardening supply that determines whether your plants thrive or just survive. Liquid fertilizers work fast and give you precise control, which is useful for container plants and heavy feeders mid-season. Slow-release granular fertilizers work steadily over weeks, making them a lower-maintenance choice for in-ground or raised bed gardens. The most common beginner mistake here is over-fertilizing with nitrogen, which pushes lush green growth at the expense of fruit and root development. If you soil-test before planting, your amendments will be based on actual data rather than guesswork.
What tools and supplies to skip at this stage: Pesticide sprayers and broad-spectrum pest treatments (address pest problems when and if they arise, not preemptively, because most early-season pest pressure resolves on its own or with simple interventions), and elaborate trellising systems (assess your vining crops mid-season and build what you actually need rather than pre-building for a worst case).
Best Harvesting Gardening Tools And Supplies For Beginners

Harvest season is the payoff for everything you’ve put into the ground. The right tools at this stage protect the quality and longevity of what you’ve grown in your garden. These are the best, most essential gardening tools to have by your side come harvest time.
Garden trug or harvest basket: A flat-bottomed garden trug, the classic oval-shaped garden basket, is more practical than a round bucket or a deep basket for harvesting. The flat base keeps produce from rolling and bruising, and the wide opening makes it easy to lay longer crops like zucchini or beans flat rather than bending them.
Garden snips or sharp scissors: For herbs, beans, leafy greens, and flowers, clean cuts matter. Tearing stems rather than cutting them stresses the plant, slows regrowth, and leaves ragged entry points for disease. A dedicated pair of garden snips or sharp kitchen scissors kept in your kit handles the vast majority of soft harvesting work cleanly and efficiently.
A harvest knife: For melons, winter squash, cabbage, and root vegetables, a dedicated harvest knife earns its place on the list of best gardening tools for beginners. You don’t need a gardening-branded product here. A quality paring knife or a Japanese produce knife with a comfortable handle works perfectly well. The key is sharpness, which protects both the produce and your hands.
Breathable produce bags or harvest storage supplies: Most beginner gardening guides and tool lists end at the moment of harvest. But what you do in the first 30 minutes after picking significantly affects how long your produce stays usable. Breathable mesh or cloth bags extend the life of most vegetables and herbs by preventing the moisture buildup that accelerates spoilage in plastic bags. Beyond bags, it’s worth knowing which crops need to cure before storage. Garlic, onions, winter squash, and potatoes all benefit from a period of drying in warm, well-ventilated conditions before they go into long-term storage.
A garden journal: If the goal is to become a more confident and capable gardener season over season, a garden journal is one of the most underrated beginner gardening tools on this entire list. Tracking what you planted, when you planted it, what the soil conditions were, what worked, what failed, and what you harvested gives you a compounding advantage that no tool purchase can match. Your second season becomes dramatically more informed when you have real data from your first.
What tools and supplies to skip at this stage: specialty root harvesters and potato forks (a standard garden fork does this job cleanly), and post-harvest processing equipment like dehydrators and pressure canners (useful eventually, but well outside the scope of a beginner gardening tool kit).

One of the most practical things we can offer any beginner gardener is a realistic sense of what a functional starter gardening tool kit actually costs, and where you can save without compromising your experience.
A Phase 1 starter gardening tool kit for most beginner gardeners covers the absolute minimum needed to get through a first planting season: a hand trowel or hori hori knife, a pair of fitted garden gloves, a watering can with a rose head, a stirrup hoe, bypass hand pruners, plant markers, and a bag of seed starting mix. Going for a mid-range version of each of these beginner gardening tools could cost around $100.
On where to find quality without overpaying: end-of-season sales in late August and September offer some of the best pricing on gardening equipment and tools. Estate sales are genuinely underrated. Older American-made hand tools are often forged rather than stamped, which makes them heavier, better balanced, and longer-lasting than much of what’s available at the same price point. Farm supply stores or your local independent co-op consistently often stock high quality gardening essentials.
The general rule on what beginner gardening tools to invest in versus what to buy at a lower price point: spend on tools with handles you’ll grip repeatedly and tasks you’ll perform constantly. Save on consumables like plant markers, grow bags, and seed starting trays, and on tools with limited seasonal use.
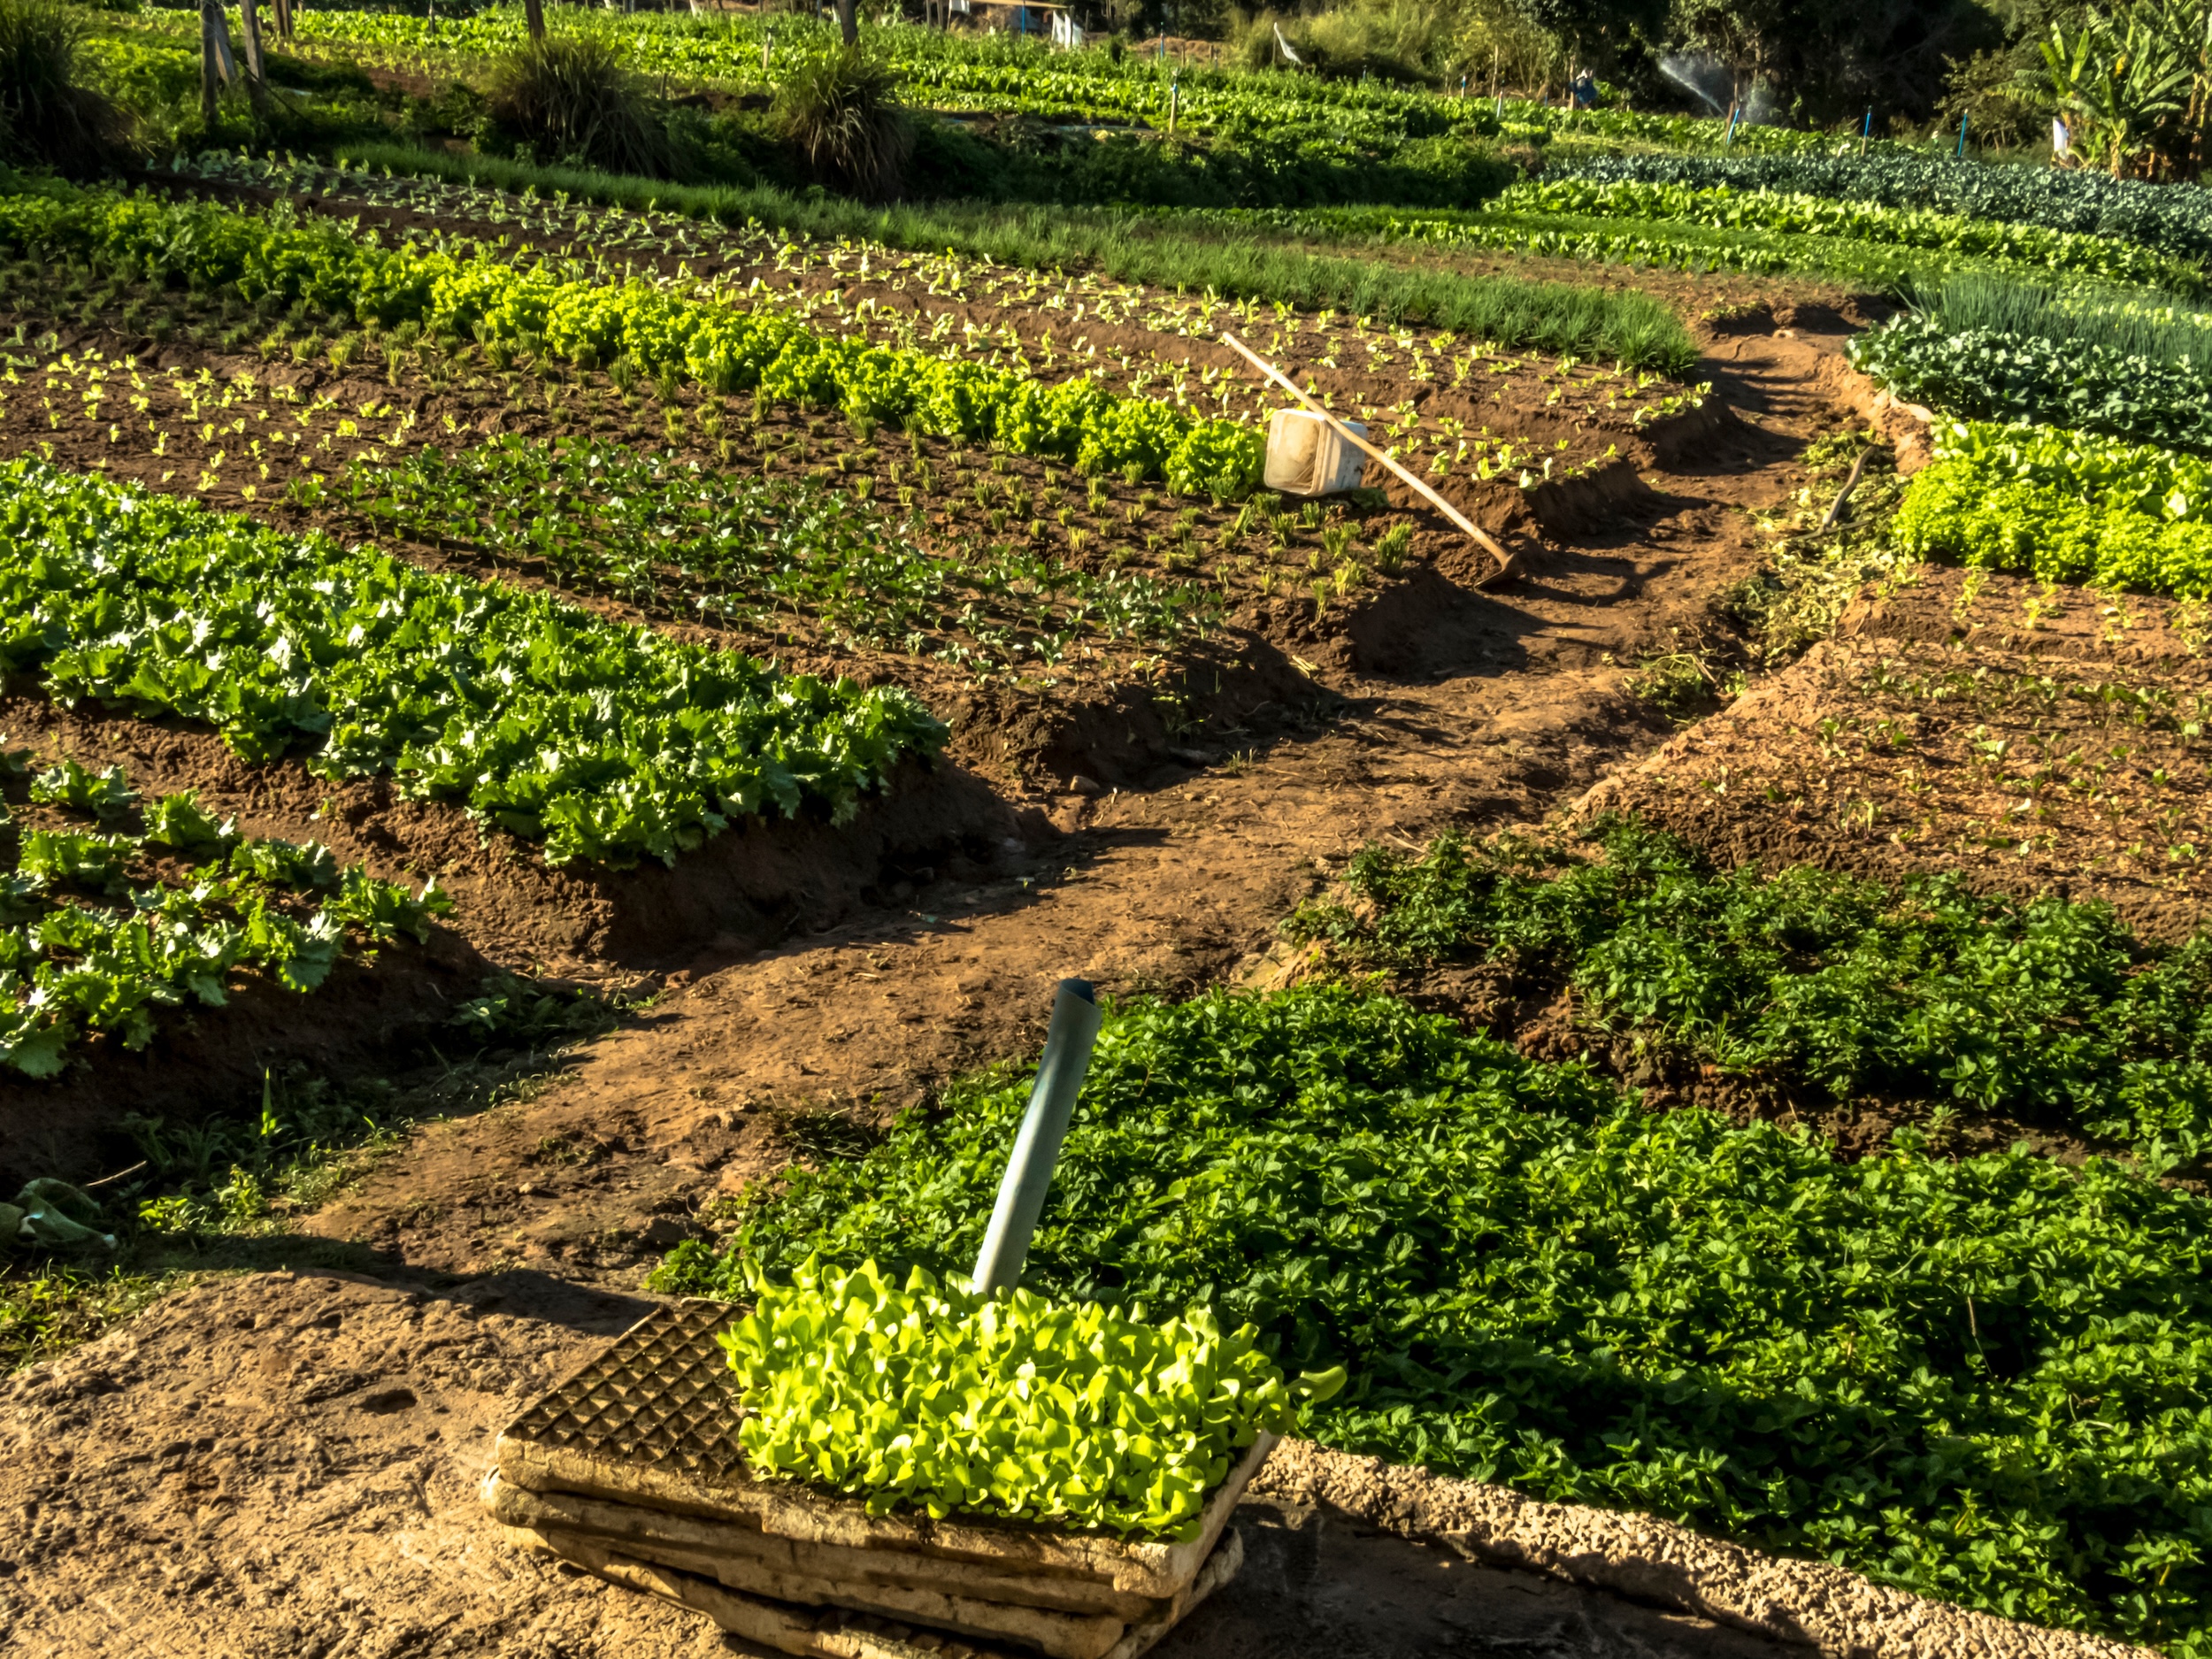
Even with a list of the best gardening tools for beginners in hand, a few consistent mistakes can undermine your setup.
Buying your gardening tools before understanding your soil. Investing in the wrong gardening tools for your soil type creates more work, not less. A standard spade in dense clay is a frustrating fight. A digging fork in that same clay is far more manageable. Know your soil type first.
Skipping maintenance of your gardening equipment. A hand trowel caked in dried soil, a spade head going orange with rust, or a pair of pruners that won’t close cleanly. These aren’t just aesthetic problems; they make every gardening task harder and shorten the life of your tools significantly. Five minutes of maintenance after each gardening session, wiping blades clean, tapping soil off metal, applying a light coat of linseed oil to wooden handles once a season, extends the lifespan of your tools.
Storing tools on bare ground. Wooden handles left in direct contact with soil absorb moisture and rot from the base up. Hang your gardening tools on a wall rack or store them vertically in a bucket of sand lightly oiled with mineral oil. This keeps metal heads clean and dry and handles off the ground.
Over-buying in year one. The YouTube and Instagram rabbit hole is real. There’s always a new specialty gardening tool being demonstrated by someone whose garden has been running for fifteen years. Resist the pull to buy these gardening tools until you know what you actually need from your own experience, which is usually once you’re no longer a beginner.
Having The Right Tools In Your Garden Is Just the Beginning
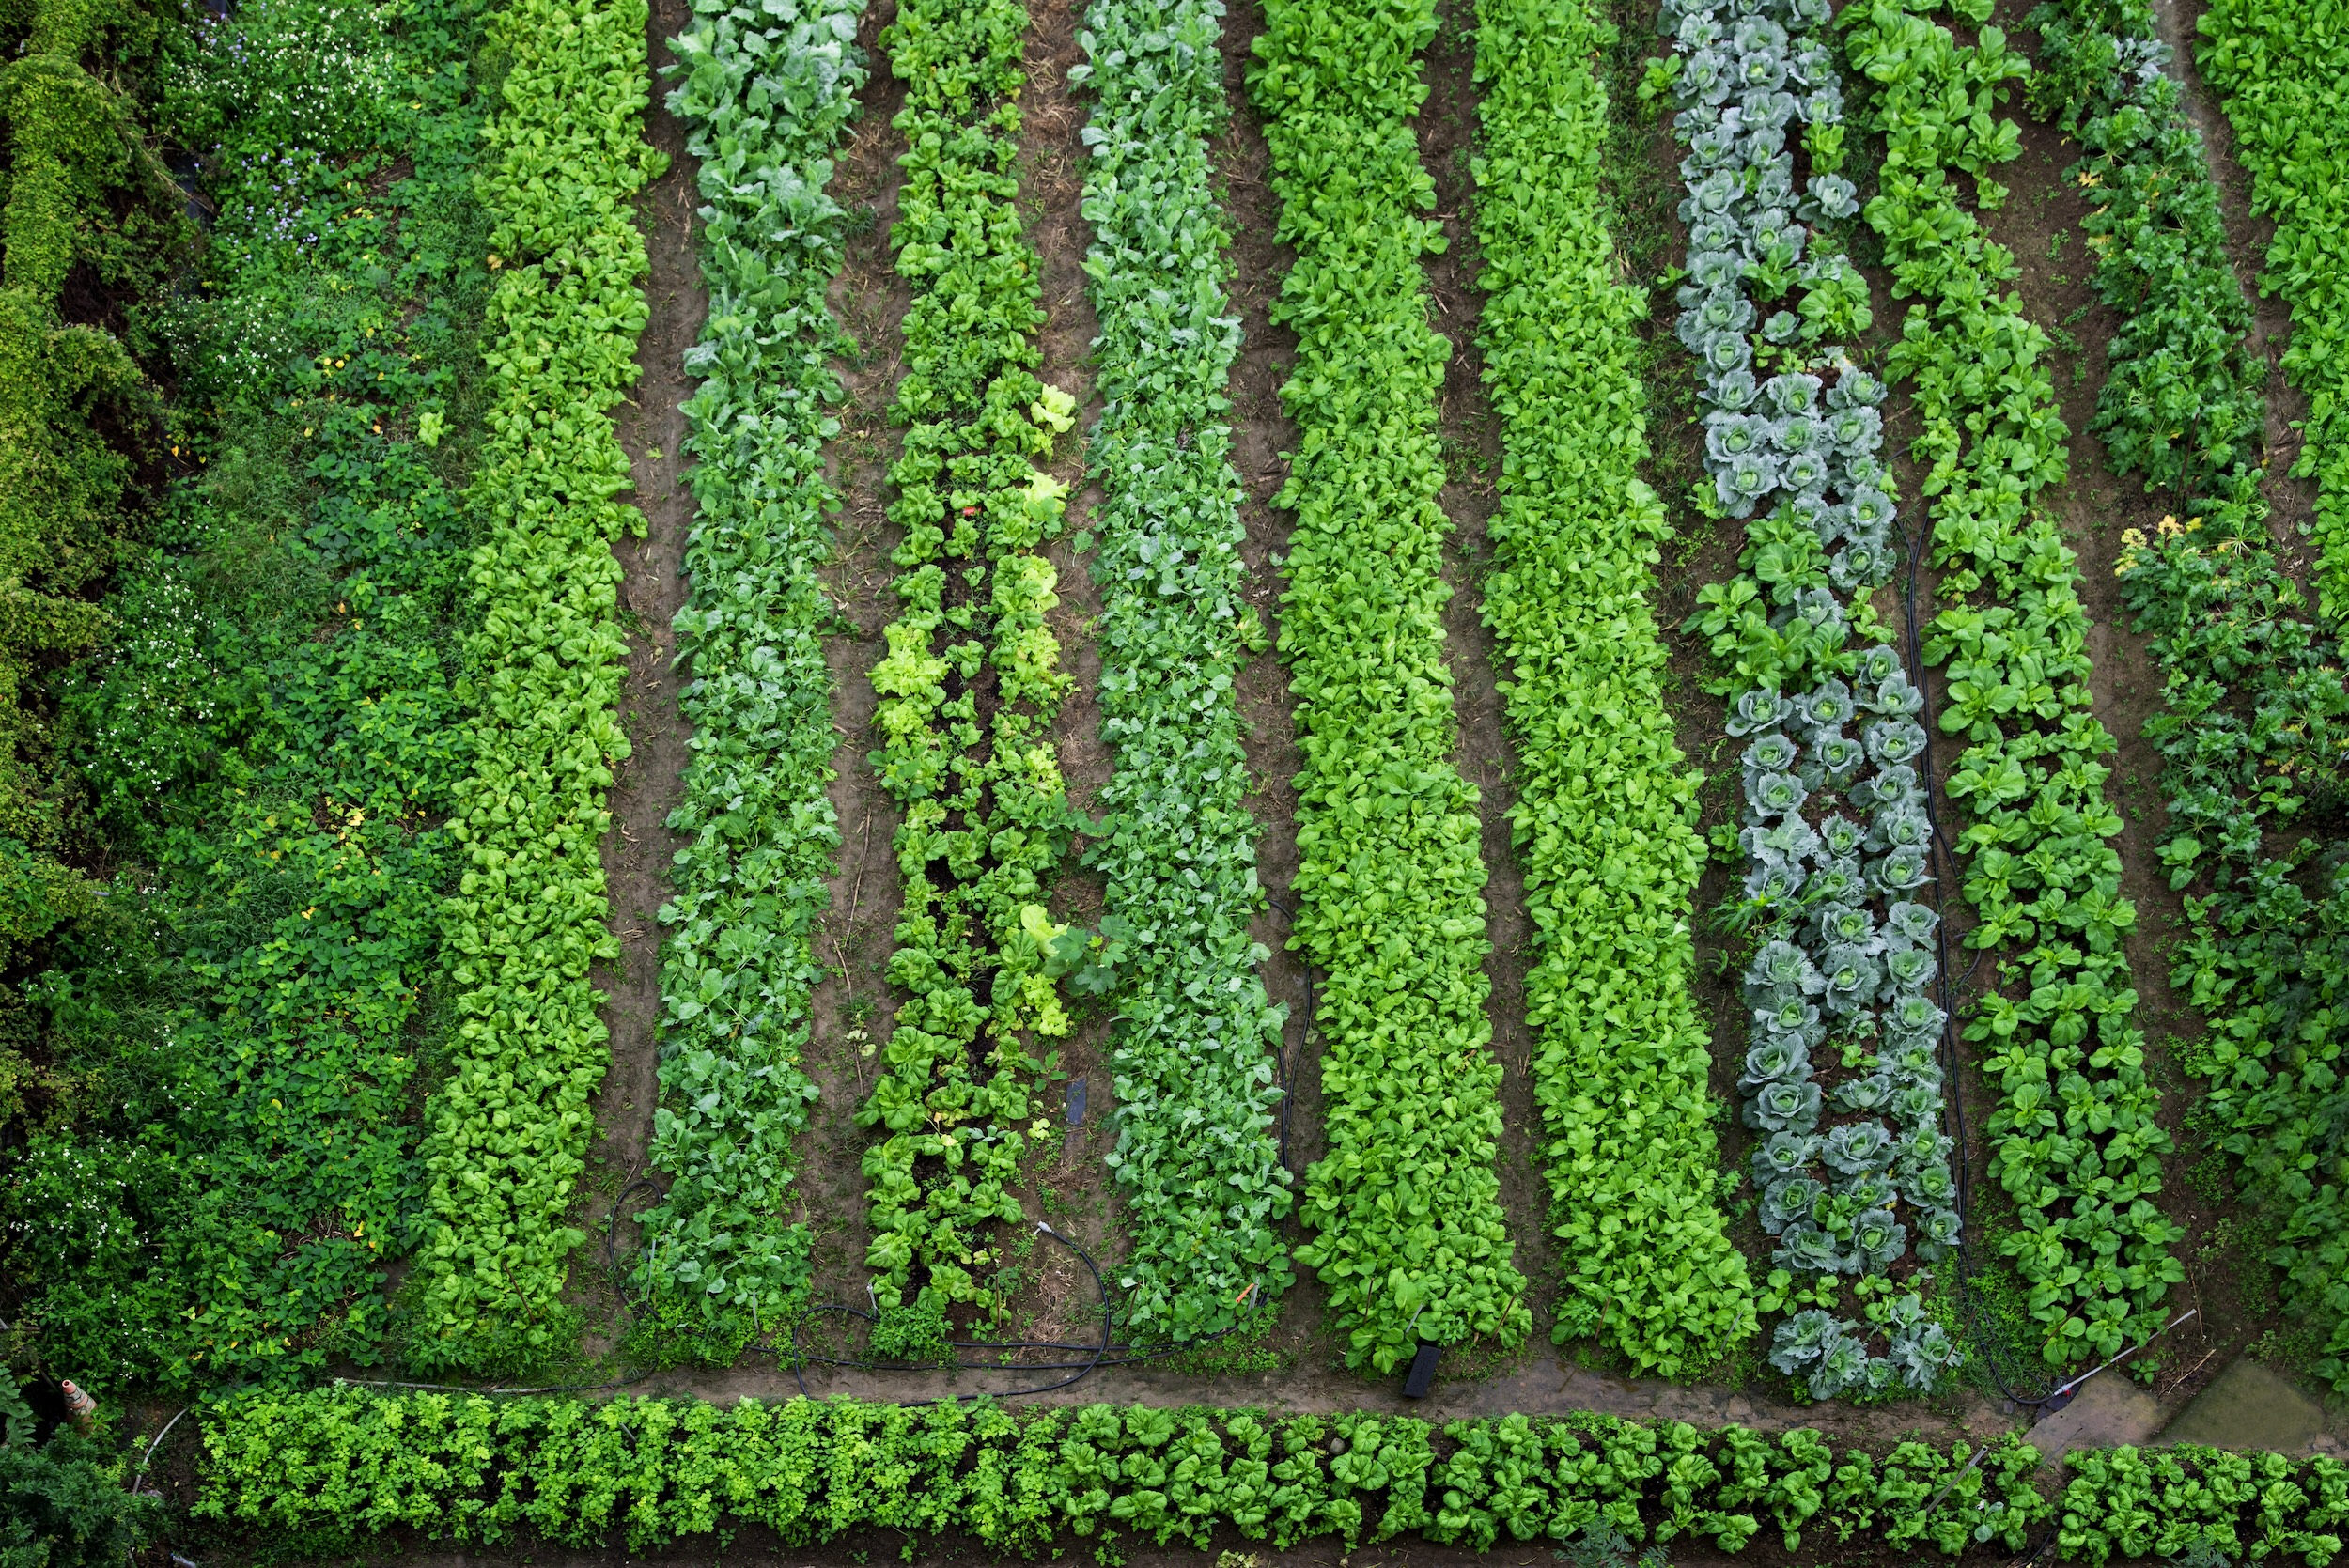
A first garden is one of the most satisfying things you can build. The right gardening tools and supplies for beginners make it achievable. The right plan makes it stick. And a realistic, stage-based approach to what you buy, and when, means you’re never spending more on gardening tools than the season in front of you requires.
Most beginner gardeners who stick with it past that first season start to notice something: the instinct to grow things doesn’t stay contained to a raised bed or a backyard plot. It expands. The more you learn to read soil, manage a growing season, and work with land on its own terms, the more land starts to feel like something worth having more of.
At Hayden Outdoors, we spend our days helping people find properties where that instinct has real room to run. Acreages, rural parcels, and working land with room for serious gardens, orchards, and everything that grows from a genuine connection to the ground.
If you’re starting with a 4×4 raised bed today and dreaming about what a few acres might look like someday, we’d love to help you find your own piece of ground.
View Available Farming Properties
Full Trailer vs Semi Trailer: Which Is Right For Your Work Truck?
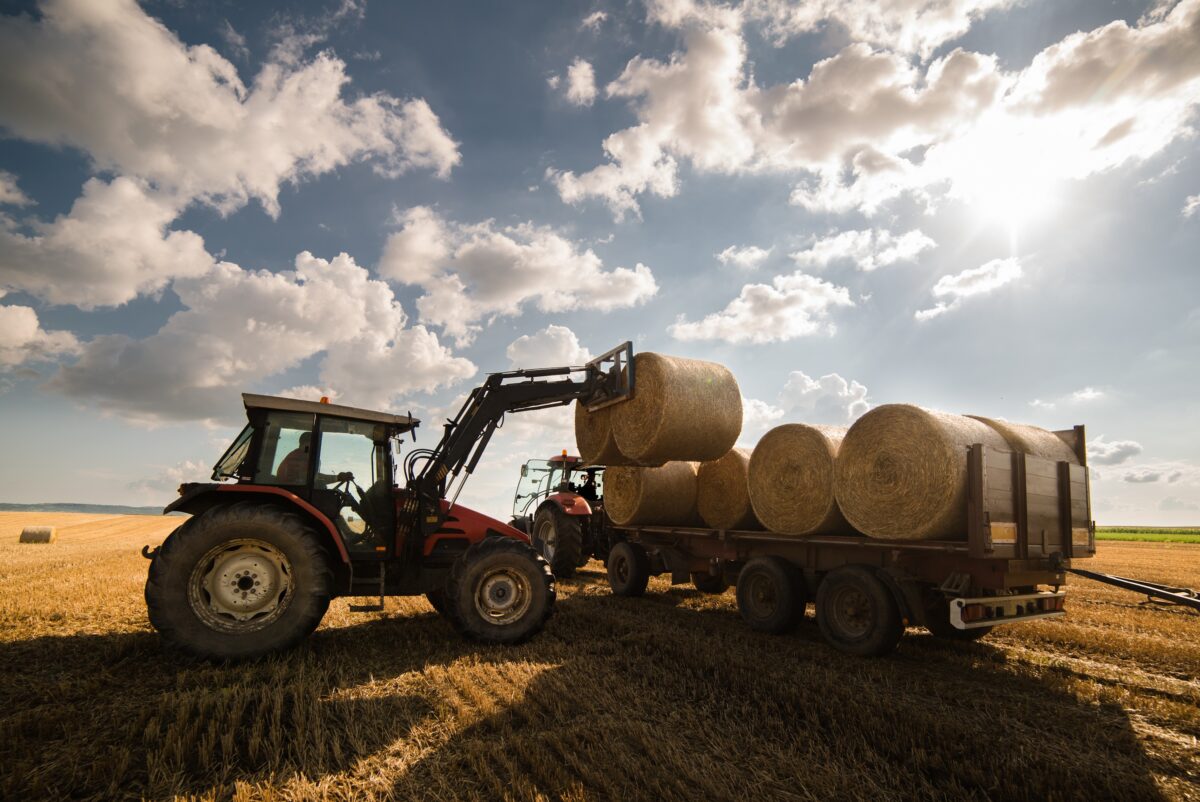
You already know you need a trailer. What you may not know yet is whether a full trailer vs semi trailer is the right call for your truck and your operation. That single decision has more downstream impact than most operators expect: it shapes what freight you can haul, how your rig handles on rural roads and tight job sites, how efficiently you can scale, and how much productive time you gain or lose on a typical workday.
The full trailer vs semi trailer conversation comes up constantly in agriculture, construction, oilfield work, and general freight. Yet the distinction between the two gets blurred by loose terminology and conflicting advice.
At Hayden Outdoors, we work alongside the kind of operators who live by the equipment decisions they make. This guide cuts through the noise so you can make a confident call before you invest in a trailer for your work truck.
Table Of Contents:
The Core Differences Between A Full Trailer vs Semi Trailer

Before comparing performance, it helps to understand what actually separates a full trailer vs a semi trailer at a structural level.
A full trailer is a self-supporting unit. It has both front and rear axles, meaning it carries its entire load on its own wheels. It connects to the towing vehicle through a drawbar or pintle hitch at the front. Because a full trailer is fully supported by its own axles, it does not transfer load to the tow truck the way a semi trailer does. A full trailer can be parked, staged, and loaded independently, without any tractor or truck attached.
A semi trailer works differently than a full trailer. It has axles only at the rear. The front of the semi trailer rests on the tractor’s fifth wheel, and the tractor bears a meaningful share of the trailer’s weight. That coupling point is the kingpin, and the fifth wheel locking mechanism is what holds the rig together. When a semi trailer is uncoupled, it deploys landing gear to hold itself upright.
The word “semi” literally refers to the partial nature of the trailer’s support: a semi trailer is semi-supported by its own wheels vs a full trailer that is fully supported by its own axles. That single design difference cascades into every practical comparison between the two.
|
Full Trailer |
Semi Trailer |
| Axle configuration |
Front and rear axles |
Rear axles only |
| Coupling type |
Drawbar/pintle hitch |
Kingpin / fifth wheel |
| Independent support |
Yes, stands on its own |
No, requires landing gear |
| Weight distribution |
Entirely on trailer axles |
Shared with tractor |
| Typical length range |
Up to ~40 ft |
48 to 53 ft (standard US) |
Mechanical Difference Takeaway: A full trailer supports its entire load on its own front and rear axles and connects to the tow vehicle via a drawbar, vs a semi trailer, which has no front axle and depends on the truck or tractor’s fifth wheel for front-end support.
Flexibility Of Full Trailer vs Semi Trailer

When operators talk about flexibility, they usually mean two things: how the trailer handles in the field, and how it fits into the day-to-day rhythm of their operation. On both counts, a full trailer and semi trailer behave in genuinely different ways.
A full trailer’s independent axle setup makes it well-suited for trucks navigating uneven ground. Weight is distributed across its own axles and places minimal extra load on the tow vehicle, which matters when you’re pulling across soft farm ground, gravel access roads, or the kind of terrain a conventional semi rig would strain over. The tradeoff is maneuverability: full trailers are harder than semi trailers to back up because the drawbar pivot point behaves differently than a fifth-wheel pivot, and on tight turns, the rear of a full trailer tracks wider than many truck operators expect.
A semi trailer offers tighter maneuvering for your truck than a full trailer in most on-road conditions. The fifth-wheel coupling creates an articulation point that truck drivers can use to position the trailer precisely in loading docks, tight yard spaces, and multi-point delivery stops. A semi trailer also enables drop-and-hook freight: a truck driver drops a loaded trailer at a destination and picks up a pre-staged loaded trailer without waiting for unloading.
A semi trailer can also swap between compatible tractors, which is valuable in fleet operations where equipment is shared. A full trailer, once hitched to a truck, is operationally paired to its tow vehicle until it is physically disconnected and repositioned.
FAQ: Can a semi truck pull a full trailer? Not directly. A semi truck’s fifth wheel is designed for a kingpin coupling, while a full trailer uses a drawbar or pintle hitch. The connections are not interchangeable without an adapter, and purpose-matched setups typically perform better.
Load Capabilities Of A Truck With A Full Trailer vs Semi Trailer
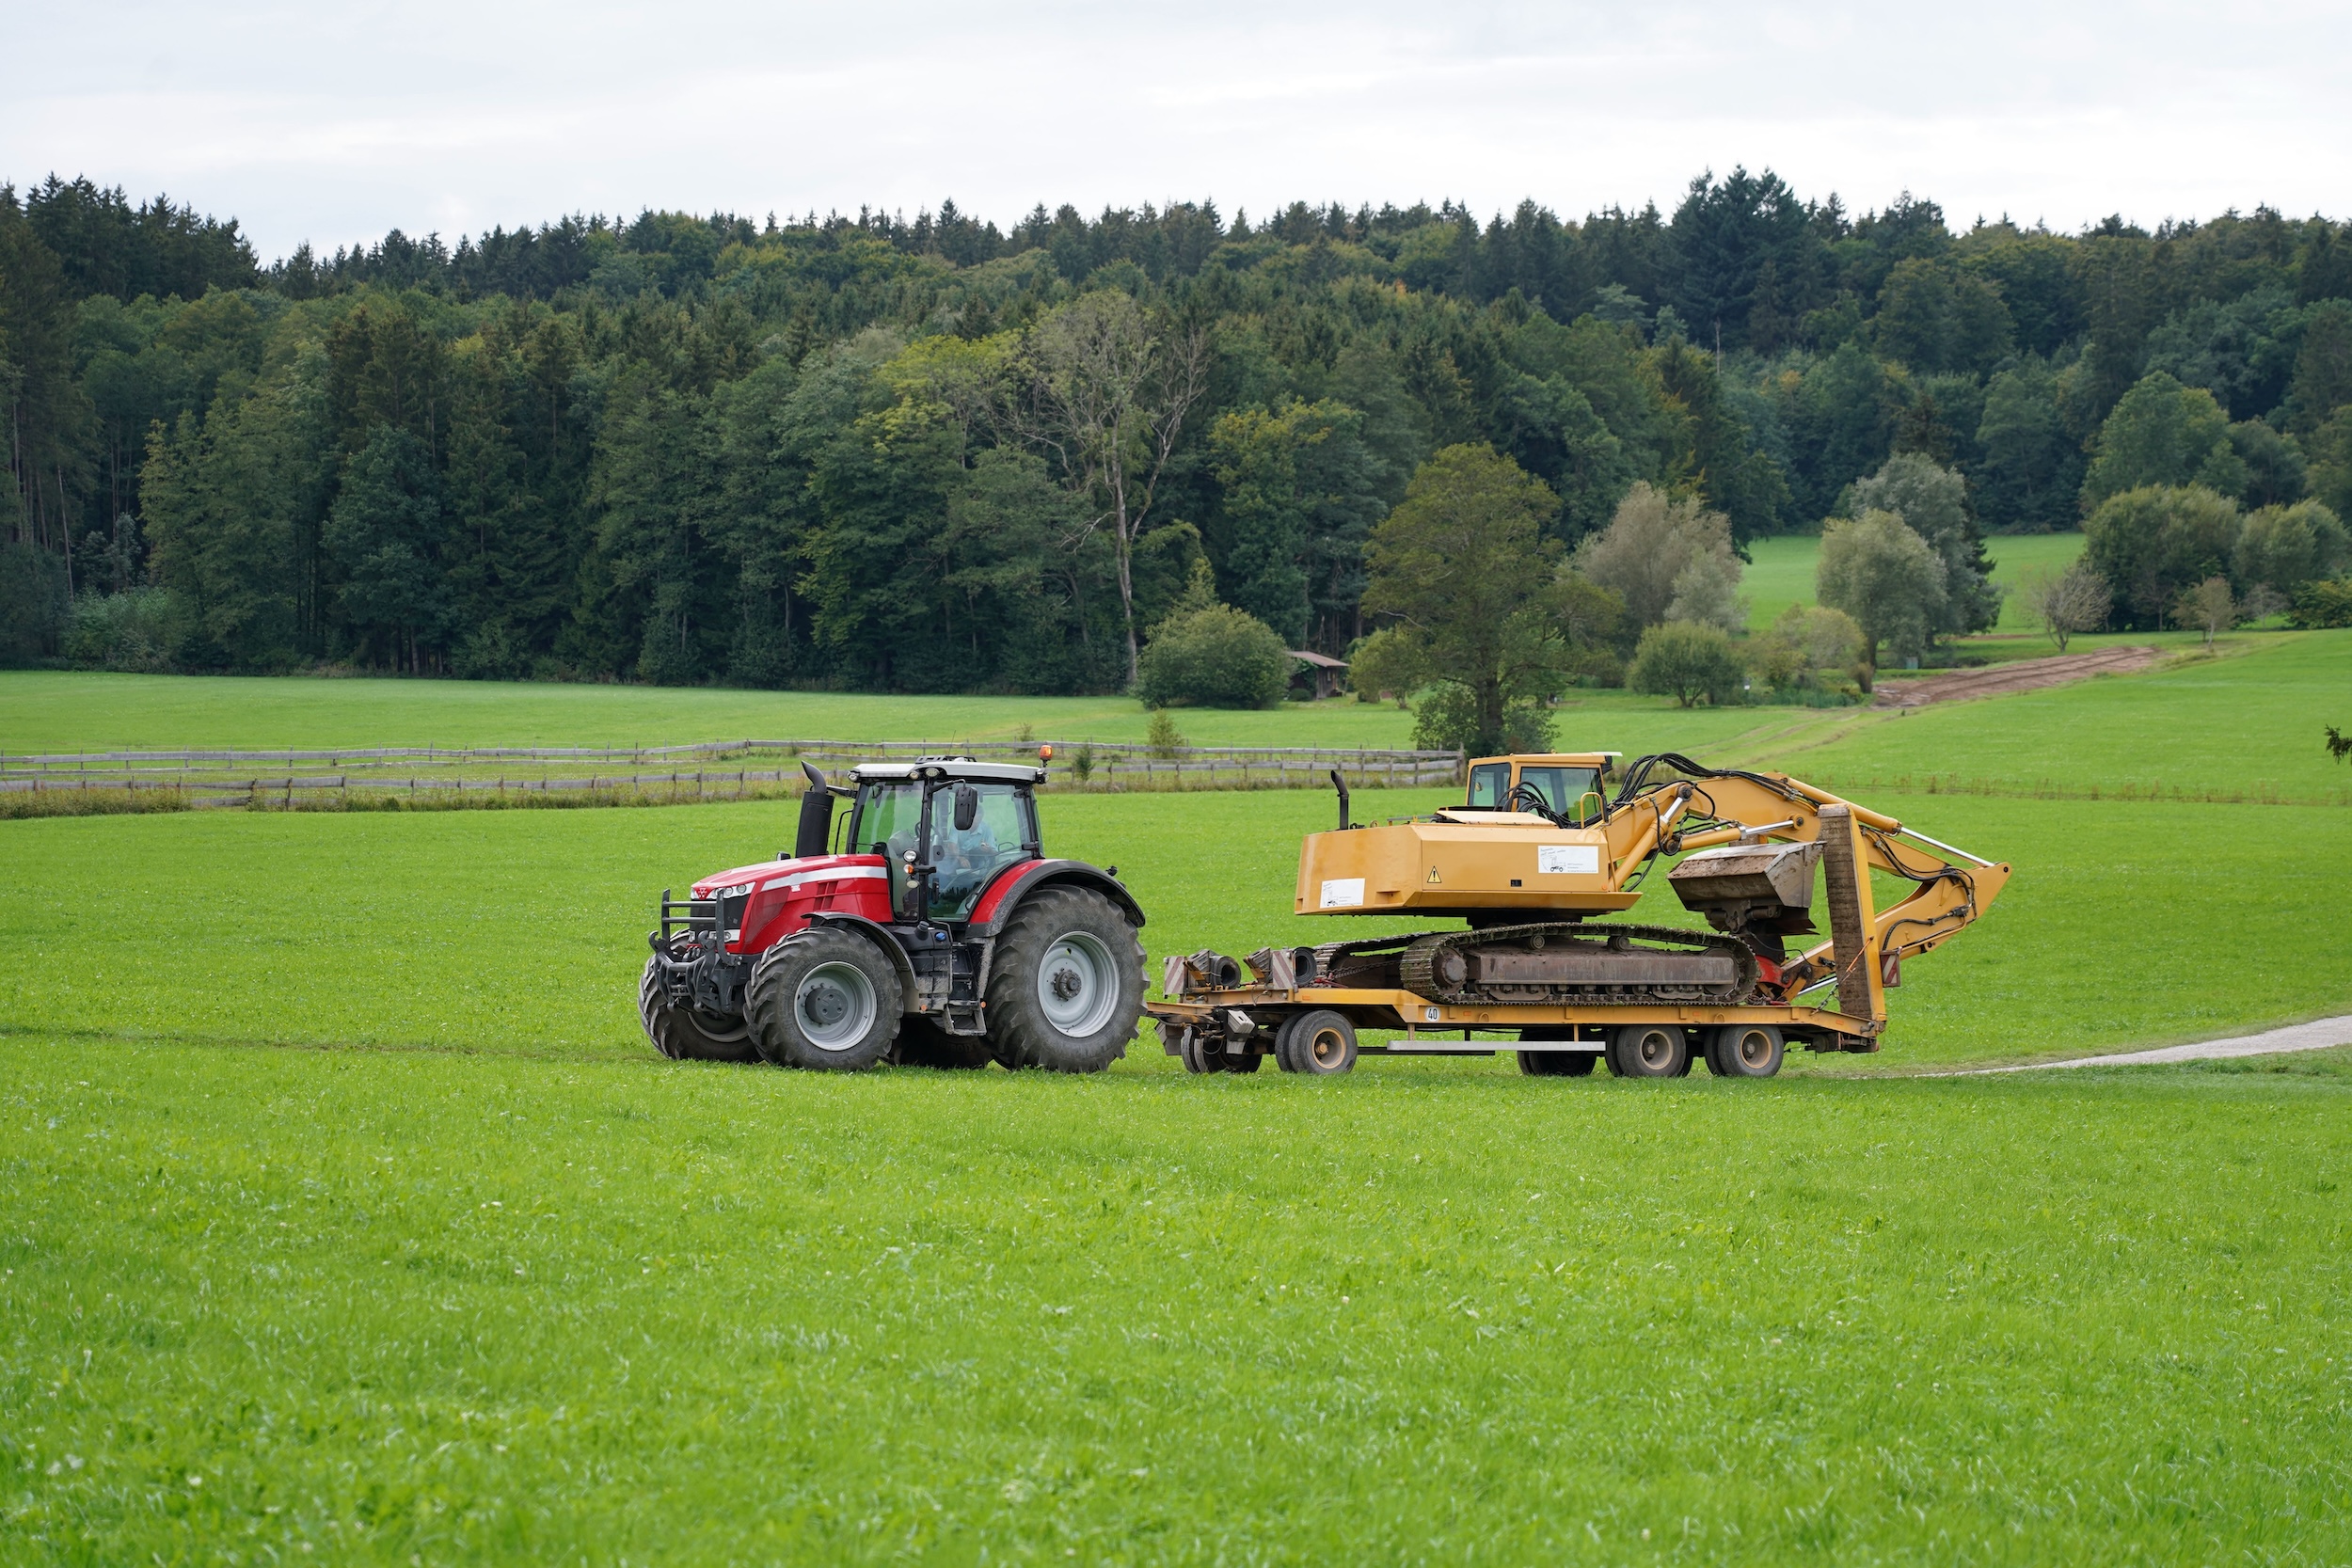
This is where the full trailer vs semi trailer conversation gets genuinely nuanced, and where a lot of truck operators make assumptions that cost them.
Semi trailers dominate the freight market for good reason. The federal gross vehicle weight limit on US interstates is 80,000 pounds for a standard tractor-trailer combination. With a typical empty tractor and trailer combination weighing between 30,000 and 36,000 pounds, most standard semi trailers carry between 43,000 and 48,000 pounds of usable cargo, depending on axle configuration and trailer type. Dry van semi trailers are the single most common configuration in commercial freight, consistently representing the majority of trailer production and demand in North America.
Full trailers, with their independent axle setup, are designed around a different kind of truck load: stable, distributed, and well-suited to terrain where road surface conditions matter as much as payload volume. Because a full trailer does not transfer load to the towing truck, all weight sits directly on its own axles. That design works in its favor when stability and field-level access are more important than maximizing linear payload.
In agricultural and construction contexts, full trailers earn their place on trucks when the cargo type calls for it. Grain, hay, pipe, and aggregates load well into full trailer configurations, particularly where the goal is staged delivery or field access rather than highway efficiency. For oversized or particularly heavy equipment, specialty semi trailer configurations such as lowboys and step-decks handle loads that no standard full trailer configuration can practically match.
The cargo type question is the key filter here. Ask yourself what your truck is hauling most of the time, and whether that cargo demands the length and fifth-wheel load-sharing of a semi trailer vs whether the simpler, more terrain-friendly profile of a full trailer serves you better.
FAQ: Which trailer type holds more weight? In most common configurations, semi trailers carry higher total payloads vs full trailers, because the tractor’s drive axles share the load. Full trailers are self-contained but typically have shorter frames and lower gross weight ratings in standard configurations.
Scalability Differences Of A Full Trailer vs Semi Trailer
Single-trailer operations eventually face a growth question: what happens when the work outgrows the rig? The answer looks different depending on whether you started with a full trailer setup vs a semi trailer setup for your work truck.
Semi trailers are the standard across the commercial freight industry. That ubiquity means parts availability is strong, service networks are widespread, and adding trailer units to a fleet is straightforward because the equipment ecosystem is built around the fifth-wheel standard. If you need to grow from one trailer to three, the path is well-traveled.
Full trailer scalability works differently. The defining advantage here is the B-train or road train configuration, where multiple full trailers are linked in sequence behind a single truck or tractor. This setup is used in agriculture and bulk hauling contexts where the goal is maximizing payload per trip on routes where road conditions allow it. A road train configuration can move significantly more material per run than a standard semi setup, but it trades off maneuverability and requires routes and sites that can accommodate the combined length.
From a maintenance standpoint, full trailers have the edge in simplicity vs what you get with a semi trailer. Without a kingpin or fifth wheel to maintain, and with a more straightforward axle and brake configuration, full trailers are generally easier and less expensive to service. Semi trailers carry more moving parts and more sophisticated brake integration because of how they interact with the tractor or truck they’re hitched to.
Long Haul vs Short Haul: Are Full Trailers Or Semi Trailers Better?
Truck haul distance is one of the clearest filters in the full trailer vs semi trailer decision, and it is worth applying it early.
Semi trailers were built for long haul trucking. Their fifth-wheel design is optimized for highway use: stable at speed, efficient under sustained load, and fully compatible with the interstate freight network. The semi trailer vs full trailer comparison on long-haul routes is not much of a competition. Semi trailers dominate that job. When comparing semi trailer trucks vs full trailer trucks across the breadth of the US freight market, the semi configuration wins on distance, payload efficiency, and freight network compatibility.
Full trailers are stronger candidates for short-haul work, particularly in agricultural, construction, and regional contexts where haul distances are measured in tens of miles rather than hundreds. A truck moving grain from field to elevator, hauling equipment from yard to job site, or delivering bulk materials within a county does not need the interstate-grade payload architecture of a semi rig. A full trailer gets the material where it needs to go with a simpler setup and better terrain tolerance.
Fuel consumption follows the same logic. A truck running long haul benefits from the shared axle load of a semi trailer that reduces rolling resistance per ton carried. A full trailer on a short, variable-terrain run can often be pulled by a lighter tow vehicle, which carries its own fuel efficiency benefit.
The honest answer on haul distance: if your truck routes are interstate and your freight is general commercial cargo, a semi trailer is typically the the right call. If your truck routes are local and your work involves terrain, staging flexibility, or agricultural access, a full trailer deserves a serious look.
Which Trailer Type Is Better For Owner-Operators

Trucking owner-operators carry a different set of pressures than fleet managers. There is no dispatcher to absorb a mismatch between equipment and freight type. Every empty mile and every declined load is your cost to bear. That raises the stakes on the full trailer vs semi trailer call considerably.
For most owner-operator truckers working general freight, the semi trailer is the practical choice. The load board market is structured around semi trailer configurations. Dry van, flatbed, and refrigerated semi trailer freight make up the vast majority of available loads, and an owner-operator with a semi truck has access to all of it. Drop-and-hook freight, one of the most time-efficient load types in the market, is essentially exclusive to semi trailer setups.
That said, owner-operators who specialize in agriculture, equipment hauling, or regional bulk work sometimes find that a full trailer configuration for their truck opens opportunities a standard semi rig cannot serve. An ag hauler running grain or hay on familiar routes may find the terrain handling and staging flexibility of a full trailer a better operational fit vs a semi trailer, particularly if their existing tow vehicle is not configured for fifth-wheel coupling.
The buying decision for owner-operators also involves vehicle compatibility. If you already have a tractor or truck you plan to use for hauling, the trailer you choose needs to match its coupling and weight rating. Choosing a trailer type that requires reconfiguring your existing equipment adds cost and complexity that can erode the margin on which owner-operators depend.
Which Is Right For Your Operation: Full Trailer vs Semi Trailer?
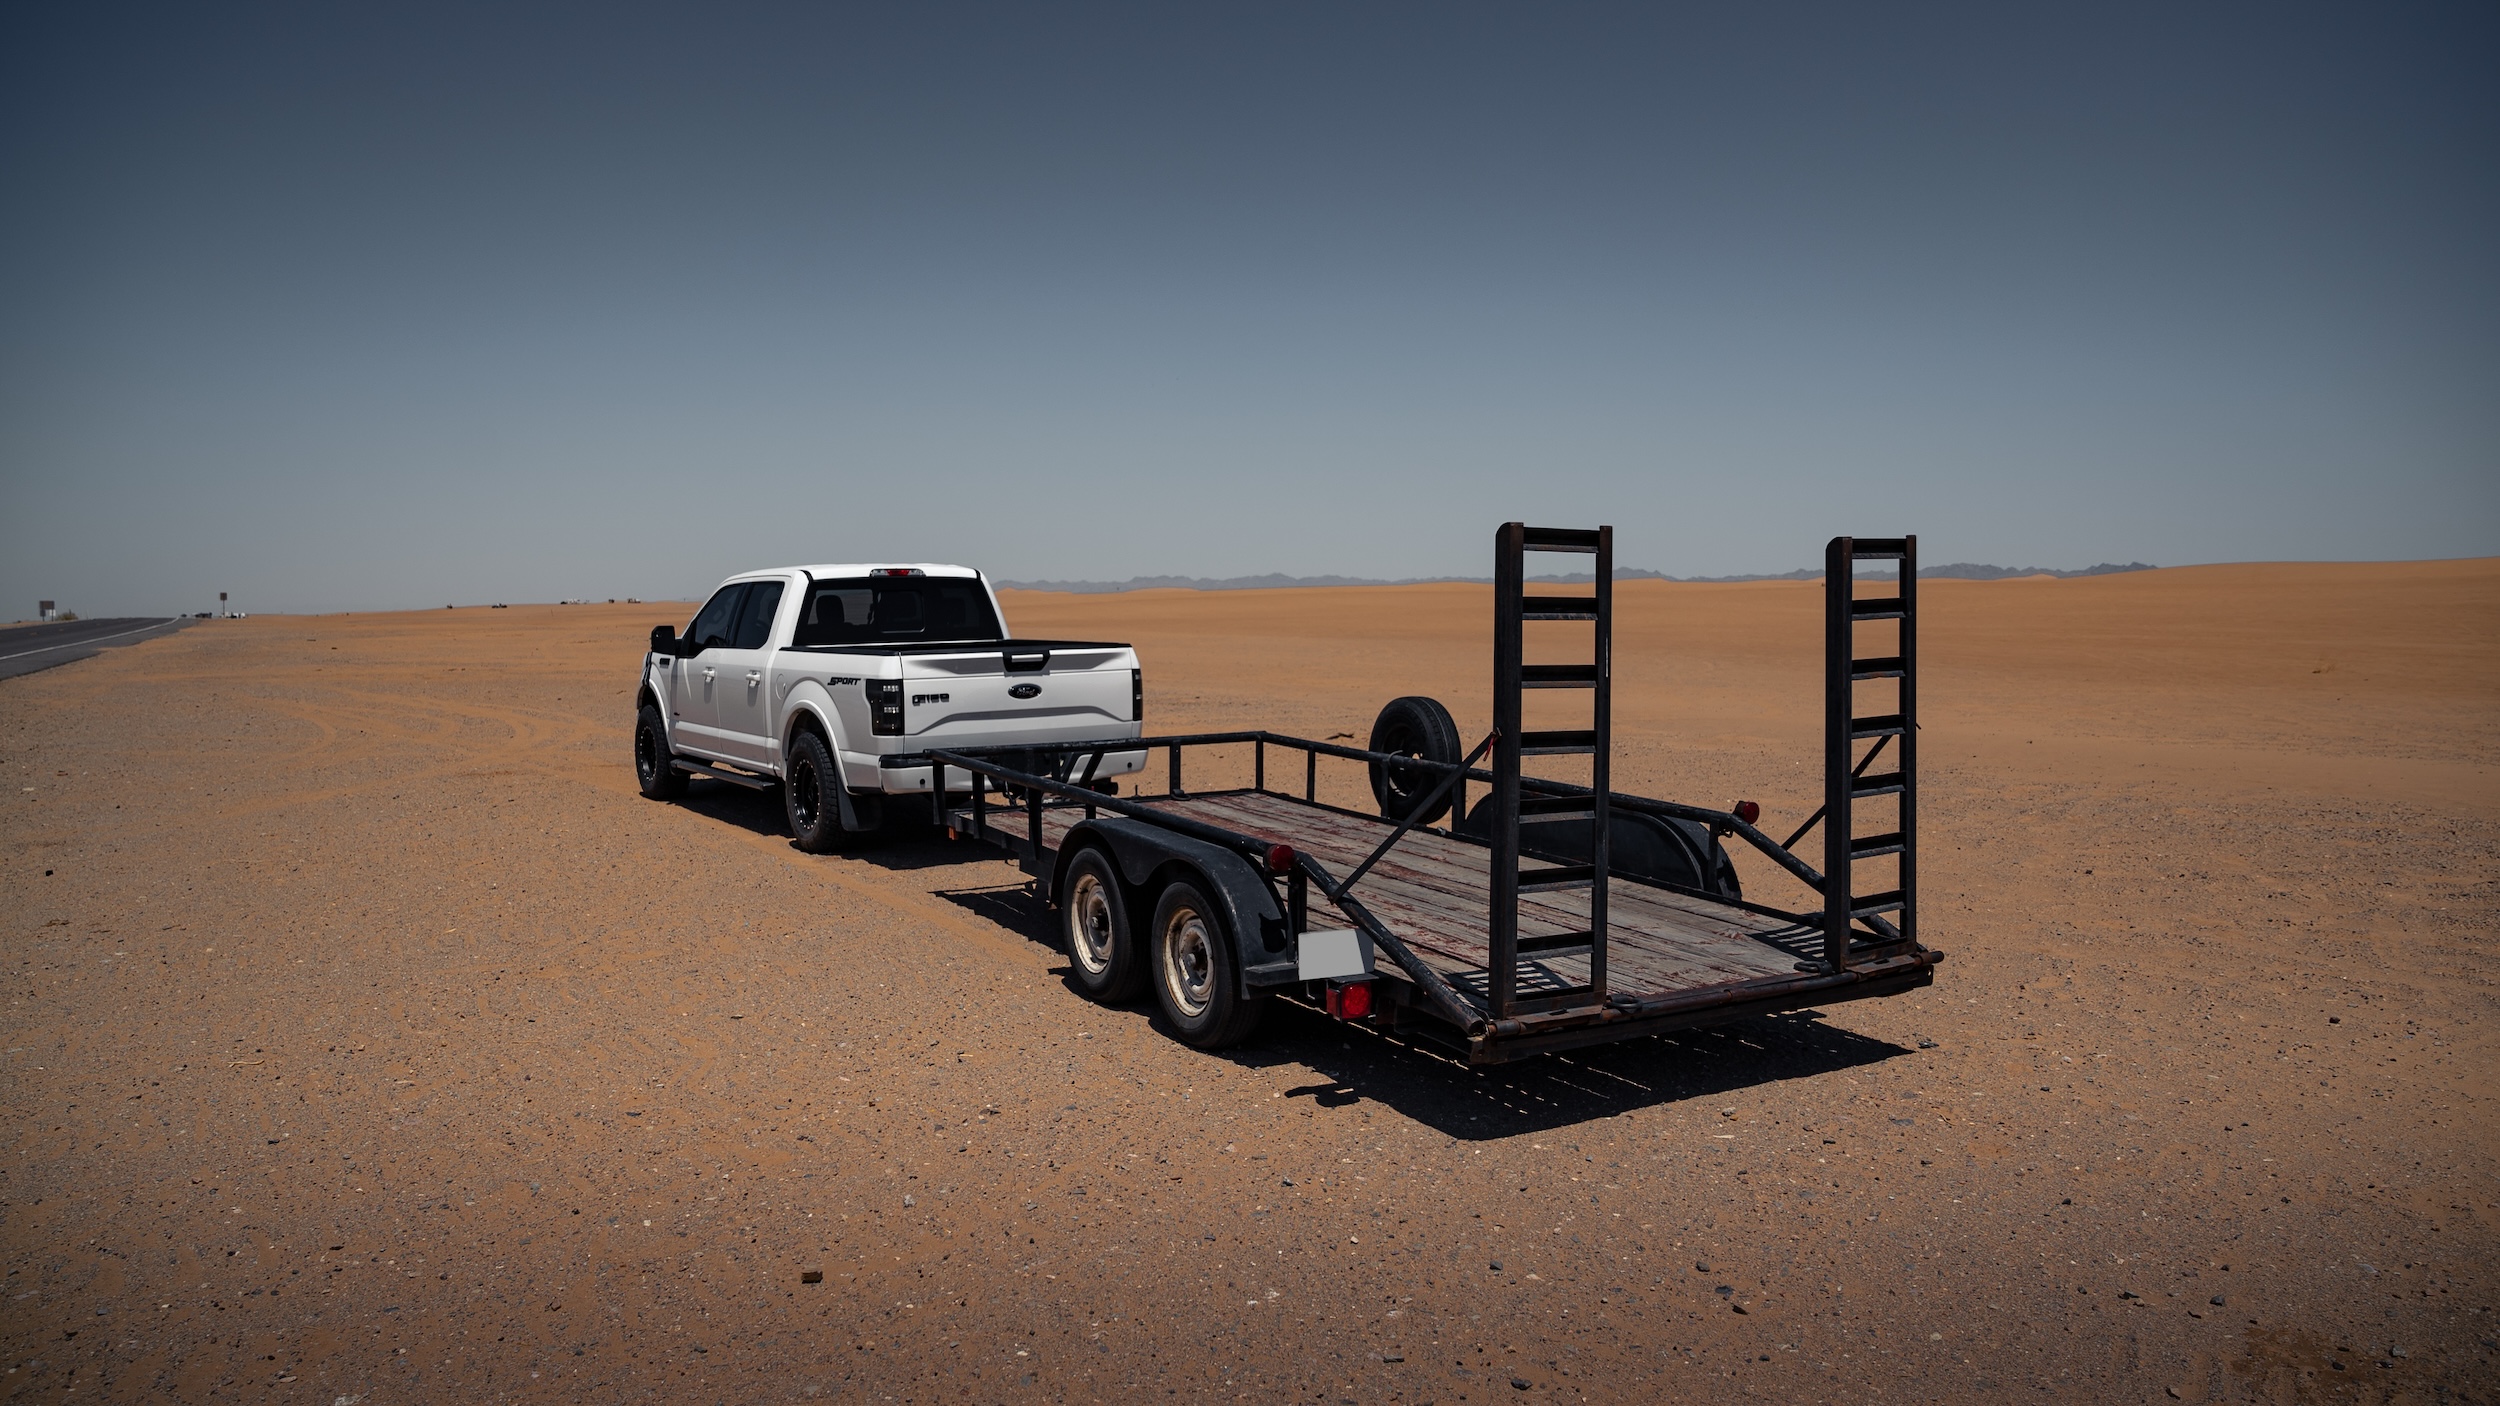
Four questions cut through most of the noise in the full trailer vs semi trailer decision:
- What is my truck hauling, and how does my cargo behave on terrain?
- What are my typical haul distances?
- Do I need to stage, swap, or position trailers independently of my truck?
- What is the towing capacity of my vehicle?
If your cargo is standard commercial freight, your routes are predominantly highway, and your operation benefits from drop-and-hook capability, the semi trailer is likely a better answer for your truck vs a full trailer. If your work is agricultural, construction, or regional bulk hauling with terrain access requirements, the full trailer deserves serious consideration.
Industry Match: What Tends To Win By Sector
| Industry |
Common choice |
Primary reason |
| Agriculture and farming |
Full trailer (grain/hay); semi for long-haul livestock |
Terrain access, field staging, load type |
| Construction and heavy equipment |
Semi (lowboy, step-deck) |
Oversized load capacity, highway access |
| Oilfield and energy |
Semi configurations |
Long-haul pipe, specialized loads |
| Landscaping and turf |
Full trailer/gooseneck |
Equipment transport, short runs |
| Logging and forestry |
Semi log trailers |
Volume, length requirements |
| General freight and retail |
Semi (dry van dominant) |
Load board access, freight network compatibility |
Questions To Ask Yourself Before Investing In A Trailer For Your Truck

Getting this decision right starts with honest answers to a short list of practical questions. Work through these before you commit to a trailer type for your truck:
What will I haul 80% of the time? Your most common cargo type should drive the full trailer vs semi trailer decision more than your edge cases.
What are my typical haul distances? Short, terrain-heavy routes favor full trailers. Long interstate runs favor semi trailers in almost every case.
What vehicle do I already have, and what is it rated and configured for? Choosing a trailer that requires reconfiguring or replacing your tractor or truck changes your math significantly. Your GCWR (Gross Combined Weight Rating) is the maximum allowable combined weight of your loaded tow vehicle and loaded trailer together. Your trailer choice must fit within that ceiling. Your vehicle’s curb weight (its weight with a full tank but no passengers or cargo) eats into that GCWR before you load a single pound of freight. And if you are running a full trailer or a gooseneck, pay close attention to tongue weight, the downward force the trailer exerts on the hitch, typically 10 to 15% of total trailer weight. Exceed your hitch’s tongue weight rating, and you lose steering control fast. Choosing a trailer that requires reconfiguring or replacing your tractor or truck changes your math significantly.
Do I need to stage trailers independently of my tractor? If detaching, repositioning, and reloading without your tow vehicle present is a regular part of your workflow, the full trailer’s independent support is a genuine operational advantage over a semi trailer.
Am I buying for today’s volume, or for where I want to be in three to five years? A trailer that fits your current operation but limits your growth options may cost more in the long run than one that gives you room to scale.
The mistake operators most commonly make is buying for a use case they imagine rather than the one they actually run. A full trailer bought with interstate freight ambitions will spend most of its time mismatched to the loads available. A semi trailer bought for short agricultural runs may offer more overhead than the operation needs. When deciding between a full trailer vs a semi trailer, buy for the job you actually do.
Whichever Trailer You Need, Hayden Outdoors Can Help You Find It
Here at Hayden Outdoors, we connect equipment buyers and sellers across the country, with no fees and no commissions. Whether you have a trailer to sell or you’re looking for new or used inventory, our platform brings both sides of the transaction together directly. You list, buyers inquire, and the deal happens between you.
Browse trailers for sale on Hayden Outdoors to see what’s currently available, or list your own equipment and put it in front of buyers who are actively looking.
The full trailer vs semi trailer decision is worth getting right. The right equipment means more productive days, better access to the work you want, and an operation that runs on your terms.
View Available Trailers For Your Truck
What Is A Skid Steer Loader Used For And What Can It Do?
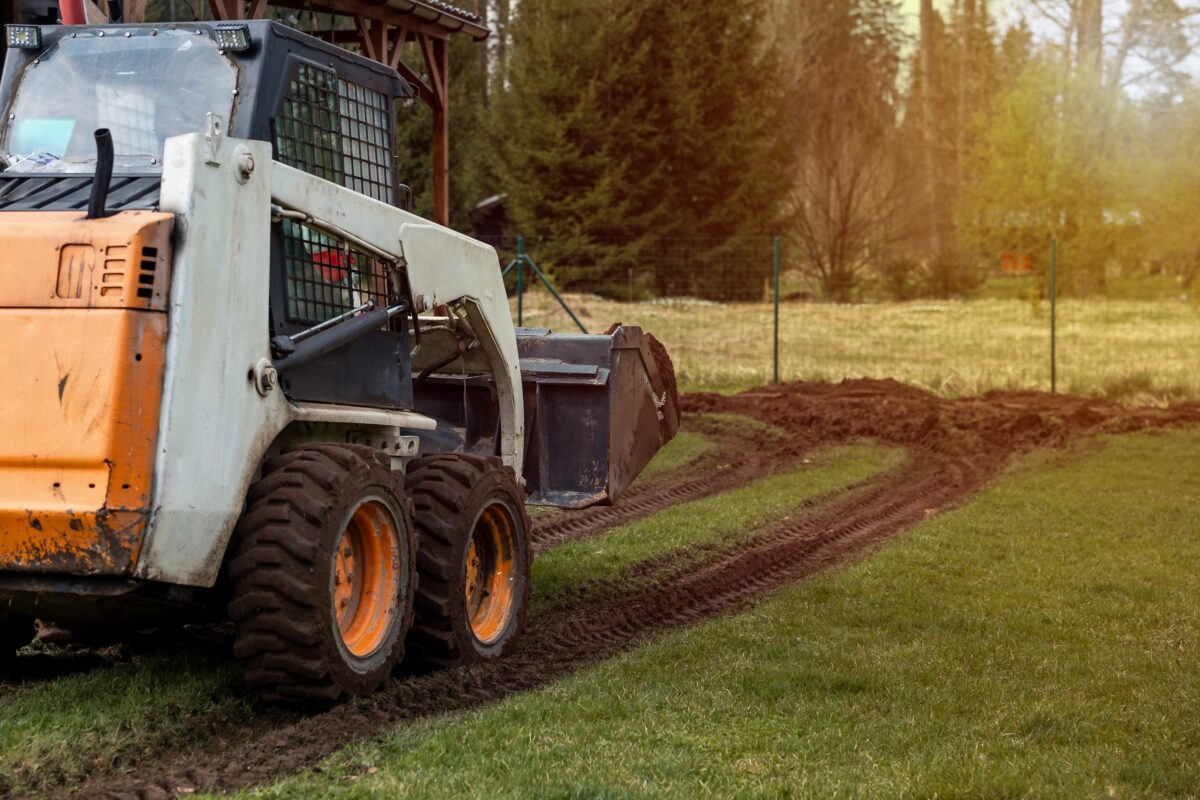
When it comes to must-have equipment on your property, it’s easy to feel like there are too many options. One of the most versatile and useful pieces of machinery for most operations is a skid steer loader, but what is it even used for, and what can it do?
We get it; you’ve got real work to do. Maybe you’re staring down a property that needs grading, a barn that needs mucking out, a fence line that needs digging, or a pile of storm debris that isn’t going to move itself.
You need a machine that can keep up with all of it, fit through a gate, and not require a separate piece of equipment for every task on the list. And yet if you’ve tried to research that question online, you’ve probably run into the same problem: vague lists, recycled bullet points, and guides written by people who don’t work the land day in and day out.
At Hayden Outdoors, we’ve spent decades working alongside the farmers, ranchers, and landowners; we know how to actually run these machines inside and out. And we know what questions matter when you’re making a real equipment decision.
Our guide breaks down every major skid steer loader use case, walks through the different types (and what they do), and gives you the straight, practical information you need to put the right machine to work on your land.
Table of Contents
Why The Skid Steer Is Such A Crucial Piece of Equipment For So Many Operations

A skid steer loader is a compact, engine-powered machine with lift arms at the front that accept a wide range of interchangeable attachments for different uses.
What sets the skid steer apart from other compact equipment is its steering method (which ultimately impacts what it’s used for): the wheels or tracks on each side are powered independently, so the machine changes direction by varying the speed between sides rather than turning its wheels. This design allows it to pivot in its own footprint, which is where the name comes from.
Skid steers are consistently some of the most frequently rented pieces of construction and farming equipment in the US, which is a clear reflection of the broad ways in which the machine is used across industries.
That combination of compact size, strong hydraulic power, and attachment versatility is why skid steer loaders are used on farms, ranches, construction sites, landscaping operations, and rural properties of every kind.
To fully understand the capabilities, it helps to start with three core advantages that set it apart from every other piece of compact equipment.
The One-Machine Advantage: Skid Steer Attachments Change Everything
The biggest reason skid steer loaders are so frequently used across a variety of industries is the attachment ecosystem built around them that allows them to do so much. With a wide variety of attachment types available from major manufacturers, a single skid steer can be used as a loader, a trencher, a mower, an auger, a snowblower, a brush cutter, a grader, a demolition tool, and more.
It’s like the Swiss Army Knife of compact equipment. You change the attachment, and you effectively have a different machine for a different job.
For a farm, ranch, or rural property operation where the work shifts by season and by the day, the kind of flexibility that a skid steer offers has direct financial value. One capital investment covers a wide range of tasks that would otherwise require separate equipment purchases, separate maintenance overhead, and separate storage.
When people ask what a skid steer is used for, this attachment flexibility expands those uses to a wide variety of tasks, significantly expanding what the equipment can do.
Zero-Turn Maneuverability: The Feature That Sets Skid Steers Apart
Most equipment steers by angling the front wheels. A skid steer cannot do that. Its wheels stay fixed and point straight ahead at all times. The operator changes direction by varying the speed between the left and right sides.
Speed up the right side, and the machine pivots left. Do the reverse, and it pivots right. Drive both sides in opposite directions, and it spins in place, executing a zero-radius turn.
When it comes to use cases, that capability means a skid steer loader can work in spaces where nothing else fits: between buildings, inside a barn aisle, through a standard farm gate, along a fence line, or on a residential job site hemmed in by neighboring structures.
For landowners and operators working in tight conditions, zero-turn maneuverability is often the deciding factor in choosing a skid steer over anything else available at the same price point that can’t do this.
How Skid Steers Compare To Other Equipment On Your Property
One of the most common questions from rural landowners figuring out what a skid steer can be used for (and whether it belongs in their lineup) is how it compares to other machines they already own or are considering purchasing. Most equipment guides don’t touch this at all. Here is a straightforward breakdown.
Skid steer vs. a tractor: A tractor wins on drawbar work, pulling implements across large acreage, and powering rear-mounted PTO equipment. A skid steer wins on tight-space maneuverability, push-and-lift tasks, and attachment versatility for jobs that don’t require traveling across wide-open ground. On most working properties, they complement each other rather than replace each other.
Skid steer vs. mini excavator: A mini excavator is purpose-built for deep, precise digging and is hard to beat when you need to trench a utility line at significant depth. Skid steers are more versatile across job types and can dig with a backhoe or auger attachment, but they won’t match an excavator’s reach or precision for that specific task.
Skid steer vs. wheel loader: A full-size wheel loader moves more material per pass and cycles faster on large-volume jobs. A skid steer costs less to buy and operate, fits in spaces a wheel loader cannot enter, and handles a much broader range of tasks and uses through its attachment system. For most small-to-medium property operations, the skid steer is the more practical investment.
What They Can Do: Breakdown Of Skid Steer Loader Use Cases
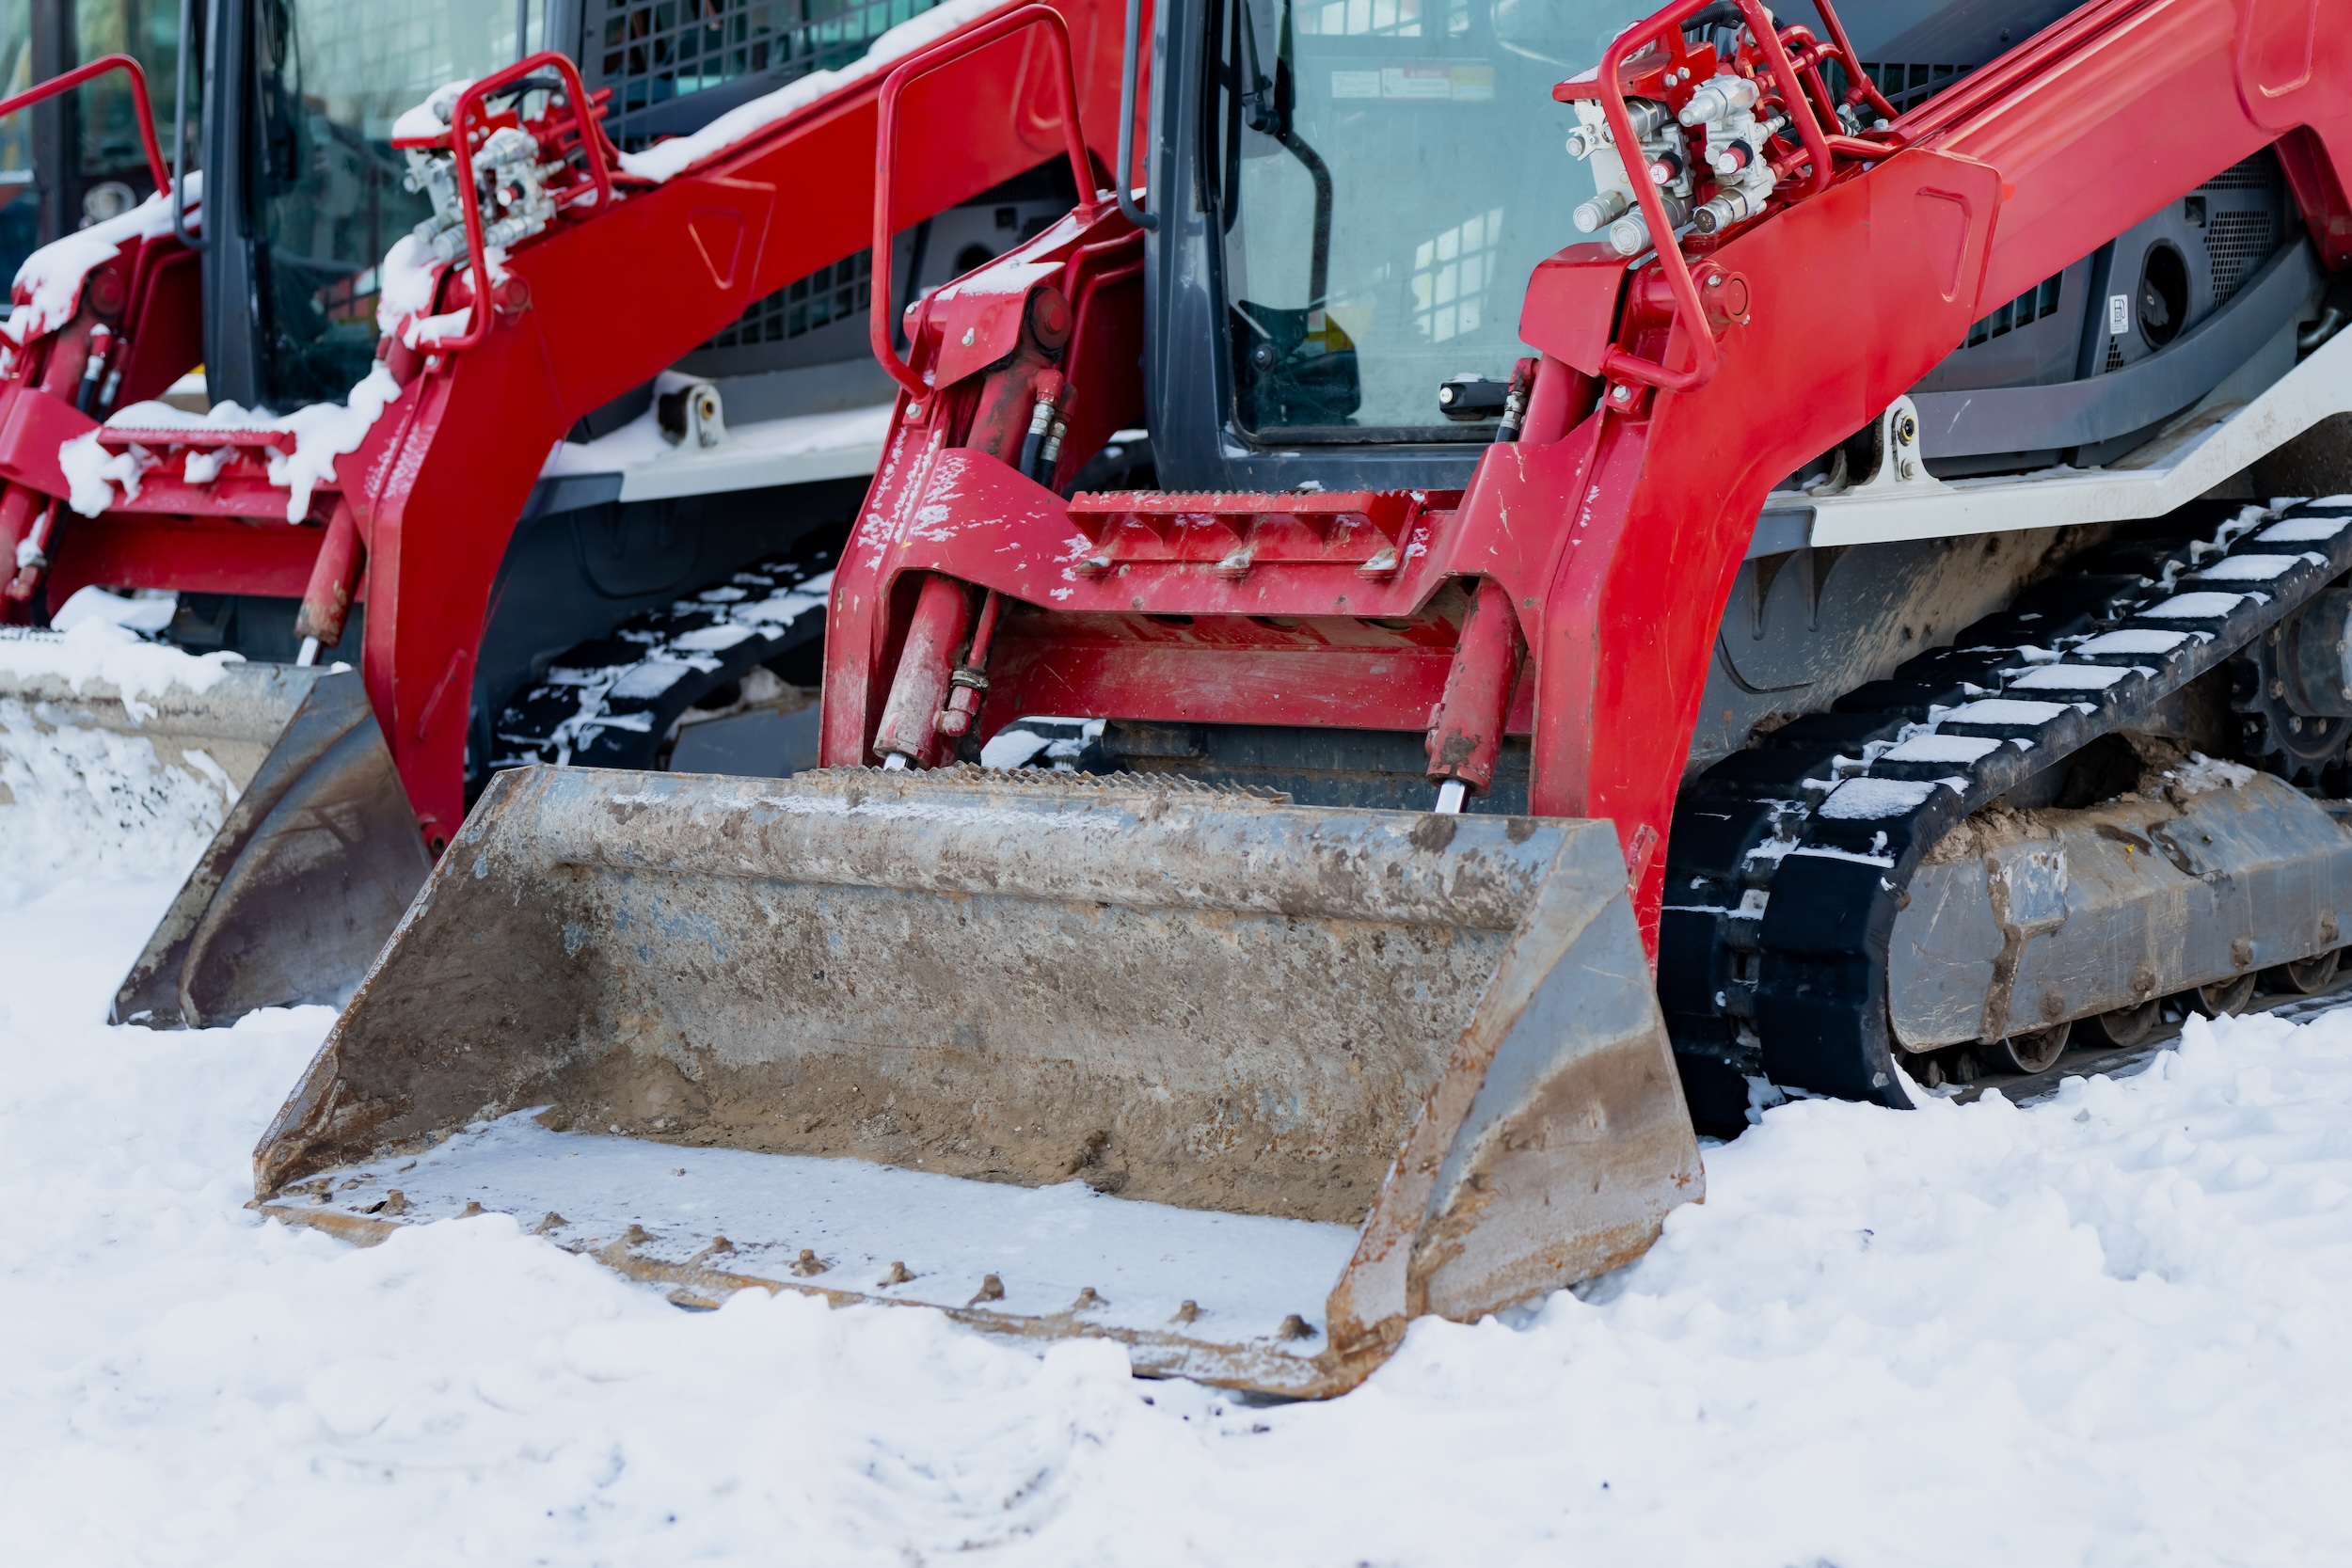
The honest answer to what a skid steer can do is simply: a lot. The skid steer loader uses we’ve listed below span construction, agriculture, landscaping, and beyond. We’ve organized them by application so you can get straight to what is most relevant for your operation.
Farm And Ranch Applications
This is where a skid steer and what it can do truly earns its reputation as the workhorse of rural operations. While most online guides reduce farm and ranch skid steer loader uses to a short bullet list, the reality is that a properly equipped machine handles a significant portion of the daily and seasonal workload on a working operation.
- Livestock and feed management: A bale spear or bale grapple attachment is used for moving round and square bales faster and more safely than manual handling. You can also transport hay, dispense feed rations, and handle palletized bags of grain without a separate forklift.
- Barn and pen cleaning: This is one of the most time-consuming jobs on any livestock operation. A skid steer with a bucket or manure scraper attachment is used for cutting the time dramatically, and its compact size lets it work inside barn aisles and through standard doorways that exclude larger machines.
- Fence work: An auger attachment drills post holes faster than any manual method. A post driver pounds them in. The bucket clears brush and old wire from fence lines. For operations managing miles of perimeter fence, a skid steer can be used to cover the full job from clearing to setting posts.
- Manure management and spreading: Cleaning corrals, scraping lots, and spreading manure as fertilizer are all straightforward tasks with the right bucket, scraper, or spreader attachment.
- Seeding and soil preparation: Skid steer tiller attachments can be used for preparing ground for new seeding, and hopper-style spreader attachments handle efficient seed and fertilizer distribution across larger areas.
- Water and irrigation infrastructure: Skid steer trencher attachments can be used for handling the digging for irrigation lines, water lines, and drainage systems. Combined with an auger for pipe and post setting, a skid steer covers most of the labor-intensive digging work associated with water system installations across a property.
- Road and lane maintenance: Farm roads take a beating, especially during wet seasons. A skid steer loader with a blade or grader attachment can be used to spread and grade gravel, fill ruts, repair drainage, and keep access lanes passable year-round.
- Year-round utility: Brush clearing in summer. Material handling and harvest assistance in fall. Snow removal in winter. Ground prep in spring. If you’re still wondering what a skid steer loader is used for on a working ranch, this is the simplest answer: whatever the season demands.
Construction And Site Work
On a job site, a skid steer earns its keep from the first day. The compact frame of the skid steer allows it to be used where larger equipment cannot go, and its power-to-size ratio makes it useful across every phase of a project.
Skid steer loader uses on a job site include:
- excavating and digging building foundations
- grading and leveling building pads and site areas
- backfilling after trenching or footer work
- demolition of concrete slabs and structures with a hydraulic breaker attachment
- loading and moving debris and materials
- roadwork and asphalt patching with a cold planer or cement mixer attachment
- general site cleanup throughout a build.
On urban or residential sites where the space between structures is measured in feet rather than acres, a skid steer is often the only compact piece of equipment that can be used to do the job at all. Its ability to swing around in a tight footprint and work close to existing structures without damaging them is a genuine operational advantage and is one of the core uses for the skid steer.
Landscaping And Property Improvement
For landscaping and property development work, the skid steer loader is one of the most practical tools available. Small and medium frame machines are particularly well-suited here, with enough power for meaningful work and enough control to avoid tearing up finished areas.
Skid steer loader uses in landscaping include:
- grading soil for lawns, patios, driveways, and building pads
- spreading and moving topsoil, mulch, and gravel
- trenching for irrigation systems and drainage lines
- stump grinding
- brush and vegetation clearing
- placing large landscape features like boulders and specimen trees
- seeding and aerating with the right attachments.
For landowners developing raw acreage or improving an existing property, this is a clear answer for what a skid steer loader is used for in a residential or rural context: it handles the majority of site prep work that would otherwise require hiring out multiple equipment types on separate days.
Snow Removal And Seasonal Work
Another practical answer to what a skid steer can do in colder climates: it’s one of the most effective snow removal machines available at this size and price point, because of the combination of pushing power and attachment flexibility.
Plow blades, snow pushers, and snowblower attachments all mount to a standard machine, and the skid steer’s weight and low center of gravity provide solid traction on packed or icy surfaces.
For rural properties with long driveways and access lanes, ranch facilities with large lot areas to keep clear, or commercial operations that need consistent snow management, a skid steer with a snow attachment functions can be used as a year-round asset, rather than single-purpose equipment that sits idle for most of the year.
Specialty And Less-Obvious Applications
There are a few skid steer applications and uses that most guides overlook but are worth knowing about, particularly for buyers trying to evaluate total utility from a single machine.
- Small-frame skid steers fit through standard commercial doorways, which makes them genuinely useful for interior demolition work. Concrete floors, partition walls, and structural debris can all be broken up and removed with the appropriate attachments in spaces where you simply cannot bring anything larger.
- Land clearing and forestry work is another area where skid steers are used and are more capable than most people realize. Mulcher attachments, brush cutters, and tree shears make a mid-to-large frame skid steer an effective clearing tool for acreage that doesn’t justify the cost of a full-size forestry machine.
- Skid steers also used regularly in municipal maintenance operations using sweeper attachments for lot and road cleanup, and cold planer heads for asphalt work. On larger rural properties, those same capabilities apply to maintaining private roads, clearing culverts, and managing storm cleanup and debris removal.
Type Breakdown: Understanding What Each Type Of Skid Steer Is Used For
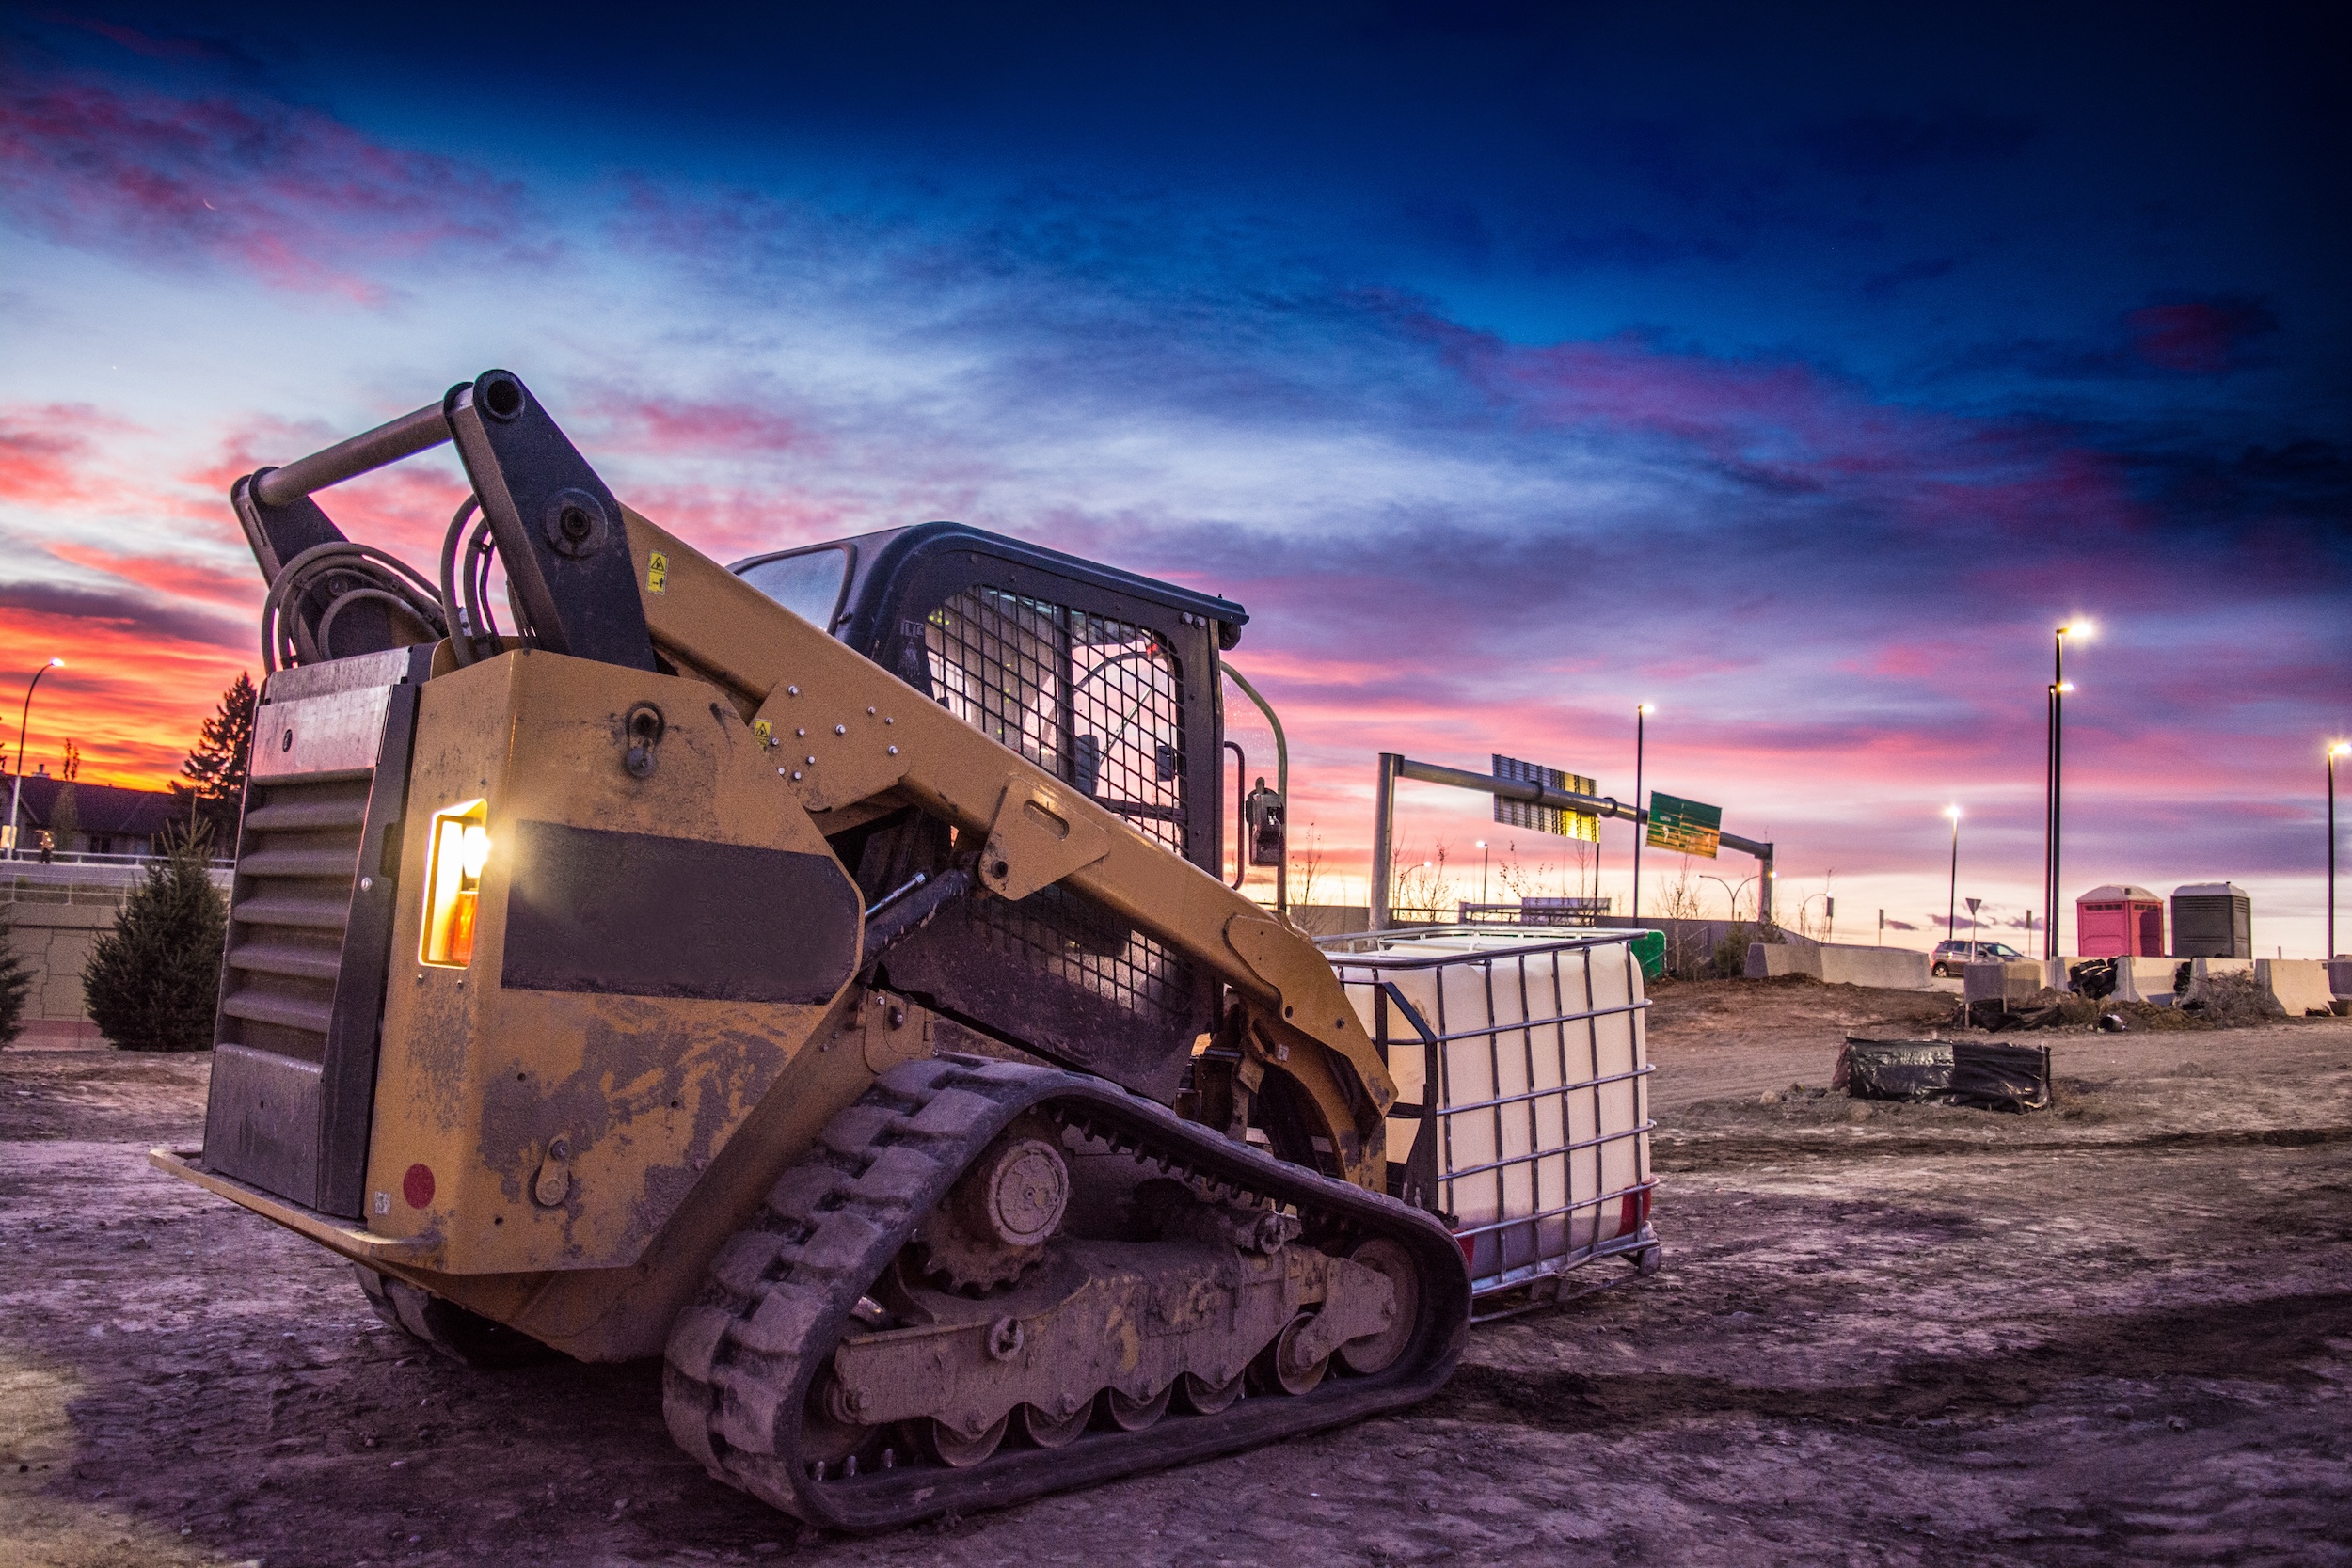
When evaluating what a skid steer loader can be used for and do on your property, there are two dimensions that directly affect suitability: whether the machine runs on wheels or tracks, and what size frame it carries.
Get both of these right and the machine works with you. Get either one wrong, and you’ll spend your time fighting your equipment instead of getting work done.
Wheeled Skid Steers: Best For Hard, Flat, And Developed Surfaces
Wheeled skid steers are the more common configuration that’s used on developed ground. They move faster than tracked machines, execute true zero-radius turns, and cost less both to purchase and to maintain over time.
Wheeled skid steers are the right call when used for:
- construction sites with gravel, asphalt, or concrete surfaces
- barn interiors and feedlot areas
- landscaping work on firm ground
- commercial and residential snow removal on paved surfaces
- operations where the speed of movement between tasks matters.
The tradeoff is traction and ground stability. Wheels lose grip in mud, sand, and soft, saturated soil. On turf, the skidding motion of a turn tears up the surface. If your primary working environment involves wet fields, undeveloped ground, or slopes, a wheeled skid steer will fight you in those conditions, thus limiting its uses.
Compact Track Skid Steer Loaders: Best For Soft, Wet, Or Uneven Terrain
A compact track skid steer loader, commonly abbreviated as CTL, runs on two continuous rubber tracks rather than wheels. The tracks distribute the machine’s weight over a much larger ground contact area, which reduces ground pressure per square inch and provides dramatically better traction on soft, muddy, or uneven surfaces.
CTLs are the right choice of skid steer for:
- wet-season farm and ranch work when fields and lots turn to mud
- undeveloped land clearing where the ground is rough and variable
- post-storm cleanup on saturated ground
- working on slopes and hilly terrain where wheel traction would be marginal
- applications where getting stuck is a serious operational risk.
The tradeoffs are cost and surface limitations. Track loaders cost more upfront, tracks are more expensive to replace than tires, and these skid steers can mark hard paved surfaces when they’re used there. They also move more slowly and do not execute the true zero-turn of a wheeled machine without some risk of track wear.
Radial Lift vs. Vertical Lift: Why The Lift Path Matters For Your Use Case
This is a specification that so many equipment guides skip, but understanding it changes what a skid steer loader is used for in a practical sense, and should factor into any purchase or rental decision.
A radial lift skid steer raises its boom arms in a curved arc, reaching maximum forward reach at mid-height. It’s that arc path that makes these particular types of skid steers great when used for grading, backfilling, trenching, scraping; essentially tasks that require staying close to the ground. Radial lift machines are generally the lower-cost option and work well for most farm, ranch, and landscaping applications.
A vertical lift skid steer raises its boom in a path that keeps the load closer to the machine as it rises, then extends it forward near the top of the arc. The result is a higher maximum reach and more consistent dump height throughout the lift cycle. A vertical lift skid steer is the better choice when you regularly do the following: load trucks, fill elevated hoppers, stack materials, or work with attachments that need maximum height clearance. If loading out over high truck bed walls is a regular part of your operation, the use of a vertical lift skid steer is worth the additional cost.
Small vs. Medium vs. Large Frame: Matching Machine Size To The Job
Skid steer loaders are categorized into three frame sizes, which can directly impact the ways the equipment is used and what it can do. The three frame categories below map directly to the range of jobs each machine is built to handle.
Small frame (under 50 HP, under 1,750 lb rated operating capacity): This is the most maneuverable skid steer configuration and the one that fits through standard farm gates and commercial doorways. It’s best for residential and small-property landscaping, interior demolition, tight job sites in developed areas, and light farm and property maintenance tasks. It also has lower operating costs and is easier to transport than larger machines.
Medium frame (50-70 HP, 1,750-2,200 lb rated operating capacity): This is the most commonly owned and rented skid steer size, and for good reason. It handles the broad middle range of construction, landscaping, and agricultural work without the bulk of a large machine. Most working farms and ranches find that a medium frame skid steer loader covers the overwhelming majority of daily tasks and uses. This is the configuration most rental fleets stock in the greatest volume.
Large frame (over 70 HP, over 2,200 lb rated operating capacity): This skid steer size provides maximum lifting capacity and horsepower for heavy demolition, high-volume grading, large-scale land clearing, and any application that regularly pushes the limits of what a smaller machine can sustain. These machines tend to be less maneuverable and more difficult to transport, but they’re capable of work that smaller skid steers are unable to do within a full production day timeframe.
How To Choose The Right Size Skid Steer Loader For What You’re Using It For
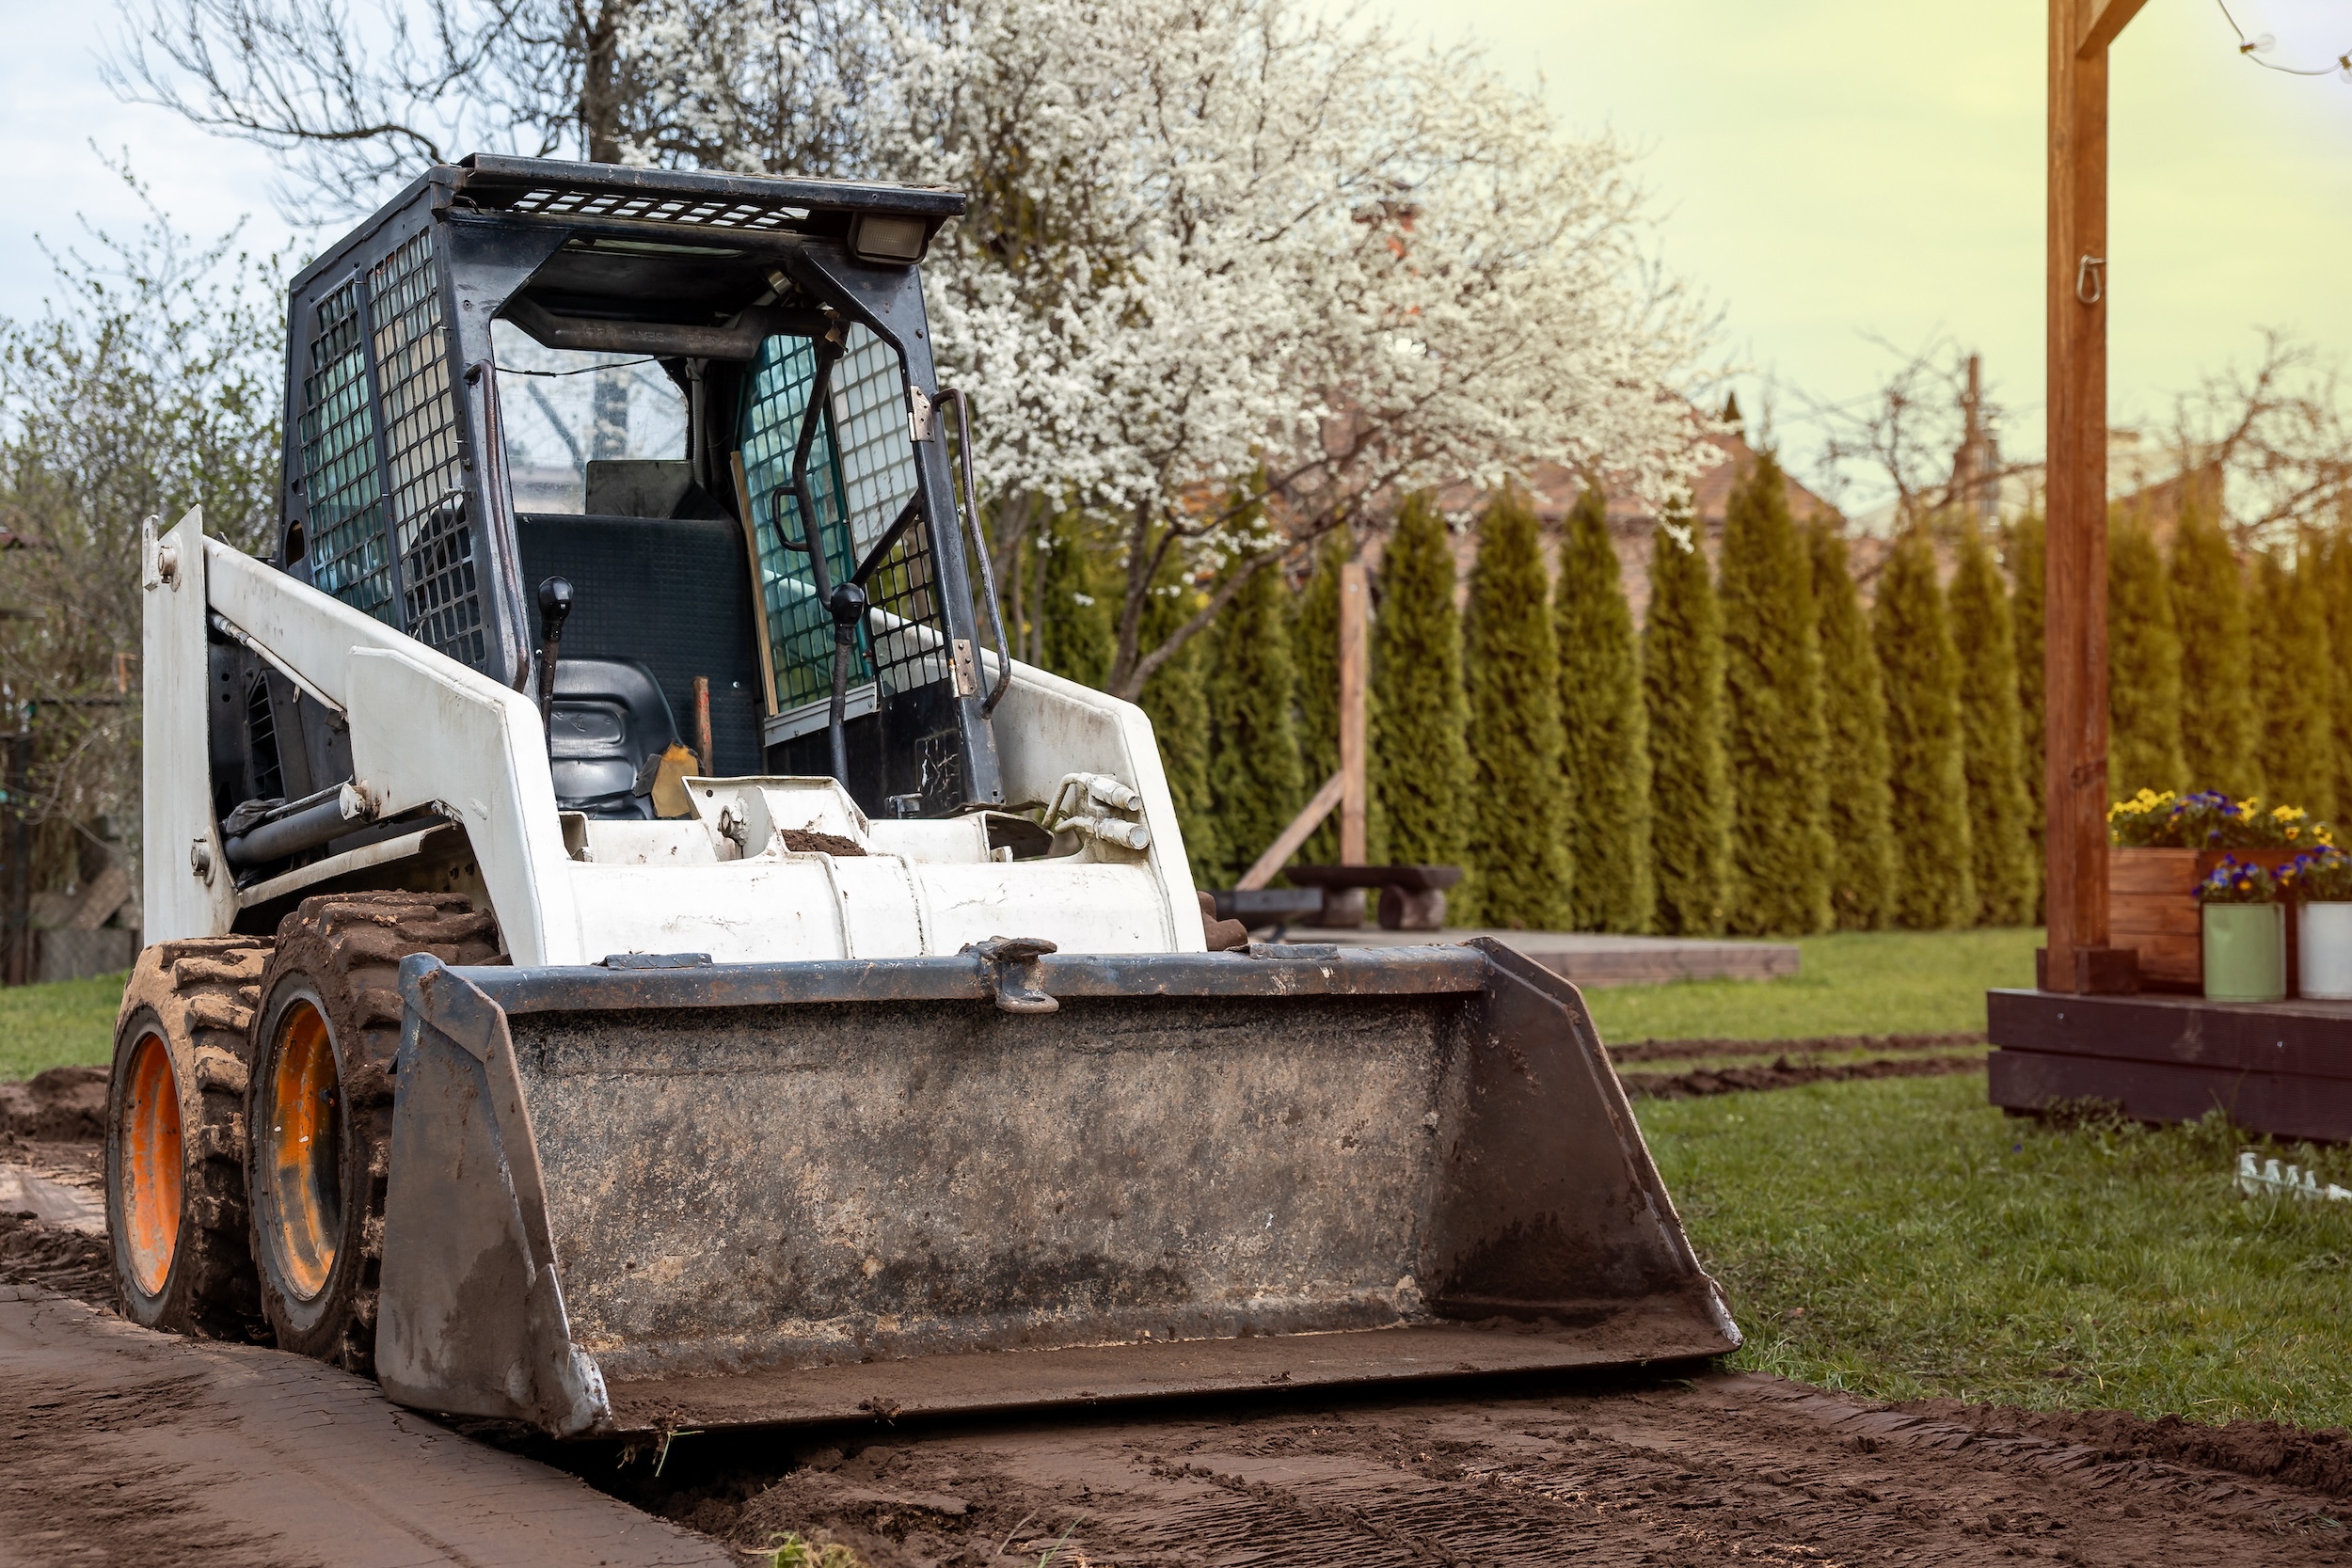
Once you understand what a skid steer is used for across all its applications, the next step is matching the right machine to your specific work.
The most common mistake buyers and renters make is sizing to the average of their expected tasks rather than the most demanding one. Start with your hardest requirement and size from there.
Match Your Rated Operating Capacity To Your Heaviest Load
Every skid steer has a rated operating capacity, or ROC. Per OSHA’s material handling guidelines, for wheeled machines the ROC is set at 50 percent of the machine’s tipping load. For compact track loaders, the standard is 35 percent. That safety margin exists for good reason: operating close to the tipping load is dangerous and puts stress on both the machine and the ground beneath it.
The practical approach is to know the weight of your heaviest expected load, add a comfortable safety buffer, and use that number to set your minimum ROC requirement.
If you regularly move round bales weighing 1,500 pounds, you want a machine with a ROC well above that figure, not one that barely meets it. Getting this right is the most mechanical part of figuring out what a skid steer loader can be used for on your specific property.
Think About Where You Work, Not Just What You Move
Terrain and site conditions often determine the right type of skid. steer more definitively than lift capacity alone. Work through these questions before finalizing a configuration:
- Is your primary working surface developed and firm, or undeveloped and variable?
- Do you work through wet seasons where soft ground and mud are regular factors?
- Do you need to move the machine through standard gates or doorways?
- Are slopes a consistent feature of your terrain?
- Does your work require moving quickly between tasks across a larger area?
Answer these questions honestly, and you’re that much more likely to arrive at the right type and size of skid steer without second-guessing your purchase later. down the line.
Consider Hydraulic Flow Before You Commit To Using Specific Attachments For Your Skid Steer
This is a specification that trips up a lot of first-time buyers. Skid steers come with either standard-flow or high-flow hydraulics, and the difference determines which attachments you can use at full capability.
Standard-flow hydraulics handle the majority of common attachments well: buckets, augers, grapples, bale spears, post drivers, and most landscaping tools. High-flow hydraulics are required for power-hungry attachments including cold planers, high-speed mulchers, large brush cutters, and some trenchers.
If you intend to run high-demand attachments, verify that the skid steer you’re considering has high-flow capability before you plan to use it on your property. Adding it after the fact is not always possible and is never inexpensive.
Buying vs Renting A Skid Steer To Use On Your Property
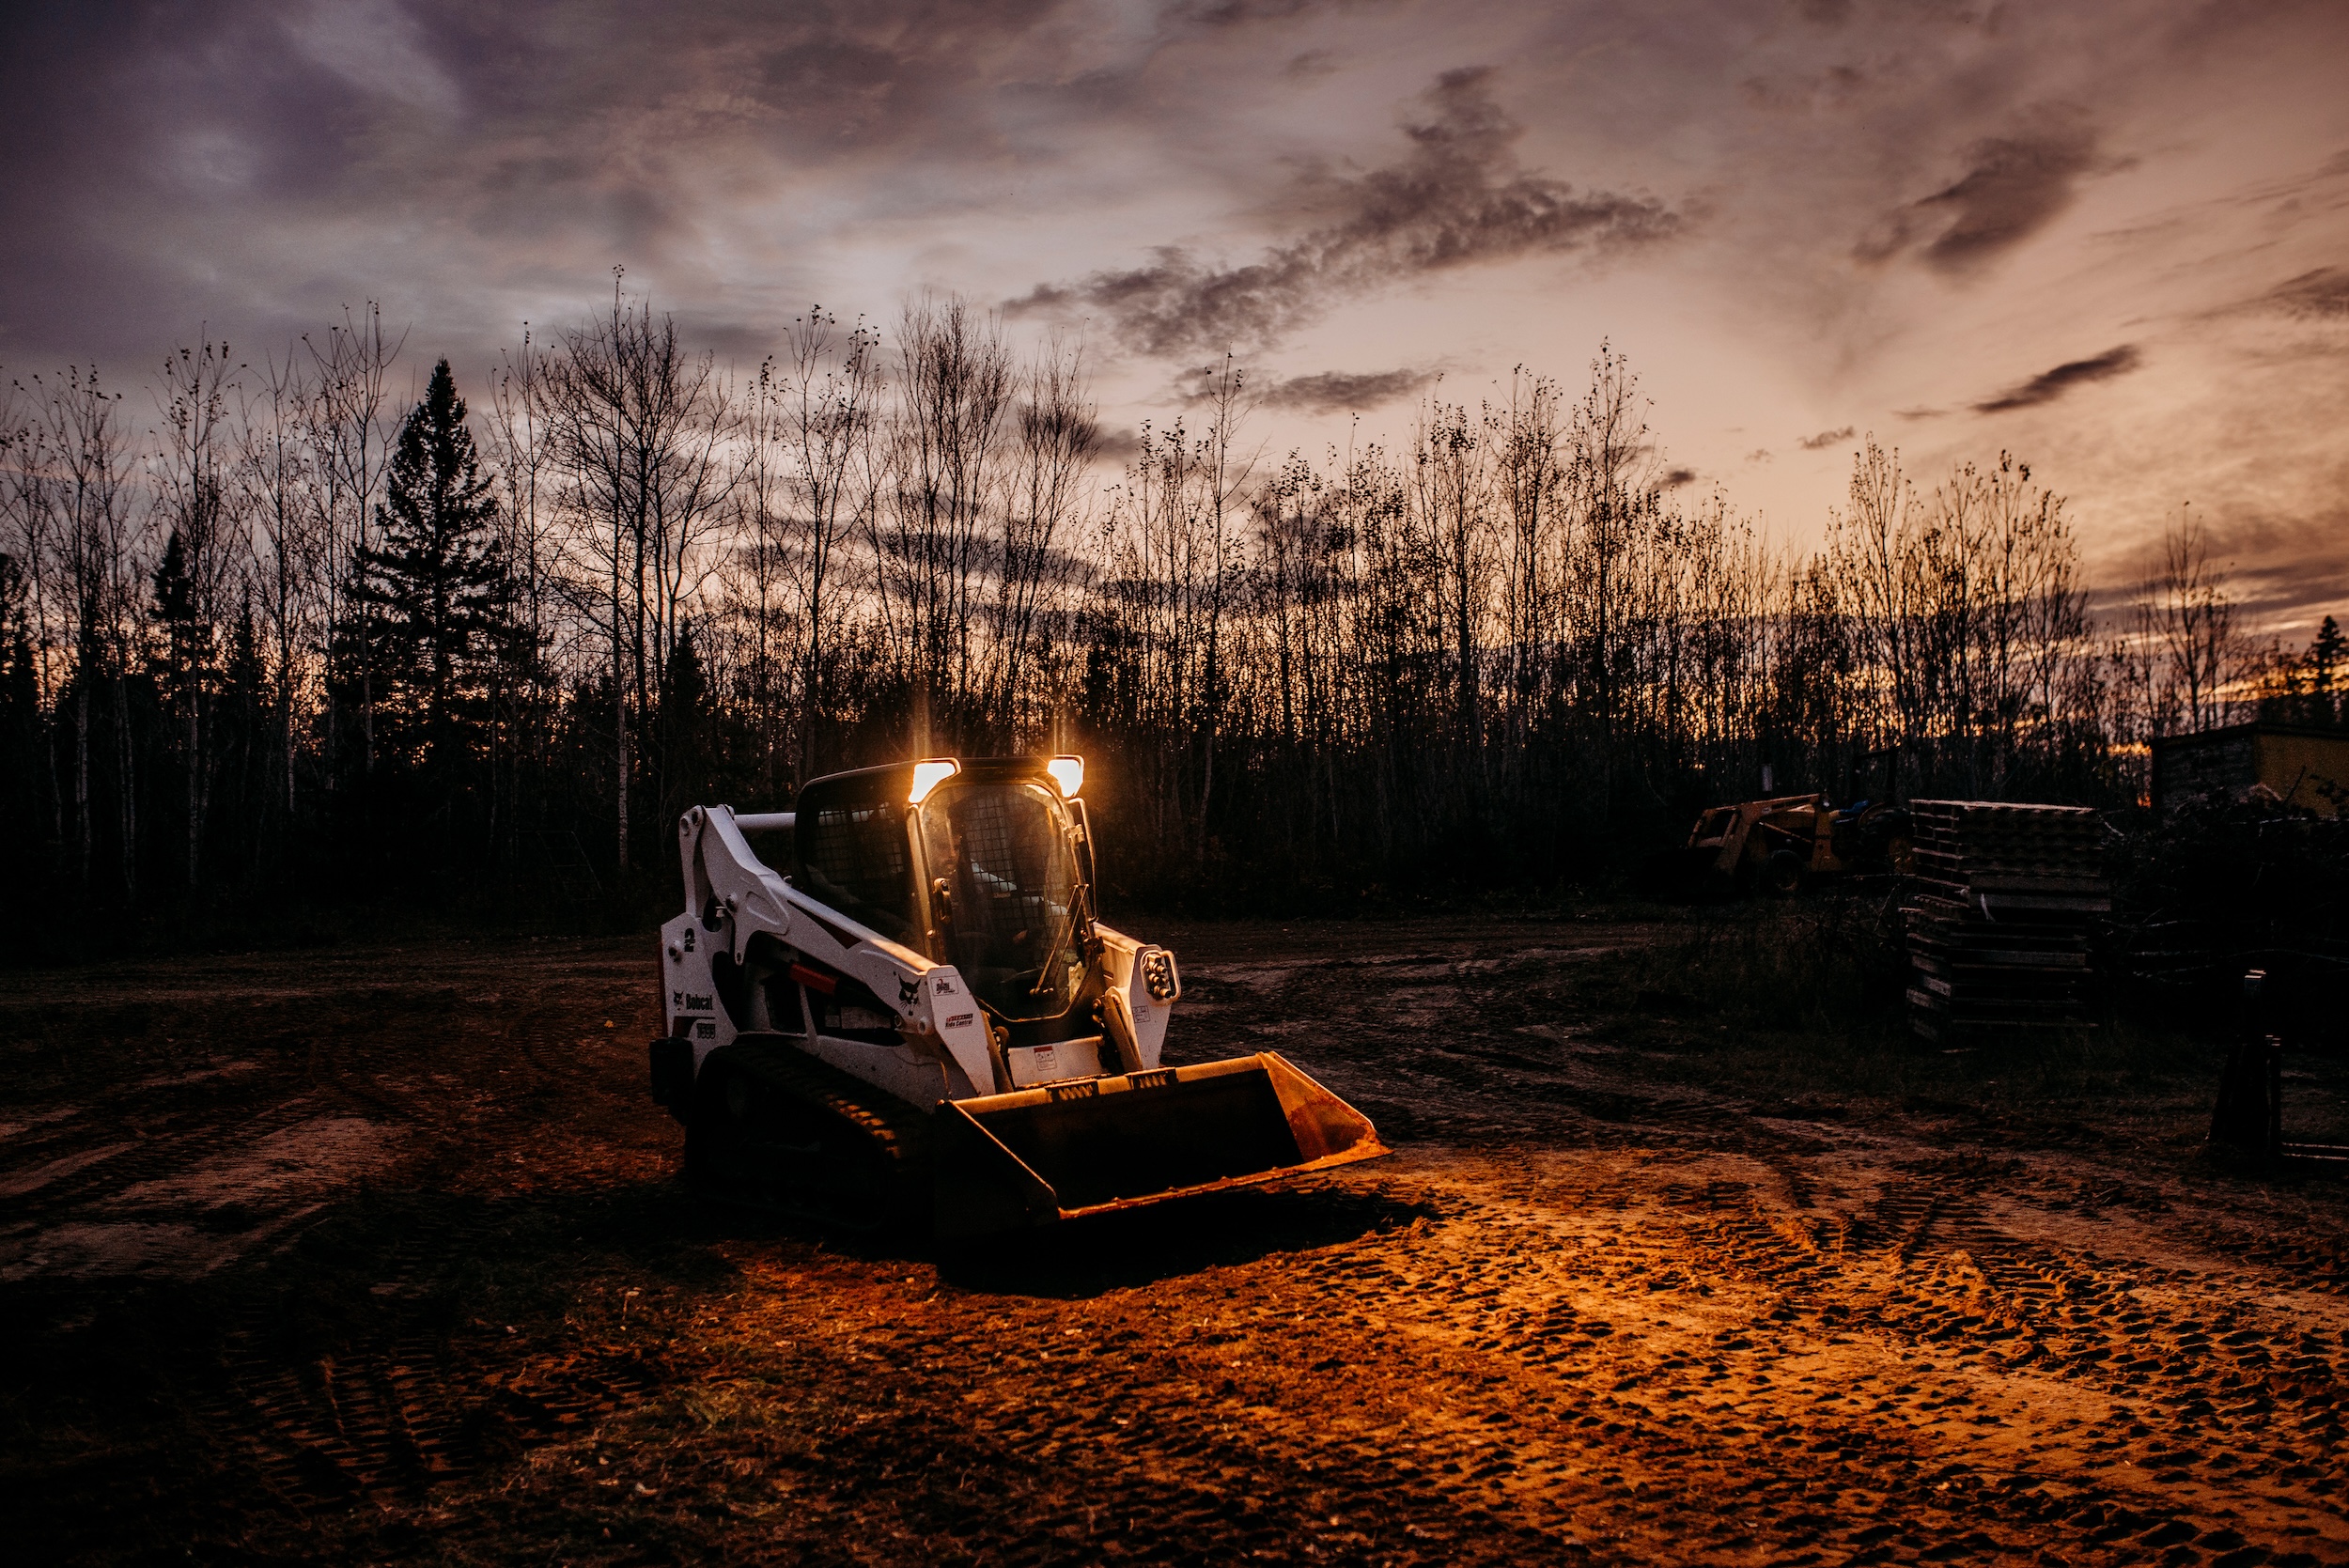
Part of knowing what a skid steer is worth to your operation is deciding whether renting or owning one is right for your particular use case. Both paths make sense depending on your situation, and the straight answer is that neither is universally right for everyone.
When To Rent: Renting a skid steer makes sense when you have a one-time or short-duration project, you’re not yet certain which type or size fits your operation, you want to avoid the overhead of ownership, including maintenance and storage, or you need a specialized configuration for a task that doesn’t come up regularly.
When to Buy: Buying makes sense when you’re putting a skid steer to work multiple times per year across different tasks, you have ongoing farm, ranch, or property needs that justify year-round availability, and the economics of ownership hold up against repeated rental costs. For most working rural properties, if you’re renting a skid steer more than two or three times annually, ownership starts to make financial sense.
The Used Skid Steer Option: Skid steers hold their value well and are built for demanding work, which means a well-maintained used machine with documented service hours is often the smart middle-ground purchase. Buying used lets you get into the right configuration without paying new-equipment pricing, and the major manufacturers build machines with long service lives that make used purchasing a sound long-term investment.
Ready To Put A Skid Steer Loader To Work On Your Property?
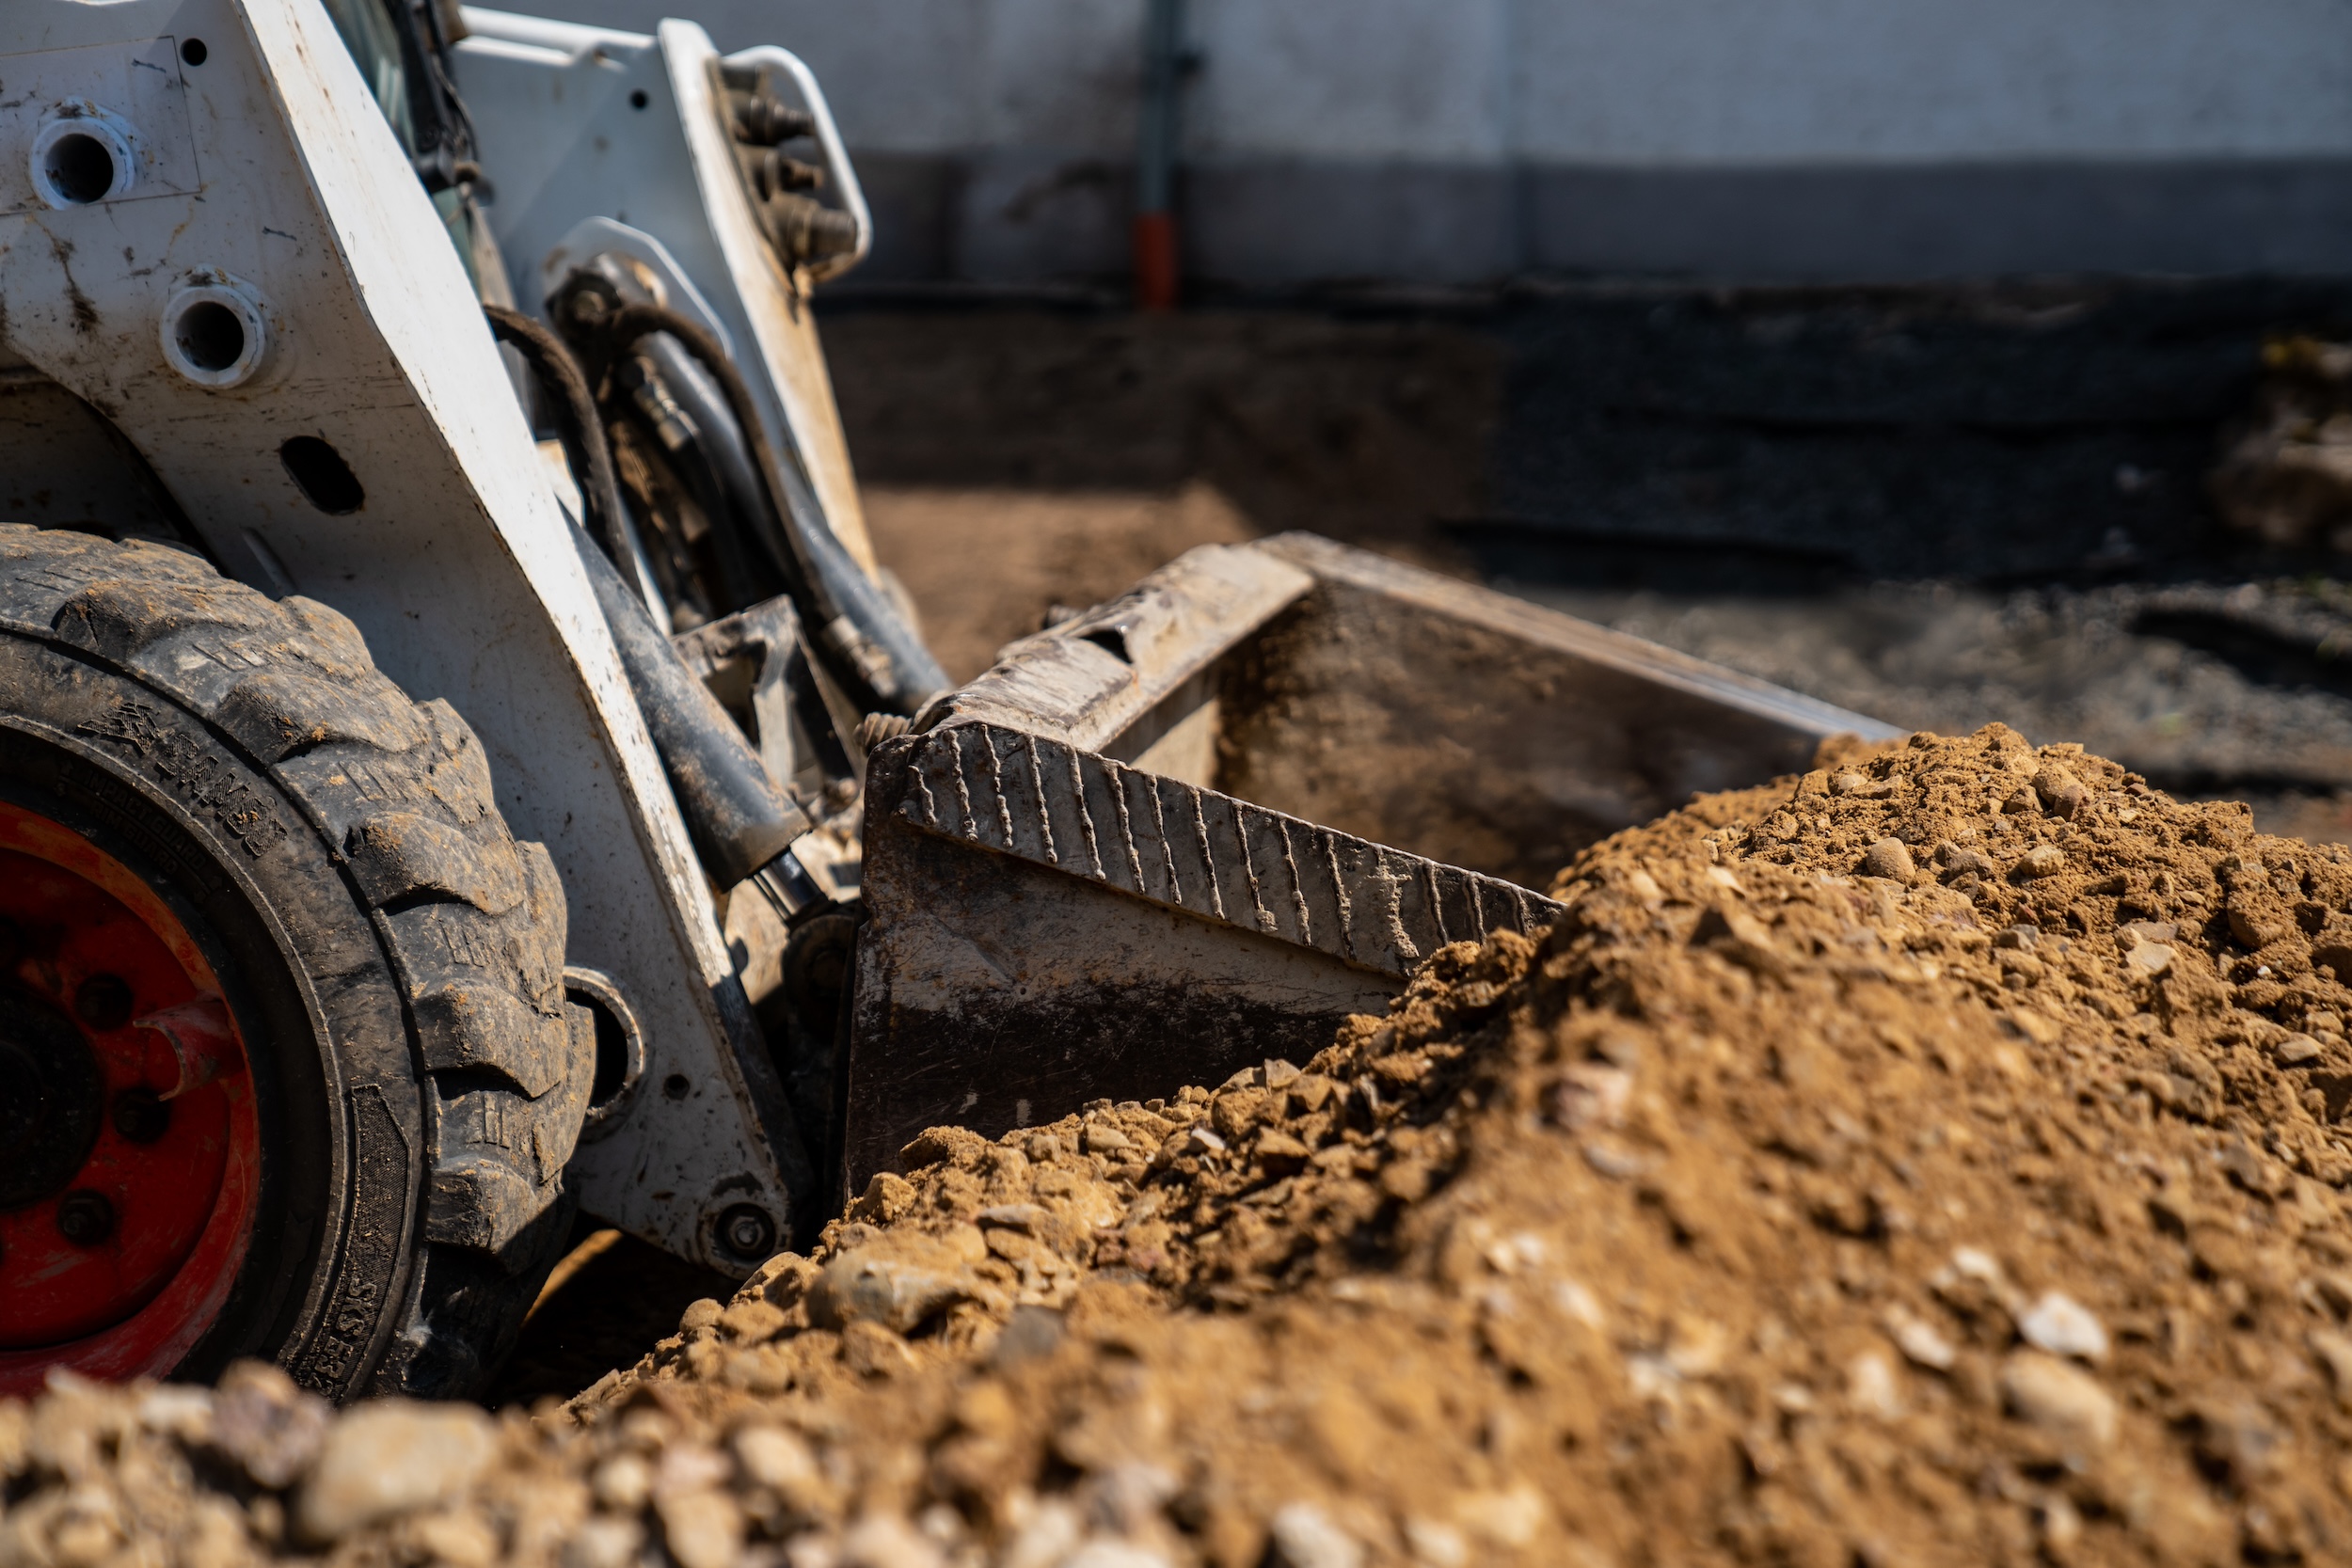
You’ve got a clear picture now of what a skid steer is used for across construction, agriculture, landscaping, and beyond, which type fits your terrain, and how to size the machine to the work. The next step is finding the right machine at the right price from someone who understands what you’re actually going to do with it.
At Hayden Outdoors, we connect buyers and sellers of farm, ranch, and rural equipment directly, with no fees or commissions collected on either side. Whether you’re looking for your first skid steer or adding to an existing fleet, our equipment listings are the place to start.
View Skid Steer Equipment
Complete Buying Guide: How Much Does a Combine Harvester Cost?

Picture this: you’ve spent years building up your grain operation, and the time has finally come to put a combine harvester on your farm. You start browsing listings, talking to combine harvester dealers, and asking around; the pricing numbers you get back are all over the map. One machine is listed at $40,000. Another looks nearly identical and carries a $200,000 price tag. A brand-new model from a major dealer clocks in at over $800,000. And suddenly the question “how much does a combine harvester cost” starts to feel a lot more layered than you expected.
Here’s the good news: the wide price range for combine harvesters actually makes complete sense once you understand what’s driving it. Combine harvester pricing reflects everything from machine size and crop capacity to technology level, age, and condition.
A compact used unit suited to a few hundred acres of small grain is a completely different animal than a high-capacity rotary harvester designed to chew through thousands of acres without missing a beat. The gap in combine harvester price ranges reflects the gap in capability, and that means there’s a machine at the right price for nearly every farming operation.
In this guide, we’ll walk you through everything that shapes the cost of a combine harvester, what you’ll want to budget for beyond the sticker price, the renting versus buying debate, your financing options, and how to find a great machine at a great value. By the time you’re done reading, you’ll know exactly how to approach the combine market with confidence.
Table Of Contents
How Much Does a Combine Harvester Cost?
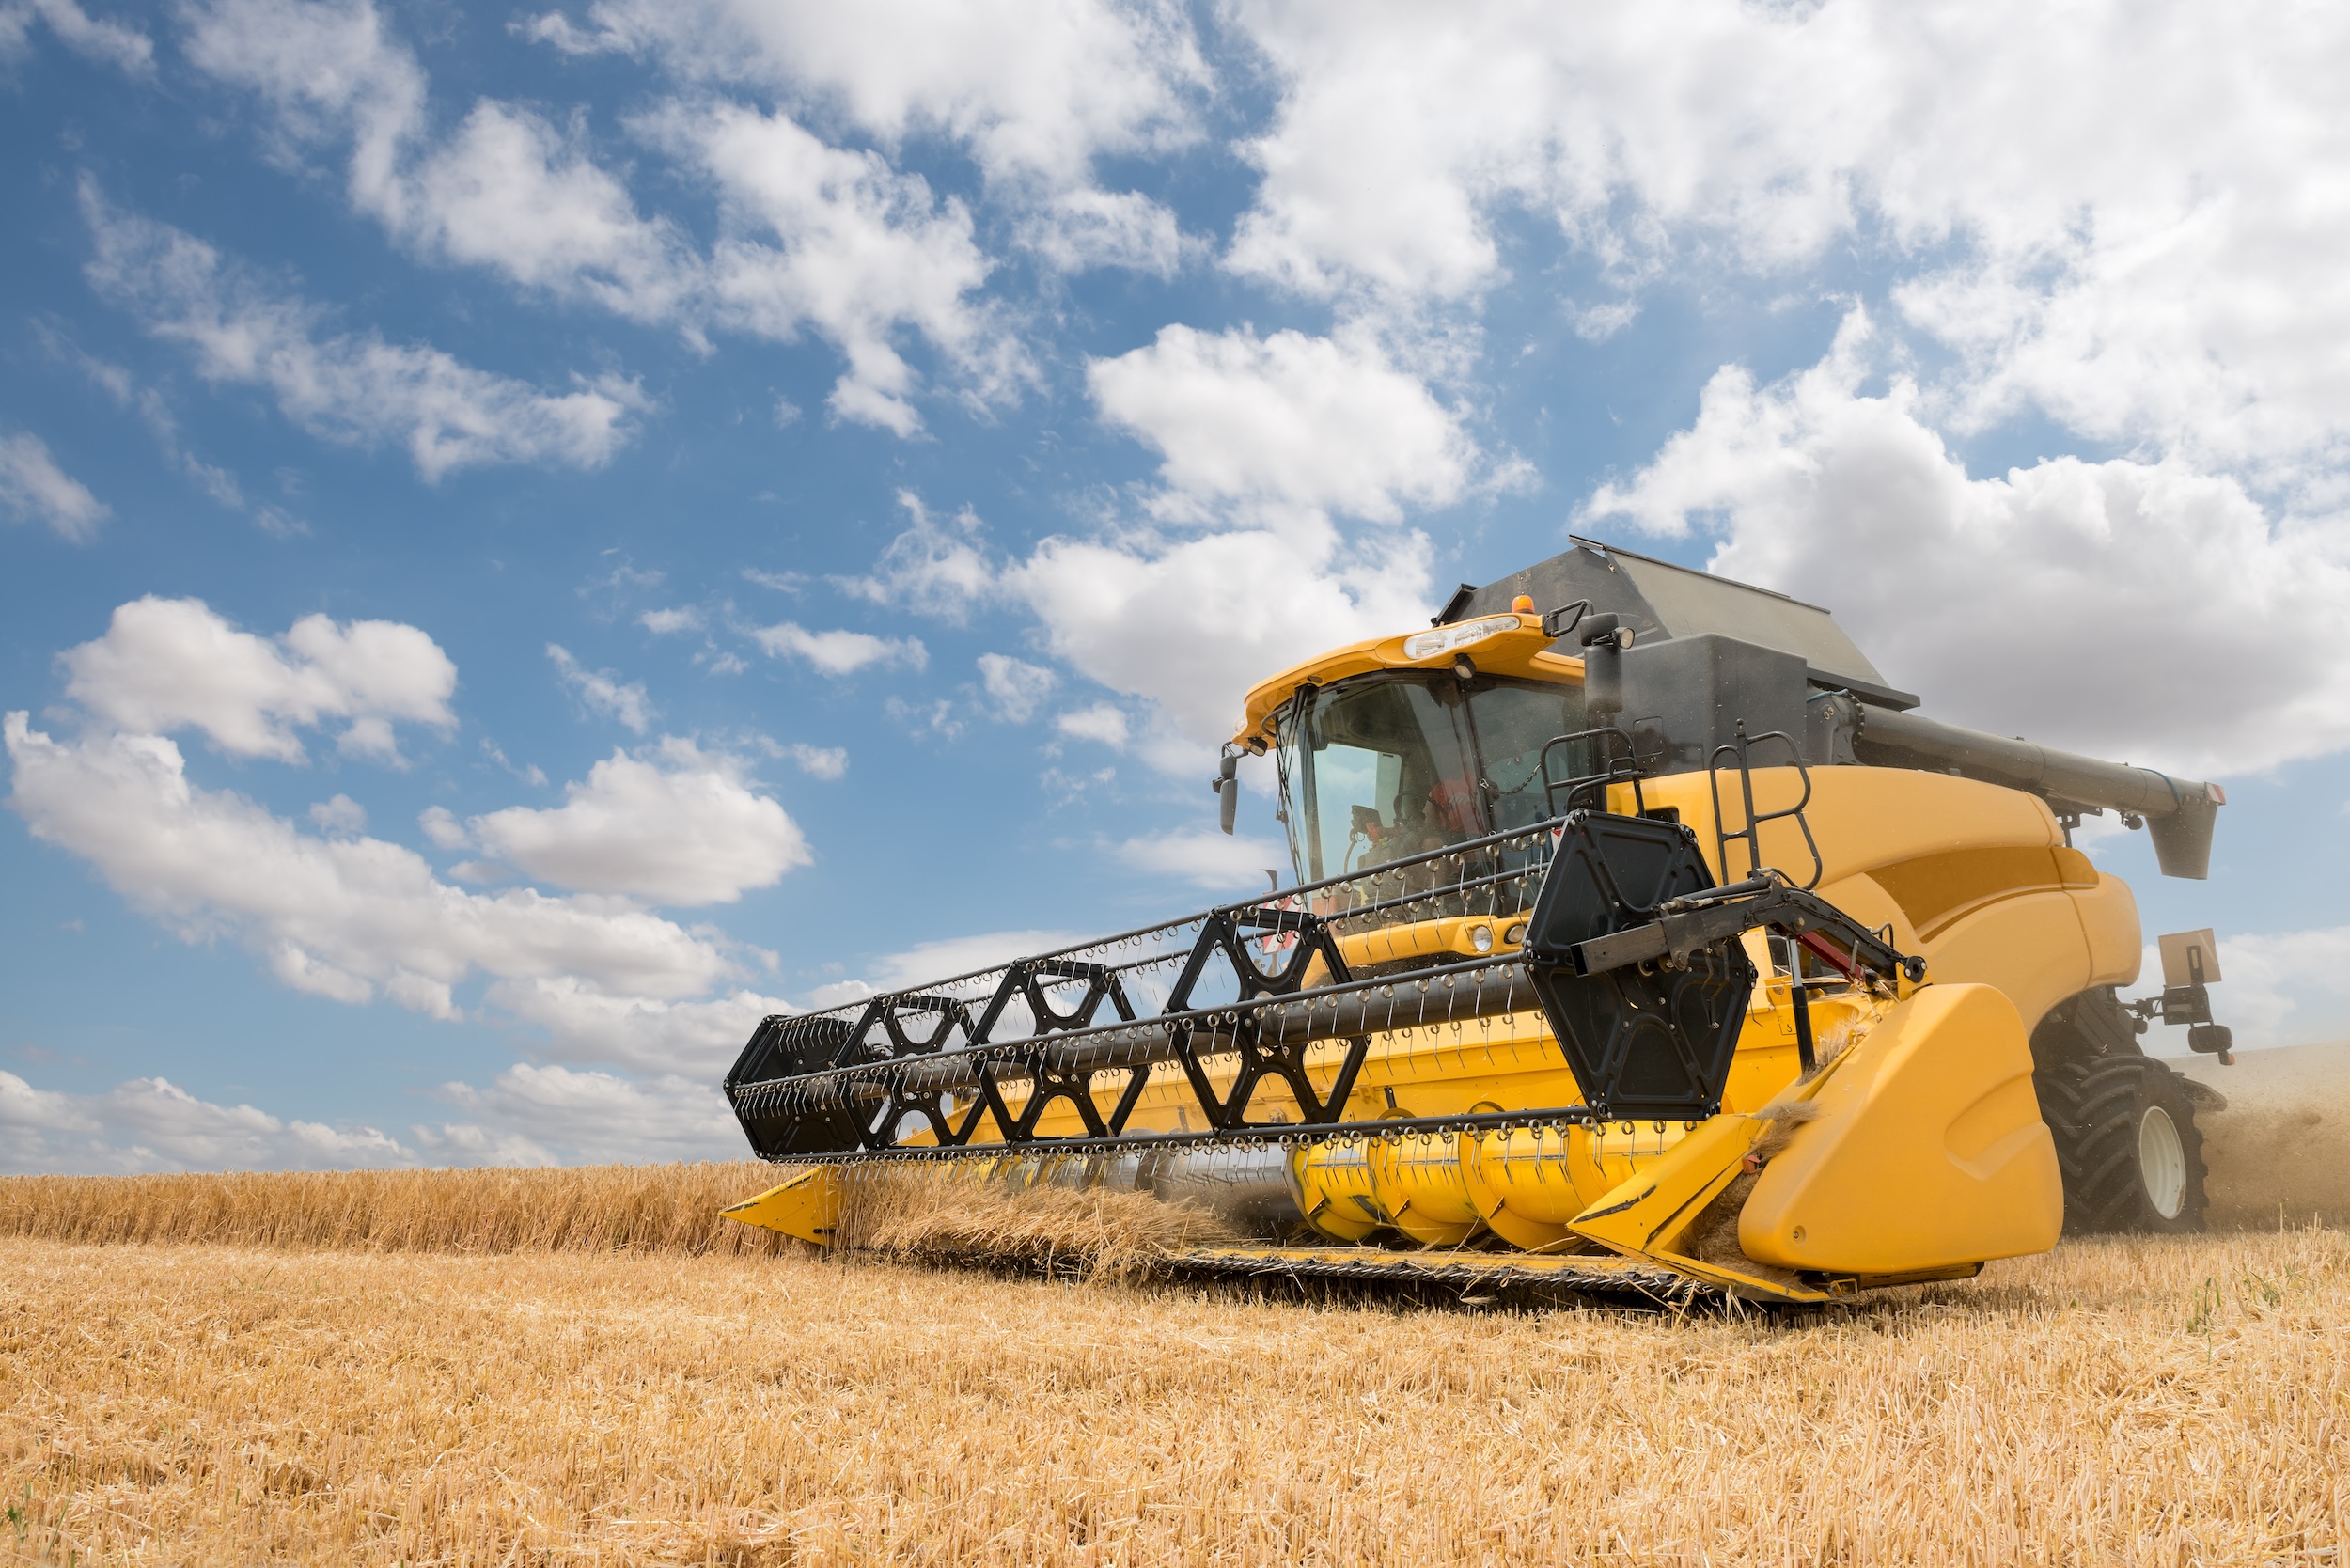
Before we get into the factors that shape how much a combine harvester actually ends up costing you, it helps to have a general sense of the pricing landscape. Combine harvester costs come in a pretty massive price range: from around $10,000 for an older, smaller used machine all the way up to over $1,000,000 or more for a fully loaded new flagship model.
Most late-model used combines trade somewhere in the price range of $100,000 to $400,000 range, depending on age, hours, and condition.
If you’re wondering how much a new combine harvester costs specifically, expect to start somewhere around the price range of $200,000 to $300,000 for a newer entry-level model, with mid-range and high-capacity machines climbing from there. At the top of the market, premium new models from major combine harvester manufacturers can comfortably exceed a cost of $500,000 to $700,000 fully configured.
Those pricing numbers represent the full spectrum of what’s available. How much a combine harvester costs for your specific operation depends on your acres, your crops, and what you actually need the machine to do. That’s exactly what the rest of our guide will help you figure out.
Factors That Impact How Much A Combine Harvester Will Cost

Understanding those wide combine harvester price ranges starts with understanding what you’re paying for in the first place. Several key variables drive combine harvester costs up or down, and knowing them helps you compare machines intelligently and find the best fit for your budget.
How Size And Harvesting Capacity Impact The Cost Of A Combine Harvester
Machine size is one of the most direct drivers of combine harvester price. Combines are built in different harvesting classes, and each step up the class ladder brings more processing capacity, more engine power, a larger grain tank, and faster throughput.
For a smaller or mid-sized farming operation, a lower-class combine harvester will do everything you need at a price that fits comfortably within your budget. For large-scale operations harvesting thousands of acres in tight weather windows, a higher-class combine harvester is a better fit for the job, and its cost reflects that capability.
The practical takeaway: match the machine to your acres. A combine harvester price that seems high in isolation is often more reasonable than it seems when you divide it across the number of productive acres it will cover each season.
The Cost Difference Between New vs. Used Combines
New or used is the biggest single lever you can pull to determine how much a combine harvester could cost you. A brand-new machine gives you the latest technology, full factory warranty coverage, and zero hours on the clock.
A used combine harvester gives you a significantly lower cost, and with the right inspection and history, it can deliver many more years of dependable service at a more approachable price point.
How much does a new combine harvester cost compared to the price of a used one? Generally speaking, a well-used machine can come in at 30 to 60 percent of the equivalent price of a new combine harvester, sometimes less, depending on hours and age.
That kind of spread is why the used combine market stays so active, and why it’s worth exploring thoroughly before committing to a new one.
Using Separator Hours To Determine How Much A Combine Harvester Will Cost
When evaluating used combine harvester prices, separator hours are the most important number on the spec sheet. Separator hours measure how long the threshing and separation system has been running, and they are the clearest indicator of mechanical wear on a used machine.
A used combine harvester with low separator hours (under 1,000 or so) will carry a higher price that approaches a similar cost to that of a new machine. As hours increase, the price of the combine harvester comes down accordingly, which creates some of the best value opportunities in the market.
Higher-hour combine harvesters are often the most negotiable on price, and with a solid inspection, many of these machines have plenty of productive seasons ahead.
Technology And Precision Agriculture Features That Drive Up Combine Harvester Price
When it comes to determining how much a combine harvester could cost you, it’s important to remember that modern combines can be equipped with GPS guidance, yield mapping, automated speed control, moisture sensing, and remote diagnostics.
These features deliver genuine daily value: better data, higher efficiency, and more precision across every acre you harvest. However, they can also drive up the cost of a combine harvester, which is worth understanding when comparing the price on various listings.
Factory-integrated precision ag packages on newer machines can add a meaningful amount to the base price of a combine harvester. When shopping, note exactly which technology features each machine includes, since two combine harvesters with a similar price may be configured quite differently under the hood.
It’s also worth asking whether any technology features carry annual software or connectivity subscription fees, as these recurring costs can drive up the lifetime cost of owning (or renting) a combine harvester.
Pricing Impact Of The Combine Threshing System: Conventional vs. Rotary
Combines use one of two primary threshing systems. Conventional combine harvesters, sometimes called straw-walker combines, carry a lower price and work exceptionally well for small grains like wheat, oats, and barley.
Rotary combines handle a broader range of crops with higher throughput and are common on larger, more diverse operations. Rotary combine harvesters carry a higher price, but for farms that depend on their capacity and versatility, that cost reflects real daily productivity.
When you see two combine harvesters that look similar in size but carry noticeably different prices, the threshing system is often part of that cost equation.
How Market Timing And Regional Conditions Impact The Cost Of A Combine Harvester
The cost of a combine harvester doesn’t exist in a vacuum. Equipment market conditions, regional demand, and where you are in the model cycle all play a role.
When manufacturers release new machine generations, the previous generation depreciates, and prices on those combine harvester models soften, creating a solid opportunity for buyers who don’t need necessarily need the latest technology on their farms.
Regionally, combine harvester prices can vary based on local crop mix and inventory levels. Fall listings, right after harvest season, typically bring the widest selection of used combines to market as farmers upgrade or transition out, which tends to be a buyer-friendly time to shop.
Elements That Aren’t Built Into The Price You Pay For A Combine Harvester

One of the most useful things you can know going into a combine harvester purchase is that the listed price is almost always the starting point, not the complete cost picture. Understanding the additional line items up front helps you budget accurately and walk into a price negotiation fully prepared.
Grain Headers And Harvest Attachments
A combine harvester is typically sold as a base machine. The header (the front attachment that cuts and gathers the crop) is priced and purchased separately in almost every transaction.
Header costs vary based on type and cut width, and depending on your crops, you may eventually want more than one configuration.
The good news is that used headers are widely available through equipment auctions and third-party marketplaces at prices well below dealer new pricing, which is a great way to get fully outfitted while keeping your total cost for your combine harvester down.
Freight And Delivery Of Your Combine Harvester
Moving a combine harvester from the seller or dealer to your farm requires a flatbed or lowboy trailer. Freight costs depend on the distance involved, but this is a real line item that’s worth building into your budget early, especially when buying remotely through an auction or private sale.
Pre-Purchase Inspection Of Your Combine Harvester
For new machines purchased through a dealer, a pre-delivery inspection is part of the standard process. When purchasing a used combine, an independent inspection from a qualified ag mechanic is one of the smartest steps you can take.
Knowing the mechanical status of a combine harvester before you finalize a purchase gives you full confidence in your decision and the price you’re paying. And if the inspector finds anything worth discussing, it gives you useful information to leverage during the negotiation process.
A thorough inspection typically runs from a few hundred to a couple thousand dollars, which is a very small number relative to the total price of the combine harvester and its attachments.
Insurance And Annual Maintenance
Farm equipment insurance and routine annual maintenance are the ongoing operating costs that come with owning a combine harvester. Insurance protects the substantial investment and price you’ve made.
Routine maintenance (belts, bearings, fluids, and seasonal prep) keeps the machine running at its best and extends its useful life.
Both are predictable, plannable costs, and building them into your annual budget from the start makes owning a combine harvester sustainable for the long haul.
How To Decide Between The Cost Of Renting vs Buying A Combine Harvester
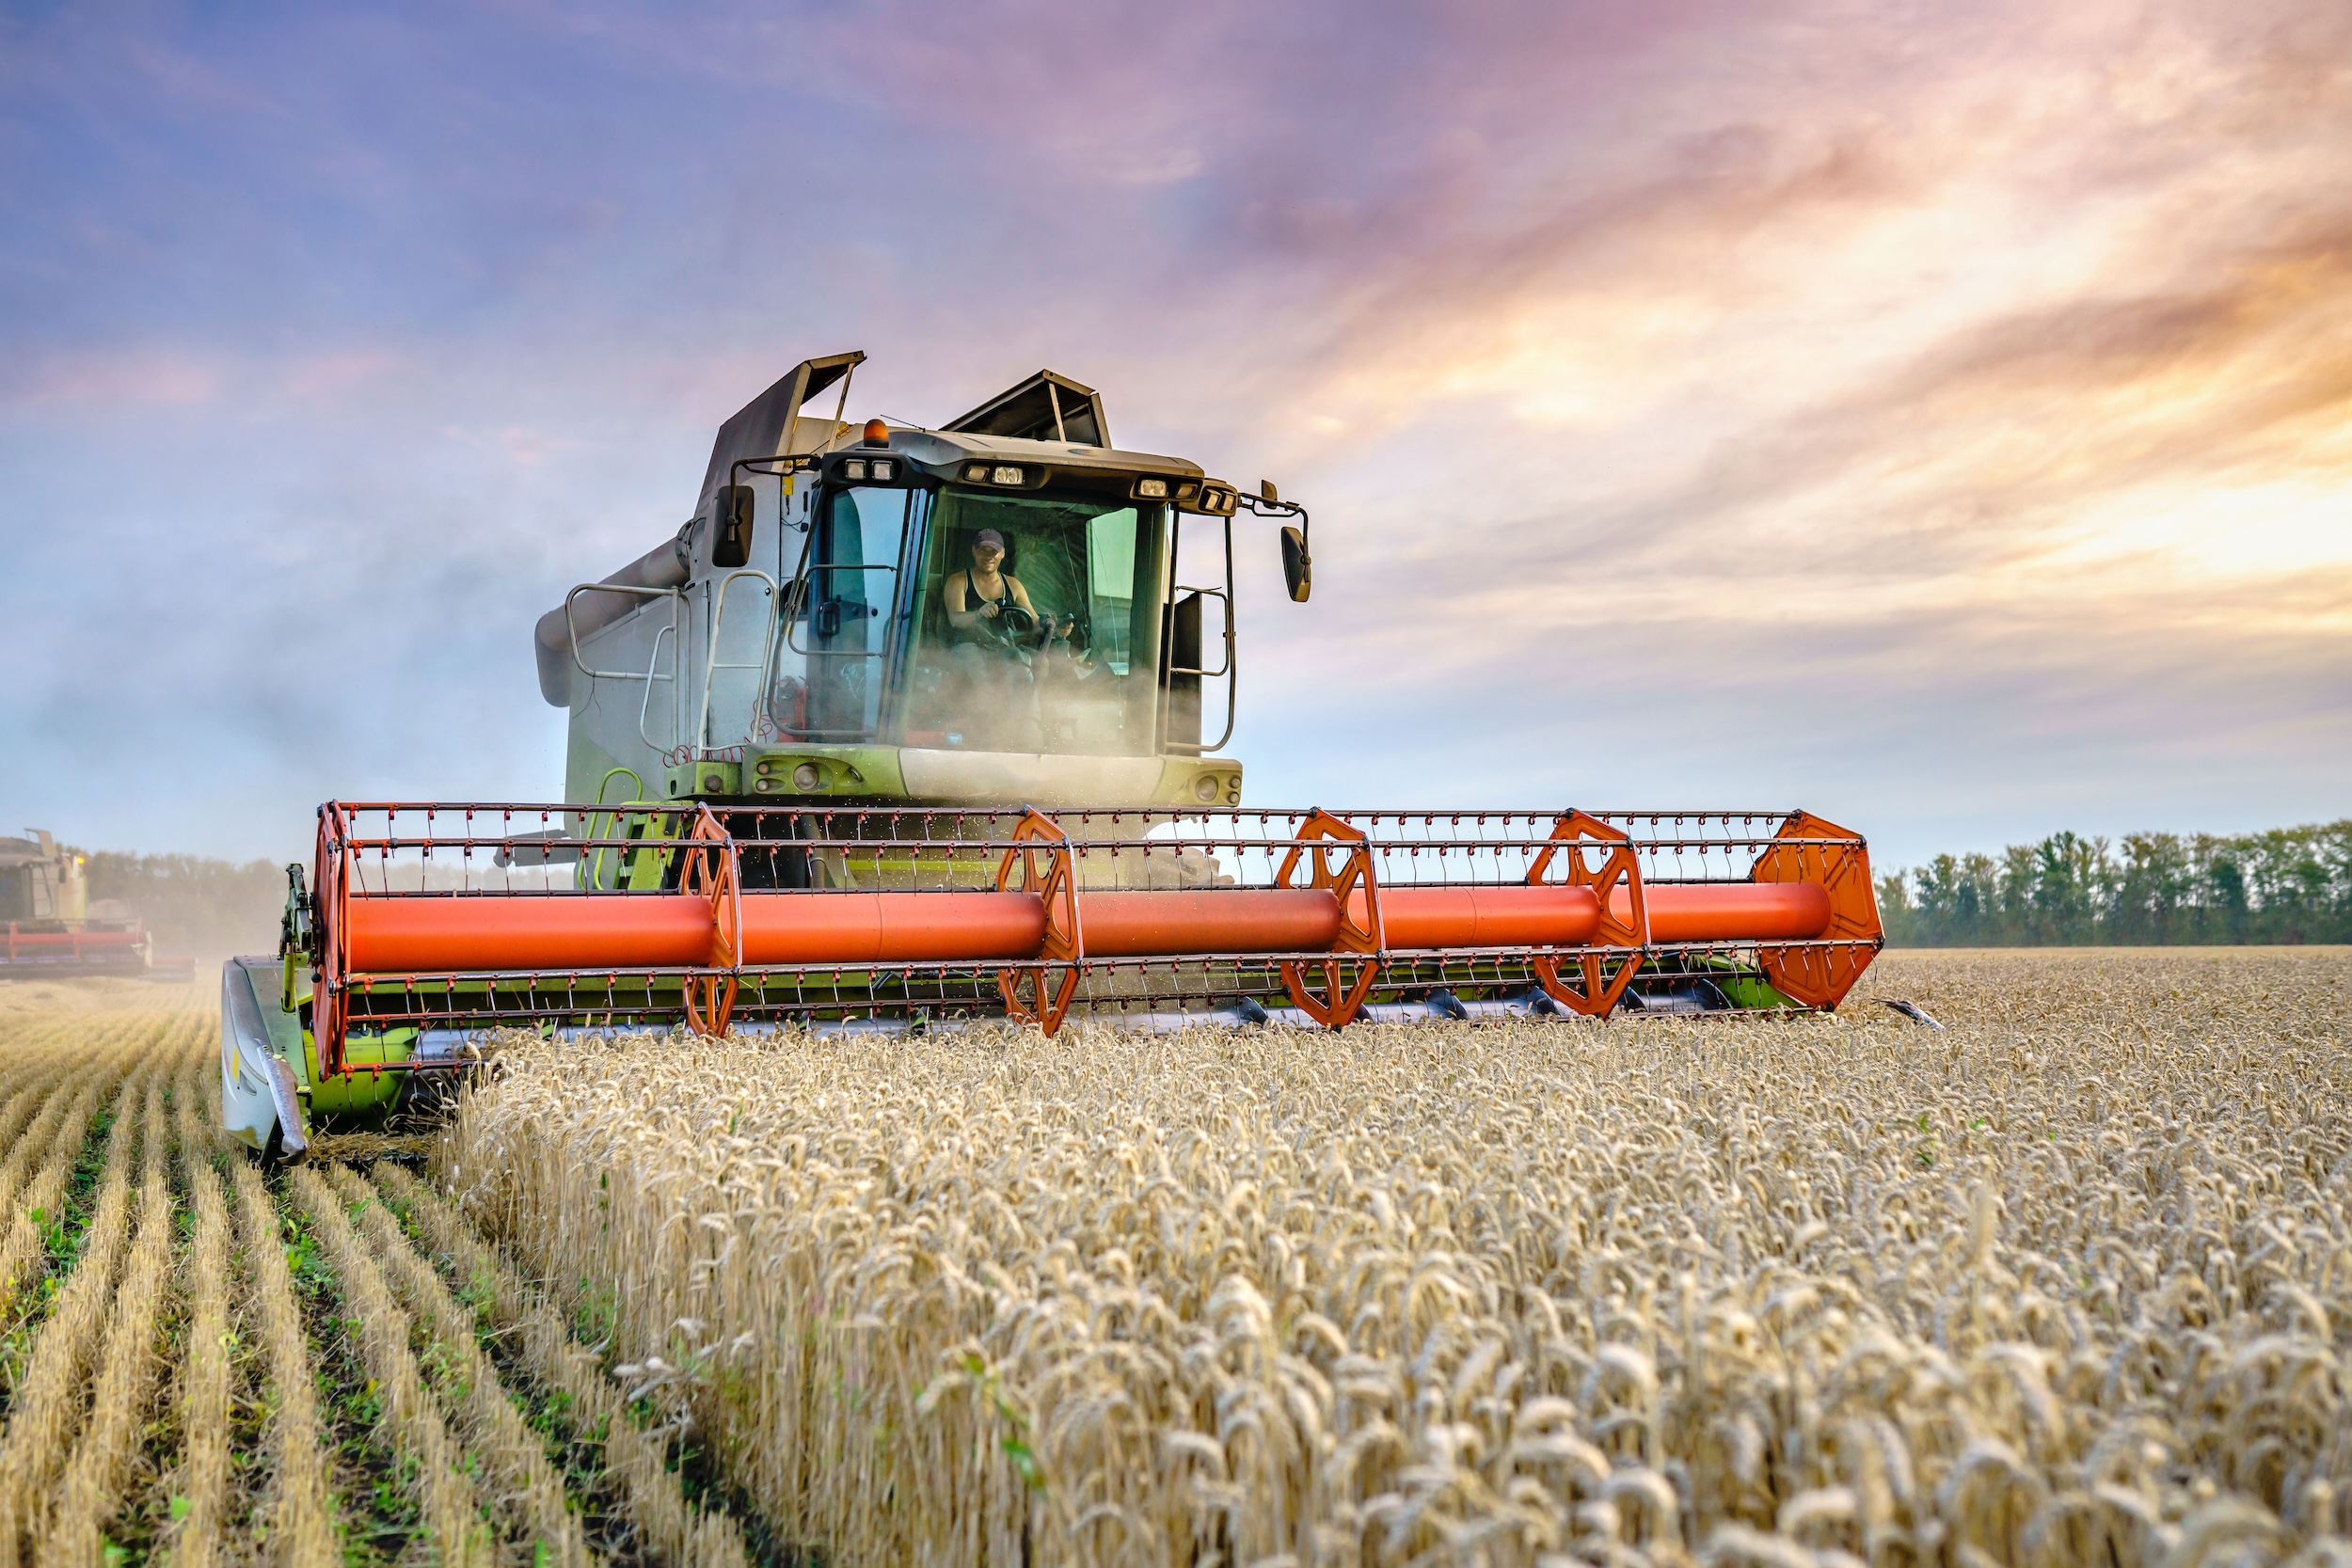
When farmers look at how much a combine harvester can cost, one of the first questions that comes up is whether ownership is the right path for them.
Renting, custom hiring, and leasing are all strong options, and for certain operations, and sometimes they make financial sense. In other scenarios, owning a combine harvester truly is the most viable path from a long-term cost perspective.
Let’s talk through the factors you’ll want to consider:
The Acreage Foundation
Acreage is the clearest starting point for this analysis. The more acres you harvest per season, the more efficiently a purchased combine harvester pays for itself, even at a higher price tag.
Operations farming larger acreages can spread the cost of a combine harvester across more productive use, which makes ownership increasingly efficient over time.
For smaller acreages where a machine wouldn’t be in the field very many hours per season, renting or custom hiring often delivers more value per dollar.
That said, as your operation grows, the economics of buying a combine harvester begin to make more financial sense. Many farmers start by renting or custom hiring, then make the move to ownership when their acreage supports it.
How Much Does It Cost To Rent A Combine Harvester?
If you’re farming a smaller acreage or want to run a machine type before committing to a purchase, renting a combine harvester is a practical and flexible path from both a cost and logistics perspective.
Daily rental cost for a combine harvester typically runs around $1,000 to $3,000, depending on model and region, with hourly rates in the $150 to $225 range for larger machines.
Maintenance is typically the rental provider’s responsibility, which can simplify your harvest season logistics considerably.
Custom Harvesting
Custom harvesting, hiring a contractor who brings both their combine and an operator, handles a significant share of crop acres in major grain states.
Custom harvesting rates typically run $35 to $45 per acre, but this cost can also vary quite a bit, depending on your region and crop type.
For operations with limited labor, or for growers who want to focus their energy on grain hauling and logistics during harvest, custom hiring can be an efficient, more price friendly way to get the crop in without taking on the full cost of combine harvest ownership.
Leasing Your Combine Harvester
Leasing a combine sits between renting and buying. It typically requires less upfront capital than purchasing outright, provides consistent access to a machine, and some lease structures allow you to upgrade to a newer model at the end of the term.
Lease payments are often fully deductible as a business expense, which can be a meaningful tax advantage. If staying current with technology matters to your operation, leasing is worth a conversation with your ag lender.
Choosing The Right Path
The right choice among buying, renting, leasing, and custom hiring comes down to your acreage, your crops, your labor, and your cash flow.
Farmers harvesting large acreages with tight timing windows get the most from owning a combine harvester, even with the up-front cost factored in.
Farmers who are scaling up or running smaller operations often find that the flexibility of leasing or renting a combine harvester works better at their current stage. There’s no wrong answer; just the right answer for where your operation is today and where it’s headed.
How To Finance The Purchase Cost Of A Combine Harvester

Combine harvester costs at the higher end of the market represent one of the largest single investments some farming operations make, and most buyers finance at least part of the purchase price.
The ag lending world is well-equipped for this, and you have several different routes to choose from:
Manufacturer and Dealer Financing: The major equipment manufacturers offer their own financing programs, and dealers frequently run promotional rates during key buying seasons. These programs are convenient and sometimes very competitive for financing, especially for new combine harvesters with higher price tags. Comparing rates from at least one outside lender gives you a fuller picture and makes sure you’re getting the best deal available.
Farm Credit and Agricultural Lenders: Farm Credit institutions specialize in agricultural lending and are often one of the strongest options for financing the combine harvester purchase price. Regional ag banks and credit unions with farm lending experience are worth contacting as well.
USDA Farm Service Agency Loans: The USDA Farm Service Agency offers loan programs specifically designed to help farmers access the financing they need to grow. FSA Operating Loans can be used to purchase farm equipment, including combine harvesters, with terms built around the realities of farm income and cost structures. Newer farmers and operations looking for flexible financing will find FSA programs especially worth exploring.
Section 179 Tax Deduction: The IRS Section 179 deduction allows farm businesses to deduct the full purchase price of qualifying equipment in the year of purchase rather than spreading depreciation across multiple years. On a combine harvester purchase, this can meaningfully improve your first-year tax position and reduce your effective combine cost. A conversation with your tax advisor is critical to understanding your options.
How To Find A Combine Harvester At The Best Value For The Cost
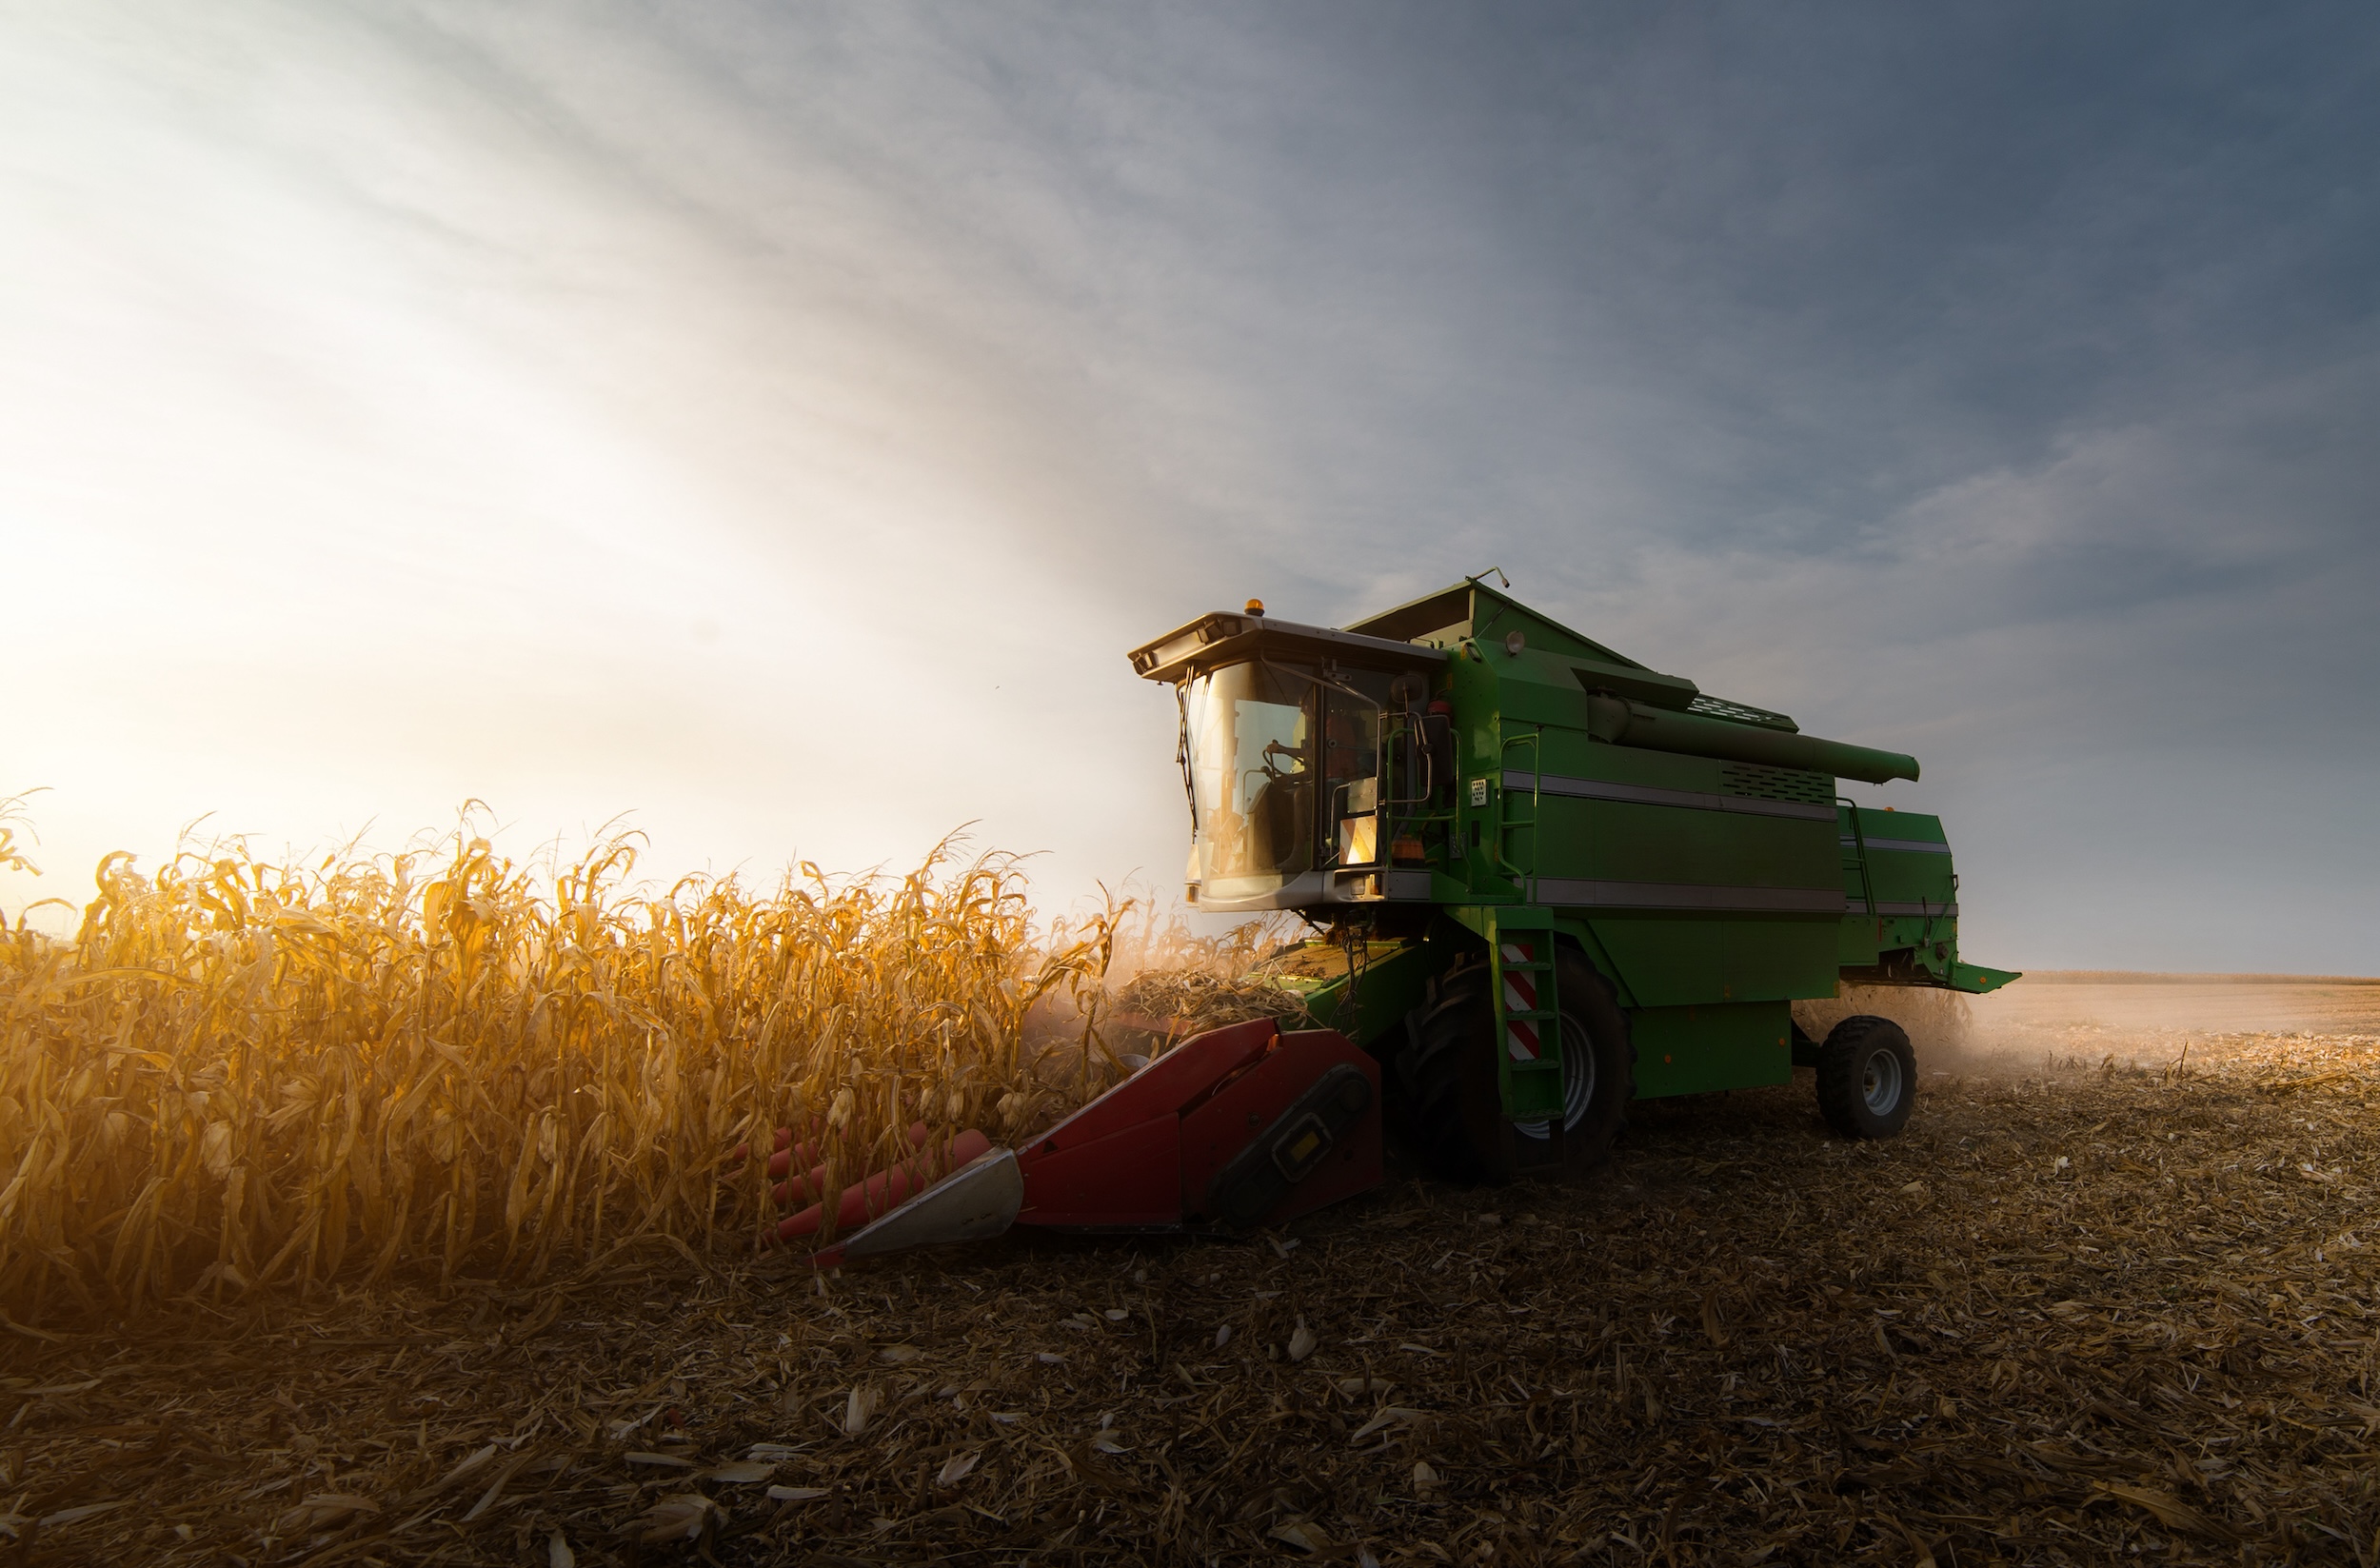
Understanding combine harvester prices and how much you can expect this equipment to cost you is one thing. Knowing how to shop for the best value is another. Here are the habits that help farmers find the right combine harvester at the right price.
Shop In The Fall: Fall is prime time for used combine inventory. After the harvest wraps up, farmers who are upgrading or transitioning their operations list their machines, which means more selection and more motivated sellers (which can often translate to a lower cost for that combine harvester you have your eye on). Shopping in the fall or early winter typically gives you more options and a stronger negotiating position than you’d find in the spring.
Focus On Hours Over Year: When comparing used combine harvester price tags, prioritize separator hours over model year to truly understand the value in relation to the cost. A machine with fewer hours and a slightly older year often represents better value than a newer machine with significantly more hours on it. Always ask for a full maintenance history alongside the hour meter reading. A seller who can provide detailed records cared for the equipment, and that history supports the asking price for the combine harvester.
Commission An Independent Inspection: An independent pre-purchase inspection gives you a clear, objective picture of your combine harvester’s mechanical condition before you commit to the price. It’s also a useful tool for price negotiation. If the inspector identifies items that need attention, that’s a fair and constructive basis for revisiting the combine harvester with the seller. This step is especially valuable when buying through an auction or private sale.
Compare Across Channels: Traditional dealerships are a great starting point for understanding what a given machine class should cost and for exploring warranty and trade-in options for combine harvesters. Equipment auctions and third-party marketplaces are where you’ll often find the most competitive prices for a combine harvester, because you’re working directly with motivated sellers without dealer overhead built into the price. Browsing both channels gives you a full picture of the market and helps you recognize genuine value when you see it.
Explore The Used Header Market: Headers and attachments depreciate quickly and are widely available through equipment auctions and marketplaces at prices well below new dealer pricing. Pairing a solid used combine harvester with a used header sourced separately is a smart way to get fully operational without paying new prices across the board. And it’s a great way to manage how much a combine harvester could cost you in total, without compromising your harvest capability.
Find The Right Combine Harvester, At The Right Price, For Your Farm
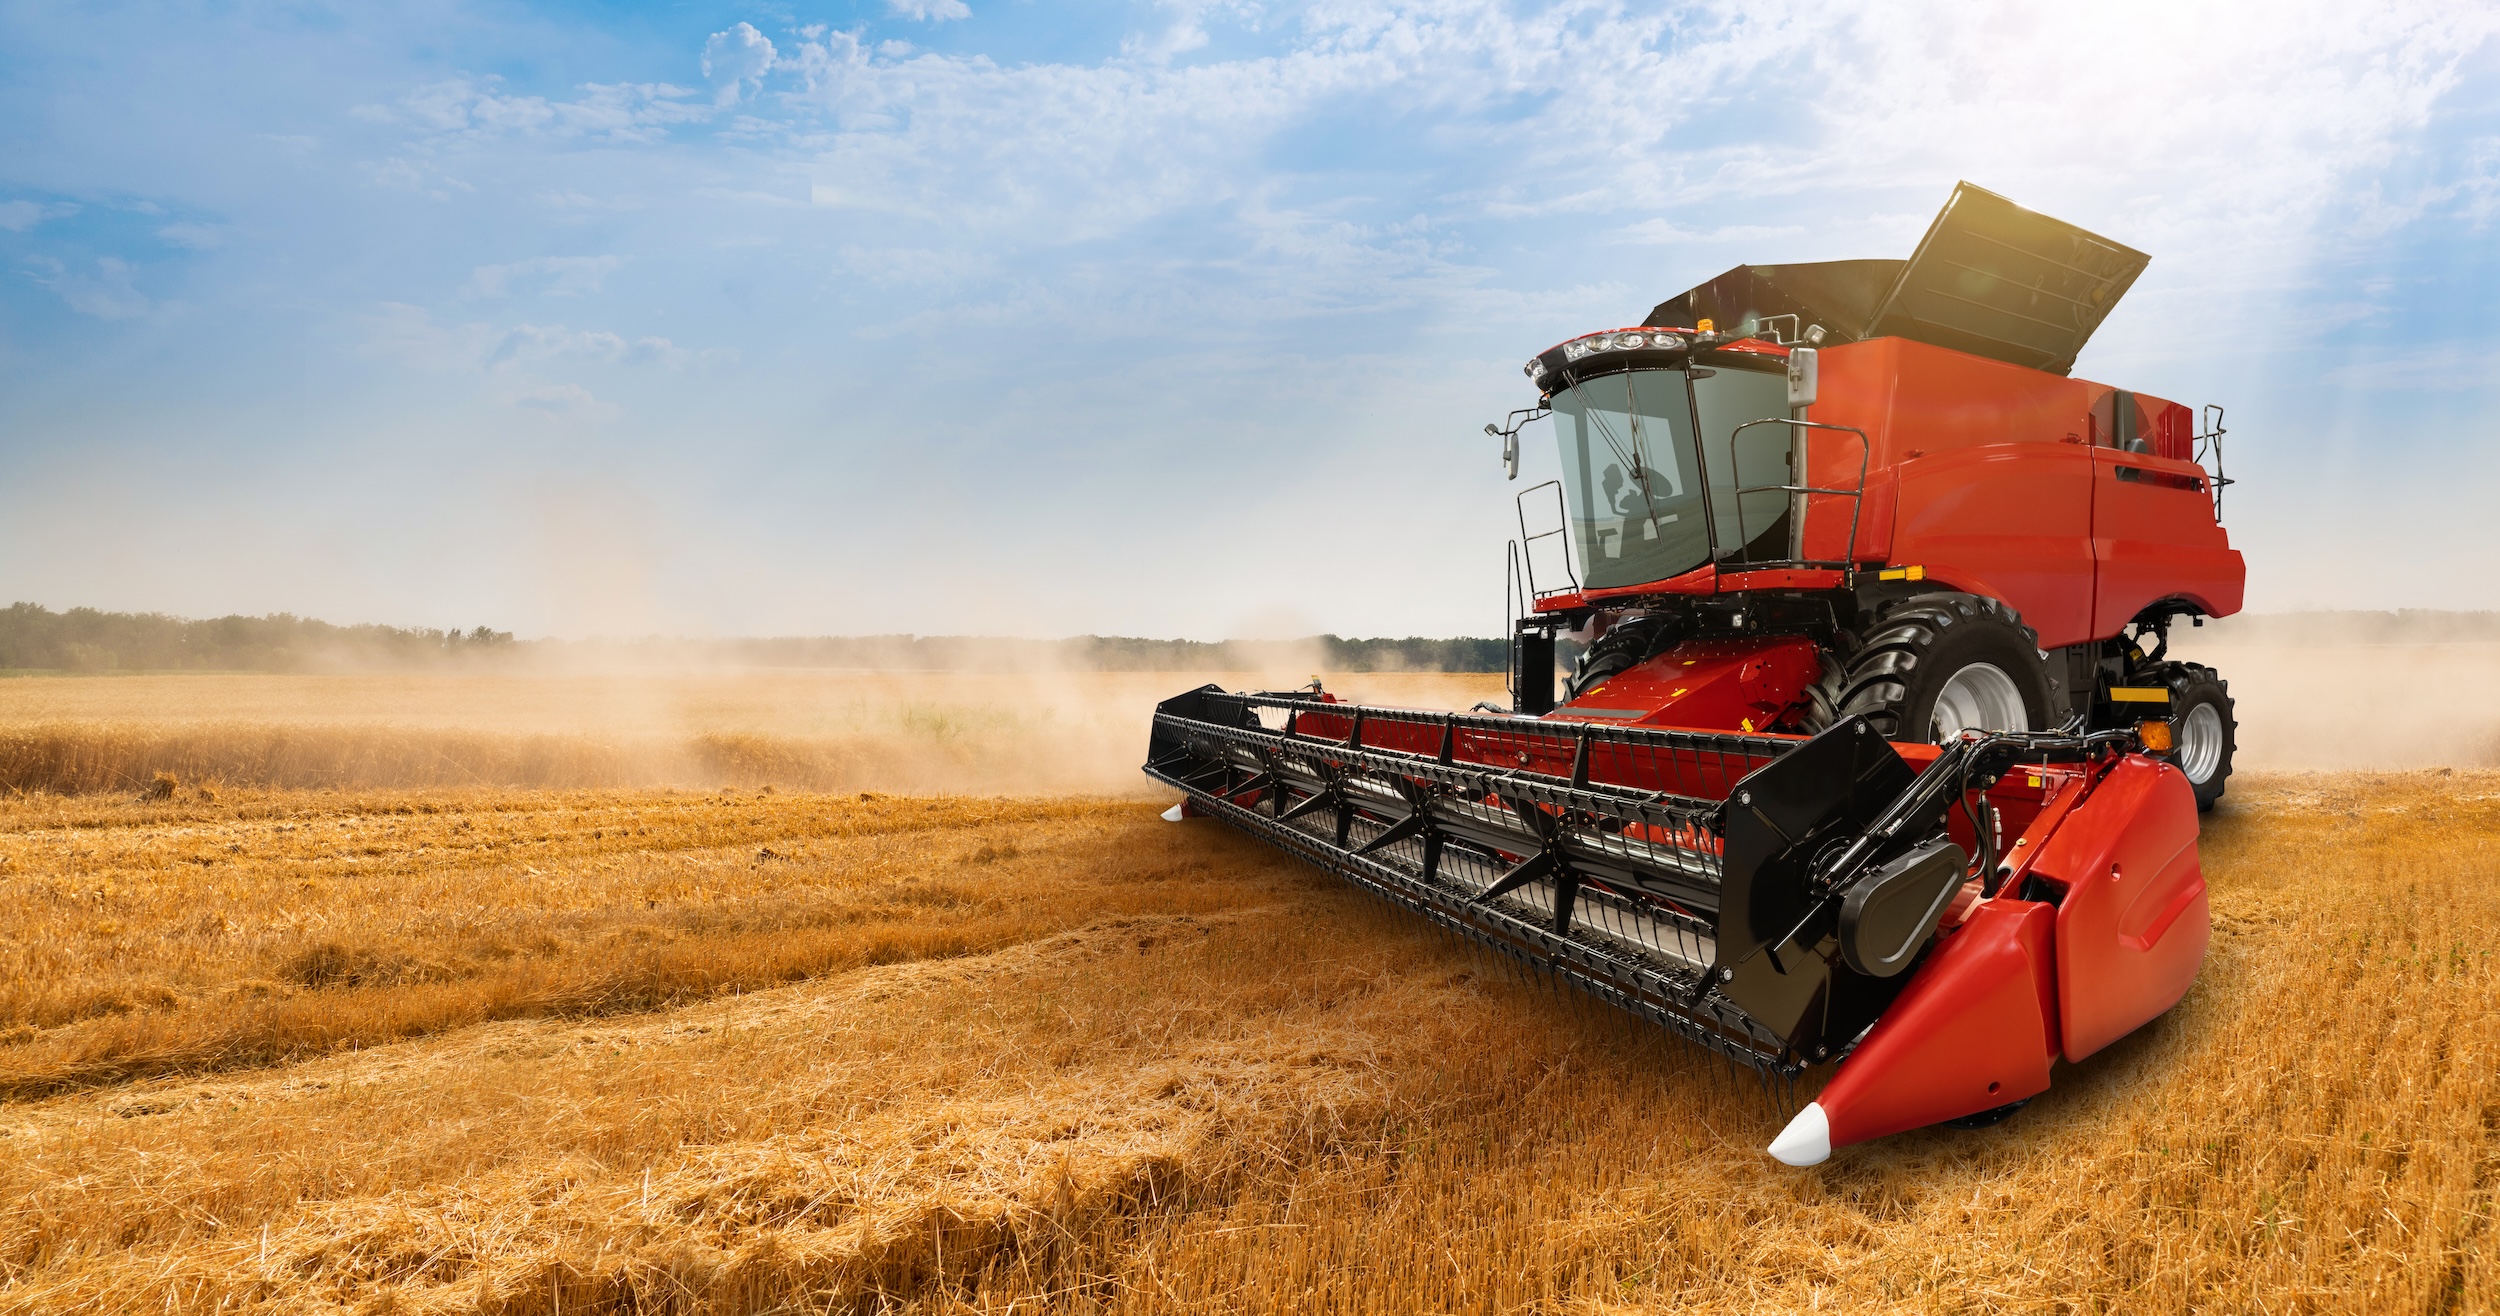
You’ve done the research. You understand what factors can impact how much a combine harvester could cost your farm, what to budget beyond the sticker price, how to think through renting versus buying, and how to shop the market effectively. That’s a strong foundation for making a confident, well-informed purchase decision.
At Hayden Outdoors, our equipment marketplace connects equipment sellers directly with buyers across the country. Sellers list their own equipment directly, which means transparent pricing and direct communication; no dealer overhead stands between you and a fair price for a combine harvester.
Whether you’re looking for a late-model combine to power a growing operation or a solid used machine to get your farm off to a strong start, browse what’s available.
View Combines and Harvesting Equipment
The information in this article is for educational purposes only and should not be considered legal or tax advice. Always consult with attorneys, tax professionals, and financial advisors before making decisions about your farming operation.
How To Clear Land: The Complete Step-By-Step Clearing Guide
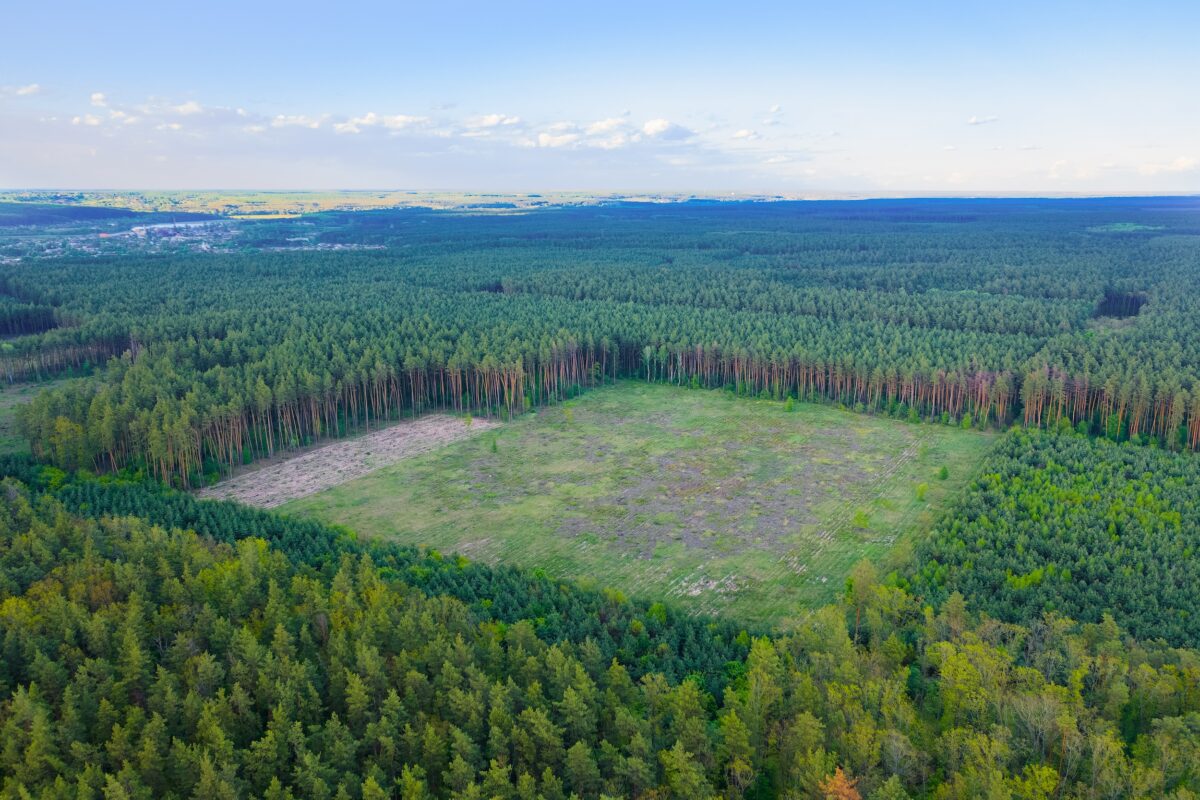
Whether you’re preparing a homesite, creating pasture, or developing recreational property, knowing how to clear land properly is a critical element to using your property to the fullest. Clearing ground involves more than simply removing trees and other plant life. It’s about understanding the right methods, timing, and techniques that will save you money while protecting your investment for years to come.
At Hayden Outdoors, we specialize in making the most out of life on the land. We regularly work with landowners looking to optimize the usage of their property, whether it’s clearing space for their cattle ranch or simply increasing the value of their acres.
Our guide will walk you through everything you need to know about land clearing, from choosing the right method to executing each step with confidence.
Table Of Contents
How Long Should You Expect It To Take To Clear An Acre Of Land?

The time required for land clearing varies dramatically based on several factors. Professional crews can clear anywhere from one to fifteen acres per day depending on the method and conditions, but understanding what influences these timelines can help you plan realistic schedules.
Vegetation density plays the largest role in how to clear land efficiently. Light vegetation with sparse brush might take just 1-2 days per acre for a professional crew. Moderate density with mixed brush and small trees can extend this timeline to 3-5 days per acre. Heavy forests with large mature trees can require 1-2 weeks per acre when using traditional land clearing methods.
The type of equipment makes an enormous difference in how long it takes to clear land. You can expect forestry mulchers to process 1-3 acres per day when dealing with moderate vegetation, while large commercial mulchers are capable of taking on 15 acres daily (assuming ideal conditions). Traditional bulldozing and grubbing typically clears 1-3 acres per day depending on tree density.
Terrain and accessibility also affect how long it takes to clear land. Flat, easily accessible land clears faster than steep slopes or rocky terrain. Wet or frozen ground creates different challenges, depending on your region and season. Areas requiring careful navigation around obstacles or preservation of specific trees naturally take longer.
Ground Clearing Pro Tip: For DIY projects, we recommend multiplying professional estimates by three to five times. A quarter-acre with light brush might take several weekends for a landowner working alone. Larger properties or denser vegetation can stretch into months of weekend work.
The Different Methods Of Land Clearing And How They Can Change Your Approach
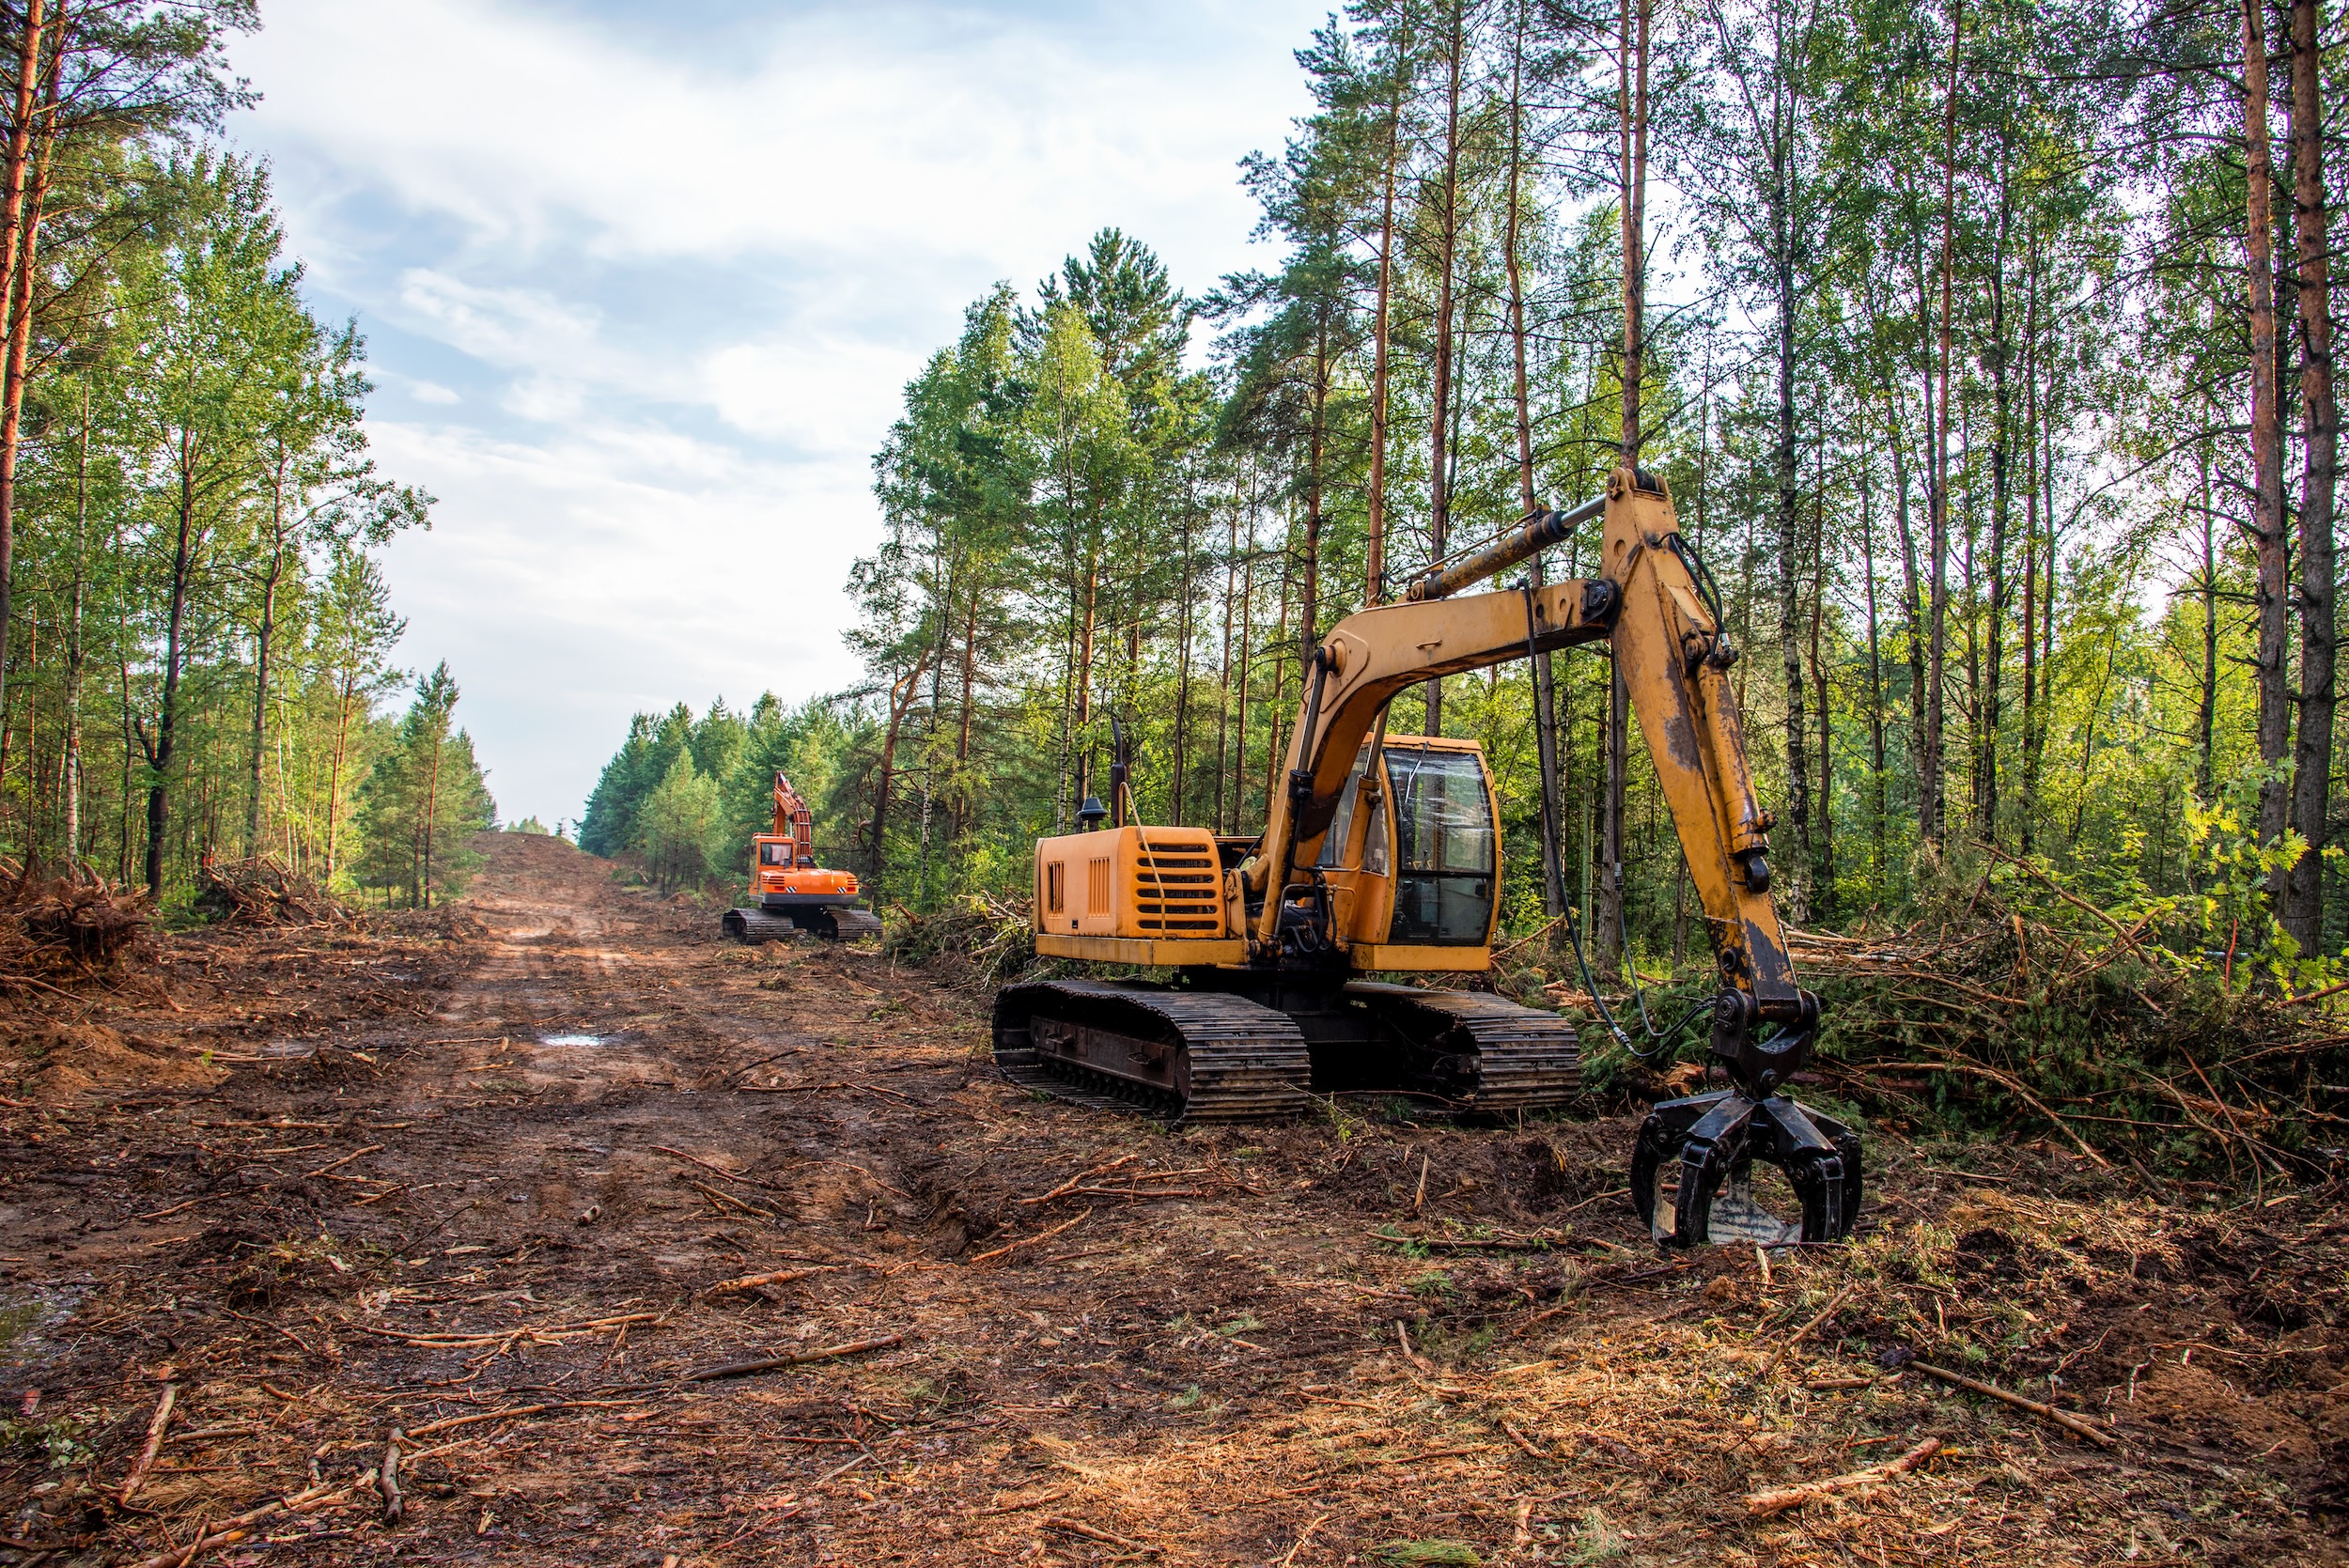
Choosing the right land clearing method affects everything from your budget to soil health to how quickly you can use your property. Each approach has distinct advantages for specific situations. Here’s the breakdown:
Forestry Mulching
This increasingly popular method uses a single machine to grind vegetation into nutrient-rich mulch that stays on-site. The process involves a rotating drum or disc with hardened steel teeth that shreds trees, brush, and undergrowth into chips.
Forestry mulching typically costs $400-$800 per acre for moderate vegetation, with denser areas reaching $1,000-$2,500 per acre. The method excels at clearing properties where you want to preserve topsoil and prevent erosion. It’s ideal for pasture preparation, fire prevention zones, and recreational land where you’re not building immediately.
The mulch layer left behind when clearing land this way suppresses weeds, retains moisture, and returns nutrients to the soil as it decomposes. However, forestry mulching typically can’t handle trees larger than 8-12 inches in diameter, and you’ll still see stumps at ground level rather than complete removal.
Grubbing And Dozing
When it comes to how to clear land, traditional bulldozing remains the go-to method for construction sites requiring complete vegetation removal. This approach uses heavy equipment to push over trees and excavate root systems entirely.
The major advantage of this land clearing method is its thoroughness. Everything gets removed, leaving a clean slate ready for grading and construction. Bulldozers handle any tree size and cover large areas quickly. Costs range from $1,500-$5,600+ per acre, depending on vegetation density.
The significant downside is soil disturbance. Grubbing destroys topsoil structure, creates erosion risks, and leaves large holes requiring fill. You’ll also face substantial debris disposal costs unless you can burn on-site or repurpose the material.
Cut And Grind
This selective ground clearing method combines chainsaw felling with stump grinding. It works well for lighter density clearing or when you want to preserve certain trees while removing others.
The approach offers more control than bulldozing and less soil disturbance. Professional services typically charge $1,000-$3,000 per acre. The cut and grind land clearing method is popular for residential lots and properties where maintaining existing landscape features matters.
Cut and grind takes longer than other land clearing methods but provides a cleaner finish. Roots remain underground but won’t sprout new growth with proper stump grinding.
Hand Clearing
For very small areas, tight spaces, or selective thinning, manual clearing with chainsaws and hand tools offers maximum control. This method makes sense for properties under a quarter-acre or for clearing around existing structures where heavy equipment can’t access.
The only significant costs are tools and your labor time. However, the physical demands and time investment make this impractical for larger projects. Most landowners use hand clearing to supplement professional services rather than as a primary method.
Land Clearing Pro Tip: Before clearing land on your property, you may want to consider doing an assessment of available resources and material value on the land. This could include anything from timber to minerals on the property. Extracting resources in the land clearing process can help offset the costs of clearing the ground, and anyone who wants to purchase those resources may assist in covering some of the land clearing costs.
How Time Of Year Impacts The Land Clearing Process

When learning how to clear land effectively, it’s important to keep in mind that seasonal timing affects equipment performance, ground conditions, and overall project success.
Fall: The Land Clearing Sweet Spot
Many land clearing professionals consider fall the optimal season for clearing ground. Cooler temperatures reduce heat stress on workers and equipment, and ground conditions remain firm in most regions, supporting heavy machinery without the mud of spring or frozen challenges of winter.
Deciduous trees drop their leaves, improving visibility and making it easier to identify what needs clearing. Wildlife nesting seasons have ended, reducing environmental concerns. And contractors often offer better ground clearing rates during the fall, since demand typically decreases after the summer peak season.
Winter: Frozen Ground Advantages
Winter land clearing works exceptionally well in regions with frozen ground. The frozen conditions provide excellent support for heavy equipment and prevent the mud issues that plague spring projects. And snow cover can actually protect topsoil during clearing operations.
Dormant vegetation is easier to see and assess when you do your ground clearing in the winter months, and lower contractor demand often means better pricing. However, the downside is that shorter daylight hours limit daily productivity, and extreme cold can create equipment challenges.
Spring: Planning And Preparation
Spring offers moderate temperatures and, once the ground firms up, good working conditions for land clearing. The season works well for projects that need completion before summer construction starts.
The main challenge of figuring out how to clear land in the spring comes from the wet and muddy conditions, especially during the early spring thaw. Equipment can get bogged down, and wet soil is more susceptible to compaction damage. Many regions also have nesting bird restrictions during spring that may limit when you can clear.
Summer: Maximum Accessibility
Summer provides dry ground conditions and long work days. Visibility through full foliage helps you see exactly what you’re clearing. This is peak season for land clearing, which often means higher contractor rates and longer wait times for scheduling.
That said, heat creates worker safety concerns and increases fire risk in dry regions, so if you’re trying to figure out how to clear land in a high-risk region, you’ll need to factor this in. Many areas implement burn bans during summer, eliminating controlled burning as an option for debris disposal.
At the end of the day, the best season for your land clearing project depends on your region, the ground clearing method you choose, and your timeline. In northern climates, late fall and winter often work best. Southern regions may find winter ideal for avoiding summer heat while maintaining good ground conditions.
Equipment Needed For Land Clearing
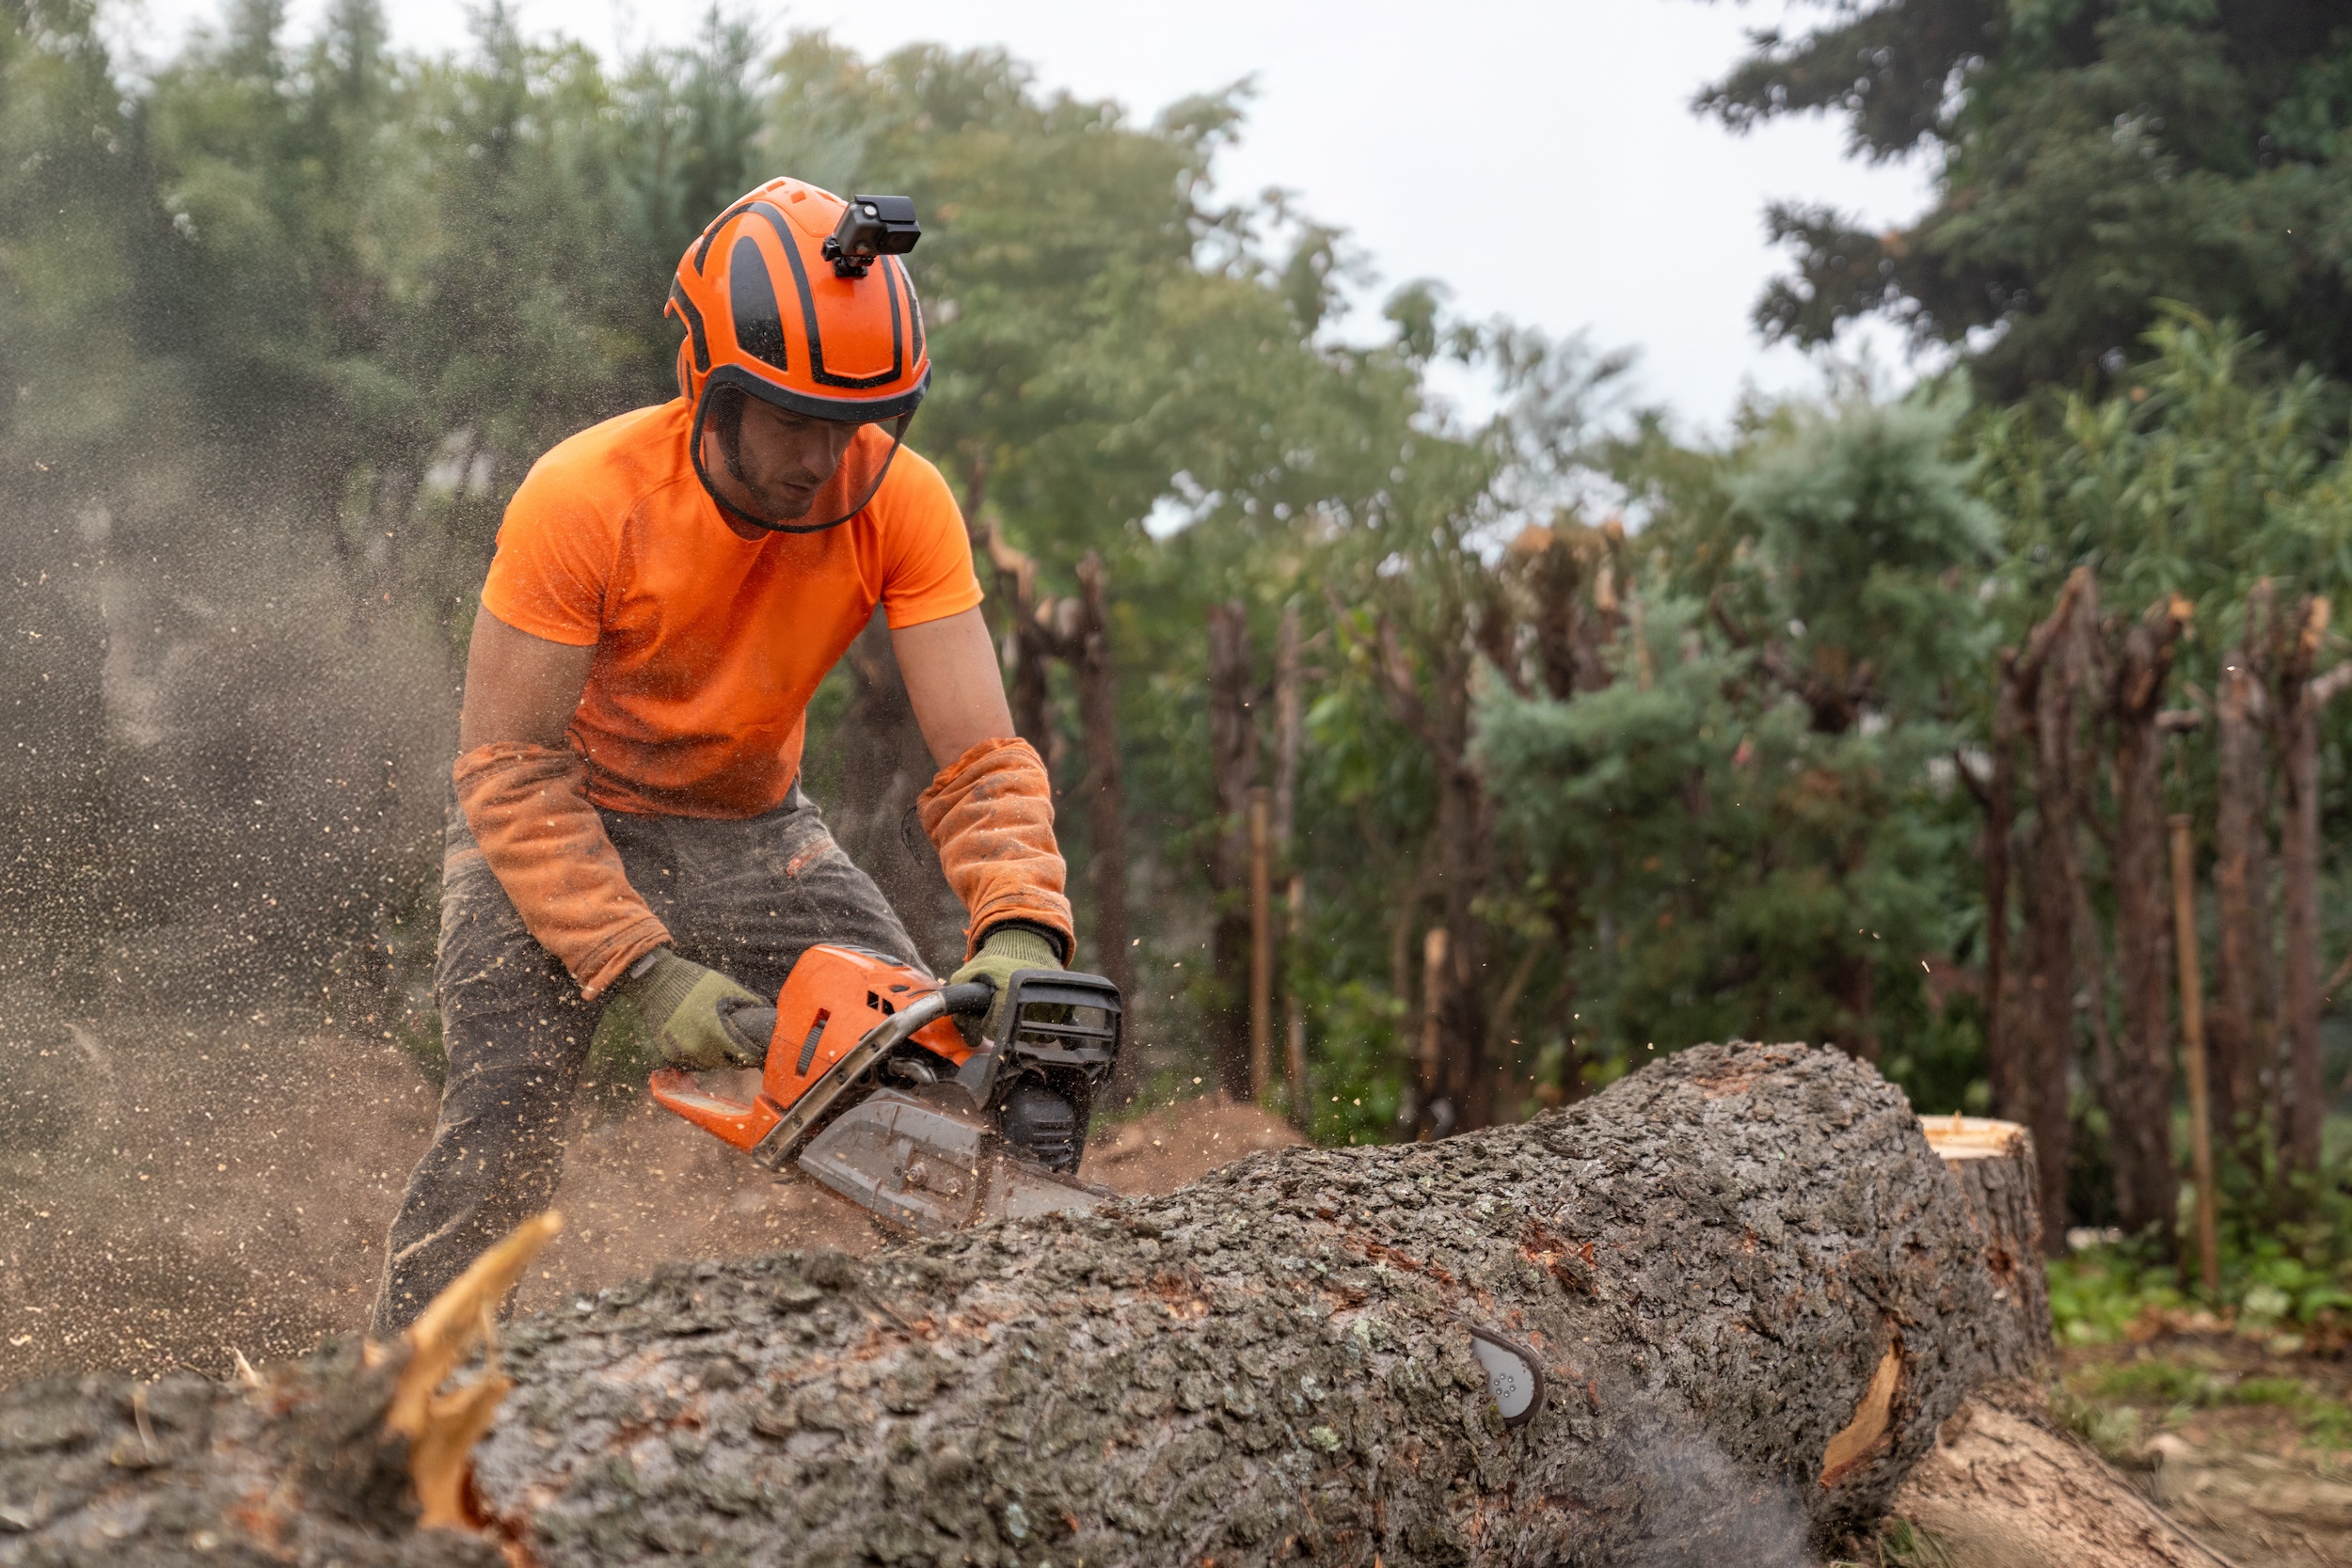
The right equipment makes the difference between an efficient ground clearing project and a frustrating struggle. Your needs depend entirely on your chosen land clearing method and the size of your property.
Equipment Needed For For Forestry Mulching
Professional forestry mulchers are specialized machines that few landowners own. These units can run over $100,000 to purchase, making rental or contractor services the practical choice for most land clearing projects. Rental rates run $1,500-$5,000 per day, including an operator.
Skid steer mulching attachments offer a more accessible option for landowners who already own equipment.
Equipment Needed For Traditional Ground Clearing
Bulldozers are the workhorses of land clearing. For DIY projects, understanding what size tractor you need can help you determine if your existing equipment can handle the job or if you need to rent larger machinery.
A compact tractor with 25-50 horsepower works for light brush clearing with a bush hog attachment. Serious clearing requires larger dozers or excavators, which cost $1,200-$2,500 per day to rent with an operator.
Browse Available Tractors
Land Clearing Hand Tools And Safety Equipment
Even when hiring professionals to clear your land, having basic equipment helps with site preparation and cleanup. A quality chainsaw runs $200-$800 depending on size and power. Safety gear is non-negotiable: chainsaw chaps ($50-$100), hard hat with face shield ($40-$80), safety glasses, steel-toe boots, and hearing protection.
For landowners considering living the rural ranch life, investing in basic land management equipment often makes financial sense. Land clearing is something you’ll likely spend a good bit of time doing. A good brush mower or bush hog attachment ($500-$3,000) handles ongoing maintenance after initial clearing.
Understanding Land Clearing Costs And Budgeting For Your Project
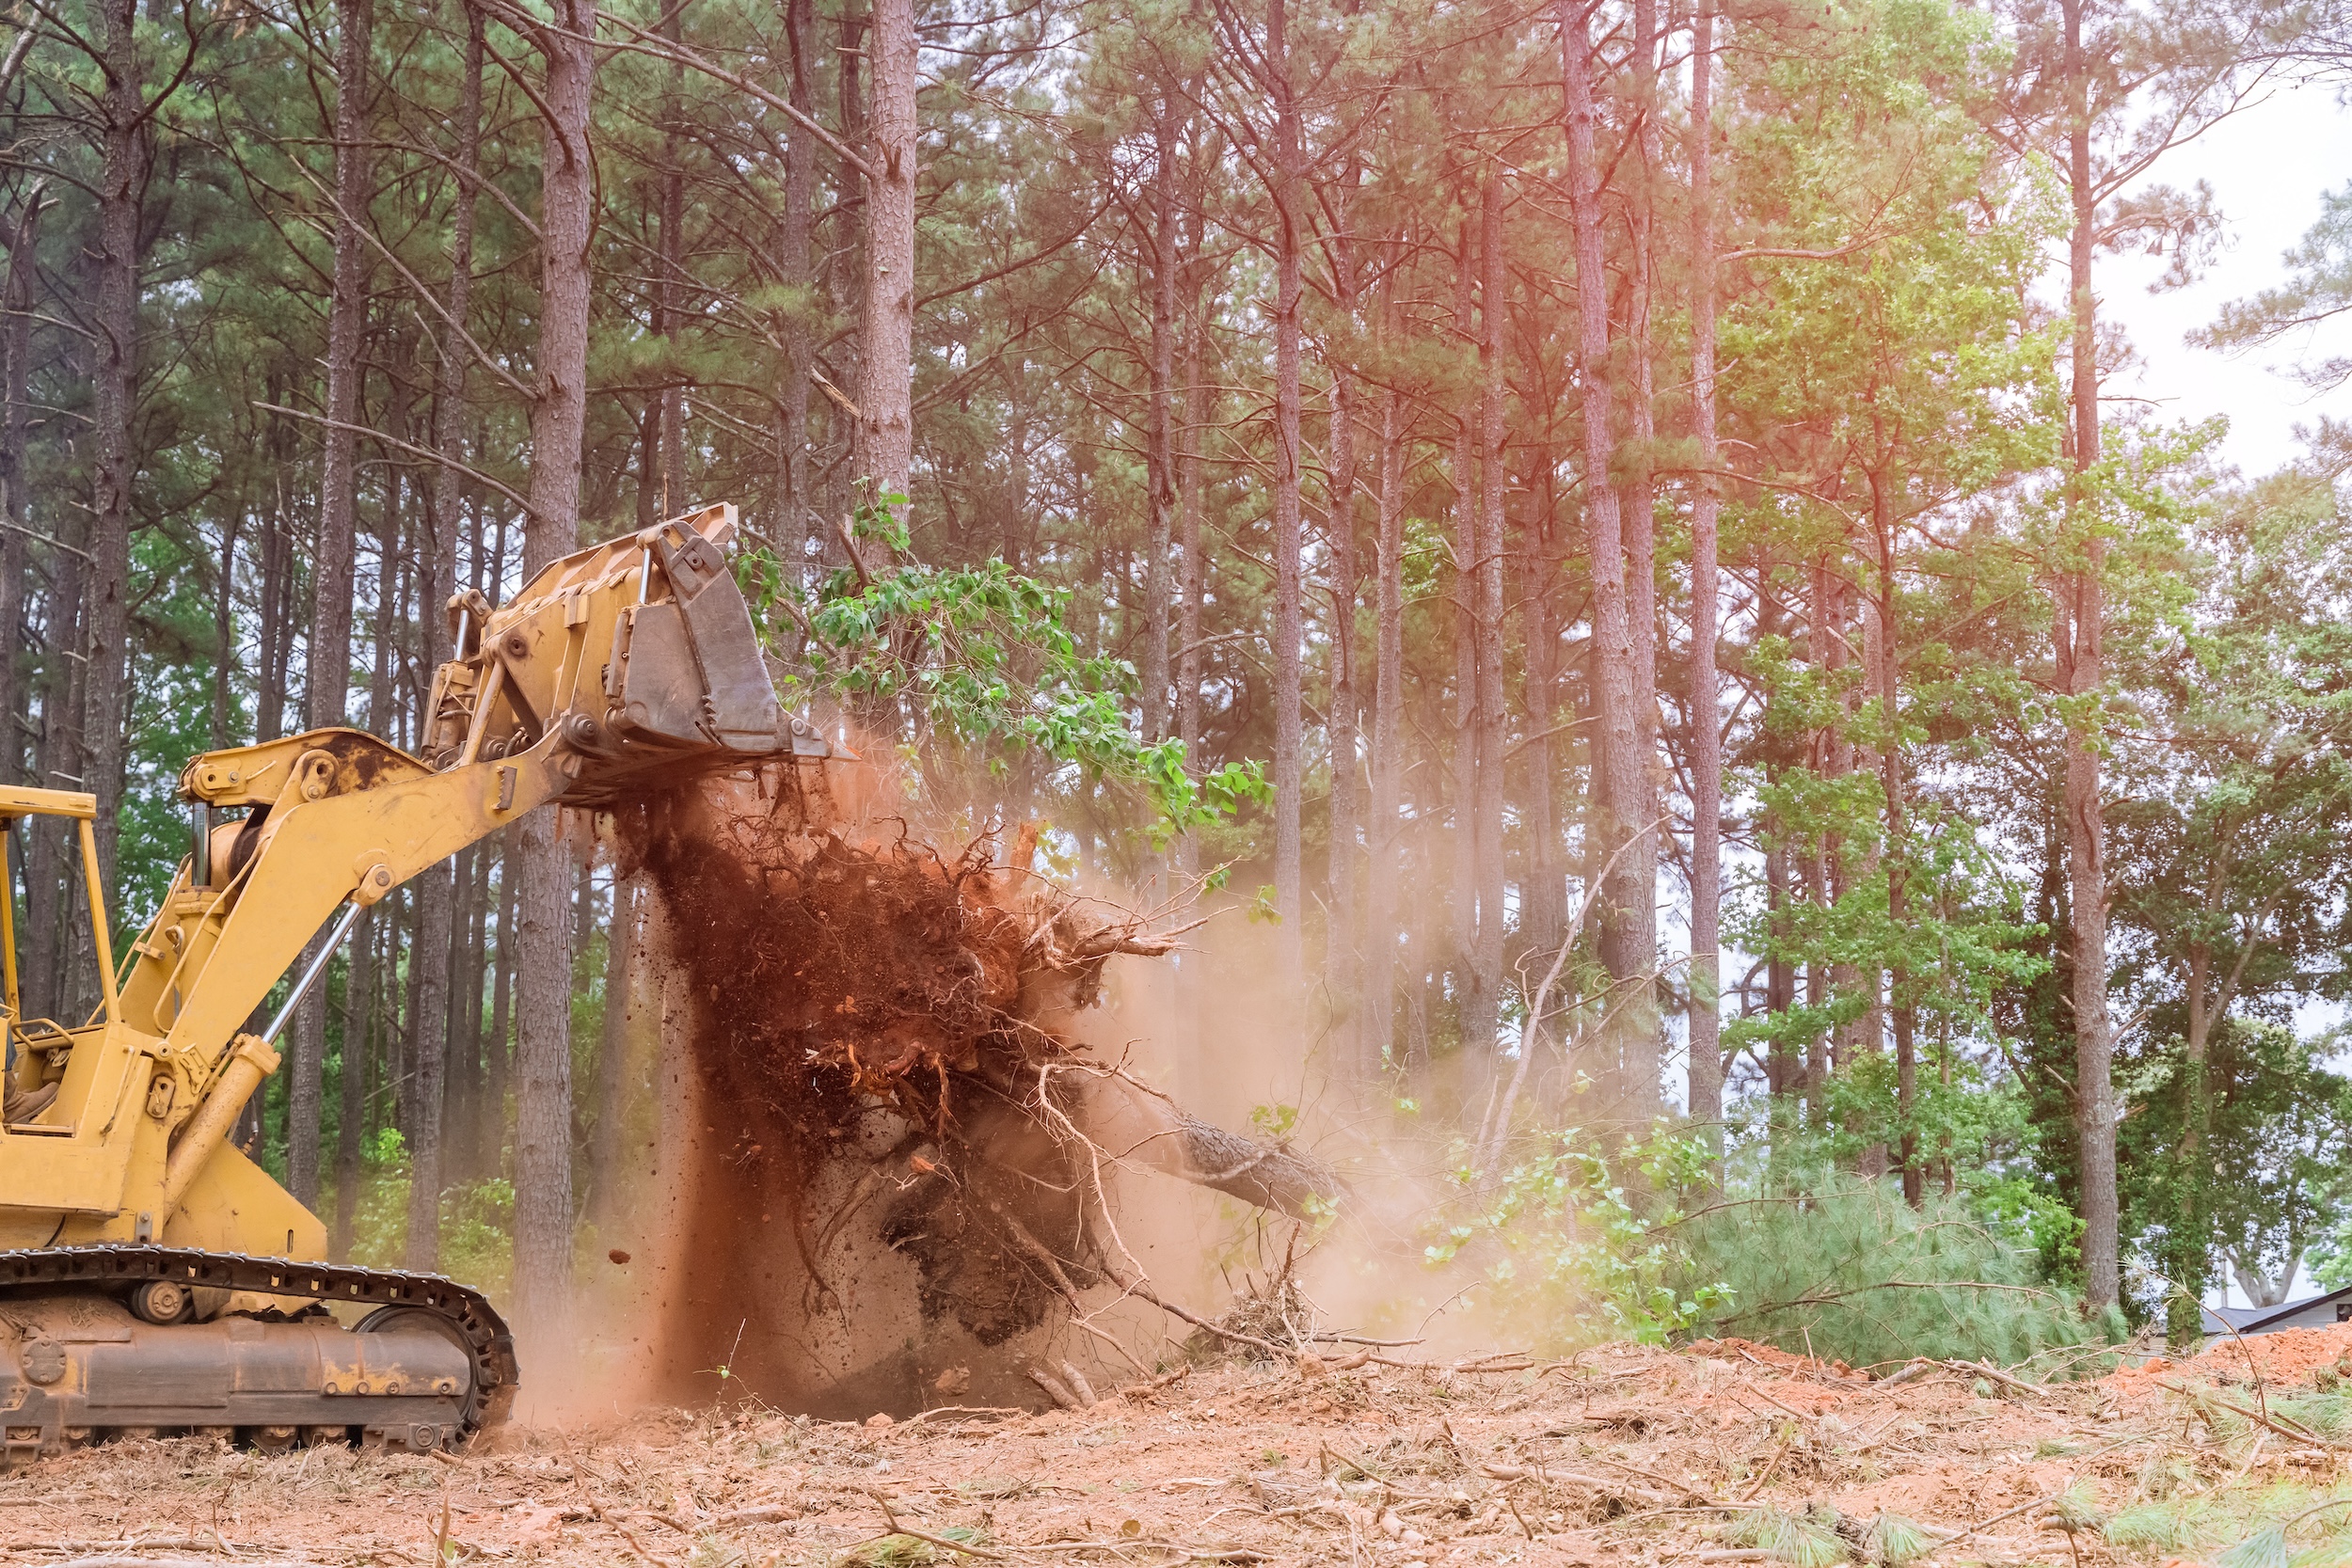
Realistic budgeting is key to preventing surprises and can help you choose between DIY ground clearing efforts and hiring land clearing professional services. The reality is, land clearing costs vary widely based on your specific situation. We’ll explain the nuances you need to be aware of.
How To Calculate Cost To Clear Land Based On Acreage
Professional land clearing averages $500-$8,000 per acre, depending on vegetation density and terrain. Light brush with few trees falls on the lower end at $500-$2,000 per acre. Moderate vegetation with mixed trees and undergrowth runs $2,000-$4,000 per acre. Heavy forest with large mature trees can reach $4,000-$6,000+ per acre.
These figures include basic clearing but often exclude extras like stump removal, debris hauling, grading, or erosion control measures.
Ground Clearing Method-Specific Pricing
Understanding how much ground clearing equipment like tractors and their attachment could cost you will help you determine whether you can feasibly go the DIY route or if hiring a professional land clearing service makes more sense. Forestry mulching services typically charge by the hour at $150-$300 or by the acre at $400-$2,500 depending on density of vegetation.
Traditional grubbing and dozing run higher at $1,500-$5,600 per acre but provide complete removal suitable for immediate construction. Cut and grind land clearing services fall in the middle at $1,000-$3,000 per acre.
Hidden Costs To Consider When Determining How To Clear Land
Many landowners underestimate the expenses associated with land clearing (that aren’t the act of ground clearing itself). Take permits, for example. Permit fees to clear land range from $100-$500 in most areas, though some ground clearing projects requiring environmental assessments can reach several thousand dollars.
When determining how to clear land, you’ll also need to budget for debris disposal. This can add $500-$2,000+ if you plan to haul material off-site. Erosion control measures like silt fencing, seeding, and erosion blankets can run $300-$2,000 per acre. Grading and leveling, particularly relevant if you’re clearing land for construction, can cost another $1,500-$5,000 per acre.
Profitability Pro Tip: Some ground clearing projects generate revenue through timber sales, especially on properties with mature, valuable trees. This is why we often recommend having your timer assessed before beginning a ground clearing project, so you can offset some of the clearing costs (or even turn a profit) from the trees you have on your land.
It’s also worth noting, financing options exist for land clearing as part of larger development projects. Understanding how you can get a loan for land improvement can make hiring a professional ground clearing team more accessible.
Investment Pro Tip: For landowners considering whether investing in land is the right decision, remember that cleared, usable land typically commands 20-50% higher value than raw, overgrown property. The clearing cost should be viewed as value added rather than pure expense.
The Step-By-Step Guide For How To Clear Land
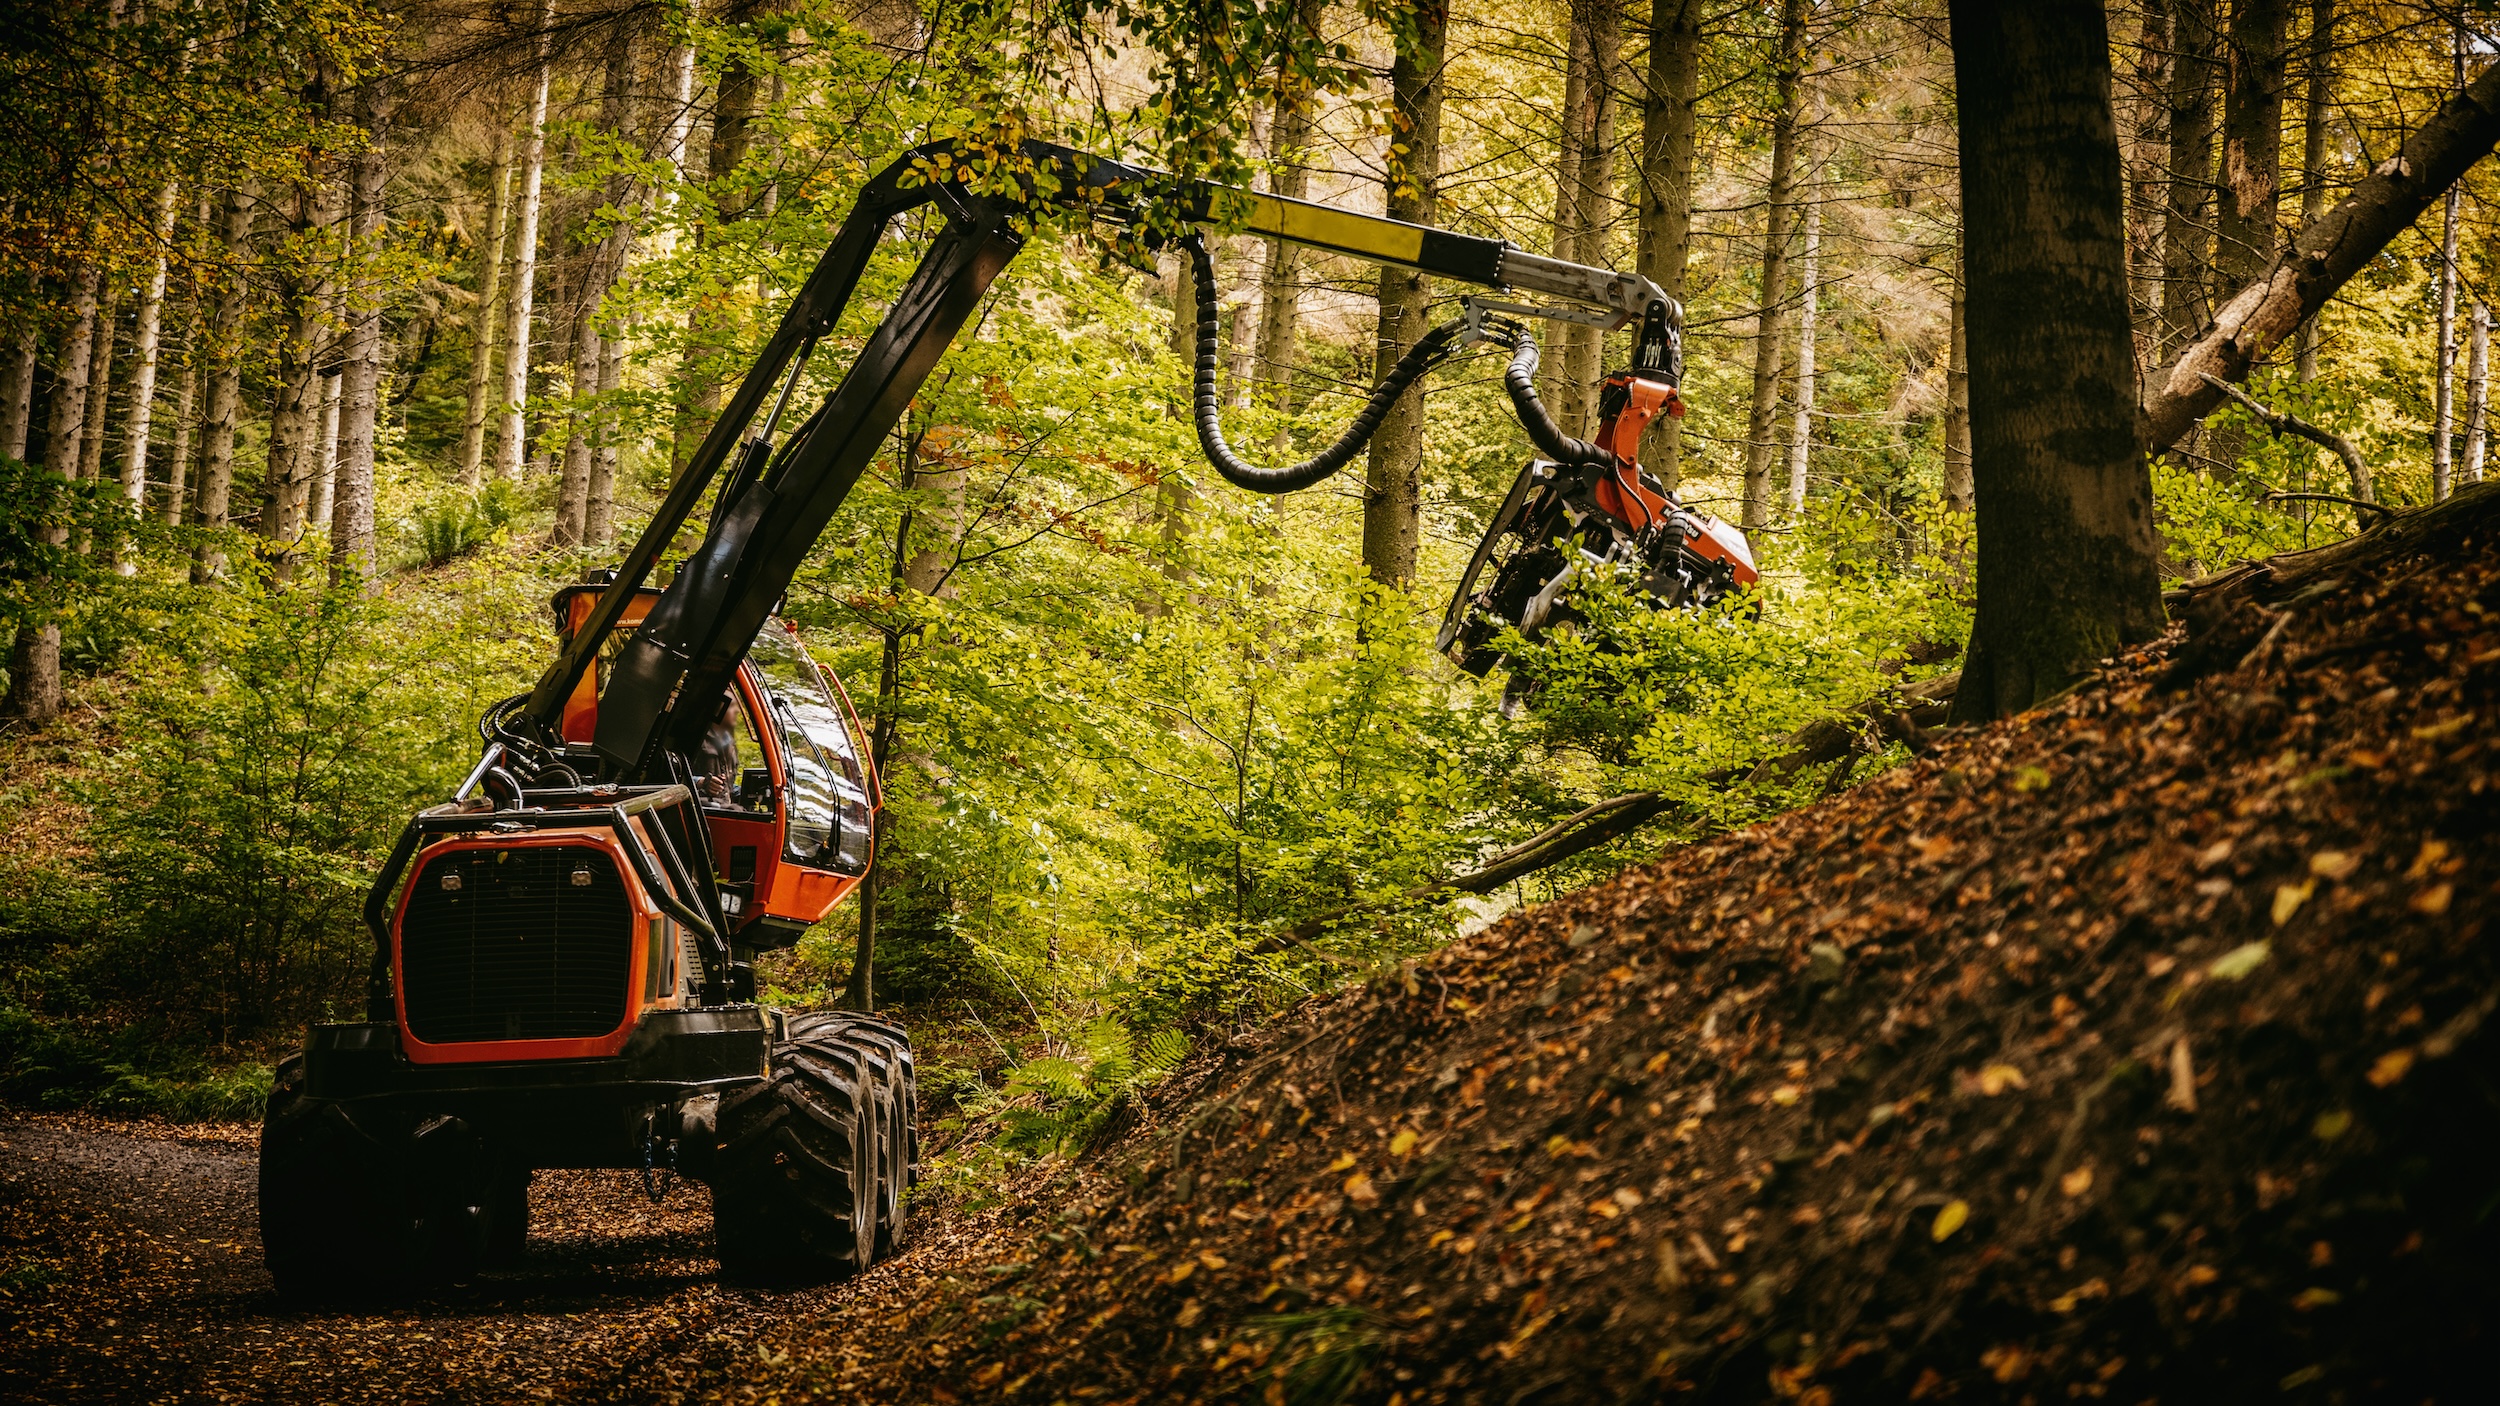
Let’s get into the weeds. Following a systematic land clearing process ensures efficient ground clearing while avoiding costly mistakes. Each step builds on the previous one for the best results.
Step 1: Assess Your Property And Create A Land Clearing Plan
Before any land clearing begins, thoroughly evaluate what you’re working with. Walk the entire property, noting tree sizes, vegetation density, terrain features, and any obstacles like rocks or old structures.
Identify and mark trees or features you want to preserve. Flagging tape in bright colors works well for communicating your intentions to equipment operators. Check for underground utilities by calling 811 several days before starting work.
Determine your clearing boundaries precisely. Property line disputes can create expensive problems, so verify your boundaries with existing survey markers or hire a surveyor if needed.
Create a basic site map showing access routes for equipment, areas to clear vs preserve, and where you’ll stage debris. This planning phase prevents confusion once work begins and ensures everyone working on your ground clearing project understands the scope.
Step 2: Secure Necessary Permits To Clear The Land
Many jurisdictions require permits for land clearing, especially on larger properties or near waterways. Contact your local planning or building department to understand requirements specific to your area.
Common permit triggers include clearing more than a certain acreage, working near wetlands or streams, removing protected tree species, or any clearing on commercial properties. Permit costs typically run $100-$500 but vary widely.
Budget adequate time for permit processing, which can take 2-8 weeks, depending on your location, time of year, and project complexity. Working without required permits can result in stop-work orders, fines, and requirements to restore cleared areas, so don’t skip this step as you’re figuring out how to clear your. land.
Step 3: Clear Access Routes And Stage Equipment For Ground Clearing
Before tackling main clearing areas, establish access to your land for equipment. This might mean widening existing paths or creating temporary roads to reach your property’s interior.
Access routes need sufficient width for your largest equipment, typically 12-14 feet minimum. Remove low-hanging branches and ensure the path can support heavy machinery.
Set up a staging area near your property entrance for equipment parking and debris collection. Keep this area organized to maintain efficiency throughout your ground clearing project.
Step 4: Remove Vegetation Using Your Chosen Land Clearing Method
With preparation complete, actual land clearing can begin. We recommend working systematically, rather than randomly jumping around the property. Many ground clearing professionals start at one end and work progressively across, which keeps the project organized and makes it easier to track progress.
- For forestry mulching, operators typically make multiple passes. The first pass knocks down larger vegetation, and subsequent passes refine the material into smaller mulch. Leave the mulch layer 2-4 inches thick for optimal erosion control and soil benefits.
- Traditional dozing works best when pushing material in one consistent direction. This creates organized piles for disposal rather than debris scattered throughout the site.
- Cut and grind land clearing methods require careful planning of tree felling directions to avoid damage to trees you’re keeping. Always plan escape routes when felling trees and never work alone on this type of project.
Step 5: Address Stumps And Root Systems
Stump removal decisions depend on your land’s future use. Building sites require complete removal, typically grinding 8-12 inches below grade or deeper if constructing over the area.
Pasture or recreational land often works fine with stumps ground flush to the surface. The remaining roots gradually decay and actually help prevent erosion on slopes.
Ground Clearing Pro Tip: Stump grinding creates wood chips you can spread as mulch or remove from the site.
Step 6: Manage Debris And Erosion Control
How you handle cleared vegetation significantly impacts the cost and timeline of your land clearing project. Forestry mulching eliminates this concern by leaving material as beneficial ground cover.
Meanwhile, other methods generate substantial debris requiring disposal. Options include on-site burning where permitted, hauling to disposal facilities, or chipping for mulch. Each approach for how you get rid of debris after you clear your land will have different cost and regulatory implications.
Regardless of disposal method, implementing erosion control immediately protects your property. Bare soil erodes dramatically faster than vegetated ground, especially on slopes or in areas with significant rainfall.
We recommend installing silt fencing along downslope edges to catch sediment that does erode. Spread mulch or straw across bare areas. Seed cleared ground within days if possible, using fast-growing cover crops that stabilize soil while you plan permanent vegetation.
Step 7: Grade The Cleared Land And Prepare For Final Use
Most cleared land needs some grading to create proper drainage and usable space. Even slight grading makes a significant difference in how water moves across your property.
Maintain at least a 2% slope for drainage, directing water away from building sites and toward stable outlets. Fill low spots that might collect water and create problematic wet areas.
Grading also smooths the surface, removing ruts from equipment and creating level areas for structures or activities. Professional grading runs $1,500-$5,000 per acre, depending on complexity.
Save topsoil when possible by stockpiling it before grading, then spreading it back over the finished grade. This preserves valuable organic material and soil biology that help establish vegetation.
Step 8: Establish Vegetation And Long-Term Maintenance
Cleared land needs revegetation to prevent erosion and support your intended use. The approach you take will ultimately depend on your goals.
- Pasture requires appropriate grass and legume species for your region and planned livestock. Agricultural extension services provide excellent guidance on seed selection, and most pasture mixes establish in 8-16 weeks with proper care.
- Wildlife habitat benefits from native species that support local ecosystems, and these often establish more slowly but require less maintenance long-term.
- Cleared land around future building sites might use temporary erosion control seeding now, with final landscaping after construction completes.
Seeding costs vary from $300-$1,500 per acre including seed, fertilizer based on soil tests, and application. Water if possible during establishment, though many rural properties rely on natural rainfall.
First-year maintenance includes mowing to prevent weeds from going to seed, monitoring for erosion issues, and reseeding thin areas. This ongoing care ensures your cleared land remains in good condition and continues improving rather than reverting to overgrown conditions.
Making The Right Choice: DIY vs. Professional Land Clearing
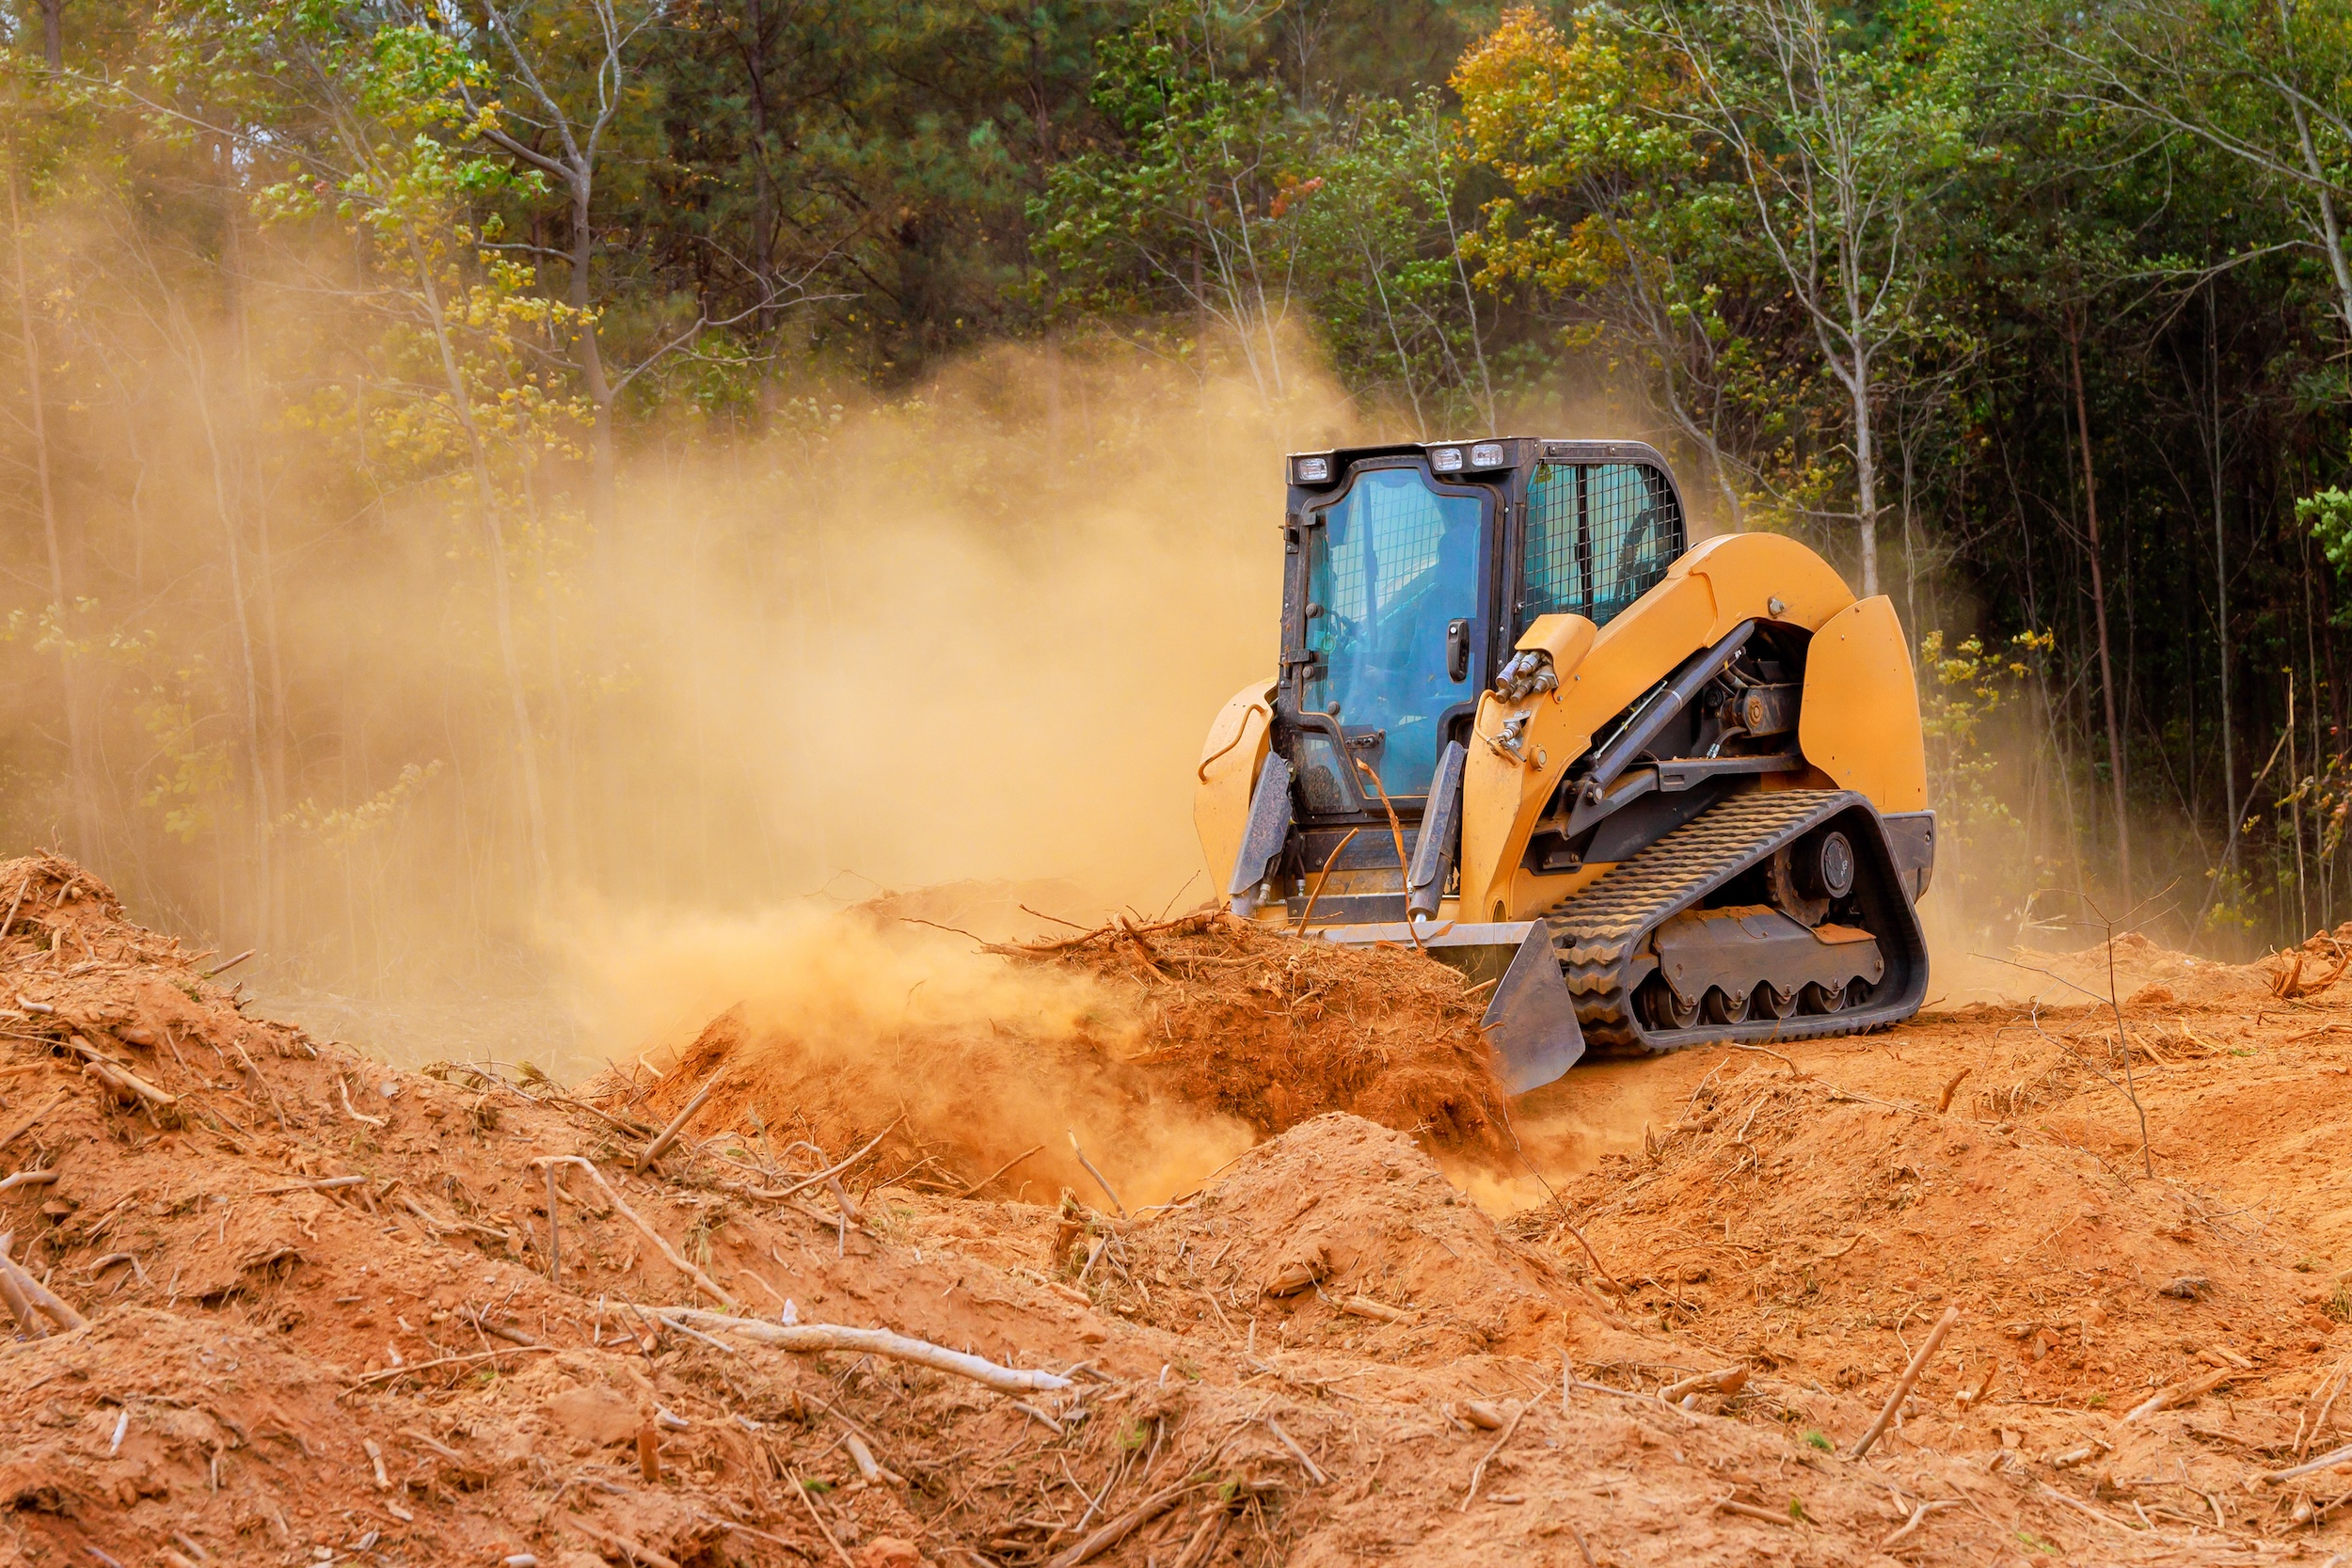
One of the biggest decisions when figuring out how to clear land is determining whether to tackle it yourself or hire ground clearing professionals. Both approaches have merit, depending on your specific situation.
When DIY Land Clearing Makes Sense
Small properties under one acre with light vegetation are often the best suited for the DIY route, especially if you own or can borrow suitable ground clearing equipment. Projects where you have flexible timelines and enjoy physical outdoor work can save substantial money with DIY clearing.
The key requirements are physical capability for demanding work, mechanical aptitude for operating land clearing equipment safely, and realistic time expectations. A quarter-acre weekend project can easily stretch into months of work when dealing with anything more than light brush.
How To Know When Professionals Are Necessary To Clear Your Land
Properties over two acres with moderate to heavy vegetation almost always justify professional land clearing services. The time and equipment investment for DIY ground clearing quickly exceeds professional costs on larger projects.
Safety concerns around large trees, especially near structures or utilities, really make professional expertise the better route. One mistake felling a large tree can cause property damage or injuries far exceeding contractor costs.
Regulatory requirements often specify licensed contractors for certain types of clearing, particularly near wetlands or in areas with protected species. Projects with tight timelines for construction or development rarely allow for DIY approaches that take months to complete.
How To Choose The Right Contractor To Clear Your Land
Choosing the right contractor for your land clearing project ultimately starts with verifying licensing and insurance. Request proof of both general liability and workers’ compensation coverage. Contractors working without proper insurance create enormous liability risks if someone is injured on your property.
Get at least three detailed quotes that specify exactly what’s included. Vague quotes or significant price differences between contractors warrant careful scrutiny.
Check references from recent similar ground clearing projects. Speaking directly with past customers reveals how contractors handle challenges, communicate during work, and stand behind their results.
Red flags include contractors who won’t provide written quotes, demand large upfront payments, can’t show insurance certificates, or pressure you to sign immediately. Quality contractors understand land clearing is a significant investment and give you time to make informed decisions.
For landowners looking into buying a ranch property, establishing relationships with reputable land clearing contractors provides long-term value. These professionals often handle multiple aspects of land management beyond initial clearing.
It’s also important that you and your contractor understand the nuances of surface rights vs mineral rights matters when planning extensive clearing, as some subsurface rights agreements may restrict surface alterations. Review all property rights documentation before committing to large-scale land clearing projects.
Setting Up Your Cleared Land For Long-Term Success
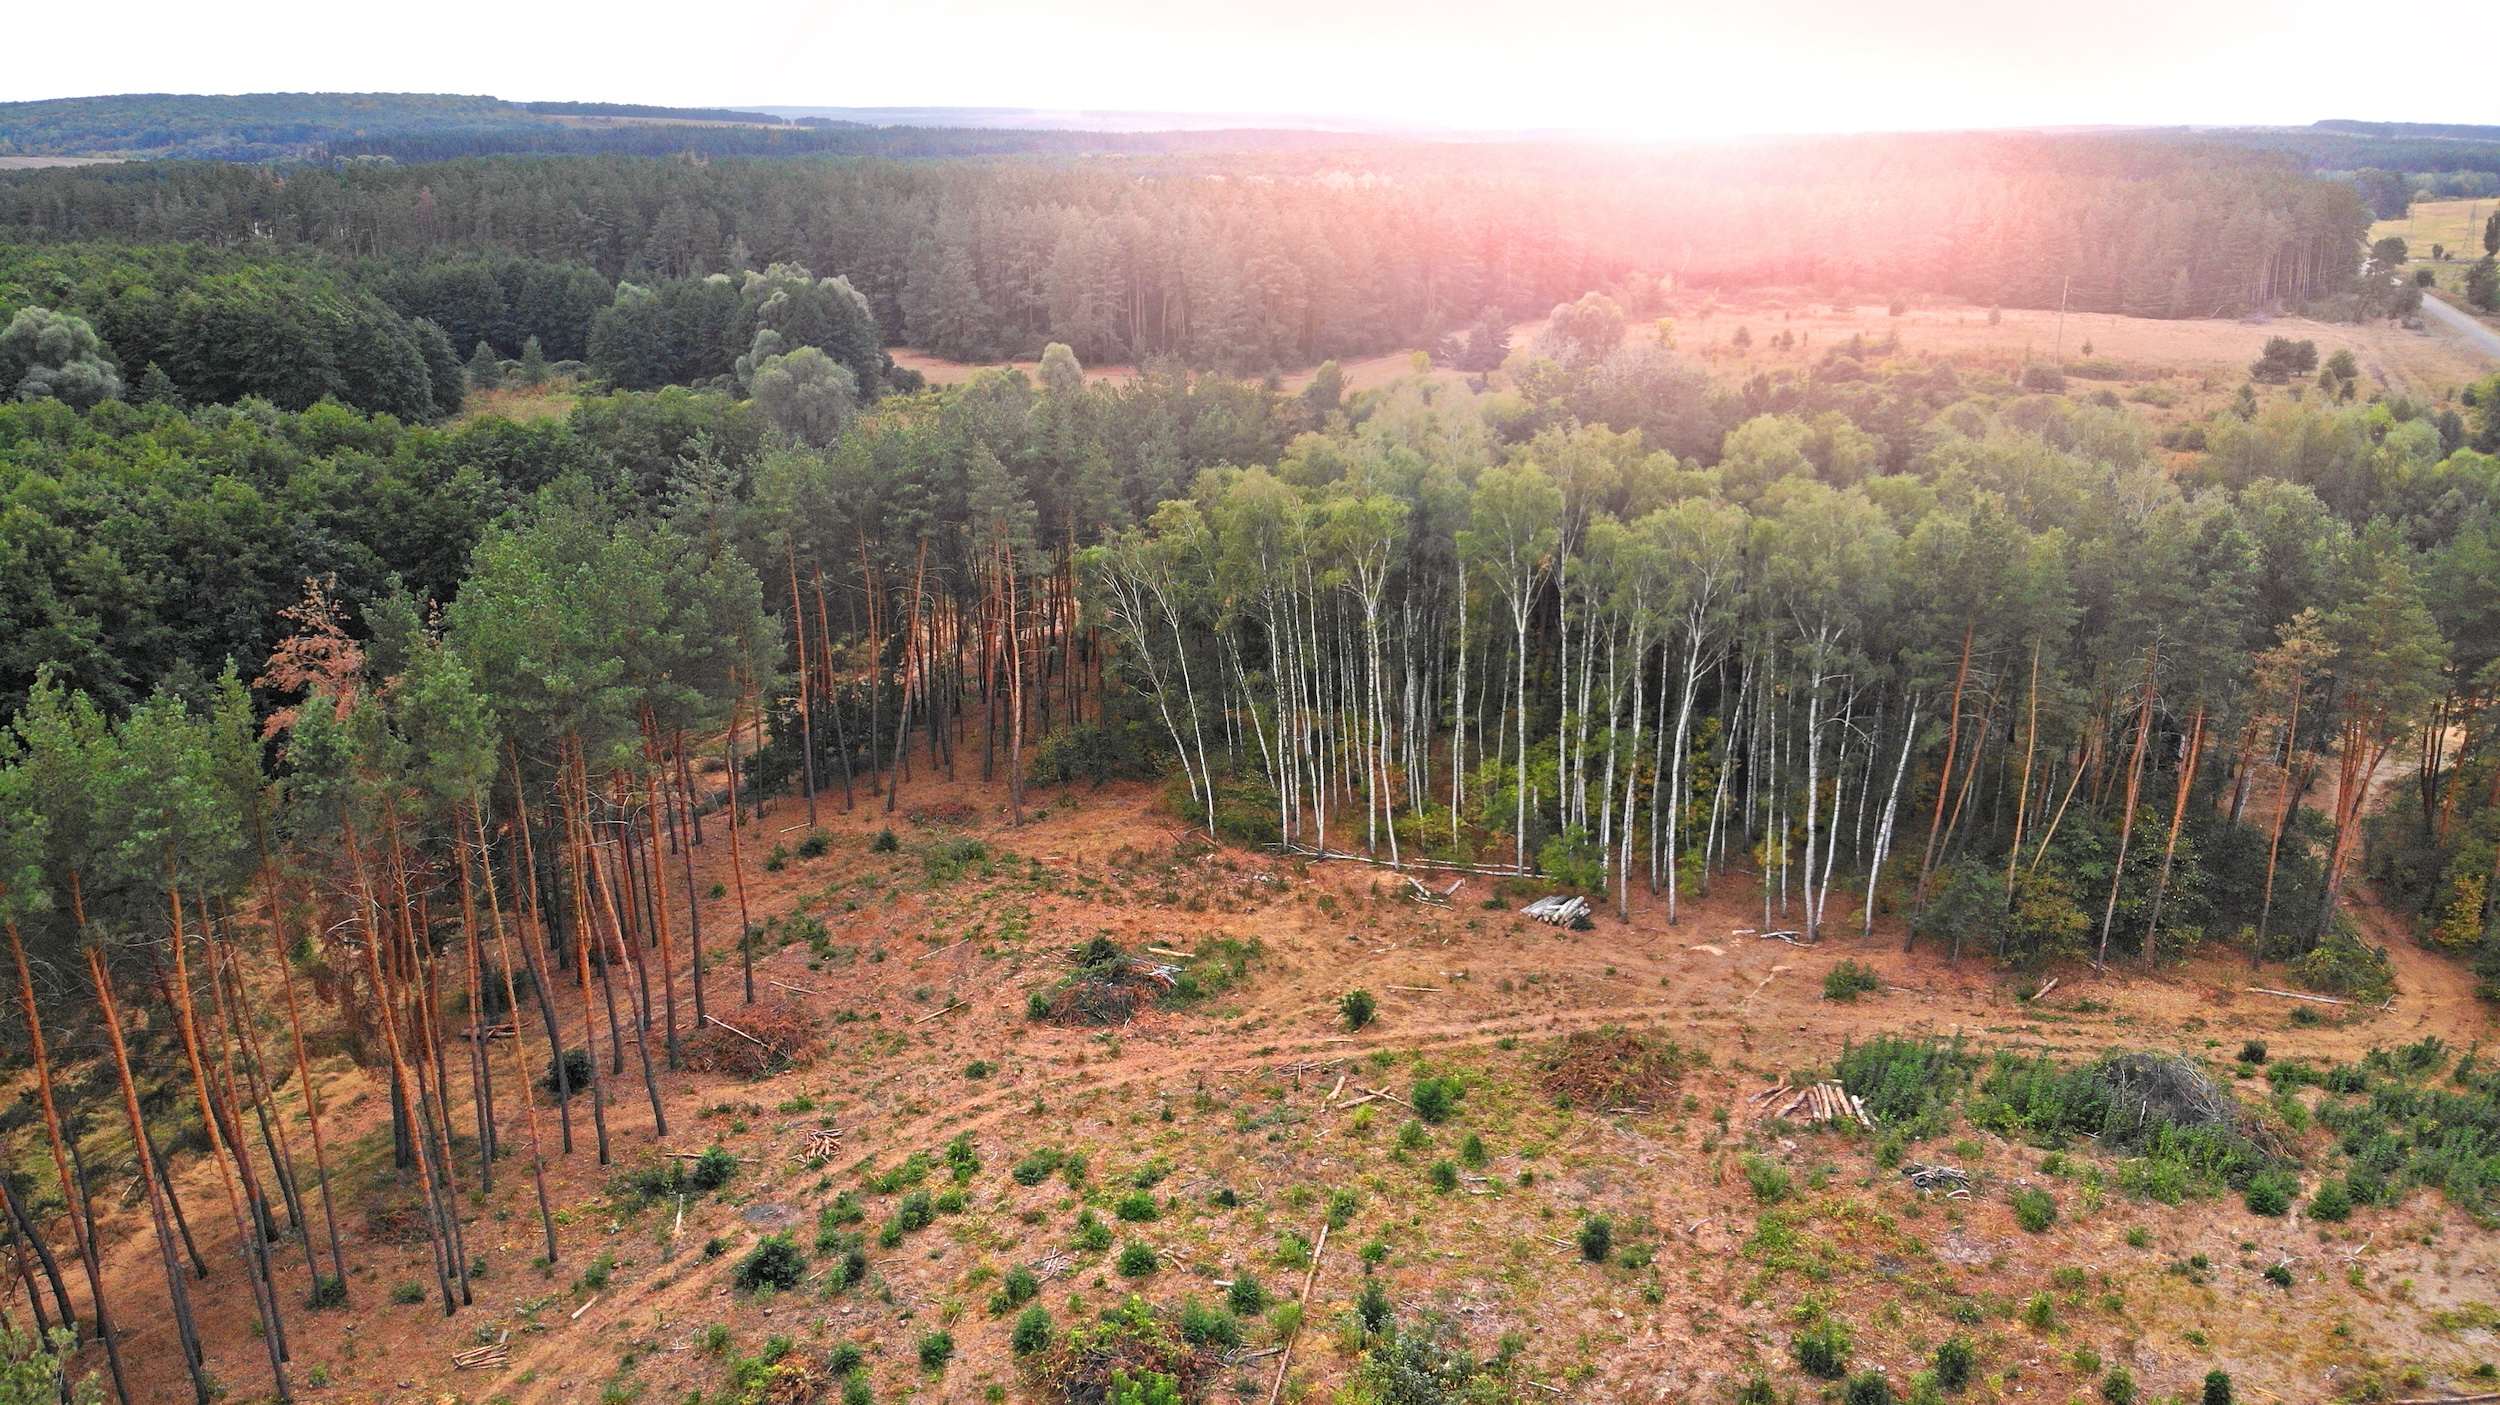
The work doesn’t end when the last tree falls. How you manage newly cleared land in the following months determines whether your investment thrives or requires expensive remediation.
Soil Health And Testing: Land clearing disrupts soil biology and structure. Testing soil pH, nutrients, and organic matter levels provides a baseline for amendments. Most county extension services offer inexpensive soil testing, or you can use home test kits for basic information.
Common amendments after clearing include lime to raise pH in acidic soils, organic matter to improve structure and water retention, and fertilizers to replace depleted nutrients. Apply amendments based on test results and your intended land use rather than guessing.
Preventing Invasive Species: Disturbed soil (often inevitable with land clearing) creates ideal conditions for invasive weeds and plants. These species often outcompete desirable vegetation, creating ongoing management headaches.
Quick establishment of intended vegetation is your best defense. Dense ground cover from pasture grasses, native plants, or cover crops leaves little room for invasives to establish.
Monitor cleared areas regularly during the first year, addressing invasive species while they’re small and manageable. Hand removal, spot herbicide treatment, or mowing before seed set all help control problems before they become overwhelming.
Maintaining Drainage And Erosion Control: Initial erosion control measures need monitoring and maintenance, especially after heavy rains. Check silt fencing for gaps or damage. Repair any erosion gullies immediately before they expand.
Drainage patterns may change as vegetation establishes and soil settles. You’ll want to walk the property after significant rainfall to identify any new problem areas requiring attention.
Planning For Structures And Development: For landowners who have cleared land with future building in mind, maintaining those cleared areas during planning and permitting phases prevents vegetation from reclaiming your work.
Periodic mowing or bush hogging keeps brush from returning. This ongoing maintenance is far less expensive than re-clearing overgrown areas when you’re ready to build.
Consider implementing your land clearing in phases if development will take several years. Clear only the ground you’ll use within 1-2 years, then expand as needed. This approach reduces maintenance costs and environmental impact of your ground clearing initiatives.
Key Takeaways On How To Clear Land Successfully
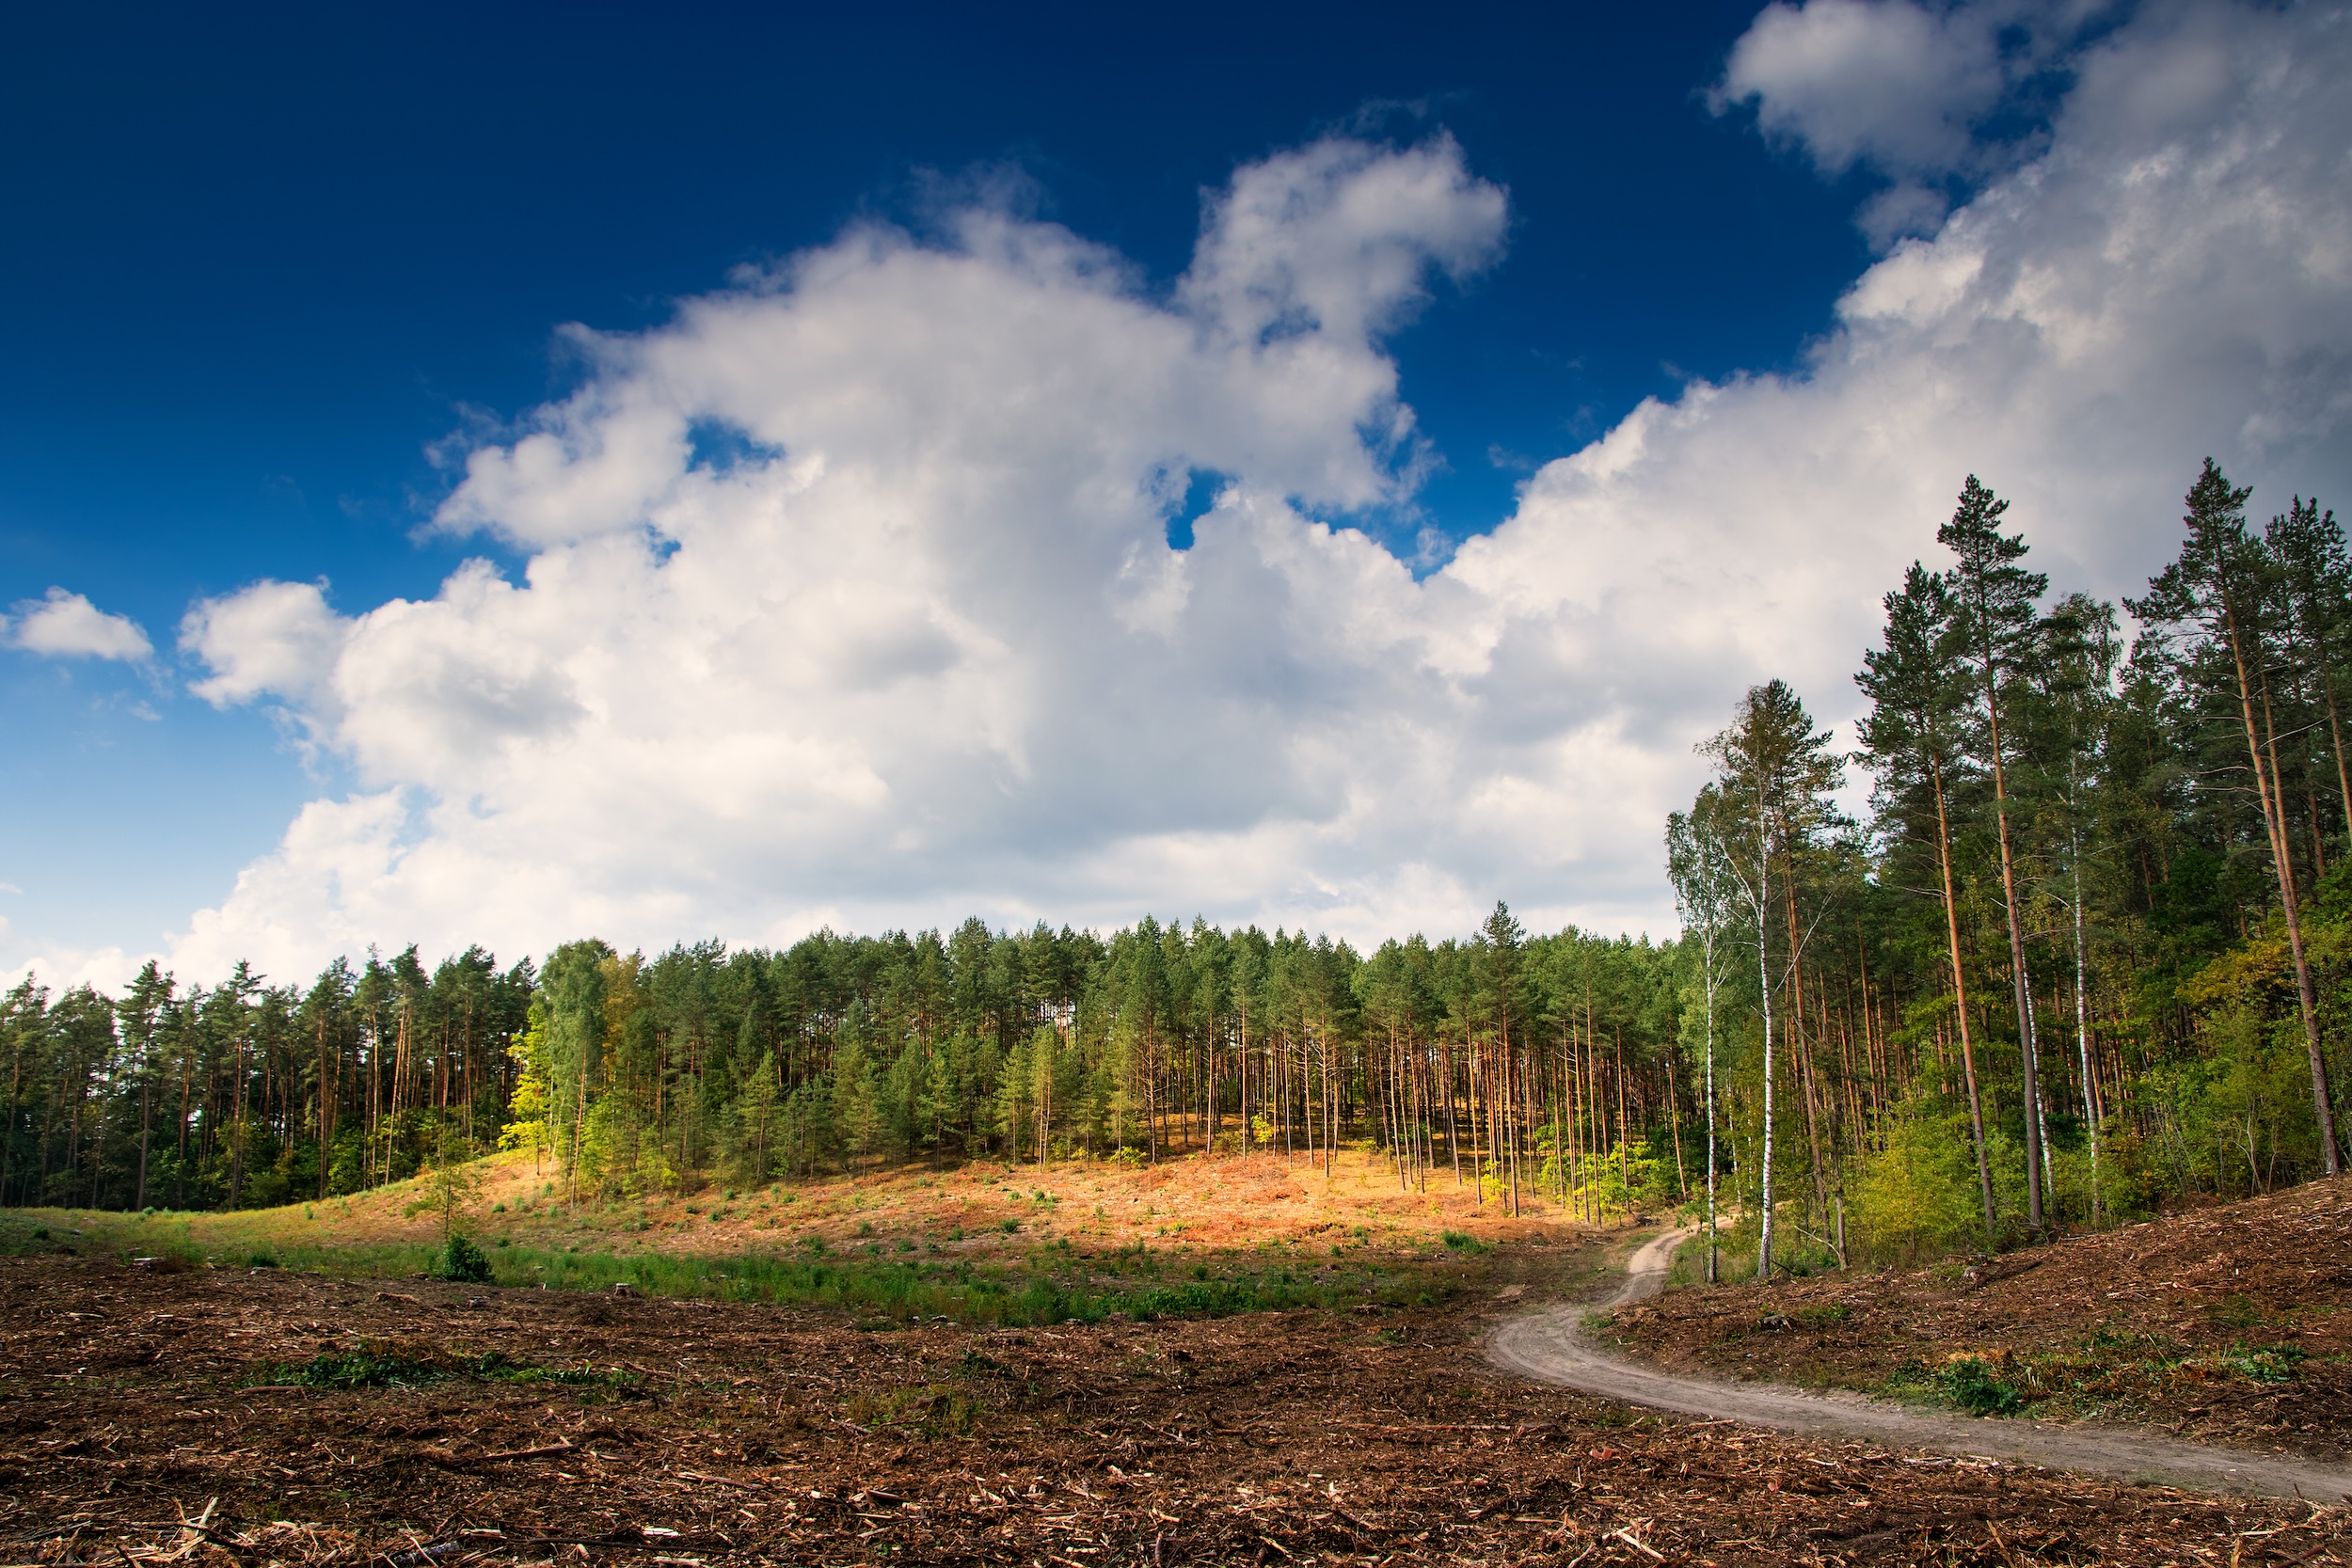
Learning how to clear land effectively requires balancing immediate the immediate needs of your project with long-term land health. The right approach depends on your specific property, goals, timeline, and budget. Let’s do a quick recap.
- Start with thorough assessment and planning. Understanding your property’s characteristics and challenges before any land clearing equipment arrives on-site. Make sure you secure necessary permits early in the process to avoid legal complications.
- Choose ground clearing methods based on your land’s future use rather than just upfront cost. Forestry mulching costs more initially but preserves soil health for agricultural or recreational use. Traditional grubbing provides the clean slate construction requires, despite higher immediate expense and soil disturbance.
- Consider seasonal timing’s impact on efficiency and cost. Fall and winter often provide the best conditions for ground clearing in most regions, with frozen ground supporting heavy equipment and dormant vegetation simplifying the work.
- Be realistic about DIY land clearing capabilities. Small projects with light vegetation are better suited for DIY ground clearing, but most properties benefit from professional expertise and equipment. The time investment and safety concerns of larger DIY projects typically outweigh cost savings.
- Budget for the complete project, including permits, clearing, debris disposal, erosion control, and revegetation of the land. Hidden costs often exceed basic ground clearing expenses, especially if you need extensive grading or environmental mitigation.
- Finally, view land clearing as the first step in long-term land management rather than a one-time project. Proper maintenance after clearing land, including erosion control, vegetation establishment, and ongoing monitoring, protects your investment and ensures the ground you’ve cleared serves its intended purpose for years to come.
Whether you’re preparing a homesite, creating agricultural land, or developing recreational property, the principles of effective land clearing remain constant: plan thoroughly, choose appropriate methods, execute systematically, and maintain consistently. And if you’re still on the hunt for the perfect land to clear for your next project, our land pros at Hayden Outdoors are here to help you find your perfect plot.
Connect With A Land Expert