Sign in to save favorite properties and equipment, save your search parameters and more
Don’t have an account yet? Sign Up Now
Sign up
Already have an account? Login Now
Login
×
Sign in
Sign in to save favorite properties and equipment, save your search parameters and more
Don’t have an account yet? Sign Up Now
Sign up
Already have an account? Login Now
The Waterfowl Sportsman Guide To Duck Hunting From A Boat
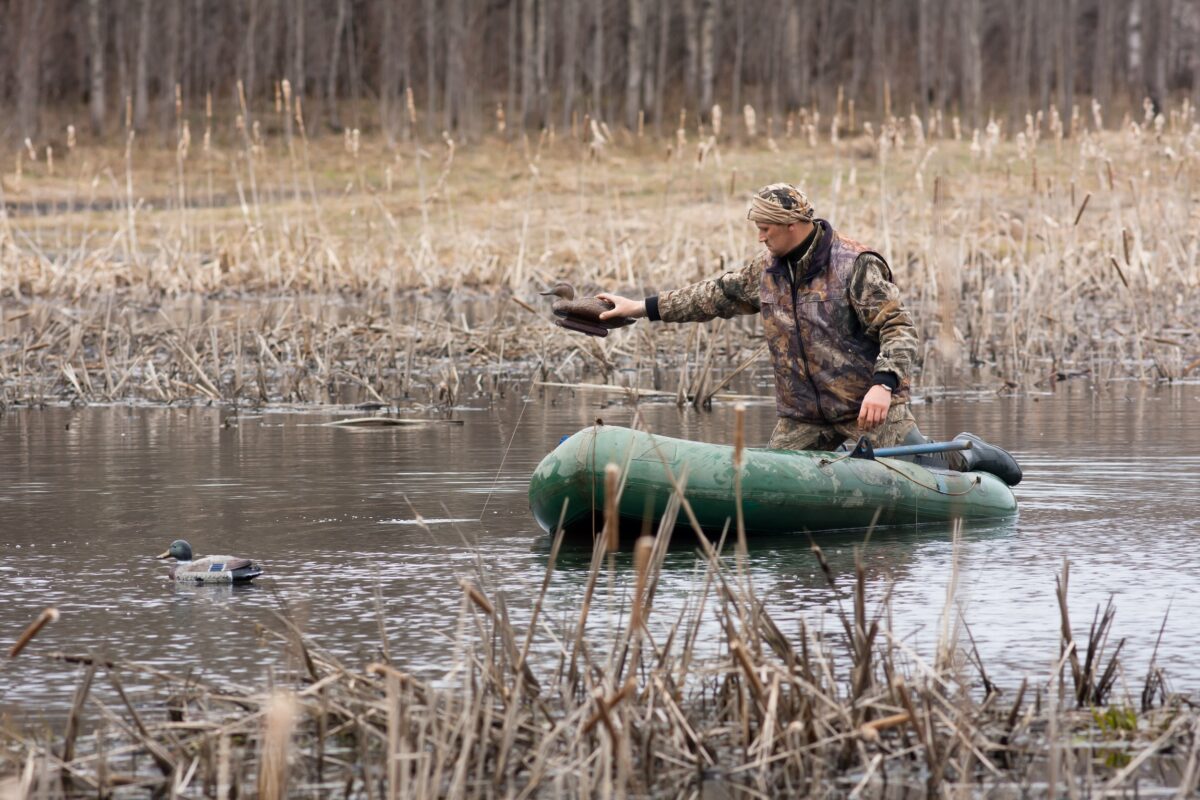
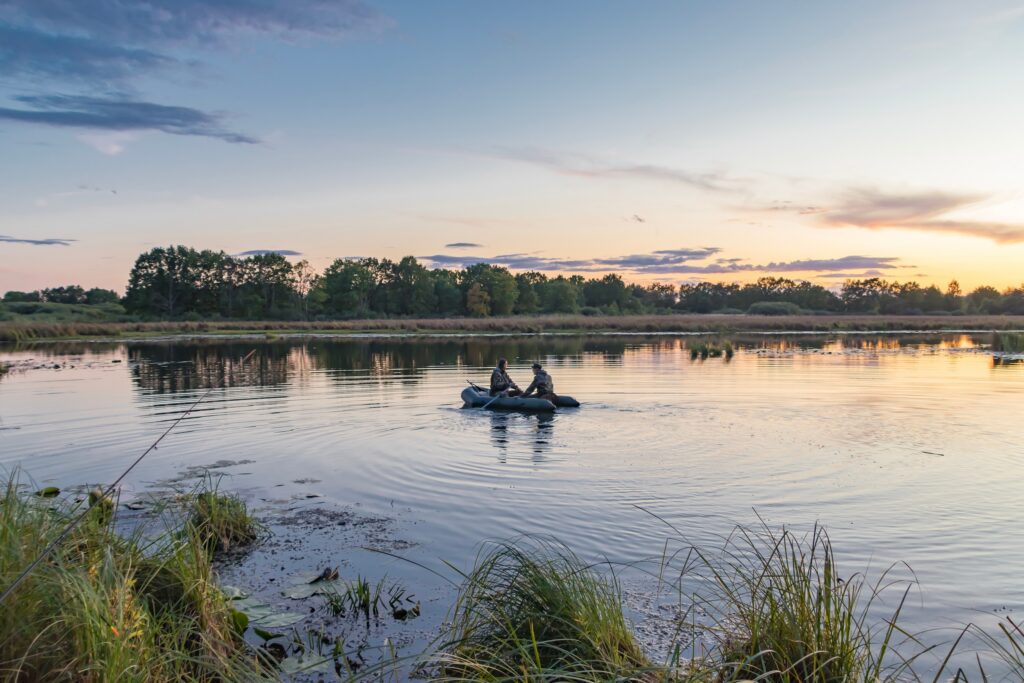
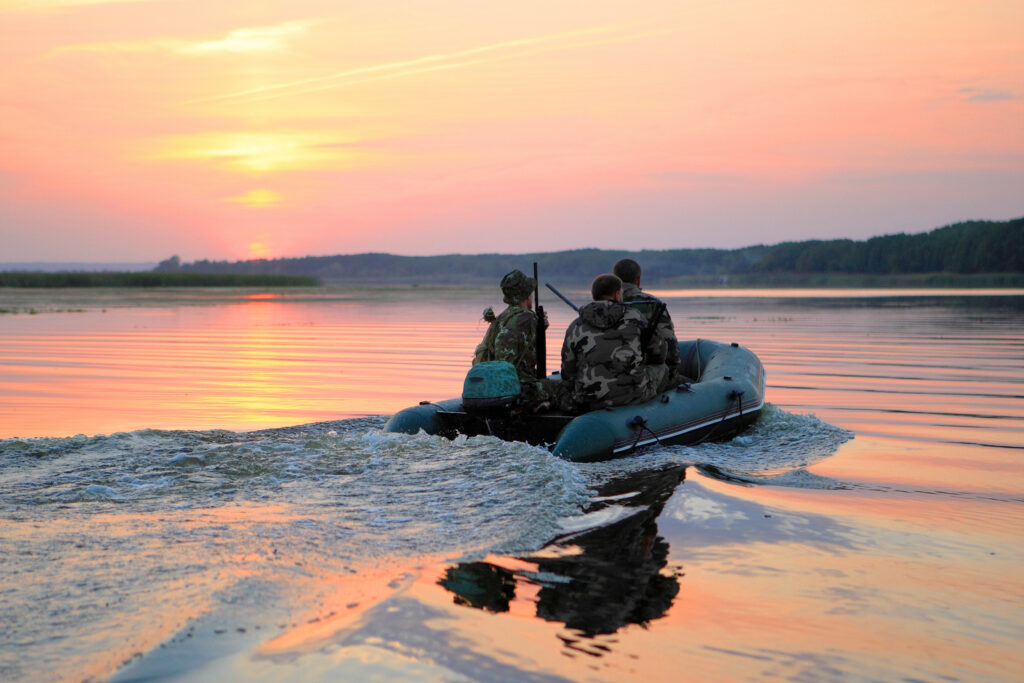
It’s still dark when you back the trailer down the ramp. The dog is trembling with excitement in the bow, decoys are stacked three crates deep, and somewhere out in the fog, there are birds. That feeling is exactly what duck hunting from a boat is about. Access. Freedom. Water that most hunters will never set foot on.
But a lot of hunters show up to that moment underprepared. Wrong boat. Wrong setup. No real understanding of the regulations, the water, or what’s actually going to separate a good duck hunting season from a forgettable one. The gear is the easy part. What comes before the gear is what this guide covers.
At Hayden Outdoors, we’re not writing this from a desk. Our land specialists spend their days out on the water, running boats before sunup, calling mallards on reservoirs, and staking out in river bottoms when the cottonwoods are bare. Whether you’re new to duck hunting in a boat or just looking to tighten up what you already know, this is the waterfowl sportsman’s guide to doing it right.
How Duck Hunting From A Boat Increases Your Success Rate
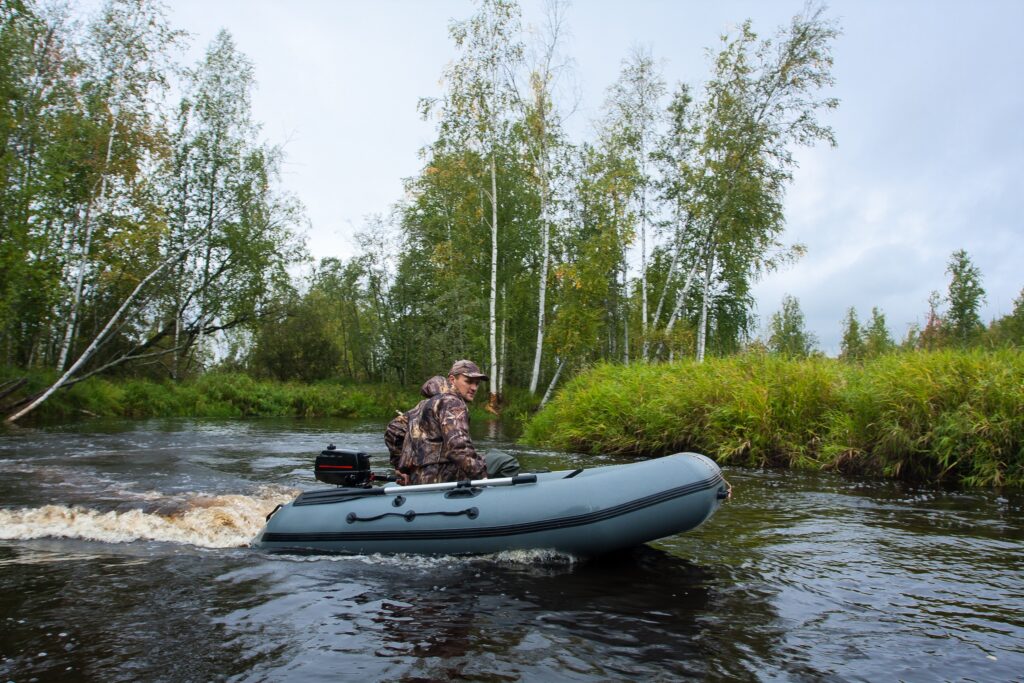
The biggest thing a boat does for a duck hunter is open doors. Land hunters are stuck with whatever they can legally reach on foot. Boat hunters aren’t. A well-rigged jon boat or duck skiff reaches flooded timber, remote marsh, river bends, and open reservoir water that the walk-in crowd never touches. In waterfowl hunting, low-pressure water isn’t just nice to have. It’s the whole game.
Beyond access, duck hunting in a boat gives you the ability to move. When birds aren’t working a hole, you pull the stake and go find them. You’re not married to a fixed blind that may or may not be in the right spot on any given morning. That flexibility is the difference between grinding a cold spot and hunting where ducks actually want to be.
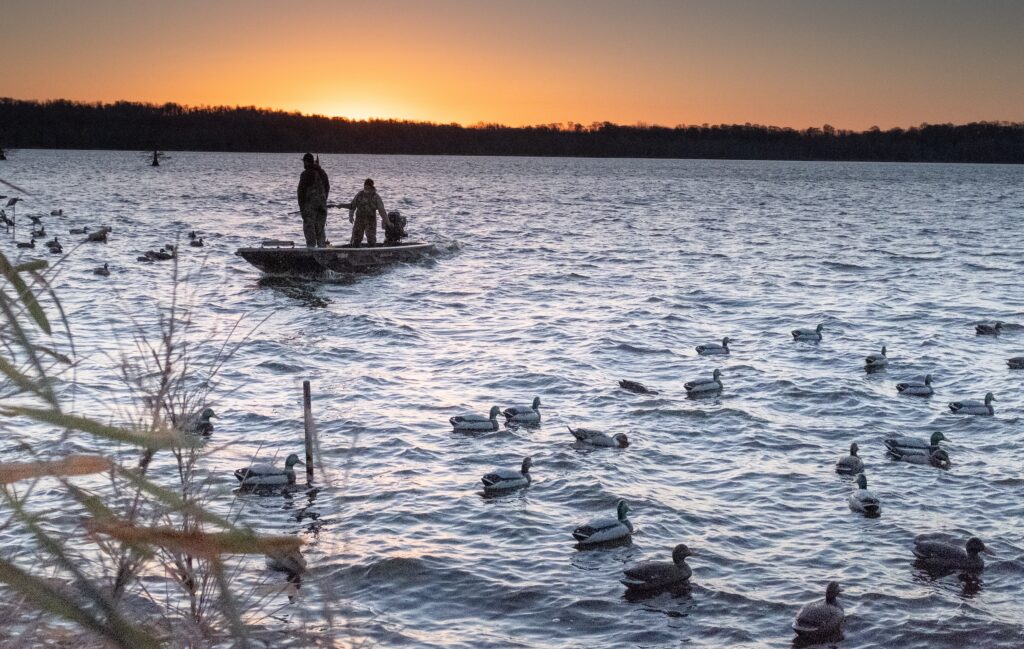
Decoy spreads work better off a boat, too. Open water lets you configure angles and landing zones that a field setup can’t replicate. And a low-profile boat tucked into cattails with a proper camo job is tougher to pick off than most permanent blinds on pressured public land.
Then there’s float hunting, which is its own thing entirely. Quietly drifting a river or pushing through flooded timber, jump-shooting birds that haven’t seen a spread all season. That’s as good as it gets.
Reading Water From A Boat: Finding Where Ducks Want To Be
Consistently good duck hunting from a boat starts before you leave the ramp. The hunters filling limits aren’t necessarily the best callers or shooters. They’re the ones who did their homework.
Get on your water before the season opens. Look for a working sign: disturbed bottom, scattered feathers, droppings, or vegetation that’s been chewed up by feeding birds. Those spots don’t show up on a map. You find them by running the water and paying attention.
Use onX Hunt and Google Earth to work the water from above. Topo data shows shallow benches, submerged points, and creek mouths that hold birds year after year. Cross-reference that with what you see on the water, and you’ll start building a picture most duck hunters never have.
Pay attention to how conditions change as the season moves. Early teal season looks nothing like late November. A cold front that drops the temperature 20 degrees overnight will move birds off areas they’ve been using all week. River water level affects where ducks feed and where they loaf.
Tidal hunters have to think in tide cycles. The water is always doing something. The duck hunters who adjust to it, rather than expecting birds to be where they were last time, are the ones who stay consistent.
Float Hunting vs. Stationary Boat Hunting: Choosing Your Approach
When it comes to duck hunting from a boat, there are two strategies. A lot of hunters default to one without thinking much about the other.
Float hunting is exactly what it sounds like. You drift quietly downstream, push through flooded timber, work the bends of a river system. No decoys. No calling. Just a slow, stealthy approach and good discipline when birds flush close. On smaller rivers and creek systems in Colorado, Nebraska, and Kansas, this works especially well early season when mallards and teal haven’t been pressured yet. It’s a different kind of hunting. More like big game in some ways; you’re covering ground and hunting what you find. One rule applies regardless: the shot has to come after all active propulsion has stopped. Drift, let birds work in, and shoot once the boat is moving freely rather than under power.
Stationary hunting is the classic boat duck hunting setup. You anchor in natural cover, throw out a spread, and work birds with the call. It’s the better play on open reservoirs when you’re targeting divers, on large marsh systems where you know birds are moving through a corridor, or anywhere you have confidence in a specific spot. Done right, it’s hard to beat.
Plenty of hunters take both of these approaches to duck hunting on a boat within the same day. Run early while birds are moving, glass the water from the boat, then lock in on a hole that’s producing and hunt it hard the last hour before the birds go quiet.
Rules And Regulations To Be Aware Of Before You Go Duck Hunting From A Boat
Regulations catch more duck hunters off guard in boat based waterfowl hunting than almost anywhere else. The consequences (fines, license suspension, loss of hunting privileges) are real. Know what you’re walking into before you launch.
Can you duck hunt from a boat? Yes, with a firm federal requirement attached: the boat must be completely stopped and the motor off before you shoot. Under 50 CFR § 20.21, you cannot shoot from a vessel that is moving under power or being actively propelled toward birds. The motor must be off, and the law also prohibits herding or driving birds with a vessel. When it comes to duck hunting, a freely drifting boat is treated differently, but the moment you’re using a motor, paddle, or oar to close the distance on birds, you’re in violation.
Federal Duck Stamp: Per the U.S. Fish & Wildlife Service, every waterfowl hunter 16 and older must carry a valid Federal Duck Stamp. As of the 2024-25 season, thanks to the Duck Stamp Modernization Act of 2023, an electronic E-Stamp is valid all season long and can be carried on your phone or as a printed copy.
State license and waterfowl stamp: On top of the federal stamp, every state requires its own hunting license and waterfowl stamp. Requirements vary. Verify before the duck hunting season opens, not the morning of.
Non-toxic shot: Steel shot is the standard. Bismuth and tungsten alloys are also approved. Federal regulations prohibit possessing lead shot on your person or in your boat while hunting waterfowl, not just in your shells.
Shooting hours: When it comes to duck hunting on a boat, legal shooting time for waterfowl typically runs from 30 minutes before sunrise to sunset; a standard that has held across nearly every season for over a century. Most duck hunters have their boat on the water well before that window opens, which means navigation lights are a legal requirement for pre-sunrise operation. Know your zone’s specific hours and have a reliable way to check sunrise time at your exact location.
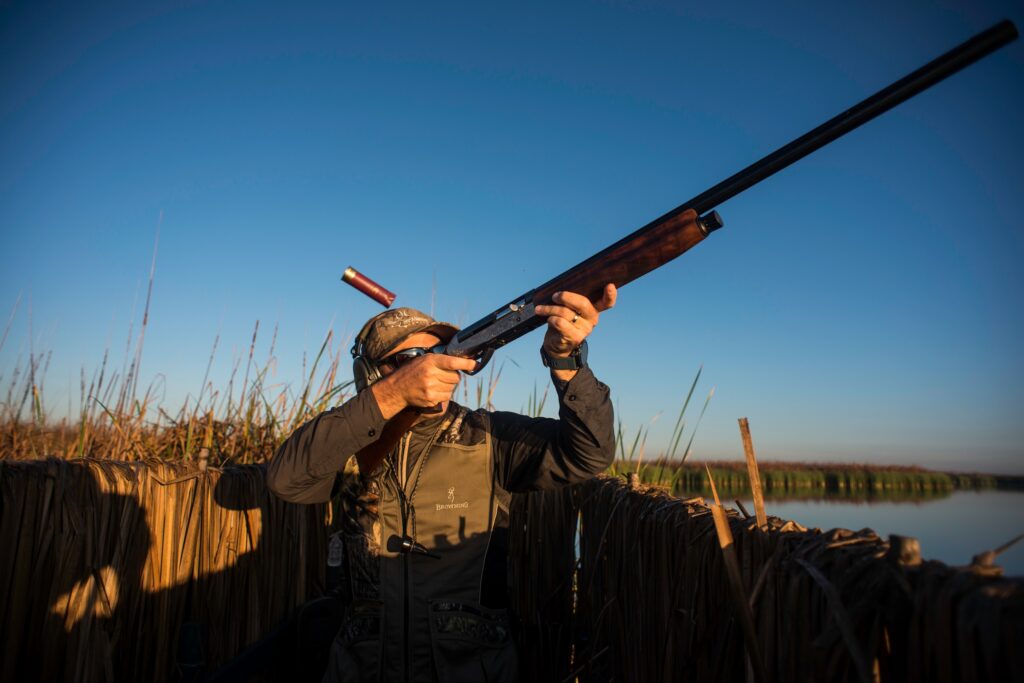
Shotgun plug: Shotguns must be plugged to hold no more than three shells total: one in the chamber, two in the magazine.
Boat registration: Current, properly displayed registration is required in virtually every state. This is a must before even considering duck hunting in your boat.
State-By-State Considerations For Duck Hunting From A Boat
Federal law sets the floor. States routinely go further.
In the core Hayden footprint (Colorado, Nebraska, Kansas, Wyoming, Montana), one of the most common traps for boat hunters is navigable waterway definitions. Whether a particular river bend constitutes public access varies by state. A spot you can legally anchor your boat and go duck hunting in Nebraska may be private bottom one state over. This isn’t a technicality. Game wardens know the difference.
WMAs and national wildlife refuges add another layer. Motorized vessels are prohibited on certain units. Some have vessel length or motor restrictions.
The statewide regs don’t always cover unit-specific rules, so pull the specific regulations for the water you’re hunting – not just the state overview.
When you’re in gray territory, call your local game warden before the hunt. That conversation is a lot easier to have beforehand.
Boat Safety Requirements (That Also Happen To Be Legal Requirements)
The legal checklist for vessel equipment and the practical checklist for coming home safe are basically the same list. Work through both before the duck hunting season kicks off, not when you’re on your boat at 5 a.m.
Per U.S. Coast Guard regulations, every vessel requires properly fitted PFDs (personal flotation devices) for each person aboard, a throwable flotation device, a fire extinguisher on motorized vessels, and a whistle or horn. Navigation lights are legally required if you’re running before official sunrise, which, again, nearly every duck hunting boat setup does.
Loaded firearm transport laws vary by state. Some prohibit transporting loaded firearms in a vessel regardless of hunting status. Know your state’s specific rules before you run spots with rounds in the gun.
Leave a float plan with someone who will actually act on it. The launch location for your boat, the water you’re duck hunting, and your expected return time. Simple. Non-negotiable in remote marsh and river country.
What To Look For In A Duck Hunting Boat
The wrong boat doesn’t just make duck hunting on the water harder. It makes it unsafe, and it costs you birds before you ever throw a decoy. Here’s what matters.
Hull draft is the starting point. If your boat can’t reach the water you’re duck hunting on, nothing else on this list matters. A deep-V hull drawing 18 inches has no business in a foot of marsh water.
Beam width and stability determine whether the boat is actually something you can go duck hunting with. A retriever launching off the side, a hunter standing to shoot, another person leaning over the gunwale to grab decoys; all of that happens when you’re duck hunting on the water. An unstable hull turns that into a problem fast.
Motor compatibility shapes where your duck hunting boat can go and how quietly you can get there. Surface-drive mud motors handle vegetation and skinny water that would wreck a prop. A bow-mounted electric trolling motor lets you make the final approach silently after killing the main motor. Both matter for different reasons.
Noise profile gets overlooked until it kills a hunt. Hull slap on chop, metal decoy clips rattling against aluminum, a motor that sounds like a lawn mower at 200 yards. All of it matters. Foam padding and rubber mounts cost almost nothing and solve most of it.
Weight capacity is almost always underestimated. Two hunters in waders, a 70-pound dog, three dozen decoys, blind material, shells, safety gear, and a cooler full of water add up to a surprising number. Know the rated capacity of your duck hunting boat and build your load around it.
What is the best boat for duck hunting? For most duck hunters starting out, a well-rigged aluminum jon boat is the answer. Versatile, shallow-drafting, and reasonably priced. Mud boats are the call for serious marsh hunting. Layout boats are a specialist tool for open-water diver hunting. Match the boat to the water you actually hunt, not the water you imagine hunting.
Boats You Cannot Or Should Not Go Duck Hunting In
When it comes to duck hunting from a boat, it’s worth separating legal restrictions from tactical ones. Both categories cost hunters.
Legal restrictions: Motorized vessels are prohibited in certain WMAs and national wildlife refuges. Some units have vessel length or motor size restrictions. Never assume a water body open to duck hunting is open to your specific boat. Verify unit-specific regulations.
Deep-V bass boats: The high freeboard ruins concealment, and the hull is unstable when you’re constantly leaning over the side. Both problems are serious in a duck hunting boat context.
Pontoon boats: You cannot effectively conceal a pontoon. They’re loud. They’re hard to maneuver in tight channels. Birds will have them patterned before you ever get a chance to call.
Center consoles and open-bow fishing boats: Built for visibility, not concealment, and typically running a motor setup wrong for shallow water. Workable in a limited open-water diver hunting scenario, but wrong for most boat duck hunting situations.
Canoes and kayaks for serious setups: Getting a safe, stable shooting position with a dog, a loaded shotgun, and a full decoy spread in a canoe is genuinely difficult. They have their uses for scouting and light early-season work, but these types of boats are not a real platform for serious duck hunting.
The multi-purpose trap: Boats marketed as hunting and fishing combo rigs are built not to fail at either thing, as opposed to excelling at one. If waterfowl hunting from a boat is your primary use, buy a boat that’s built for it.
Best Boat Types For Duck Hunting By Water Type
Jon boats run the majority of serious duck hunting operations in the country. Flat bottom, shallow draft, versatile. A 16 to 18-foot aluminum jon handles flooded timber, river systems, and marsh edges better than anything else at the price point.
Mud boats and surface-drive rigs are purpose-built for dense marsh, vegetation-choked flats, and water too shallow for a prop. The motor rides on top of the vegetation rather than through it. If thick cattail marsh or coastal grass flats are your primary ground for duck hunting, this is the boat.
Layout boats sit extremely low in the water and are purpose-built to be invisible to birds on approach. They require a tender boat and aren’t a beginner’s setup. For open-water diver hunting, nothing does what a layout boat does.
Purpose-built duck skiffs have become more popular among those serious about duck hunting who want more capability than a basic jon boat without going full specialty rig. Good stability, reasonable draft, designed to carry a blind.
Airboats access marsh that nothing else can reach, but they’re loud. In hunting situations where noise matters (which is most of them), the commotion of an airboat approach can push birds before shooting hours. Situational at best.
Must-Have Boat Modifications For Duck Hunting
Getting the right boat for your duck hunting mission is half the job. But your setup is the other half of the equation.
Boat blind system: A PVC frame stuffed with local vegetation (e.g., cattails, marsh grass, whatever grows where you hunt) is the most natural-looking option. Commercial blind kits are faster and sturdier. Most serious hunters run a commercial backing frame and pack it with local material. Natural always blends better.
Camo treatment: Flat spray paint in tan, olive, and brown does the job and costs almost nothing. Camo wraps for your boat are more durable for a full duck hunting season of hard use. Whatever you use, eliminate anything that catches light.
Stake-out poles: Silent anchoring in soft-bottom shallow water. Driving a pole rather than dropping an anchor means no splash, no chain noise. In calm conditions, that difference is the difference.
Dog platform and ramp: If you’re running a retriever, this isn’t optional. A stable, anti-slip platform at water level lets your dog work without destabilizing the boat during a duck hunting mission. A wet Lab scrambling over a gunwale on a dark morning is both dangerous and disruptive.
Trolling motor mount: Kill the main motor at a distance, trim down, and move in on electric. The birds that would flush at 200 yards from a running outboard will hold for a trolling motor approach. This modification pays for itself the first morning you use it.
Drainage and organization: Decoys and dogs move water into the hull constantly. A bilge pump, non-slip mat, and a thought-through organization system (dedicated decoy crate positions, waterproof boxes, shell caddies) keeps a chaotic duck hunting boat under control.
Gearing Up: Everything You Need For Duck Hunting From A Boat
The right boat is only half of the duck hunting equation. There are a few gear elements that can have a substantial impact on your success rates.
Building A Decoy Spread
A decoy spread is a system, not a shopping cart. How you rig and configure matters as much as how many ducks are in the water.
In still water, weighted-keel decoys are fast to deploy and hold their position. In current (rivers, tidal flats, anywhere the water moves), a Texas rig with a heavy anchor keeps your spread from bunching into an unnatural pile downwind. Match your rig to your water.
Dabblers work best in tighter spreads near cover with a clear landing hole positioned upwind of the blind. Divers want open-water rafts that read as a big flock already committed to a spot. When duck hunting from a boat on open reservoir water, bigger is generally better for a diver spread.
Motion matters. A spinning-wing decoy on a calm day with light pressure is a bird magnet. On heavily worked public water, birds pattern spinning wings fast – know when to take it down. Jerk rigs and water-agitators produce natural ripple movement that reads well in any conditions.
Organize decoys for dark deployment. Mesh bags drain well but tangle. Stackable plastic crates keep things sorted by species and string length. Whatever you run, practice it before opening morning.
Calling From A Boat: Adjusting Your Technique
Almost nobody talks about how duck hunting from a boat changes calling, due to sound carrying differently over open water. On a flat, calm reservoir, a mallard call is louder to incoming birds than the same call blown with the same air in a flooded cornfield. Hunters who don’t account for that come in too hot. Volume that reads as confidence in a field reads as panic on open water. Start lighter.
When birds are circling and showing interest, the instinct to keep calling is usually the wrong move. Birds working an open-water setup have been looking at your spread from a long way out. They’ve already made a decision. Calling frantically when they’re close doesn’t help it.
Know your duck species. Mallards want hen calls and feeding chuckles. Teal are fast and respond to a whistle. Pintail and wigeon have their own sounds. Divers (bluebills, canvasbacks) want soft grunting purrs, not the loud quacks that work on dabblers. Carry the duck calls that match the water you’re hunting.
Caller positioning matters inside the blind. In an open-water duck hunting in a boat setup, birds can pick up hand and face movement from farther out than most hunters expect. Call from a position where you’re not silhouetted against the sky, and keep the movement tight.
Clothing And Layering For Cold-Water Boat Hunting
Open water at 7 a.m. in November is not the same as a flooded field at 7 a.m. in November. There’s no windbreak. Every knot of wind comes straight across the water and hits you full. Duck hunters who dress for field hunting and find themselves on a boat in a big reservoir in a north wind find out the hard way.
Moisture-wicking base layer first. Wet underlayers from sweat or spray accelerate heat loss faster than cold air alone. An insulating mid-layer (e.g., fleece or synthetic down) holds warmth even when the outer layer gets wet. A waterproof, windproof shell is not optional when duck hunting from a boat in serious conditions.
On the chest waders vs. bibs question: if you’re wading regularly to set decoys or make retrieves, waders make sense. If you’re primarily in the boat when duck hunting, waterproof bibs are less restrictive and keep you plenty dry.
Cover your hands and face. Both are heat loss points, and both give you away to incoming birds. Neoprene gloves with trigger access and a good face mask earn their place in a serious boat hunting setup.
Bringing Your Hunting Dog Along
A retriever is half the hunt on open water. Without one, cripples in the current disappear. With a bad one (or a good one that hasn’t been prepared for boat work), you’ve got a different kind of duck hunting problem.
Not every retriever translates to boat hunting. Labs and Chesapeakes are the standard for cold-water boat work. The coat, the drive, the temperament; they’re built for it. A dog that holds beautifully in a field blind but won’t settle in a rocking, confined boat with decoys splashing and birds working overhead is a liability when duck hunting, not an asset.
Getting a dog right for boat hunting takes time. Work them in the boat in the off-season. Get them steady on the rock and noise before there are real birds involved. A dog that breaks early without stable footing in a loaded duck hunting boat is dangerous to everyone on board.
A dog platform at water level with an anti-slip surface is non-negotiable. Without one, a big dog trying to re-board over the gunwale can flip a jon boat or land on another hunter.
Is it safe for dogs to duck hunt in a boat? Yes, with preparation. A neoprene vest adds buoyancy and insulation for cold-water work. In river current, know where the downstream eddies are, keep retrieve distances manageable, and always track where the dog is relative to the boat. A dog overboard in fast water before sunrise is an emergency. Plan for it before it happens.
Safety First: What Every Sportsman Must Know Before Hunting From A Boat
Duck hunting from a boat stacks risk factors that don’t usually show up together: loaded firearms, unstable footing, pre-dawn darkness, and cold water. Any one of them is manageable. All four together, without preparation, is a different situation.
Assign shooting zones before the hunt starts. Every hunter in the boat gets a lane. Crossing shots are agreed on before birds are working, not in the moment. Muzzle awareness in a confined boat demands more attention than it does in an open field. There’s less room, and things happen faster.
Wear your PFD when duck hunting from a boat. The difference between traditional foam and an auto-inflating model comes down to whether you’ll actually keep it on. Inflatables are comfortable enough that hunters wear them consistently. They do require regular inspection; the CO2 cartridge needs to be functional. A PFD in the hull does nothing. Auto-inflating chest packs have become the standard among those serious about duck hunting from a boat for exactly this reason.
Cold water is more dangerous than most hunters give it credit for. Air temperature and water temperature aren’t apples to apples. At the water temperatures common during duck season (40 to 55 degrees Fahrenheit), cold shock starts within one to three minutes of immersion. That means involuntary gasping, rapid breathing, and spiking blood pressure before you’ve had time to process what happened. Most cold water deaths occur before hypothermia fully sets in. A PFD and a float plan aren’t overly cautious. They’re what keep a bad situation from becoming a fatal one.
Unload every firearm every time the motor runs. Before you pull the stake. Before you trim up the trolling motor.
What should a sportsman consider when hunting from a boat? Shooting lanes, PFD use, cold water risk, legal hours, boat setup and concealment, decoy strategy, species ID, and the specific regulations for the water being hunted. Every hazard that exists in field hunting exists when duck hunting in a boat, and most of them are amplified.
Extra Precautions When Hunting Solo
Solo duck hunting from a boat is common, but it demands a higher standard than a two-person hunt, because the margin for error is smaller.
Leave a detailed float plan with someone who will act on it. Specific launch ramp, specific water, expected return time, and a clear instruction for when to call search and rescue. In remote marsh and river country, that plan is your backup system.
Cell service fails in a lot of the best duck hunting spots. A handheld VHF marine radio and a satellite communicator (Garmin inReach and SPOT are the most common among serious hunters) fill that gap. They’re a minor expense relative to what a search and rescue operation costs.
Solo hunters need to apply a harder cutoff on marginal conditions. High wind on open water, strong river current, ice, and low visibility fog are conditions a two-person boat can navigate more safely than a solo rig. The birds will be there tomorrow. Go tomorrow.
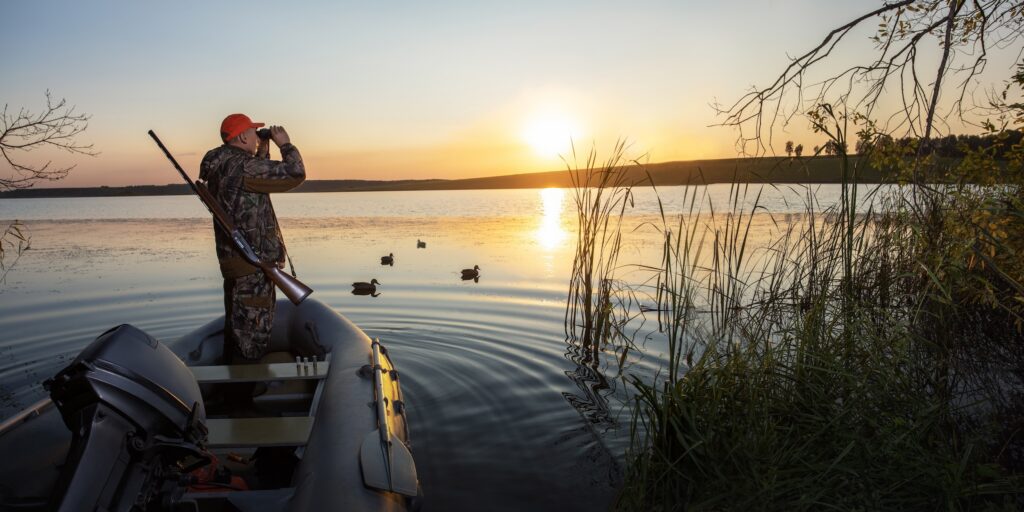
Scouting And Choosing The Right Location For Duck Hunting From A Boat
Everything else in this duck hunting guide (the right boat, the right setup, the regulations knowledge) is preparation for one thing: being in the right place when birds want to be there. It’s the last variable, and the one most hunters underinvest in.
Public water gets worked over. By the third week of the season, ducks on heavily pressured public marshes and reservoirs have seen every spread on that water and been shot at from every angle. They pattern hunter behavior faster than hunters pattern birds. Early-season public water can be productive. As the season moves, the advantage consistently shifts to unhunted ground.
Build your location strategy around pre-season scouting. Run your water before opener. Mark where birds are using. Identify feeding flats, travel corridors, and loafing areas. Pull eBird migration data for your specific flyway to understand timing and staging patterns. Then hunt what you’ve found rather than where you went last year.
Wind and weather make location decisions every morning. A duck hunting setup that was perfect on a calm day with an east wind is wrong when a north front comes through and rocks the boat. Birds approach into the wind. Your blind needs to deliver them with the sun at their backs and the decoys in front of your gun. Adjust your anchor daily when you have to.
Is float hunting legal? Yes, in most states. The federal restriction is that you cannot shoot from a vessel moving under power or being actively propelled toward birds.Check state-specific rules and any WMA restrictions before the trip, since some managed units add their own vessel use limitations.
Why Private Land Access Changes Everything
Private water is a different world. Hunters who’ve hunted both don’t need it explained. For hunters who haven’t made that comparison yet, here’s the short version.
Birds on private water haven’t been educated. Decoys work. Calls get responses. The fundamentals of duck hunting from a boat, the things you practiced and prepared for, actually perform as intended, rather than getting countered by ducks that have seen every play in the book.
Exclusive access to private marsh, flooded agricultural fields, river bottoms, or private reservoir water means you learn the water over years, not just mornings. By the fifth season you’re hunting a private piece, you know things about it that no public land hunter could. That knowledge compounds.
Private ag land next to water is some of the most productive duck hunting ground available. Flooded fields and grain stubble adjacent to marsh or river is the combination waterfowl want most: food and safety, close together. That’s what drives the most consistent duck hunting from a boat in the central flyway.
Find Your Next Duck Hunting Property With Hayden Outdoors
Private waterfowl ground doesn’t stay on the market long. Properties with real duck hunting value, like private marsh, river bottoms, flooded ag ground, and reservoir access, are genuinely rare. The people who own them hold on.
Our agents at Hayden Outdoors understand waterfowl properties because they hunt them. They know the difference between land that looks good on a map and land that actually produces birds when conditions are right. That perspective matters when you’re looking at a property you want to hunt for the next twenty years, not just the next season.
If you’re looking to buy private duck hunting ground, or just want to talk through what makes a waterfowl property worth owning, our team is the right call.
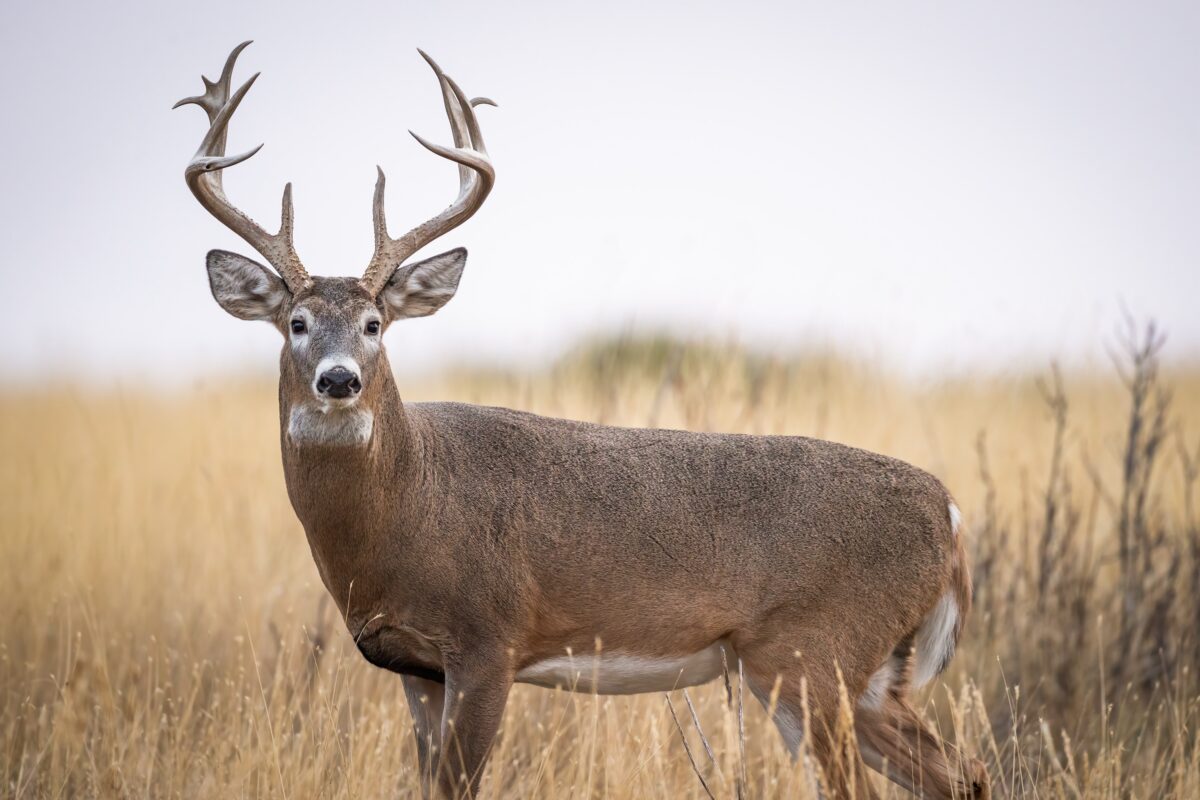
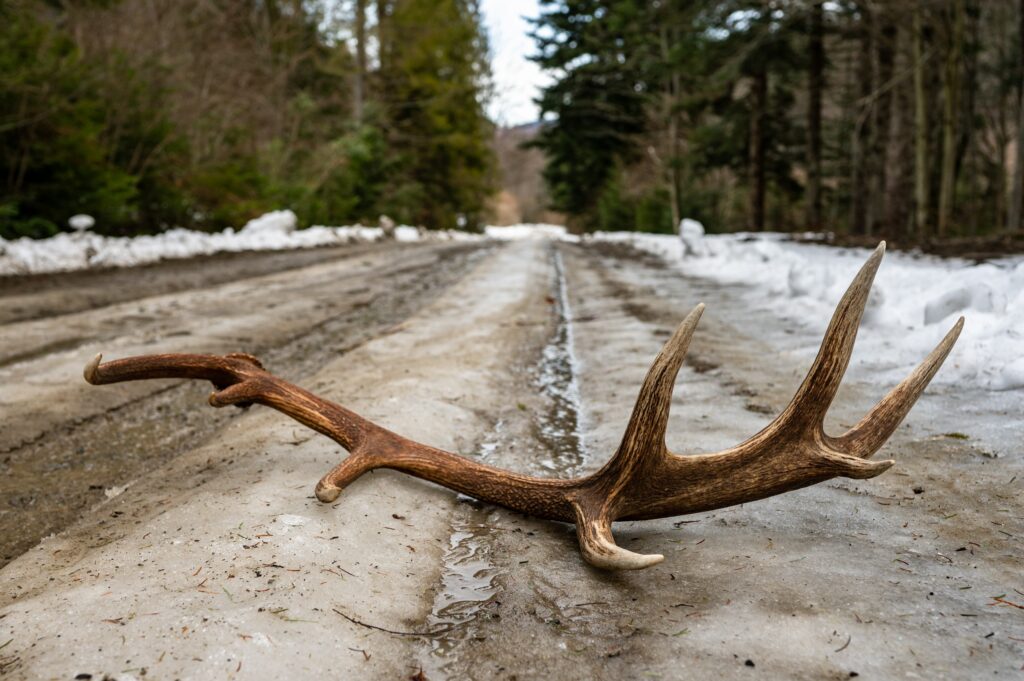
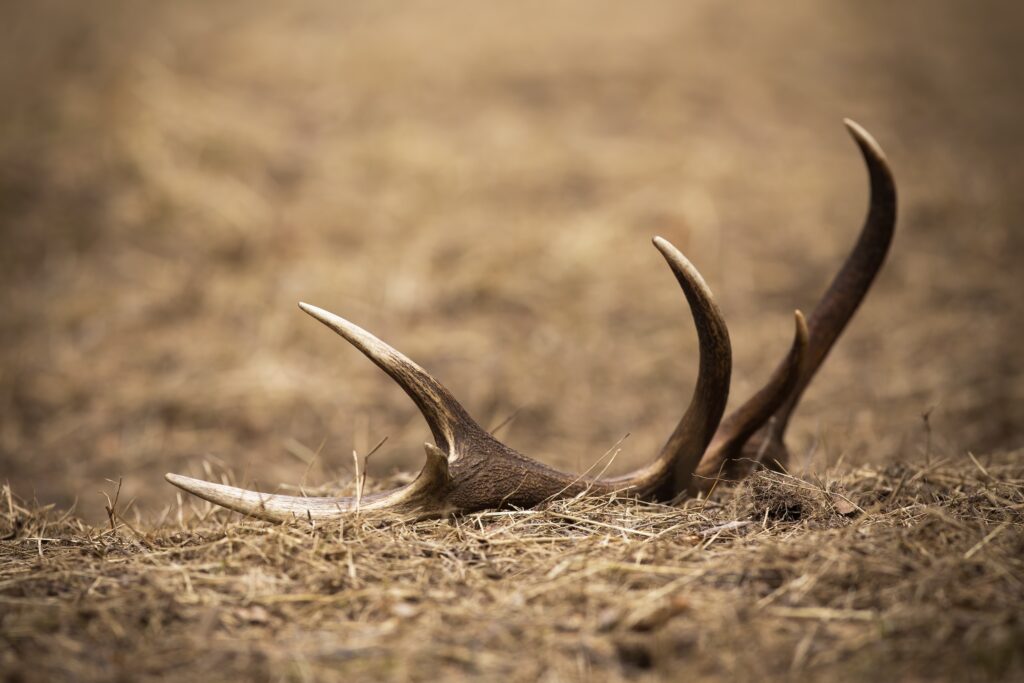
Shed Hunting Guide: When Do Deer Lose And Shed Their Antlers?
The woods are quiet. But the deer antler shed hunting season is just getting started, and every day you wait, other hunters, squirrels, and rain are getting to the antler first.
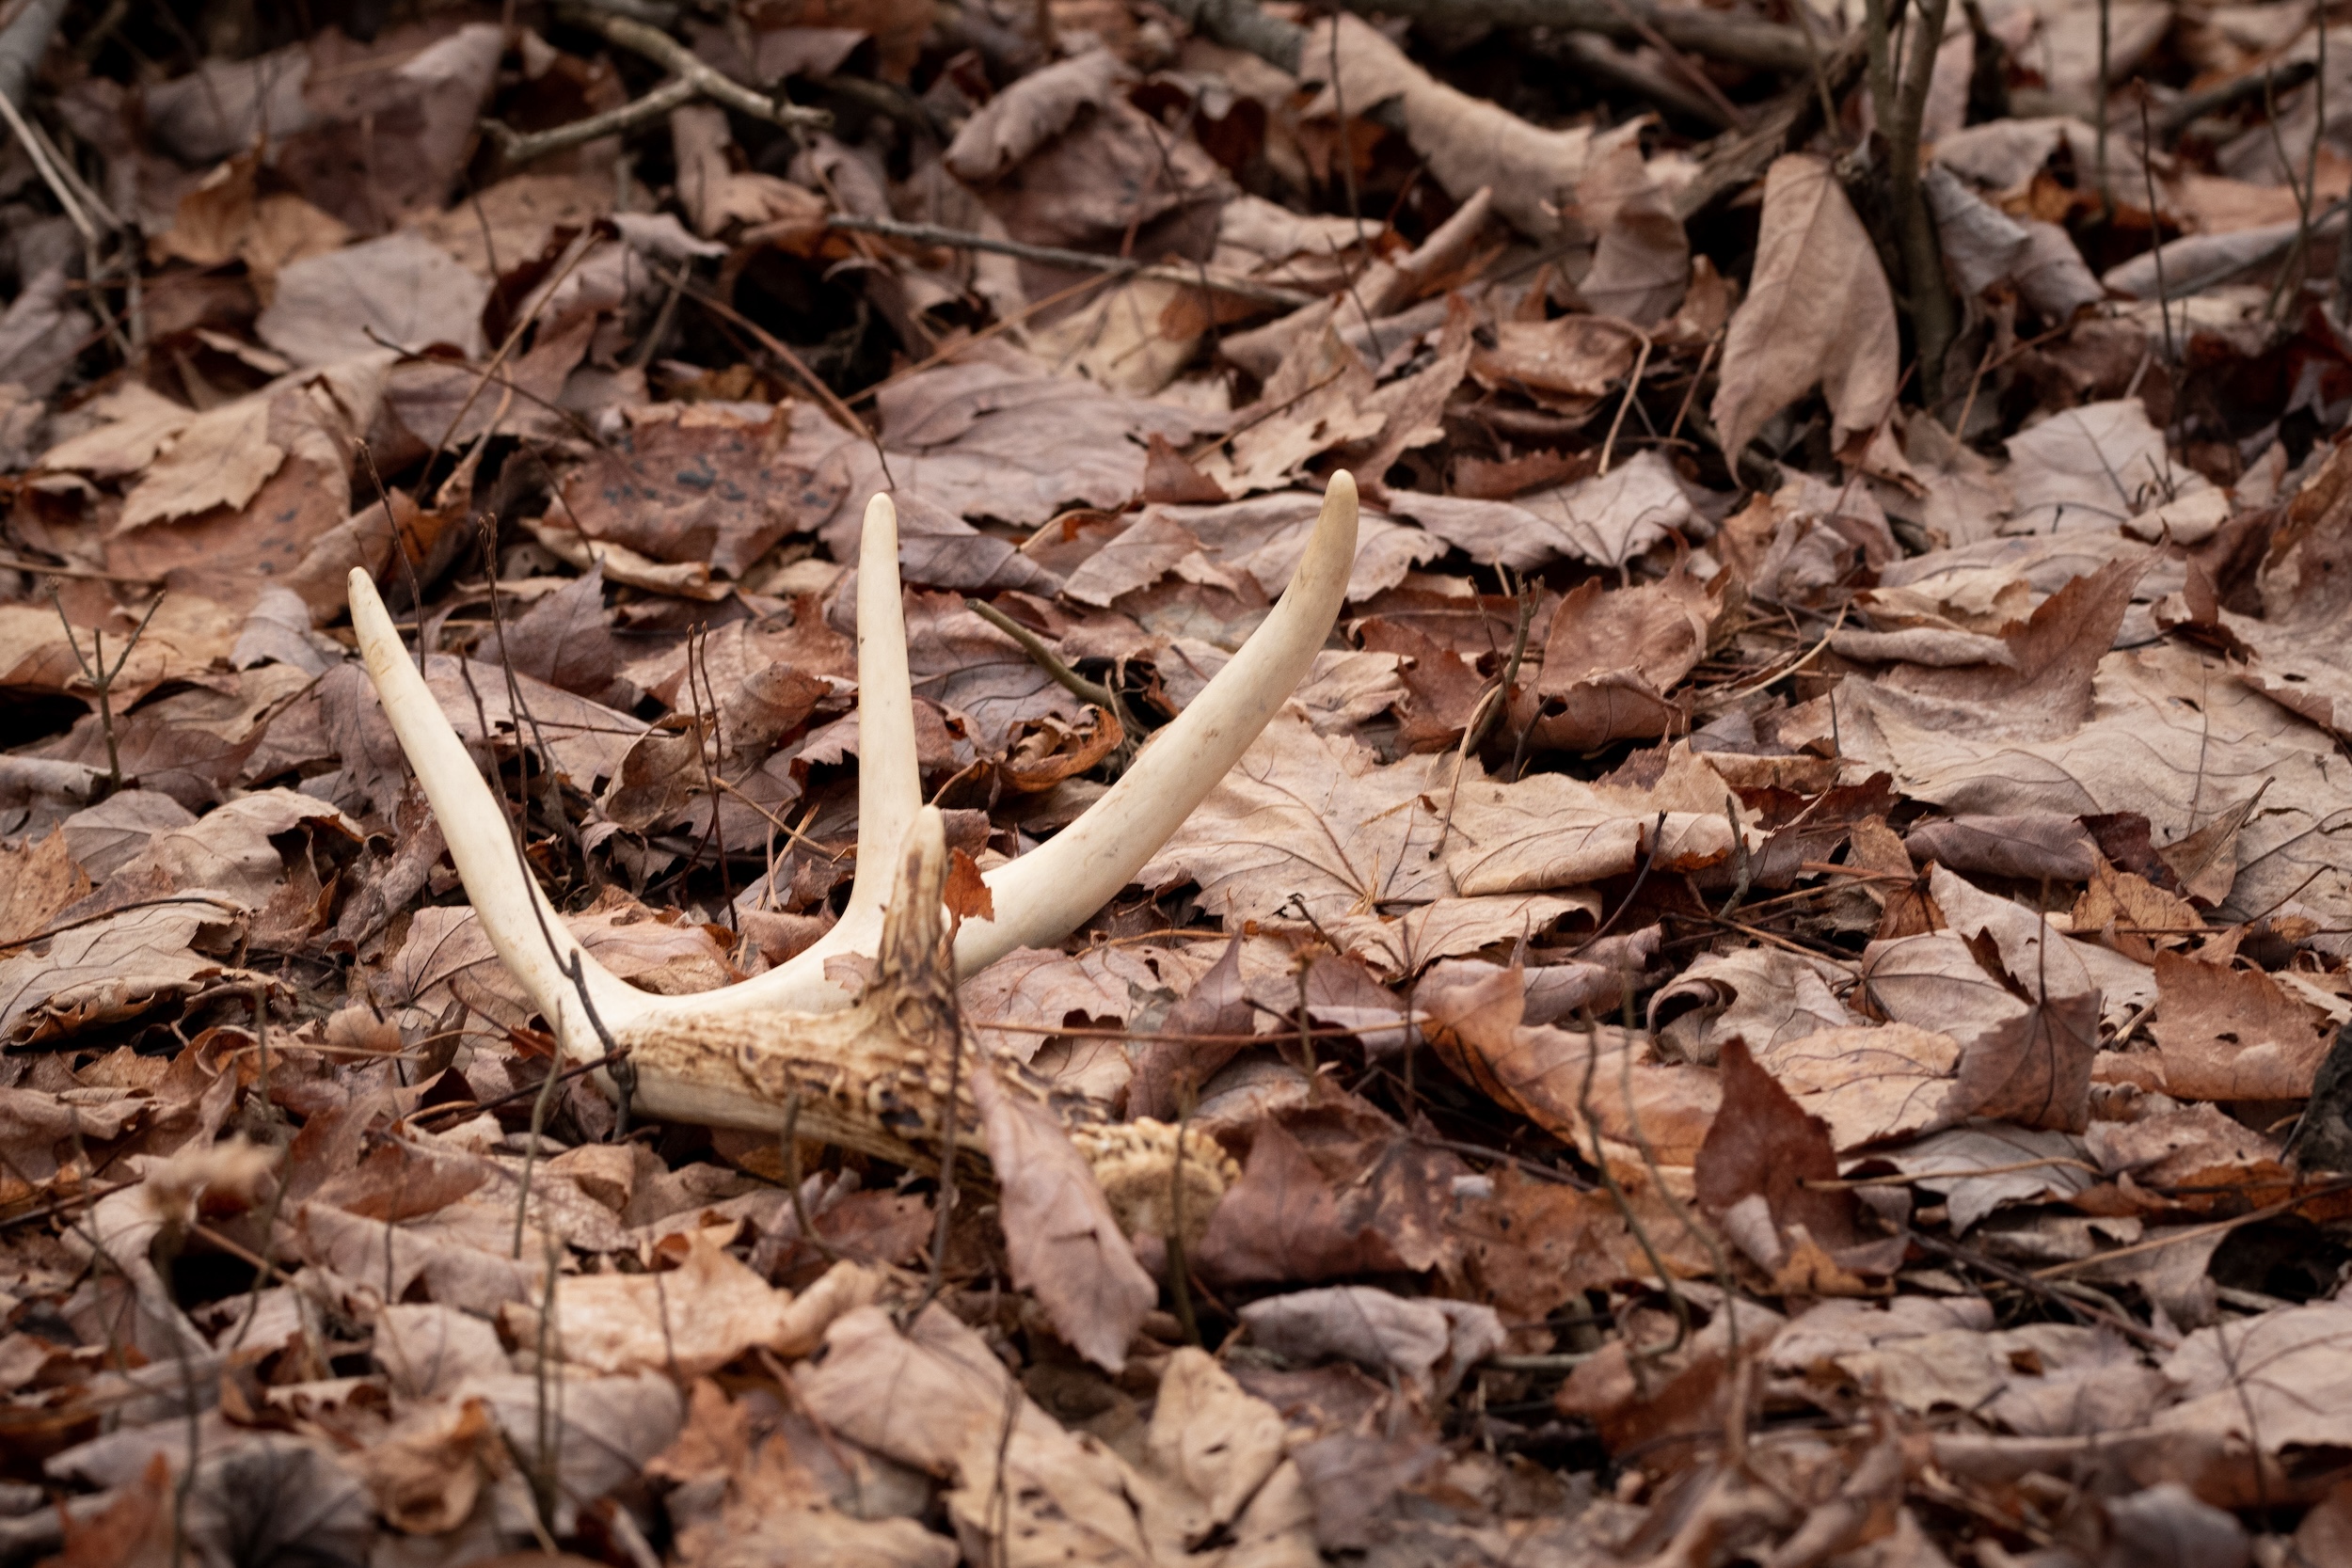
If you’ve ever walked miles of good-looking ground and come home empty, you already know the frustration. Deer antler shed hunting looks simple from the outside. Walk the woods, find the bone. In practice, the hunters who pile up deer antlers year after year are working from a plan. They know when deer shed their antlers in their specific region, they know exactly where to look, they show up prepared, and they stay on the right side of hunting regulations that are getting stricter every season.
Our deer antler shed hunting guide covers all of it. Whether you’re chasing whitetails across the Midwest, tracking mule deer sheds through the mountain West, or hunting your own private ground, what follows is everything you need to make this your best deer antler shed hunting season yet.
Regional Breakdown: When Do Deer Shed Their Antlers?
Timing is the single most important variable in deer antler shed hunting. Go too early, and you bump deer before they drop, pushing them off the property. Go too late, and rodents, weather, and other shed hunters have already cleaned up all the deer antlers.
According to MU Extension, some bucks begin shedding their antlers in late December, with most having dropped by early March. That window shifts meaningfully by region, herd health, and the severity of winter.
Pro Tip: Just because a particular time of year is ideal for shed hunting doesn’t mean it’s legal. Several states implement laws on when you can and cannot go shed hunting.
The Midwest
The Midwest is the heart of buck shed hunting country, and for good reason. Agricultural food sources keep deer well-nourished through winter, and well-fed bucks tend to hold their antlers longer.
According to the National Deer Association, higher doe-fawn breeding rates in productive Midwestern habitats can extend the rut and delay the testosterone drop that triggers antler shedding. Plan your deer antler shed hunting trips in this region from late January through mid-March, with the bulk of antlers hitting the ground in February.
The South and Southeast
According to the Alabama Cooperative Extension (Auburn University), white-tailed deer antler shedding in the Southeast occurs between January and March. The rut runs later in parts of the South, with peak breeding in some southern herds falling between Christmas and late January, meaning the post-rut testosterone crash arrives later than in the North. Warmer climates and less severe winters also mean less nutritional stress, pushing early drops. Shed hunting in the Deep South and Gulf Coast states trends toward February through March.
The Northeast
Harsh winters, deep snow, and the stress that comes with both the window for shed hunting for deer antlers earlier in the Northeast compared to the Midwest. Shed hunting in this region generally runs from February through March, though bucks on degraded winter range or those that rutted hard may drop in January. The MU Extension confirms nutritional stress as a driver of early shedding, something northeastern hunters need to account for after brutal winters.
The Great Plains
The Plains states offer some of the most productive shed hunting in the country, with high deer densities and a mix of agricultural and grassland terrain. The general window runs late January through early March, though year-to-year variability is significant. Research from the University of Nebraska, cited by the National Deer Association, found that drought stress and harsh conditions produced earlier, less-healthy drops, a real consideration in drier Plains years.
The Rocky Mountain West
The West introduces mule deer and elk to the shed hunting picture, each on their own schedule. According to Colorado Parks and Wildlife, Colorado deer shed from mid-January through March, elk from February through April, and moose from November through January. In Montana, Wyoming, Utah, and Idaho, mule deer generally follow a similar late January through March window, while elk and moose tend to run later into April. Elevation matters throughout this region. Deer wintering at lower elevations tend to drop earlier than animals holding at higher ground.
The West Coast: California, Oregon, And Washington
California, Oregon, and Washington each bring their own timing, shaped by dramatic variation between coastal lowlands, inland valleys, and high-elevation terrain.
In California, mule deer antlers are shed each year in January or early February after the breeding season, per the California Department of Fish and Wildlife. California hosts six subspecies of mule deer across terrain that ranges from coastal chaparral to Sierra Nevada peaks and southern desert, so elevation and subspecies both influence when individual bucks drop their antlers. CDFW does not maintain a seasonal closure or permit requirement for shed antler collection, but private land always requires landowner permission, and some ecological reserve and wildlife area closures apply. Always check CDFW’s current regulations and any posted closures before heading out.
In Oregon, the Oregon Department of Fish and Wildlife confirms that buck deer shed their antlers from late December through March, with coastal and lower-elevation areas trending earlier and high-elevation inland ranges running later. Bull elk in Oregon shed from late February through early April. ODFW recommends shed hunters consider waiting until May or June when deer have moved off the winter range.
In Washington, WDFW confirms that elk shed beginning in late February for the largest bulls, extending through late April and into early May for younger animals. Mule deer east of the Cascades follow a similar late winter to early spring window. Washington requires no seasons or permits for shed antler collection, but seasonal wildlife area closures apply in parts of Cowlitz, Kittitas, and Yakima counties to protect wintering elk, with trespass fines of $150 and increased penalties of $250 for removing sheds from a closed area, per WDFW.
What Shifts The Deer Antler Shedding Window
Photoperiod and latitude: Decreasing daylight is the master trigger. Bucks at higher latitudes tend to shed earlier than those in southern herds.
Nutrition and herd health: Well-fed bucks hold antlers longer. Injured deer, or those who have endured a tough, long winter, may shed their antlers sooner.
Rut length: In areas with skewed buck-to-doe ratios, unbred does keep testosterone elevated longer and delay the drop.
Winter severity: According to the National Deer Association’s Chief Conservation Officer, prolonged nutritional depletion, not a single cold snap, is what pushes shedding earlier across a herd.
The Importance Of Understanding Where And When It’s Legal (And Illegal) To Go Shed Hunting For Deer Antlers
East of the Mississippi, shed hunting is largely a walk in the woods with no paperwork required. West of it, the rules are specific, enforcement is real, and the consequences for getting it wrong go beyond a fine. Understanding the shed hunting regulations before you head out protects your hunting privileges and the deer herds you care about.
East Of The Mississippi: Generally Open For Shed Hunting
Across the Midwest, South, and Northeast, shed hunting is typically legal year-round with no permit required. Regulations do change, so verify current rules with your state DNR before heading out. Shed hunting for deer antlers on private land always requires explicit landowner permission, regardless of the state.
Western States: Stricter Shed Hunting Rules, Real Consequences
Colorado: According to Colorado Parks and Wildlife, shed antler and horn collection on all public lands west of I-25 is prohibited from January 1 through April 30 annually. Violations carry a $137 fine per offense, and each illegal antler is treated as a separate offense, each also carrying five license suspension points against your hunting privileges. Private land west of I-25 is exempt from the closure, but trespassing without permission is not.
Wyoming: Per the Wyoming Game and Fish Department, Collection Area 1, covering public lands west of the Continental Divide, is closed from January 1 through 6 a.m. May 1 for residents, and through 6 a.m. May 8 for nonresidents. Nonresidents 15 and older must also carry a conservation stamp in Collection Area 1. Violations carry fines, forfeiture of antlers, and loss of hunting and fishing privileges.
Utah: The Utah Division of Wildlife Resources requires anyone hunting shed antlers between January 1 and May 31 to complete a free online Antler Gathering Ethics Course and carry the certificate in the field. The course must be completed every year. Emergency statewide closures are possible and have been issued before, including during the record snowpack of 2023. Commercial antler buyers require a separate Certificate of Registration at $150 per year.
Montana: According to Montana Fish, Wildlife and Parks, wildlife management areas (WMAs) that manage critical winter range are closed to all public access from December 2 through noon on May 15 each year, with some site-specific variations. State parks are always off-limits for shed hunting. Anyone 12 and older needs a Conservation License to access WMAs, and as of 2026, nonresidents must pay $50 for a shed hunting license on WMAs and cannot enter during the first seven days after opening.
Idaho: Per Idaho Fish and Game, nonresidents are required to purchase a valid big game hunting license to gather shed antlers as of July 1, 2024. Regional emergency closures apply during severe winters. Residents face no permit requirement for shed hunting outside of closed areas, but regional restrictions can change seasonally, so checking current rules before any trip is worthwhile.
Oregon:Oregon DFW notes that some ODFW wildlife areas are closed to public access in late winter to protect big game. Under Oregon law, antlers shed on private land belong to the landowner, meaning written permission is required before hunting them. Oregon DFW also recommends that shed hunters consider delaying their search until May or June, when deer have moved off winter range.
Federal Lands: Always Off-Limits For Shed Hunting
Shed hunting for deer antlers is prohibited in all National Parks and National Wildlife Refuges, with no exceptions. BLM and National Forest lands are generally open, but local travel restrictions and wildlife area closures can apply. Check with the managing agency before your trip.
Three Things Most Deer Antler Shed Hunters Do Not Know
Deadheads are evidence, not trophies. If you come across a skull with antlers still attached, do not touch it, move it, or disturb the surrounding area. Per Utah DWR and Oregon DFW, a deadhead may indicate a poached animal. Report it to your state wildlife agency and let officers investigate.
Antler traps are illegal. Devices rigged to snag antlers from living animals are prohibited in most states, including Colorado. The Alabama Cooperative Extension cites Auburn University research showing pedicle damage from premature antler removal is the leading cause of permanent antler deformity in whitetails. These devices injure deer and are not a gray area.
Selling sheds has its own rules. Casual resale is generally legal in most states. Commercially buying and reselling antlers is a different matter. Utah DWR requires a $150 Certificate of Registration for commercial antler buyers. Check your own state’s rules before selling at volume or online.
Gear To Bring With You When Going Shed Hunting For Deer Antlers
Shed hunting is a walking sport, often covering miles of uneven late-winter terrain. The right kit keeps you out longer and puts more bone in your pack.
Sturdy hiking boots with ankle support. You’ll cover serious ground on terrain that is wet, frozen, and unpredictable. Blisters and rolled ankles end trips early.
Layered clothing. Late-winter temperatures swing hard between the climb and the rest. A moisture-wicking base, insulating mid-layer, and wind-resistant shell cover the range you’ll experience when shed hunting.
Binoculars. One of the most underused tools in shed hunting. Glassing open fields and hillsides saves legs and spots antlers you would walk right past at ground level. And a spotting scope is an additional optic that shed hunters use to get a closer and more stable look at longer distances.
Trekking poles. Especially valuable in the mountain West and on any ground with elevation change. Reduces fatigue on long shed hunting days and keeps you stable on frozen or slick slopes.
Backpack with hydration. Sheds are heavier than they look. A pack with frame support, exterior straps, and a hydration bladder keeps you mobile longer and carries your finds without killing your shoulders.
Mapping and GPS app (onX Hunt, GAIA GPS, BaseMap). Mark every find, log the routes you have covered, and keep yourself legal near property lines. Know boundaries before entering any public land in closure areas.
Orange vest or hat (situational). Some late turkey and upland seasons overlap with prime shed hunting windows. Check your state regs.
Bear spray (Western hunters). Prime shed country in Montana, Wyoming, and Colorado is also an active spring bear habitat. Montana FWP explicitly advises shed hunters at popular WMAs to expect bear encounters and carry spray.
Basic first aid kit. Long miles, brush, and slippery ground. Plan for blisters and minor cuts at a minimum.
Safety Considerations Before You Embark On Your Deer Antler Shed Hunting Adventure
The same remote country that holds the best shed hunting is also the most unforgiving if things go sideways. These are the ways to stay prepared on your trek.
Tell someone your plan. Where you are going, when you expect to be back, and what to do if they do not hear from you. This is non-negotiable for remote trips.
Download offline maps before you leave. Much of the best shed hunting ground has no cell service. Apps like onX and GAIA allow offline map downloads, so navigation stays available when the signal disappears.
Dress for variable conditions. Sweating through a steep climb and then stopping in cold wind creates a real hypothermia risk. Layering is not optional in late-winter terrain.
Be wildlife-aware in the West. Bears coming off winter range are hungry and unpredictable. Wyoming Game and Fish recommends making noise, hiking in groups, and carrying accessible bear spray. Mountain lion country deserves the same awareness.
Respect wintering deer.Idaho Fish and Game puts it plainly: repeated disturbance to wintering deer depletes the fat reserves they need to survive until spring green-up. Going in at the right time protects the herd and keeps deer on your property through the drop rather than pushing them onto the neighbor’s ground.
Consider a satellite communicator for remote western trips. A Garmin inReach or similar device is inexpensive relative to the peace of mind it provides when you’re beyond cell range when shed hunting.
Are Particular Times Of Day Optimal For Deer Antler Shed Hunting?
Unlike hunting the rut, shed hunting does not have a magic hour. Antlers don’t move. What matters far more is light conditions, where you are in the season, and whether you’re shed hunting on public or private ground.
Light conditions beat the clock. The Alabama Cooperative Extension specifically recommends searching on overcast days. Even and diffuse light reduces glare and makes antlers stand out in timber and leaf litter. Bright sunshine helps in open fields and food plots, but creates masking shadows in the woods. That same source notes that rain darkens antler surfaces, making them easier to spot against the ground.
Season timing matters more than daily timing. On public land, shed hunting earlier in the season and earlier in the day gives you a real edge over the competition. Other shed hunters are working the same ground, and once-over pressure is real on popular public areas.
On private land under roughly 100 acres, patience is the smarter play. Going in before most bucks have shed risks bumping deer off the property and onto the neighbor’s. Trail cameras that monitor when your herd goes antlerless tell you exactly when to make your move, and that kind of information is only fully usable when you own the ground.
The Value Of A Shed Hunting Companion
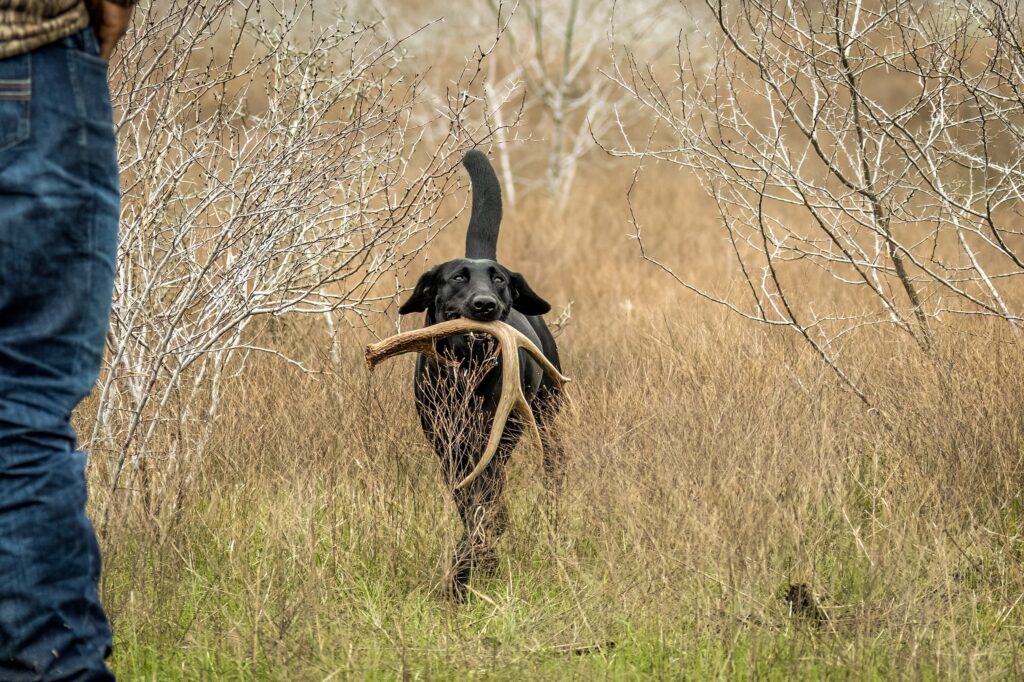
A trained shed dog is one of the most effective tools a serious shed hunter can have when searching for deer antlers. Dogs cover more ground and use both nose and eyes, while shed hunters working solo rely almost entirely on vision to find deer antlers.
Popular retrieving breeds such as Labs, Goldens, and German Shorthaired Pointers take well to shed hunting training because of their natural retrieve instinct and drive to work. Training typically starts with antler introduction around eight weeks, building toward real fieldwork by four to six months.
The progression moves from basic fetch with real antlers to scent-introduced retrieves to blind finds in actual terrain. One important field note: Idaho Fish and Game specifically warns that to wintering deer, a dog registers as a predator, even a well-behaved one raises stress. Keep dogs under control, confirm that dogs are permitted in any area with active seasonal closures, and time your entry based on when deer have actually shed rather than when you’re eager to go.
Prime Shed Hunting Locations For Finding Deer Antlers
Deer do not shed antlers randomly across the landscape. They shed them where they spend the most time in winter. That narrows the search considerably. The National Deer Association and Virginia DWR both point to three location types that produce the overwhelming majority of sheds: winter food sources, bedding cover, and the corridors connecting them.
Start With Winter Food: Food anchors all deer movement in winter, and shed hunting follows that anchor. The critical detail is that winter food sources often differ significantly from fall food sources. According to the National Deer Association, experienced Midwest shed hunters focus on fields with remaining food, cut corn, soybean stubble, winter wheat, food plots, alfalfa, clover, locust trees, and oak ridges, rather than the stands where they hunted in November. Scout fresh before assuming last fall’s hot spots will produce shed hunting results. Walk field edges early in the season before pushing deeper into cover.
Bedding Areas: A dominant buck’s core bedding territory is typically in the thickest, most remote cover on the property: overgrown swamps, conifer stands that block wind, brushy creek bottoms, saddles just below ridge lines, and south-facing slopes. Save bedding areas for shed hunting later in the season, after trail cameras confirm that most bucks have dropped. Pushing into heavy cover too early is the most reliable way to relocate deer off your property before shed hunting season really begins.
Travel Corridors And Fence Lines: Trails connecting food and bedding are natural shed hunting routes, but fence crossings deserve special attention. The effort of clearing a fence regularly dislodges a loosening antler. Check both sides of every fence line you encounter. Ditches and irrigation channels are consistent producers for the same reason. They force deer into a jump or scramble that can free a nearly-released antler.
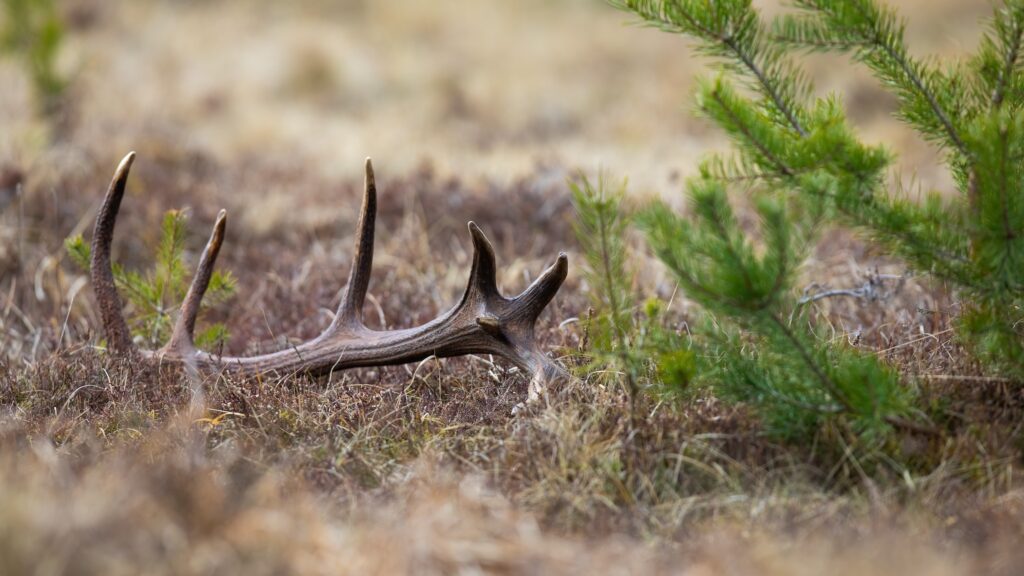
South-Facing Slopes: In the mountain West and anywhere with meaningful elevation change, south-facing slopes are where deer concentrate in winter for thermal warmth. These slopes lose snow first, exposing both food and shed deer antlers earlier than the surrounding terrain. A south-facing hillside in late February is almost always worth your time.
Use Technology To Work Smarter: Mapping apps like onX Hunt, GAIA GPS, and BaseMap let you mark every find, log the routes you have walked, and identify terrain features from aerial view before your boots hit the ground. Trail cameras left running past hunting season are equally valuable for finding shed deer antlers. Reviewing footage to track when bucks go antlerless tells you exactly when to make your shed hunting entry rather than guessing based on the calendar.
When You Find One Side, Search For The Match: The MU Extension confirms that both antlers typically drop within hours to days of each other. When you find one side, do not keep walking. Circle the area in expanding loops, check nearby fence lines and obstacles, and cover the likely bedding and feeding spots within a reasonable radius. The match is almost always nearby.
How Shed Hunting Makes You A Better Deer Hunter
Every shed antler you find is more than a trophy. It’s data. A fresh shed confirms that a specific buck survived hunting season and is still on your ground. The location tells you where he spent his winter, which is often dramatically different from where you encountered him in October. That knowledge reshapes stand placement, access routes, and scouting priorities for the following fall in ways that hunters who skip shed season simply don’t have.
Walk the same ground you shed hunt in the fall. Note every rub, scrape, pinch point, and natural funnel you encounter along the way. The terrain does not change between seasons, but your understanding of how deer use it should deepen every spring. Hunters who track the same buck’s sheds year over year build a growth and age profile that quality deer management depends on. That kind of long-term knowledge compounds over time, and it’s only possible on ground you have consistent access to.
The Benefit Of Shed Hunting On Your Own Private Land
Here’s the honest reality of shed hunting for deer antlers on public land. You’re competing with everyone who read the same guide, watched the same video, and showed up at the same trailhead. Some of them went in early, bumped your deer before they dropped, and the antlers landed on the next property. Others hit the ground right after opening and covered the best areas before you arrived for the shed hunt. The rodents handled the rest.
Private land changes every one of those variables in the shed hunting game. You decide when to enter. Trail cameras tell you exactly when your herd has shed, so you go in at peak timing with no one else working the same ground. You control access pressure throughout the winter, which keeps deer on the property through the drop. You can return as many times as you want. And the scouting intelligence you build through shed hunting your own property feeds directly into your fall hunting strategy on land you know better than anyone.
Shed hunting is one of the reasons serious hunters look at land ownership differently. The productivity of owning your own hunting property is not limited to one season. The deer you track antler sheds from in March are the bucks you’ll be patterning come October.
If you’re ready to stop sharing your best ground with everyone else during shed season, browse Hayden Outdoors hunting properties and find land worth getting out of bed for.
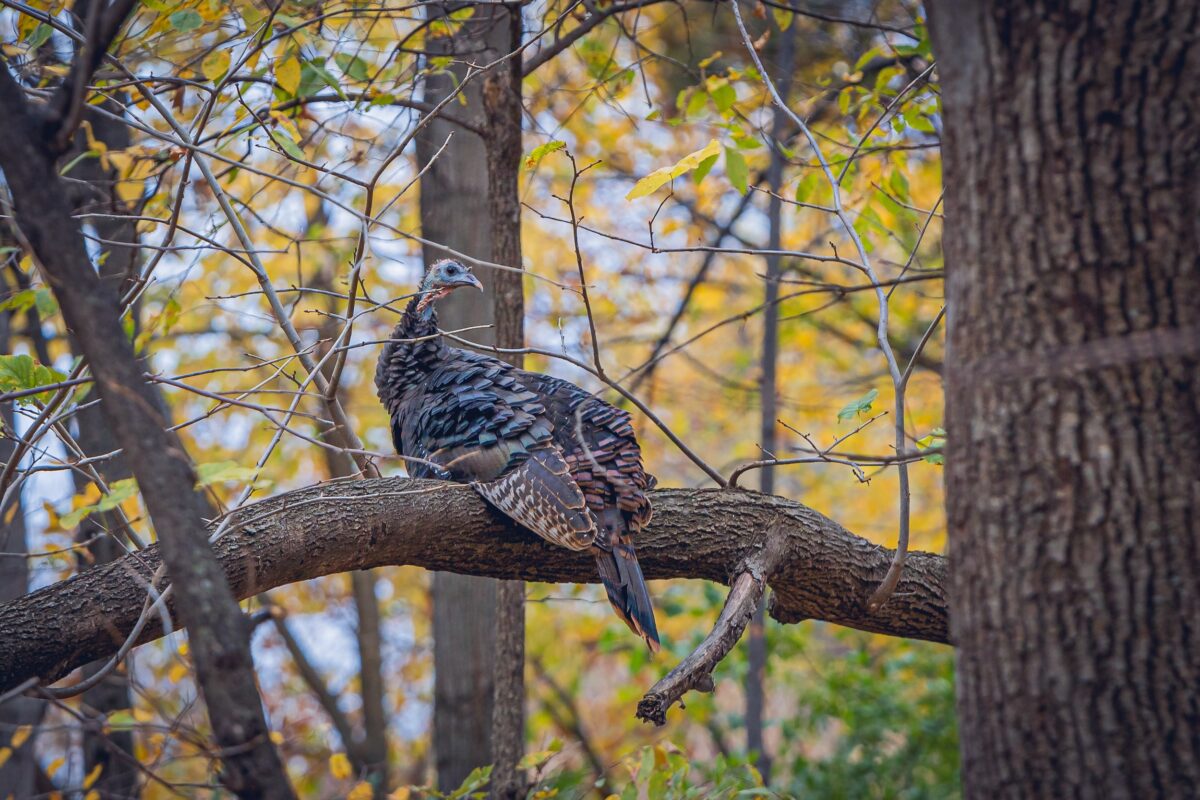
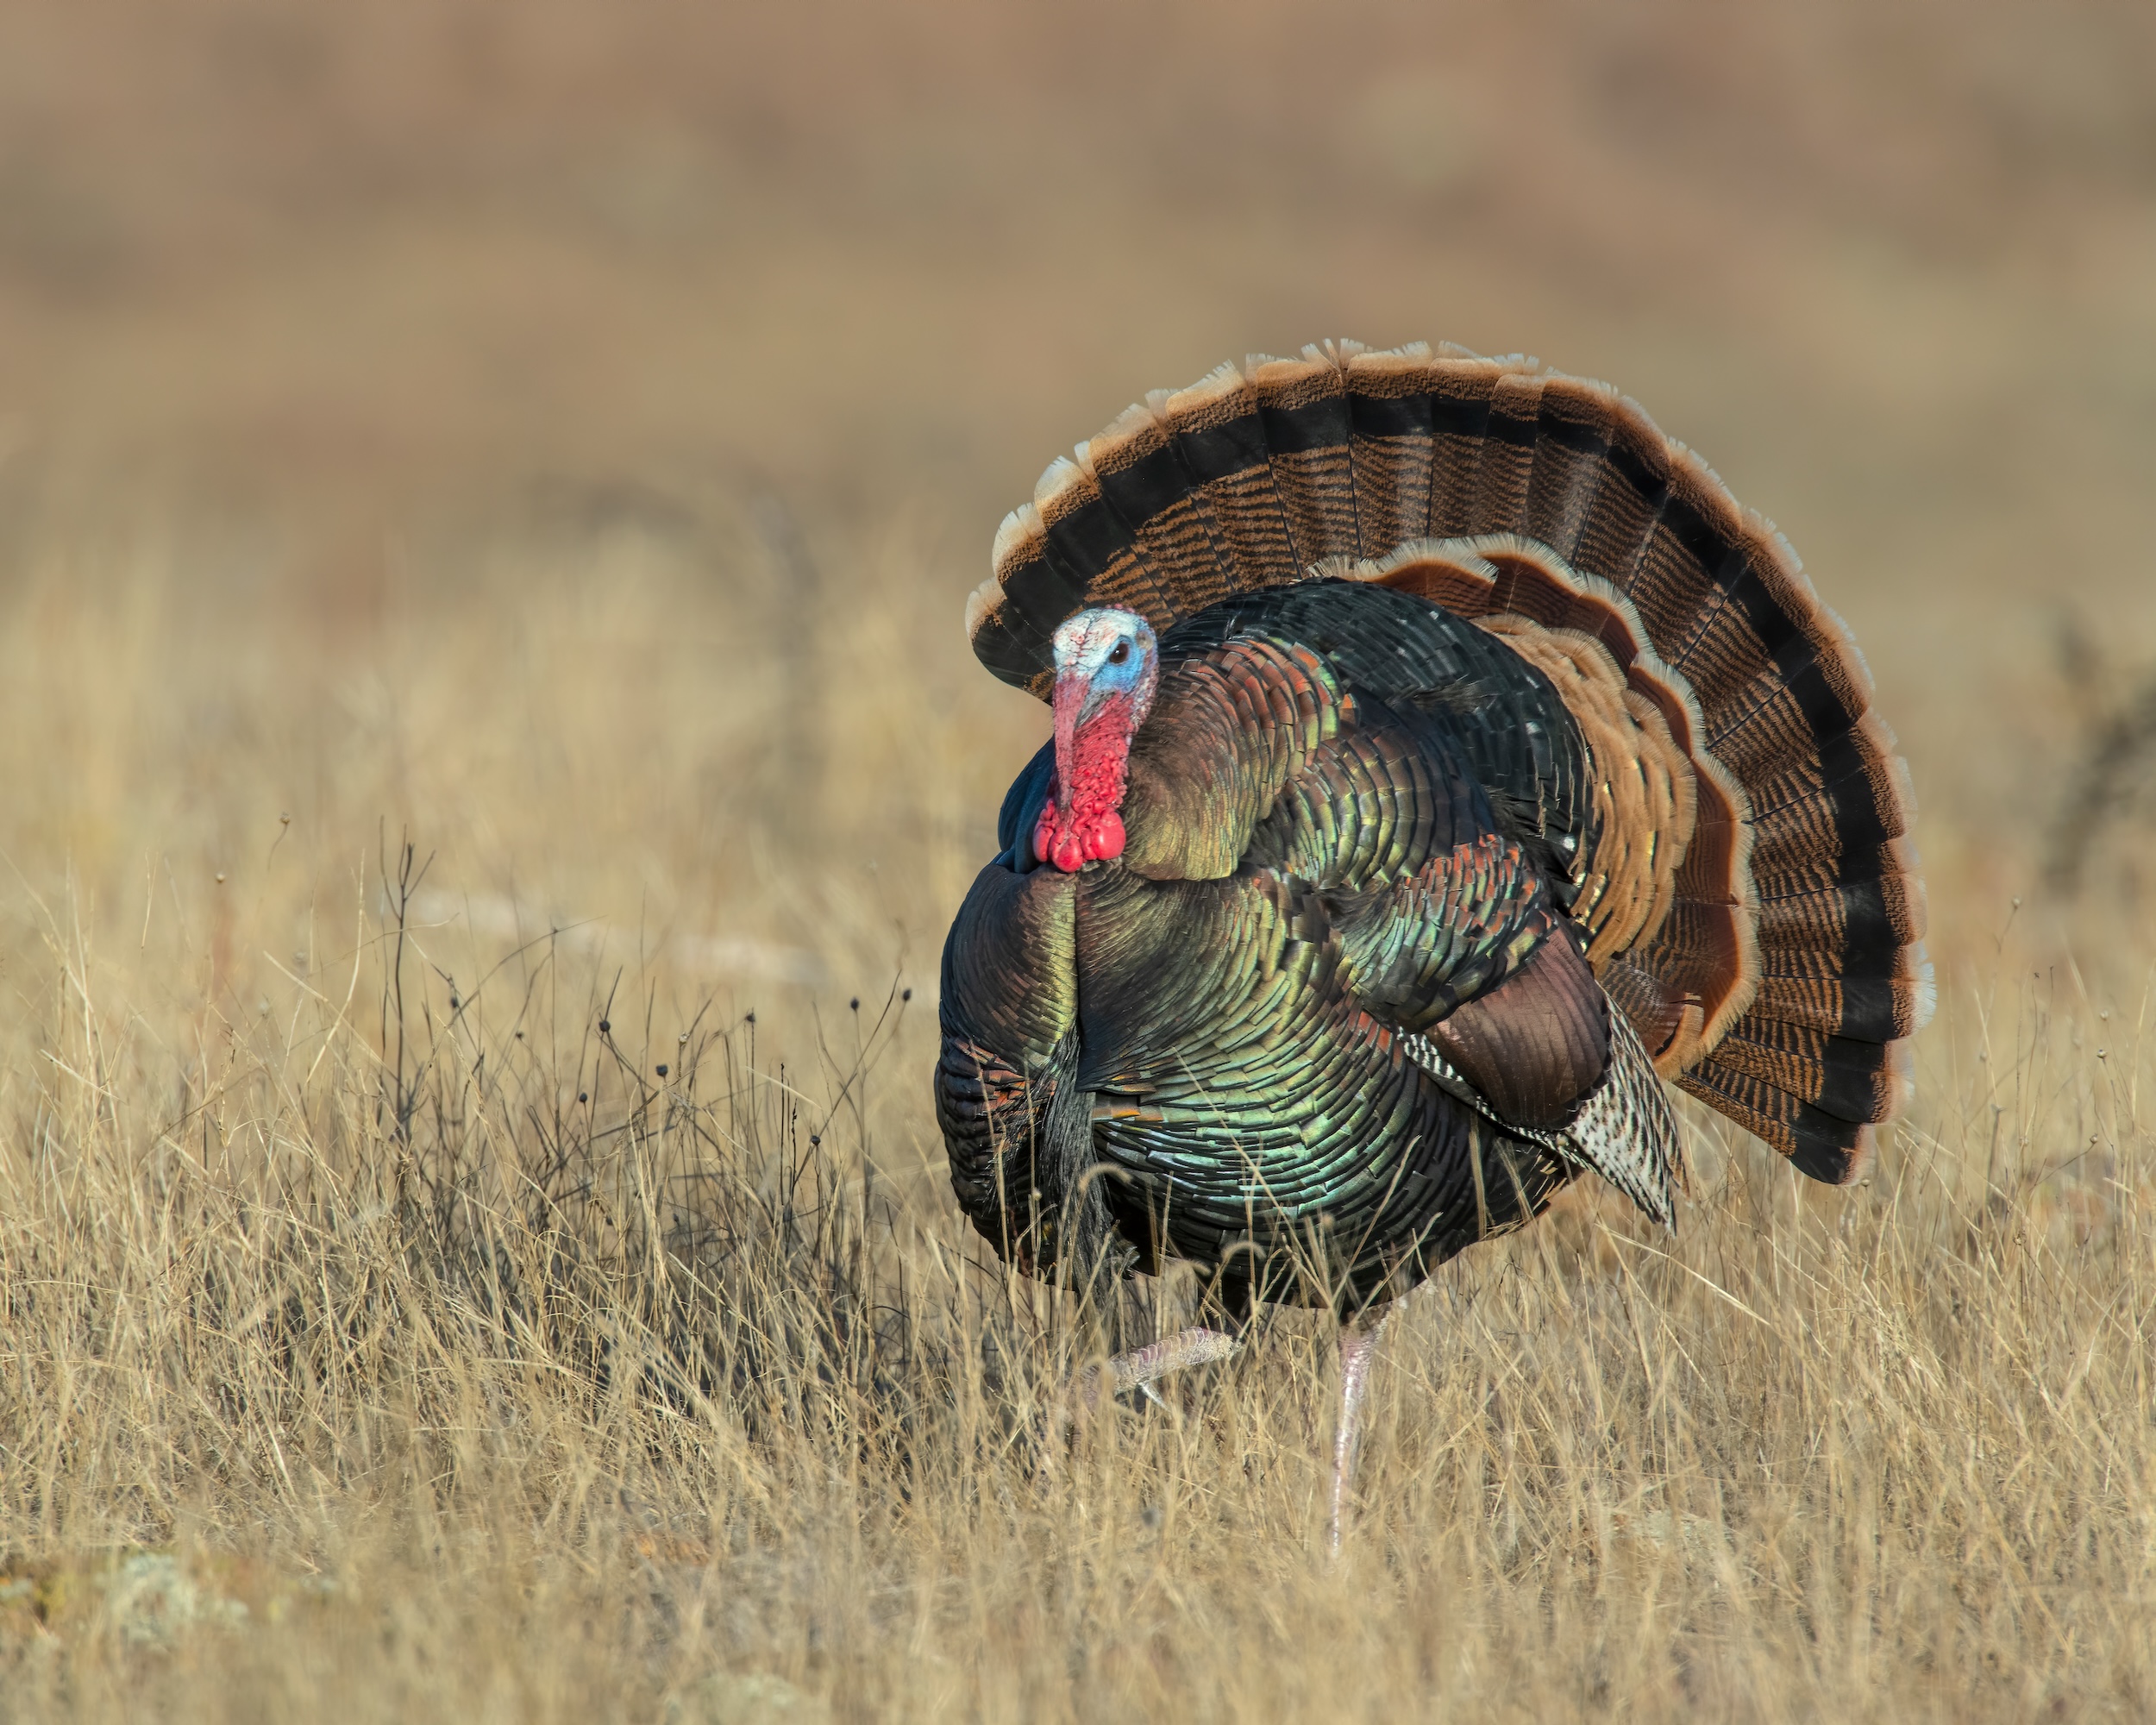
Picture this: it’s the last evening before opening day of spring turkey season. While most hunters are back at camp checking gear, you are slipping quietly through a stand of mature oaks toward a creek bottom you scouted weeks ago. Knowing how to roost a turkey is exactly what put you in those woods at dusk instead of showing up blind at first light.
Thirty minutes before last light, a big tom cuts loose from the timber ahead of you, his gobble ringing off the ridgeline like a starting gun. You ease out your phone, drop a pin, and smile. You know exactly where he will be at first light, and you already know where to be waiting.
Learning how to roost a turkey is the single most reliable edge a hunter can build into a season. It transforms opening morning from a guessing game into a calculated ambush, and it is a skill that rewards hunters at every experience level.
Whether you’re stepping into the turkey woods for the first time or you’ve been chasing longbeards for decades, roosting a turkey the evening before a hunt is the move that consistently fills tags.
In this guide, we’re going to walk you through every piece of the process, from understanding why turkey roosting matters to reading the landscape like a seasoned woodsman, to executing the morning hunt with confidence.
Before we dig into technique, let’s talk about why roosting a turkey is worth your time. The short answer: it removes uncertainty. And in turkey hunting, uncertainty is the enemy of success.
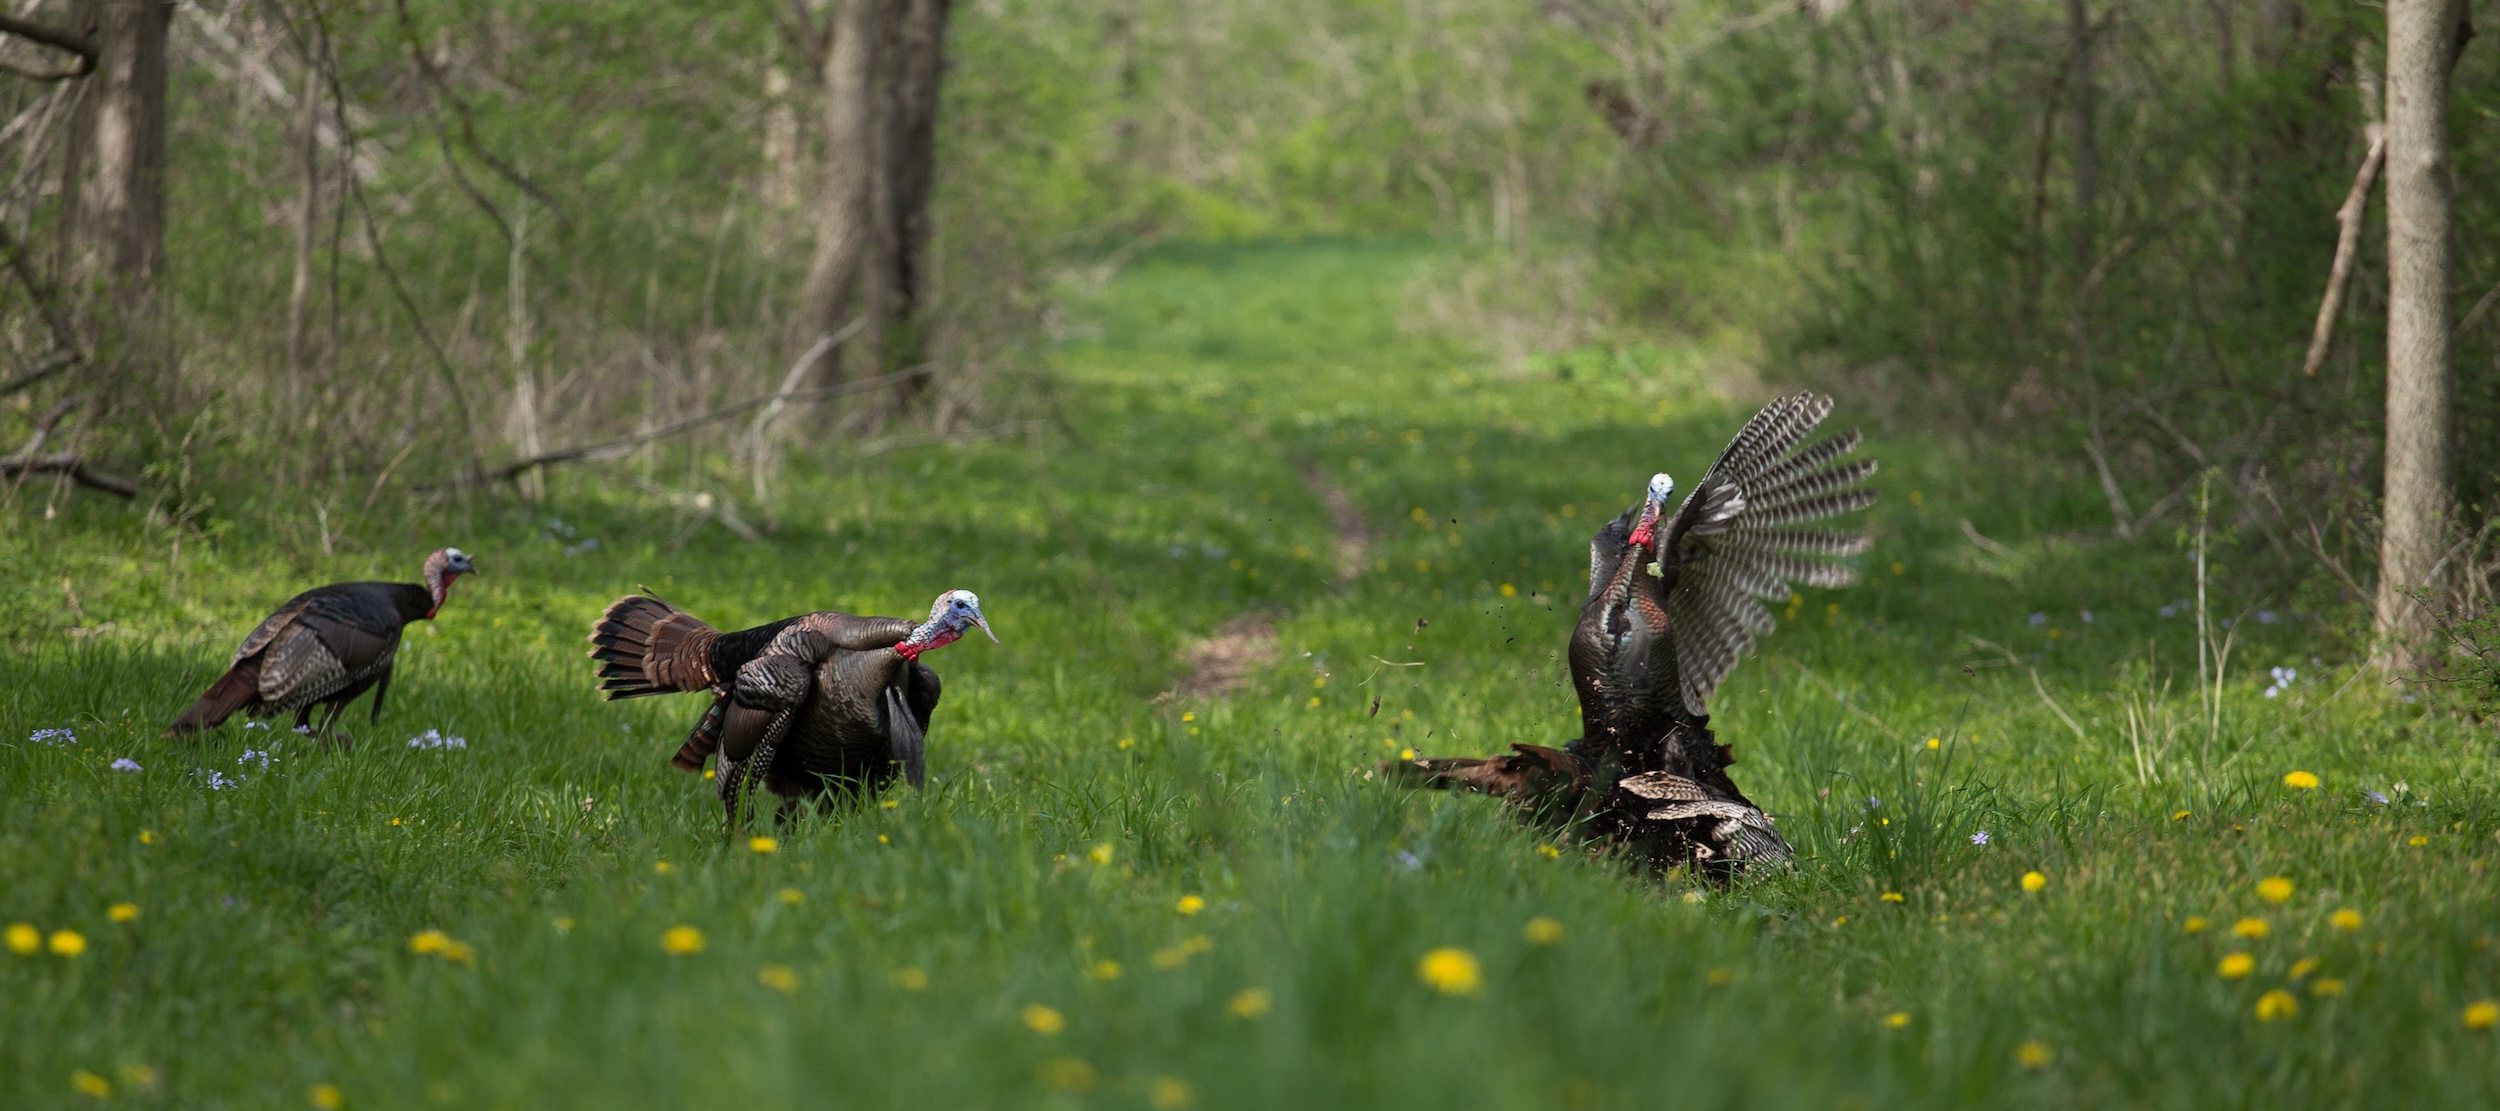
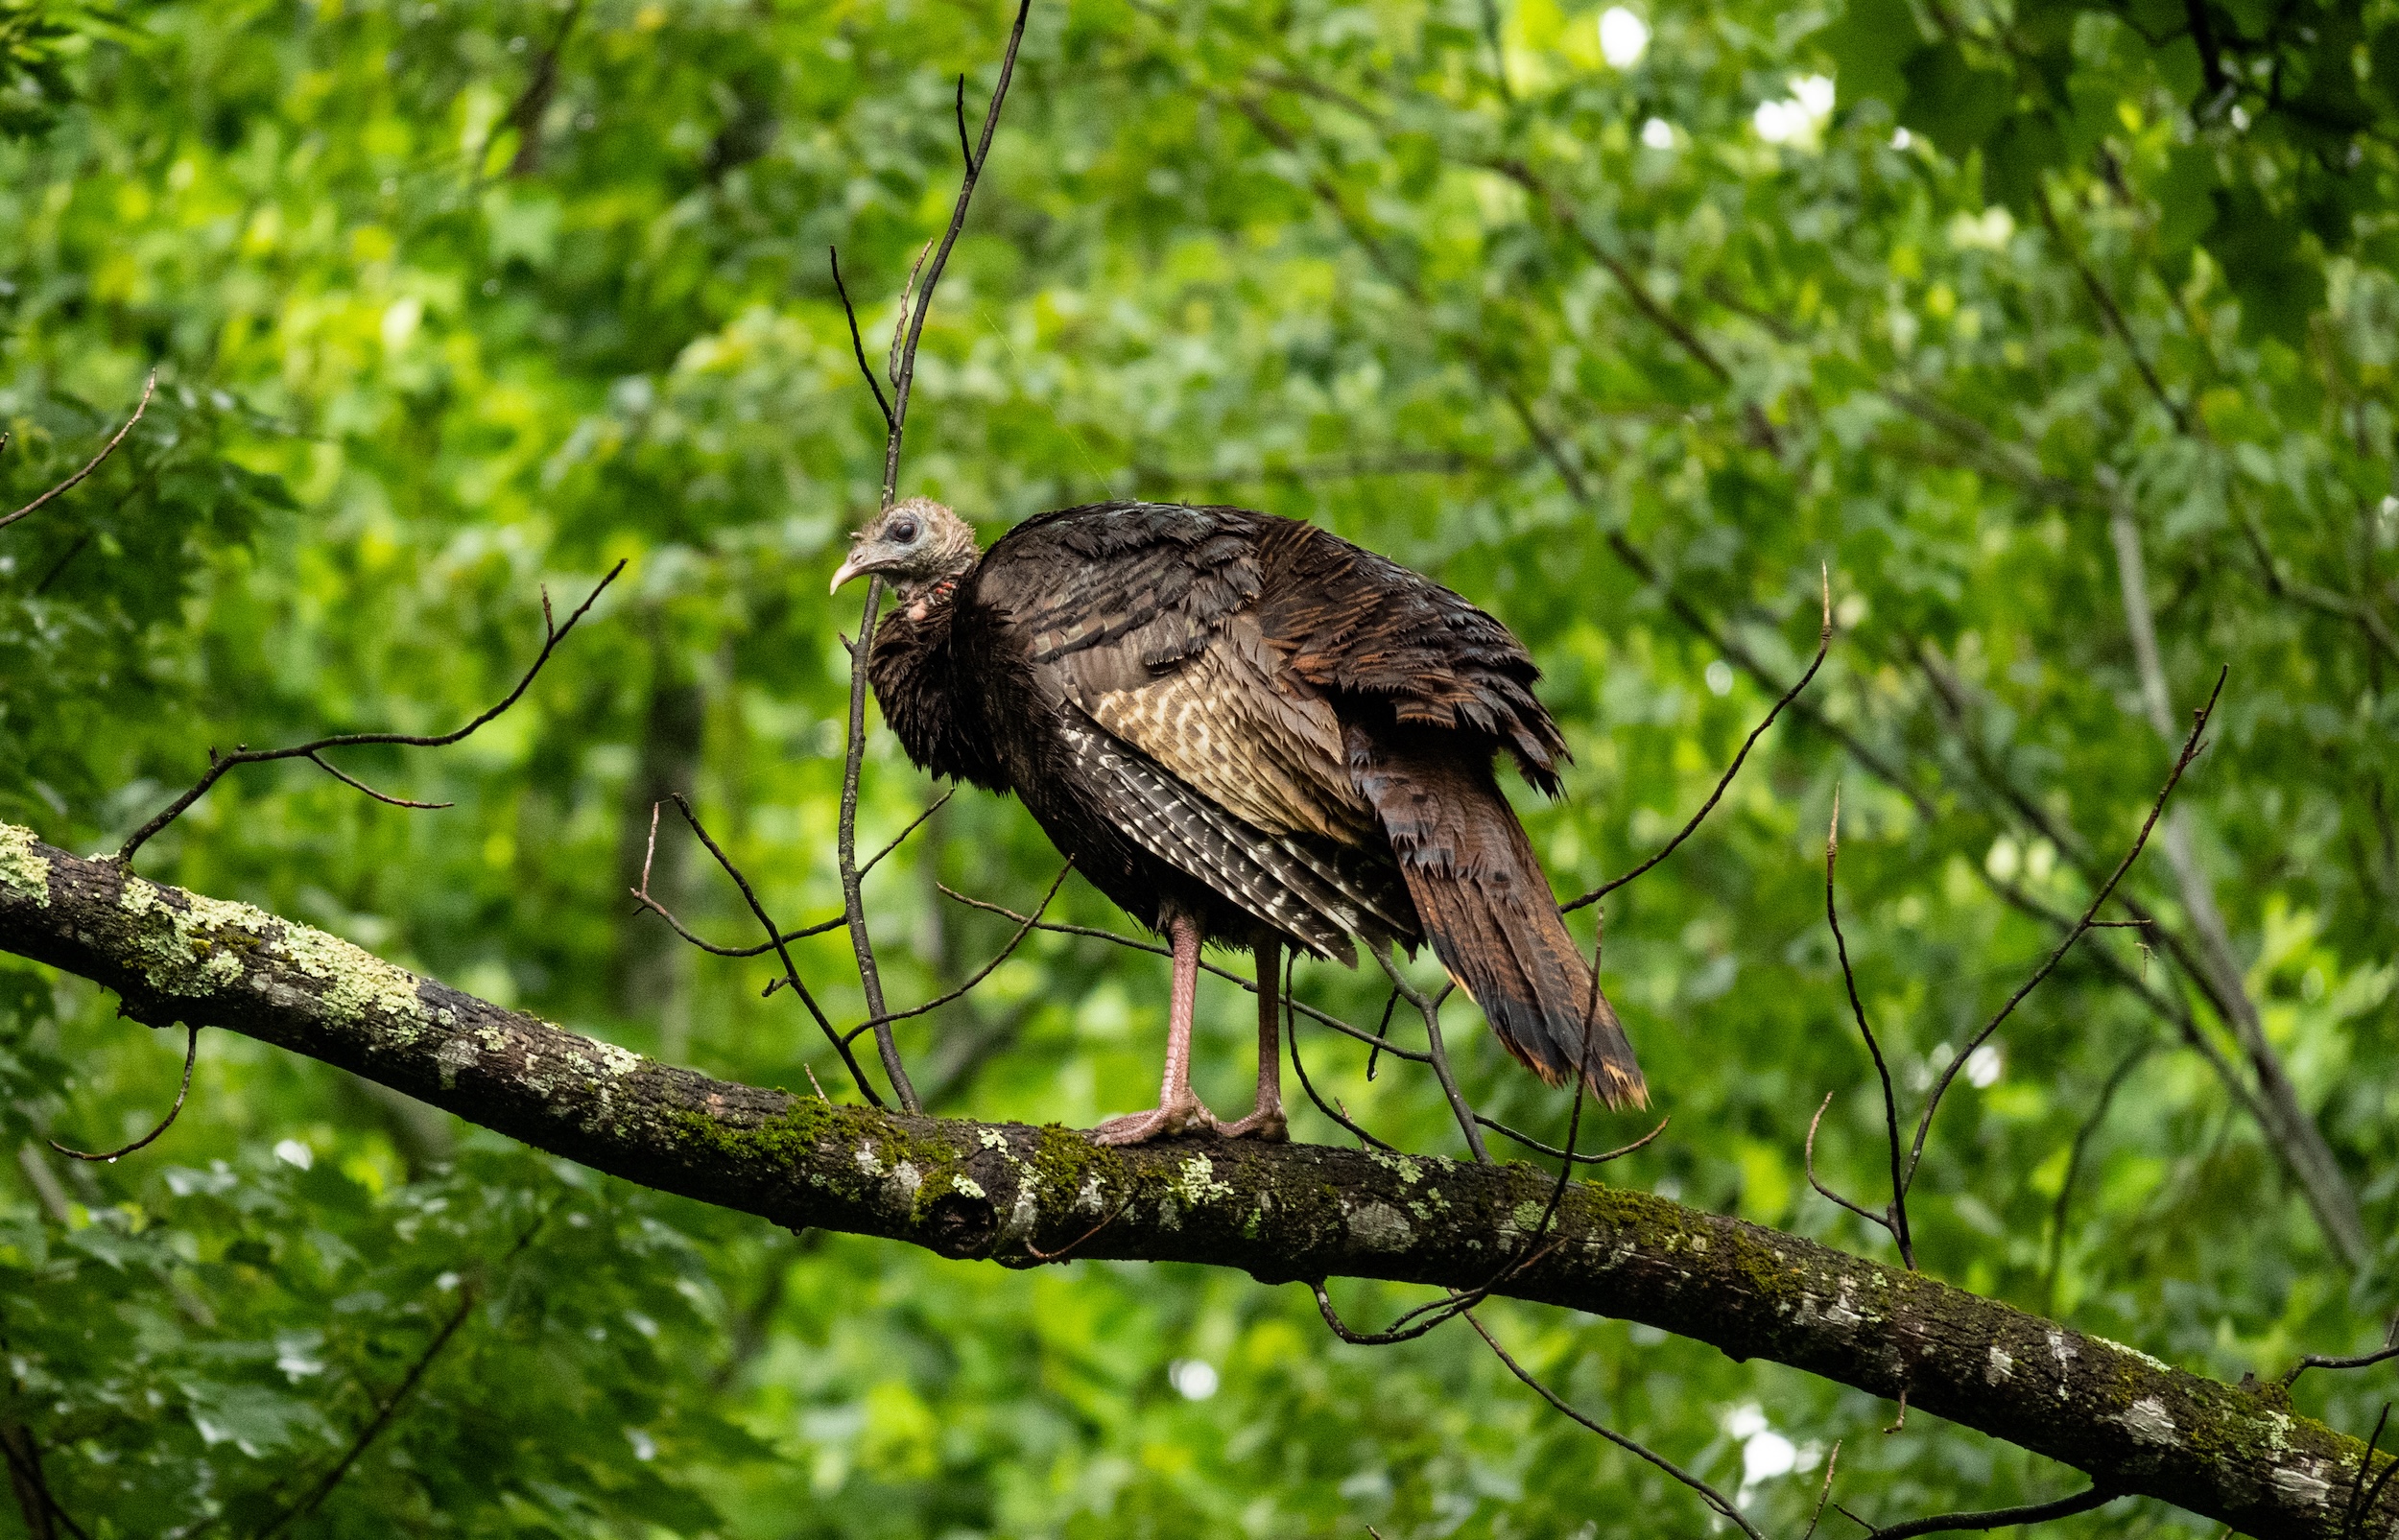
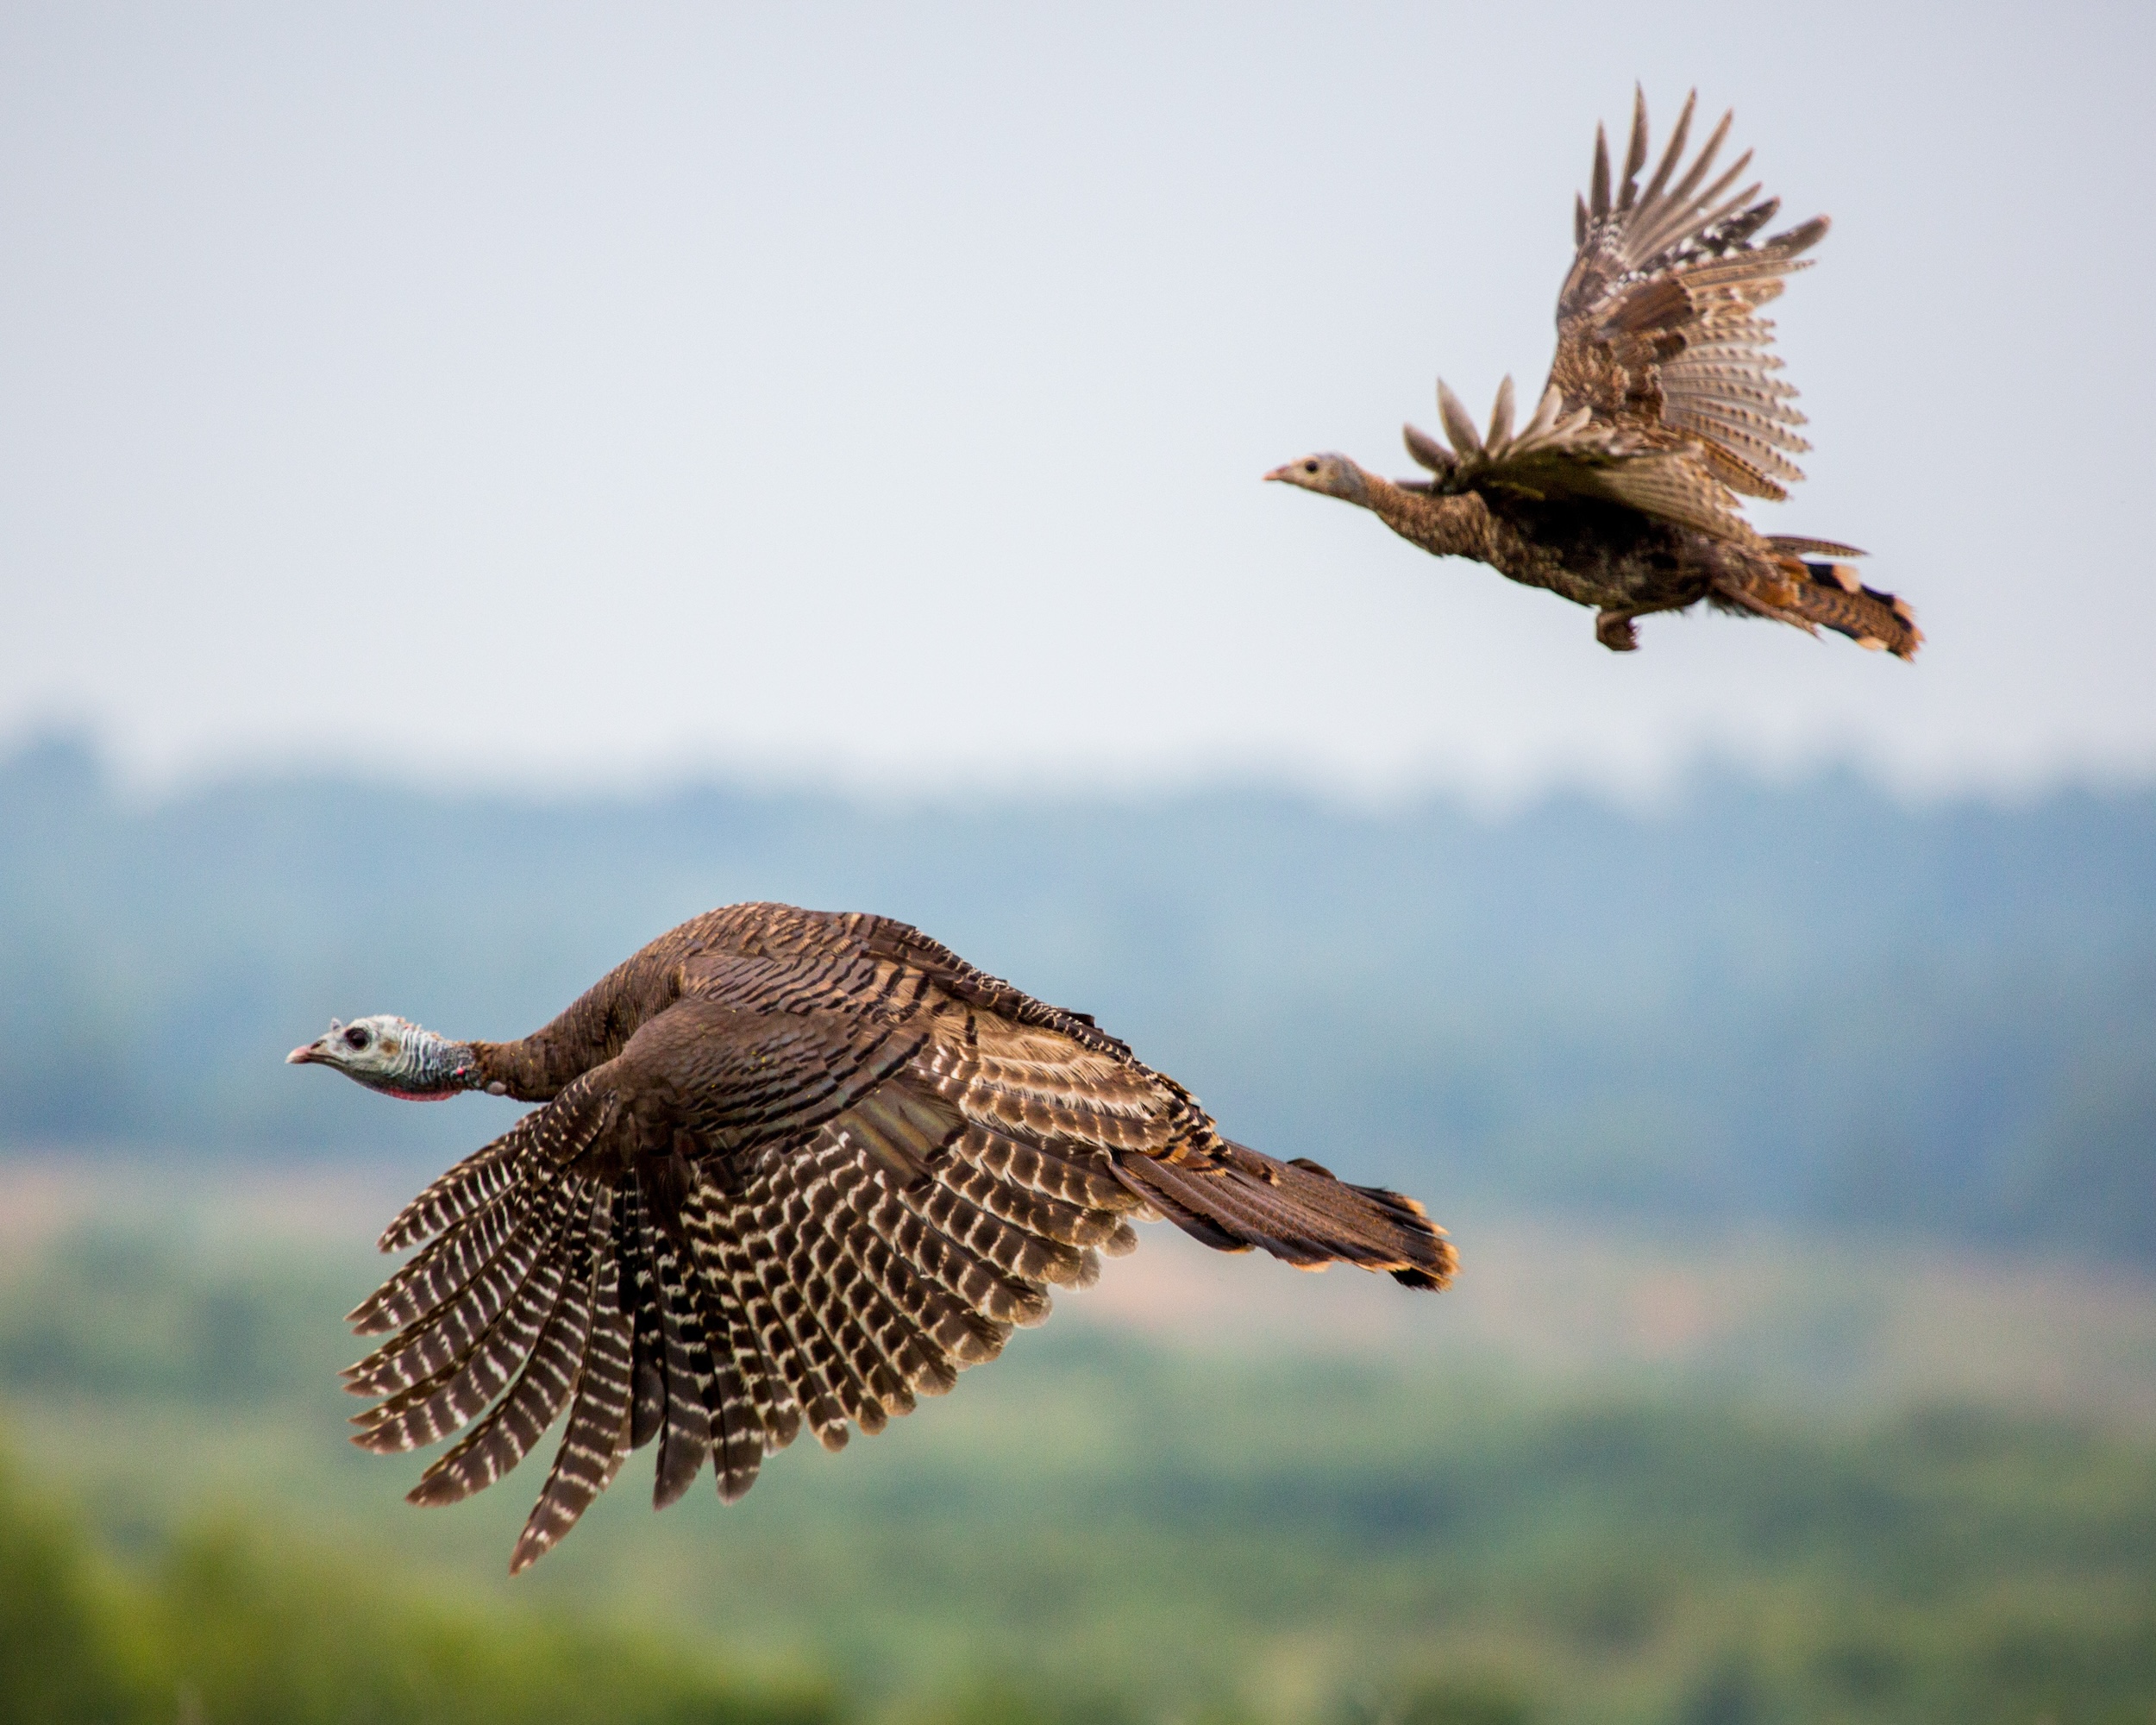
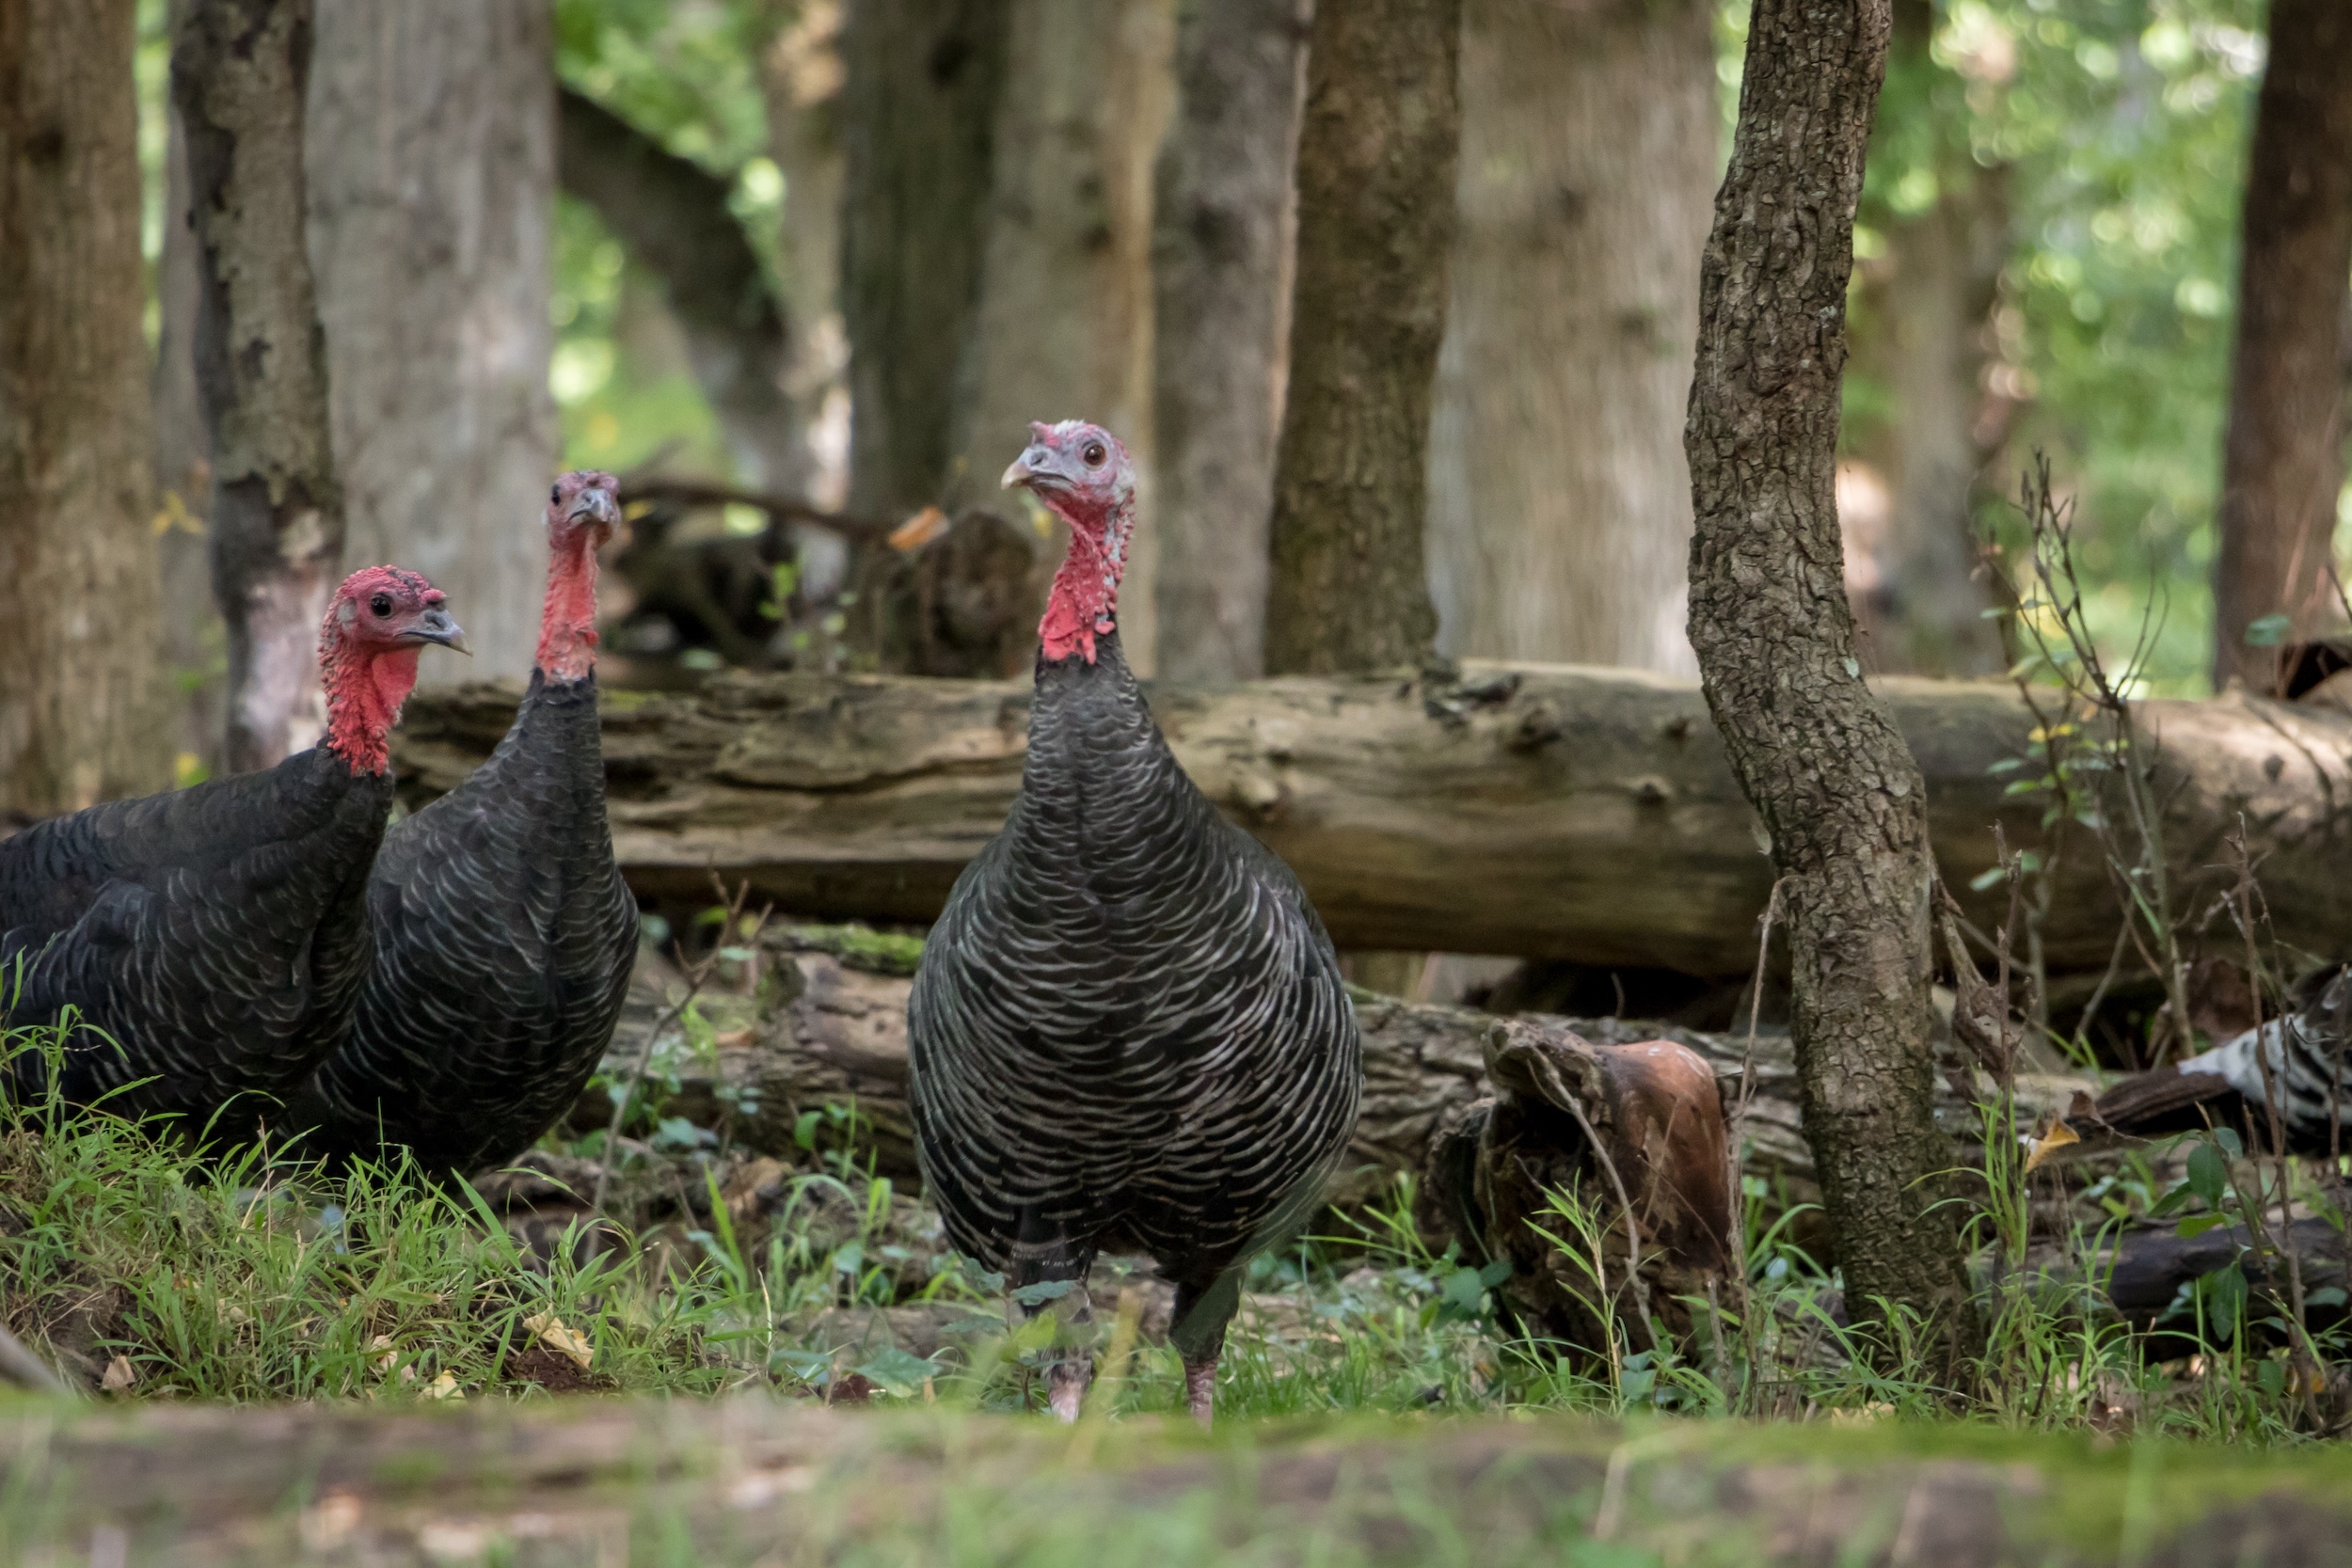
Wild turkeys are diurnal birds, meaning they’re active during daylight and spend their nights roosted in trees. This is a hardwired survival behavior. Perching off the ground puts them out of reach of most ground predators, and the height gives them a visual advantage over their surroundings.
Every single night, no matter what else happened during the day, the birds in your area are going somewhere to roost. The question is whether you know where.
Turkeys may use traditional roost sites multiple nights in a row, though they often move between trees within a general area. That detail is key: while individual birds do not always sleep in the exact same tree every night, groups of turkeys tend to return to the same roost locations with significant regularity.
That kind of repeatability is pure gold for a turkey hunter. When you roost a turkey the night before a hunt, you’re trading one variable for a certainty. You already know where the bird is sleeping. You already know the general direction he will pitch down at first light. All that is left is to get there early, get set up quietly, and be in position when the woods wake up.
That strategic advantage is exactly why turkey roosting is such a valuable scouting technique among serious hunters, and why mastering how to roost a turkey should be near the top of your pre-season checklist.
The other piece of this is confidence. There is a different energy to a morning hunt when you already have a bird roosted. You’re not wandering, you’re not guessing, and you’re not burning the first golden hour of shooting light trying to locate birds that may or may not be in the area. You’re already in position, already in the game, and already ahead of turkeys that have no idea you’re there.
What Time Of Day Do Turkeys Go To Roost?
Understanding the timing of turkey roosting behavior is the foundation of knowing when to be in the field and where to focus your attention. Miss this window, and you may cover a lot of ground without ever locating a bird. Get the roost timing right, and a single evening session can set up multiple successful turkey hunts.
Evening Turkey Roost Fly-Up Time
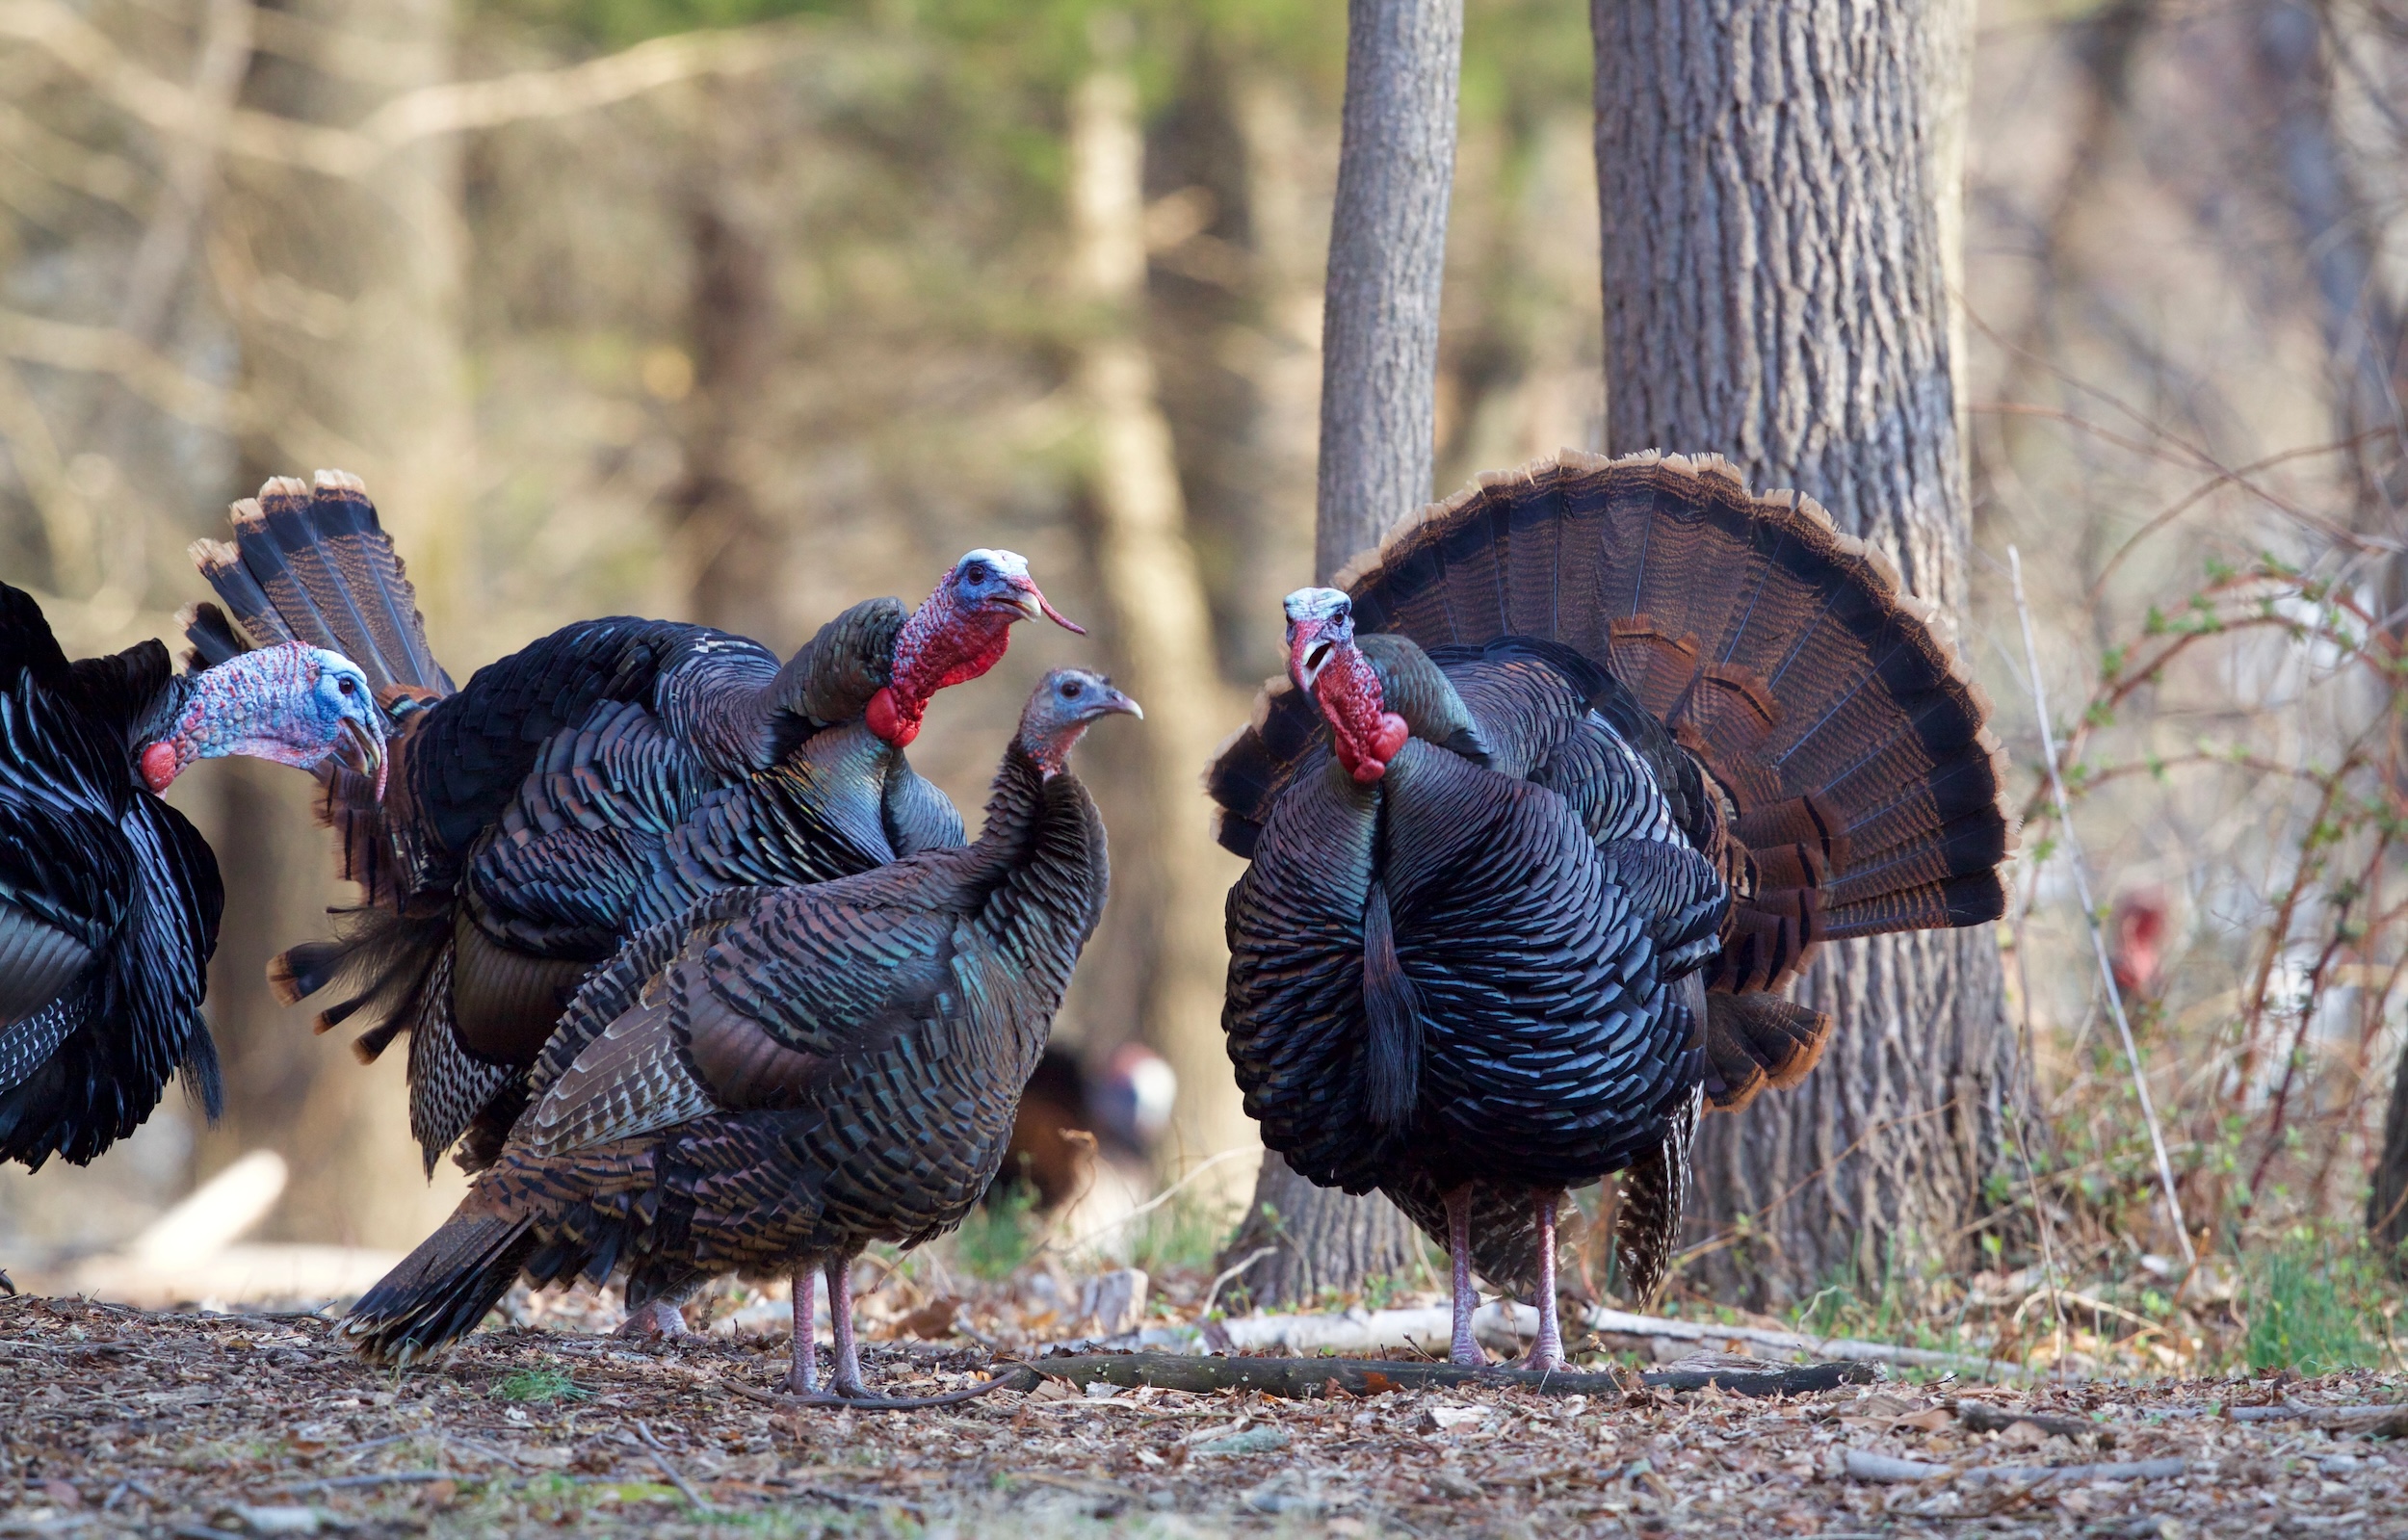
Turkeys generally begin their movement toward roost sites roughly 60 to 90 minutes before sunset, pecking and feeding their way toward the timber as the afternoon light softens. The actual fly-up to the turkey roost, the moment when they take to the branches, typically happens within the last 30 minutes before darkness.
On calm, clear evenings, you can often hear the heavy wingbeats and branch crashing as birds get airborne and settle into position. That sound is one of the most satisfying things in turkey hunting.
The weather also plays a real role in timing the turkey roost. On windy or stormy evenings, turkeys tend to fly up to the roost earlier, seeking the stability of a roost limb before conditions deteriorate. Clear, calm spring evenings are your best opportunity to listen for fly-up activity. If you’re in or near suspected roosting habitat on a calm evening, you will often hear the turkeys well before you see them.
Morning Turkey Roost Fly-Down Time
On the back end, turkeys are governed by light. They will not fly down from their roost until there is enough visibility to see predators below them. In practice, fly-down happens roughly 20 to 45 minutes after sunrise, though fired-up toms earlier in the season may pitch down sooner in response to calling or the presence of hens. Cloudy or foggy mornings can push fly-down time later, which is worth keeping in mind when determining how to roost a turkey.
This timing matters because it defines your morning arrival window. You want to be settled and in position before first light, well before the first gobbles of the day break the silence. Birds are already alert and scanning from their perches at that point. A hunter who is still moving through the woods when legal shooting light arrives has already put themselves at a disadvantage.
Your Turkey Roost Scouting Window
The most productive window for roosting a turkey is the final 60 to 90 minutes of daylight. Get into the area quietly, find a good listening post, and wait. No aggressive calling is needed at this stage. Your job is observation.
Use a locator call such as an owl hoot or crow call to trigger a shock gobble that reveals a tom’s location in the last few minutes of light, but save the turkey sounds for the morning. When roosting a turkey, you’re only gathering information, not hunting.
How To Locate A Turkey Roost: Popular Roosting Locations
This is where the real skill of learning how to roost a turkey comes into focus. Turkeys don’t roost randomly. They select specific locations based on a consistent set of preferences, and once you understand what drives those preferences, you will start reading the landscape in an entirely new way.
What Turkeys Look For In A Roost Tree
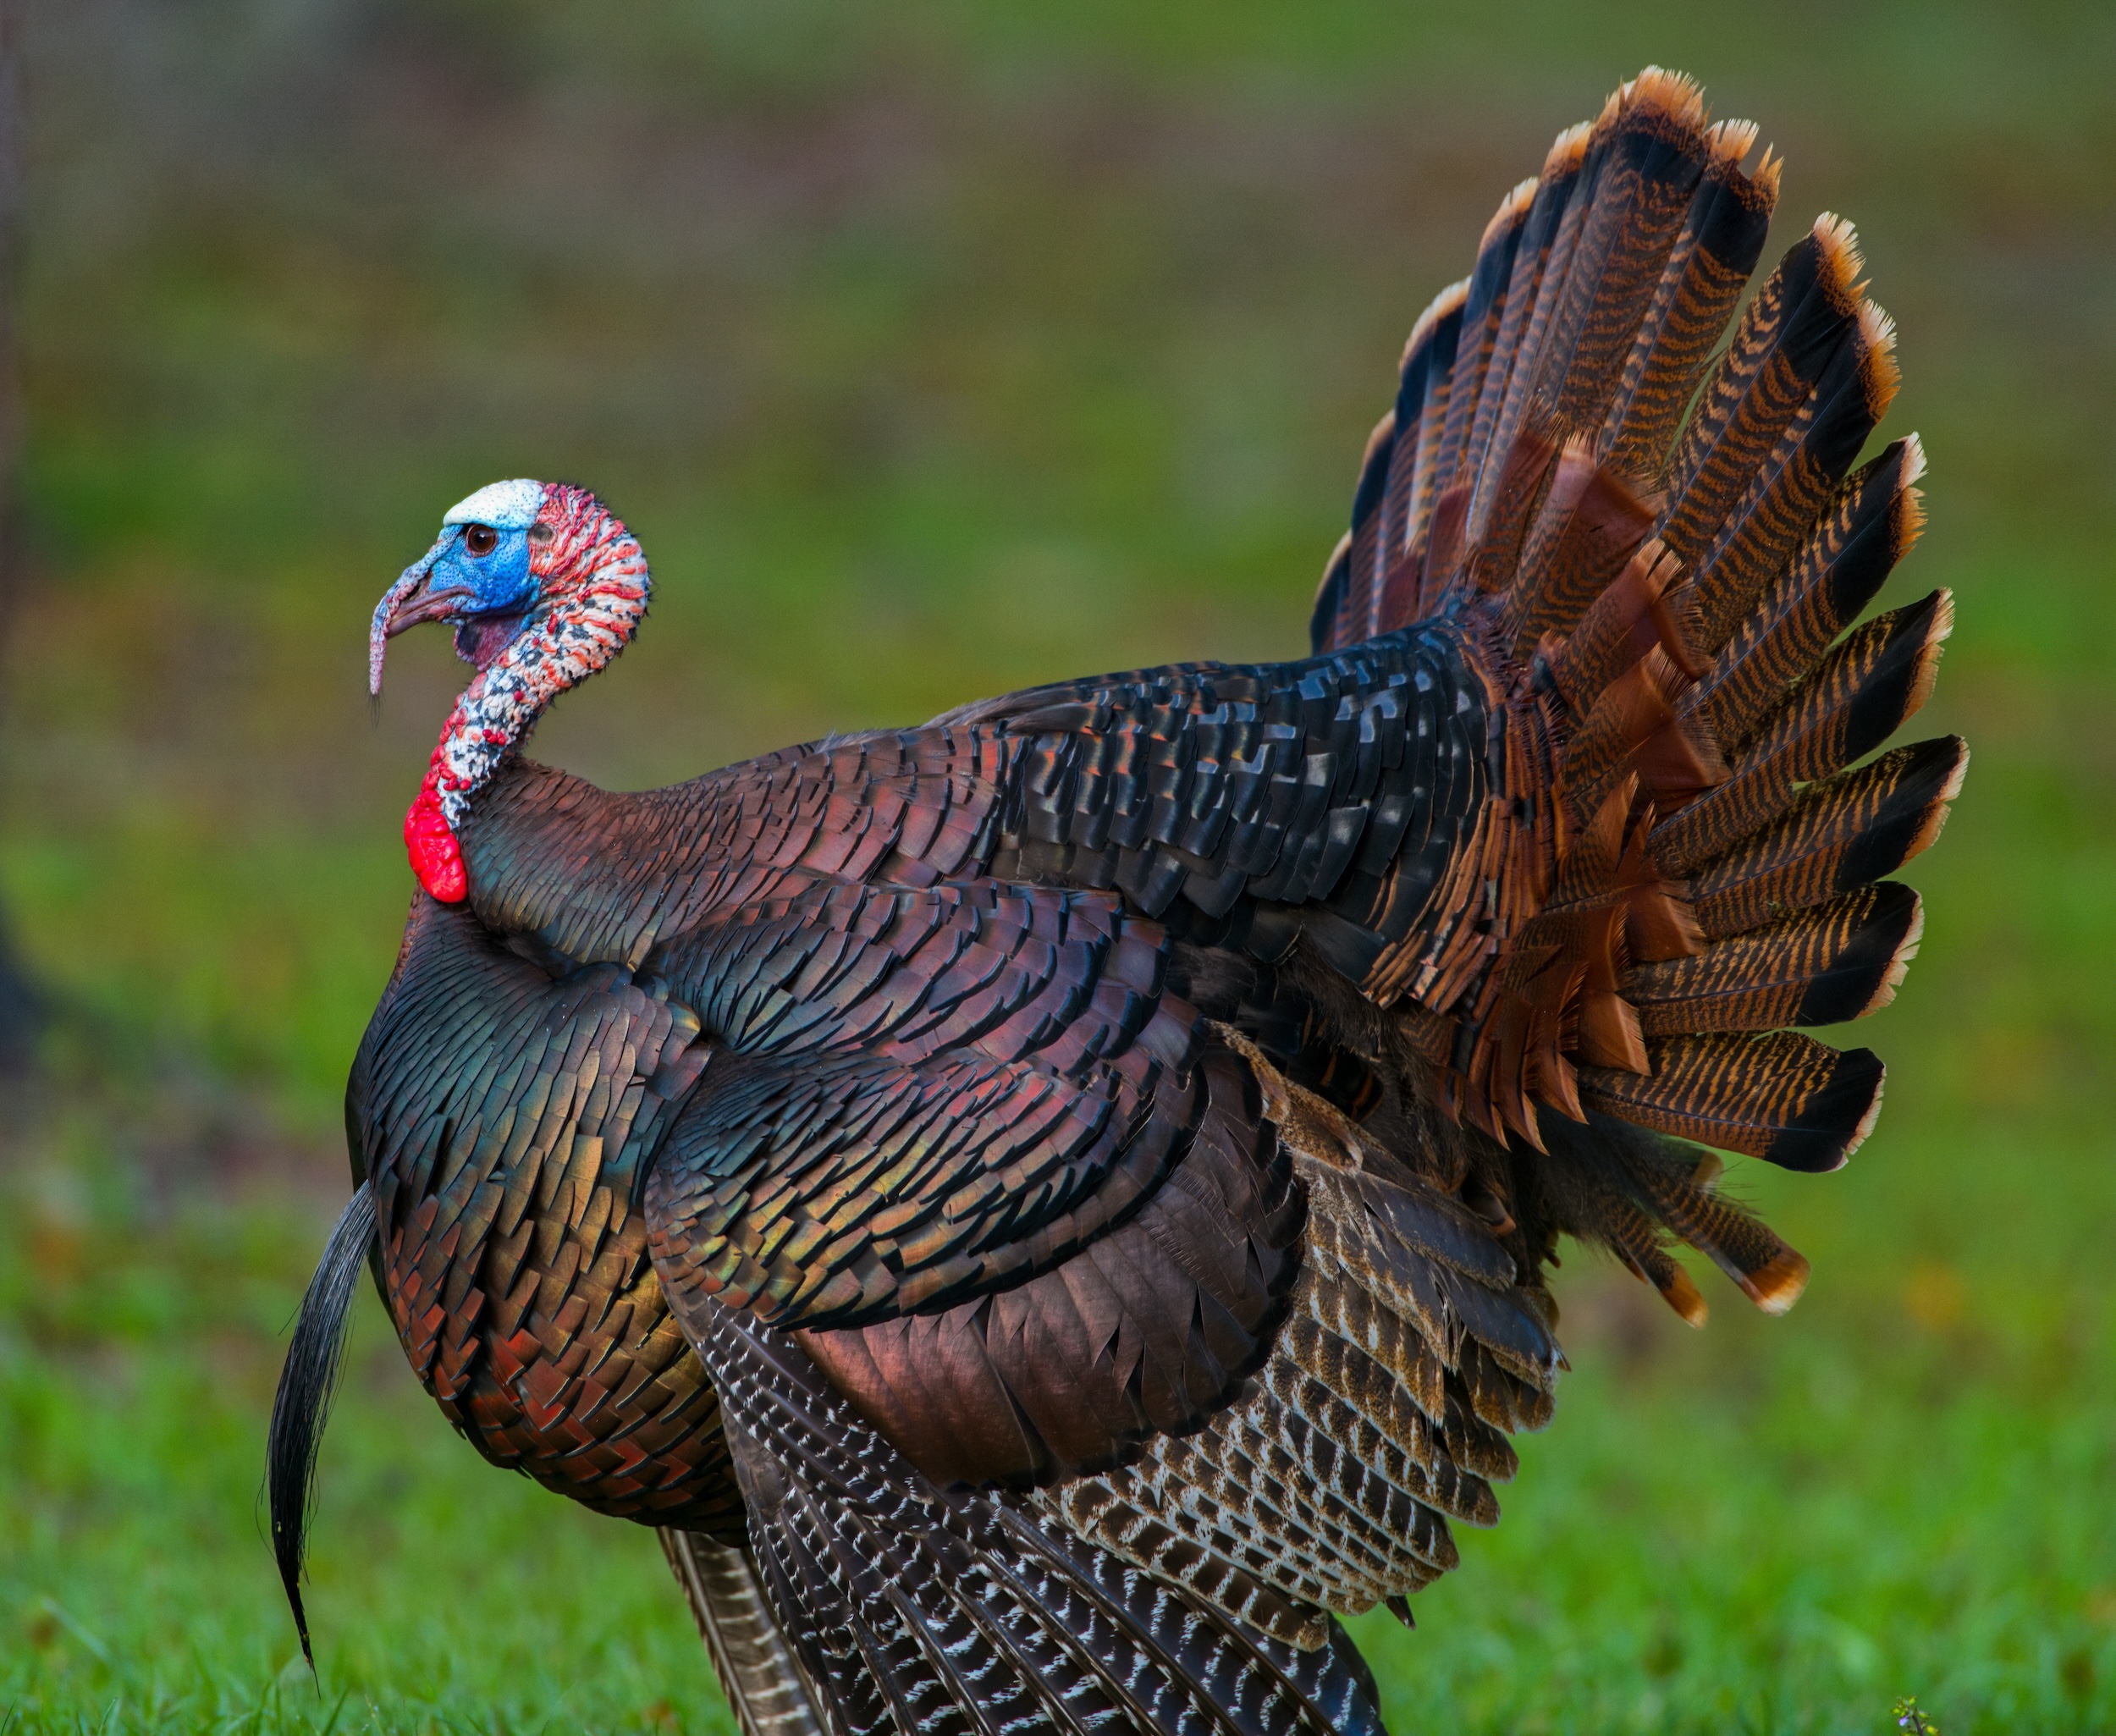
Start with the trees themselves. Turkeys tend to prefer the largest trees available and try to roost as high as they can comfortably perch. In fair weather, hardwood trees with wide, open crowns are the primary choice for a turkey roost, while conifers become more attractive during harsh weather because they offer protection from wind and precipitation.
The Oklahoma Department of Wildlife Conservation notes that ideal roost trees are generally 40 to 50 feet tall with wide, open crowns and ample horizontal limbs. Oaks, sycamores, cottonwoods, pines, and pecans are among the most commonly used species, though the specific tree will vary by region.
The understory beneath the roost tree matters just as much as the tree itself. Turkeys tend to steer clear of trees that have quite a bit of brush at the base. They need a clean flight path up and down, and they depend on their exceptional vision to watch for predators from the limb.
A perfect roost tree surrounded by impenetrable undergrowth may be passed over in favor of a slightly less impressive tree with clear sightlines.
Creek Bottoms And Riparian Corridors
One of the most reliable roost turkey patterns you’ll find is the connection between turkeys and water.
Creek drainages and river bottoms lined with mature timber are consistently productive roost areas. The tall trees along waterways provide structural support, and the proximity to water and insect-rich bottomland vegetation makes the area a complete package for turkeys.
The sound of moving water provides an added layer of security. If a creek or river runs through the property you’re hunting, make that your first turkey roost scouting destination.
Ridge Lines And High Ground
Elevation also plays a significant role in how to roost a turkey. Turkeys often choose roosts that are at higher elevations. The combination of height, wind advantage, and visibility makes ridgeline timber a premium roost location.
Birds roosting on the downwind side of a ridge benefit from scent carried uphill while enjoying an elevated view of their surroundings in multiple directions. In hilly terrain, ridge-top timber with adjacent field edges is one of the first places to scout for active roosting turkeys.
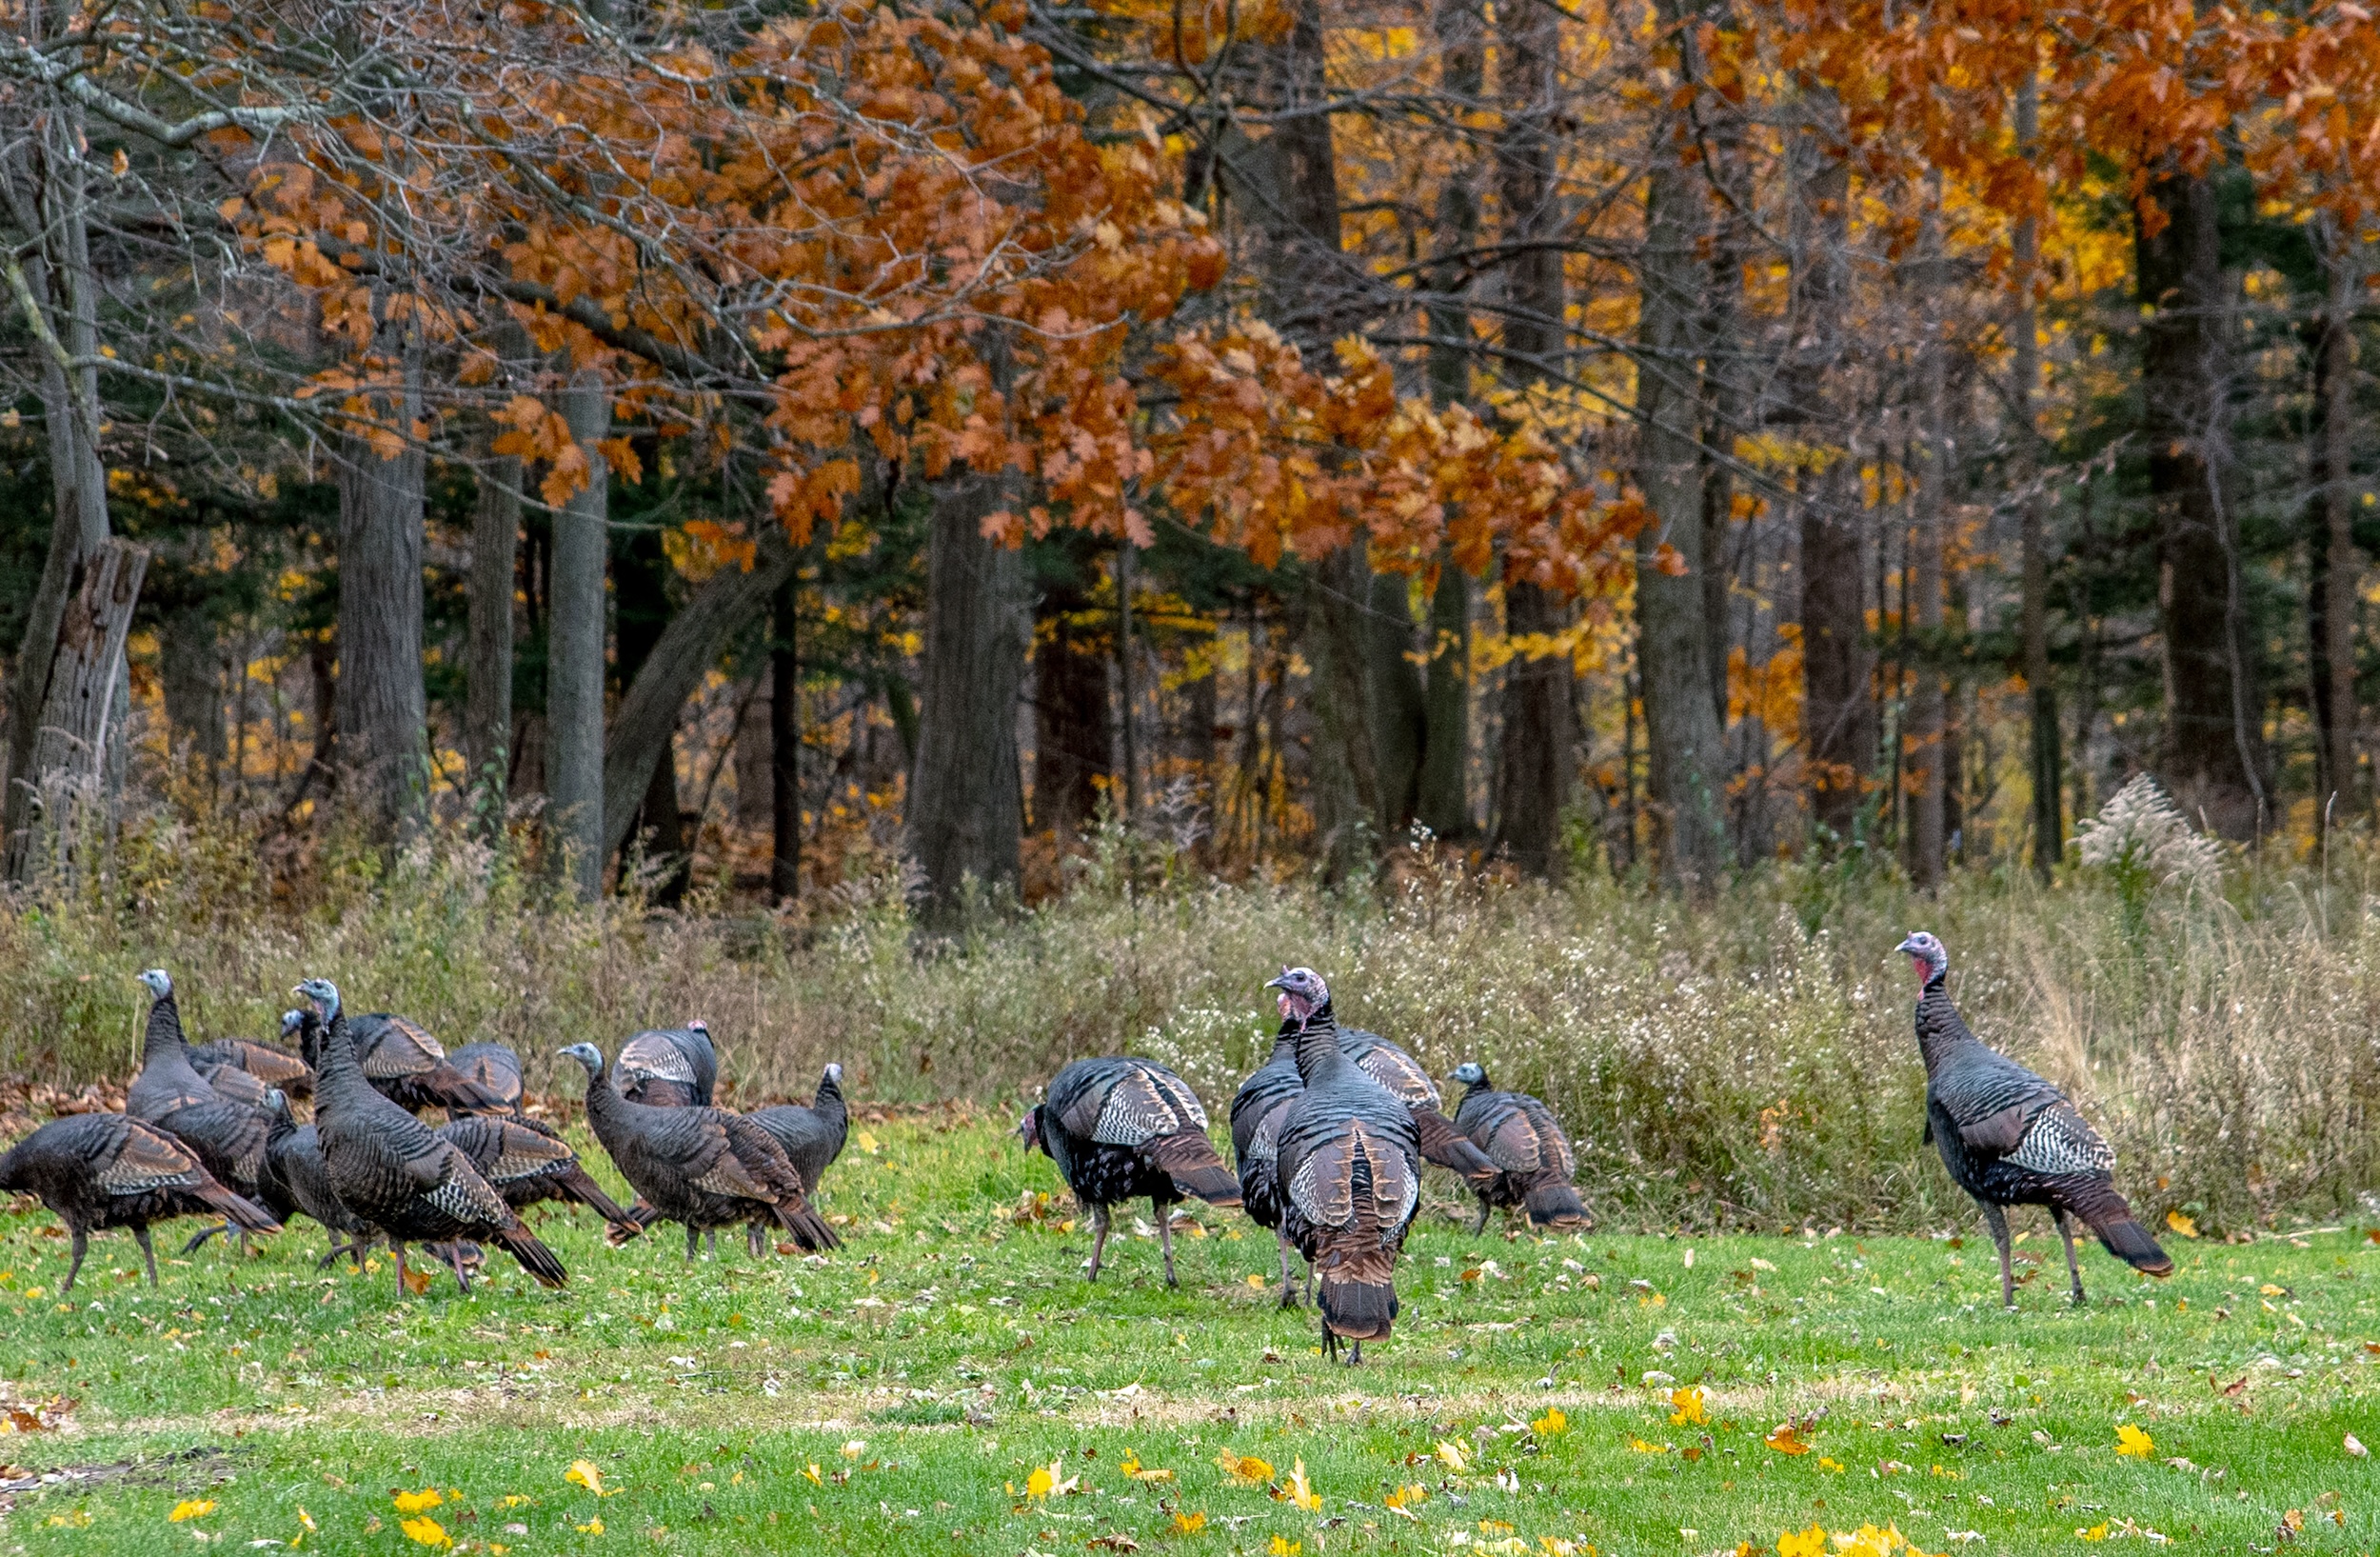
Field Edges With Mature Timber
One of the most classic turkey roost setups is the combination of an open feeding field adjacent to a woodlot with large, open-crowned hardwoods (bonus points if the tree is near a food source). Turkeys feed in the field during the afternoon, then as evening approaches, they move toward the timber edge, stage briefly in the transition zone, and fly up.
Pine Stands And Mixed Timber
Do not overlook mature pine stands, particularly in the South and Southeast. Turkeys love mature pines for nightly roosting because of their sturdy, well-positioned limbs.
Long-leaf and loblolly pines in the South, ponderosa pines in the West, and hemlock stands in the Northeast are all worth scouting during your pre-season work.
In mixed timber regions, turkeys often use whatever species offers the most structural security and the best understory visibility for their roost.
Reading The Ground Underneath The Turkey Roost Tree
Once you’re in the field, the ground beneath a tree will tell you whether it is being actively used as a turkey roost. Here’s what to look for:
Droppings: The most visible indicator is an accumulation of droppings directly beneath roosting limbs. A concentration of fresh droppings under a single tree is a strong signal of consistent use.
White wash: Large white deposits on branches, rocks, or the ground directly below perching limbs are a sign of regular roost turkey activity.
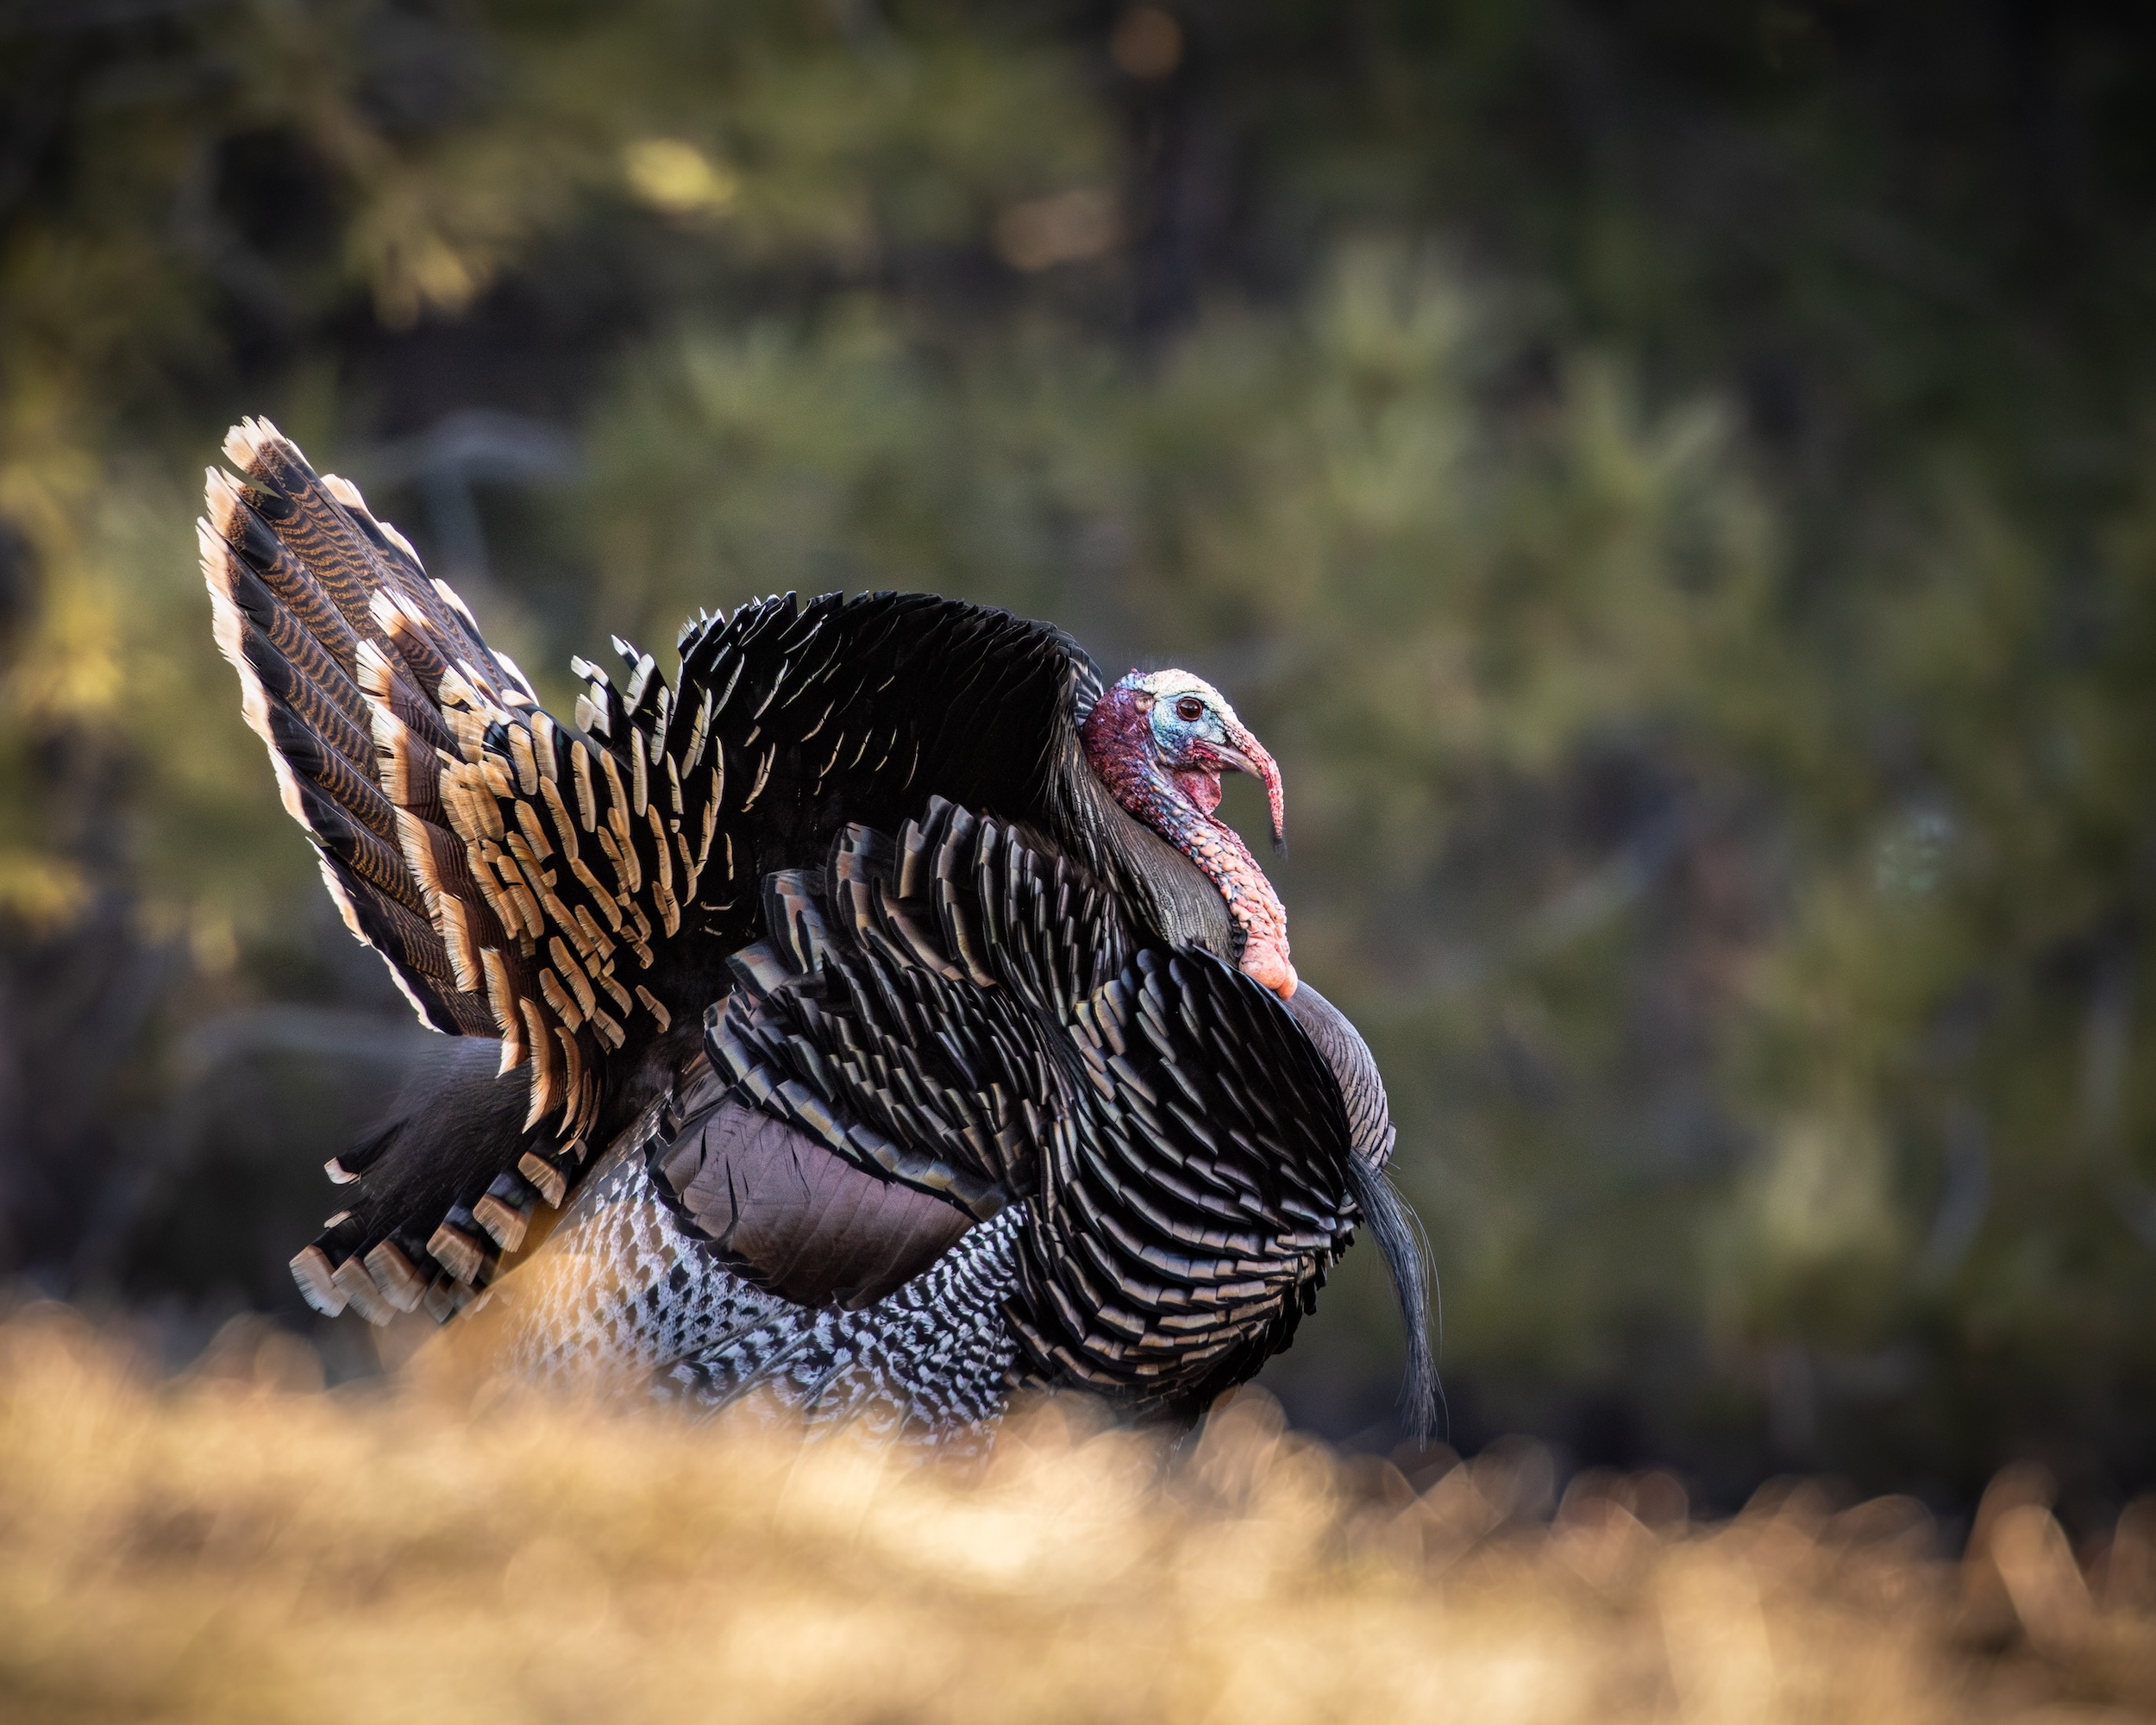
Feathers: Body feathers and wing feathers clustered beneath a tree can help confirm roosting. White-tipped breast feathers from a tom are particularly telling.
Scratching and tracks: Heavy scratching near a roost site in the early morning indicates birds feeding immediately after fly-down, confirming this timber as a key transition corridor between roost and feeding area.
Using Technology To Pre-Scout The Turkey Roost
Modern mapping tools have made pre-season scouting process a good bit faster. Some apps allow you to identify creek drainages, mature timber pockets, ridgelines, and field edges from home before you ever put boots on the ground.
Look for the combination of features described above: creek bottoms with adjacent timber, ridges with open hardwood canopy, and field edges with large trees nearby. Topographic maps help you identify benches and hollows, both of which can help you find productive turkey roost areas.
Trail cameras placed on travel corridors between roost and feeding areas, rather than directly at the roost tree itself, can confirm the presence of turkeys without disturbing the site. Positioning a camera on a logging road, field edge pinch point, or creek crossing near suspected roosting timber gives you visual confirmation of bird numbers and movement patterns without pushing a turkey off its preferred overnight roost.
Is It Legal To Shoot A Turkey On The Roost?
This question comes up often enough that it deserves a direct, honest answer: it depends on where you’re hunting. Turkey roosting regulations vary significantly by locale, and getting this wrong has real consequences for your license and your hunting future.
Several locations explicitly prohibit shooting a turkey while it’s perched in a tree. Texas Parks and Wildlife says clearly that it’s unlawful to hunt roosting turkeys by any means at any time.
Oklahoma’s regulations list roost shooting as prohibited. Michigan’s regulations say it’s unlawful to take a wild turkey while it’s in a tree. Maine similarly prohibits it. These states treat the restriction as a matter of fair chase and sound wildlife management.
Other states take a different approach. New York, for example, does not explicitly prohibit shooting a roosted bird, making it technically legal during legal shooting hours as long as all other regulations are followed.
And then in some locales, the restriction is tied to shooting hours rather than roost status specifically.
The bottom line: always consult your specific location’s current hunting regulations before your season opens. Never assume that what was legal in one spot applies in another, and never assume last year’s regulations remain unchanged. Your local wildlife agency’s official website is your authoritative source.
Beyond the legal question, there is a practical one worth understanding. The purpose of learning how to roost a turkey is not to shoot one off the limb. It’s to know where the bird is sleeping so you can set up nearby and engage him ethically on the ground at first light. That is the hunt.
The roost is simply the intelligence that makes the hunt possible. Hunters who use roosting information to execute a fair-chase morning setup are using one of the most time-honored and effective techniques in the game.
What To Do Once You Roost A Turkey
You’ve done the work. You slipped in at dusk, found a tom, heard him fly up, and marked his location. Now the real game begins. Here’s how to convert that turkey roosting success into a filled tag.
Mark The Turkey Roost Location And Study The Terrain
The moment you hear a bird fly up, drop a pin on your mapping app. Note the topography between your listening post and the roost tree, and any terrain features that might influence the bird’s fly-down direction. Turkeys often pitch down toward the same open areas they flew up from, and landing zones are frequently influenced by the topography directly adjacent to the roost. A slope leading into a field, a logging road, or a creek bottom bench are all common fly-down destinations.
Spend time that evening studying your map. Where is the nearest food source? Where does the bird need to travel to find hens, a strut zone, or water? Identify two or three possible setup locations within 100 to 150 yards of the roost tree and choose the one that puts you downwind of the bird’s most likely direction of travel.
Plan Your Entry Route
Your entry route in the morning is just as important as your setup location. A hunter who cracks branches, scrapes leaves, or inadvertently bumps close to the roost tree in the dark has burned the hunt before shooting light even arrives.
Plan a route that keeps you on the downwind side, minimizes noise by using terrain features like creek drainages or open timber floors, and gets you to your setup position with time to settle.
Being settled and still before the first gobble of the morning is the standard to hold yourself to. Turkeys are already alert and scanning from the limb well before they commit to flying down.
Set Up Smart Near The Turkey Roost
Position yourself between the roost and where the bird wants to go, not directly under his tree. A setup 100 to 150 yards away gives you room to call and lets the bird feel like he is traveling toward something rather than walking into a trap. Use a natural backstop such as a large tree, brush pile, or rock to break your outline, and ensure your shooting lane is clear in the direction the bird is most likely to approach.
Pop-up blinds are a solid option for hunters who want maximum movement concealment, especially with decoys in play. Natural cover works equally well for experienced hunters who move slowly and stay disciplined.
The Washington Department of Fish and Wildlife recommends setting up about 70 or more yards from a roost site and letting the birds come to you, and that guidance holds across most setups.
Let The Hunt Come To You
Once you’re in position, resist the urge to overcall. A soft tree yelp while the bird is still on the limb lets him know a hen is nearby without firing him up to the point where he locks up and waits for her to walk to his tree. After fly-down, a series of natural yelps and clucks spaced realistically is often all you need. The goal is to sound like a relaxed hen going about her morning.
If a tom flies down and immediately leaves with a group of hens, make a note of the direction he travels. That information is intelligence for your next setup, and it is the kind of pattern knowledge that turns average turkey hunters into consistently successful ones.
The Day-After Advantage Of Turkey Roosting
One successful turkey roosting session creates a repeatable playbook. Birds in an undisturbed area will often return to the same general roost location for multiple consecutive nights during the spring season.
If you roost a turkey on Tuesday evening and your hunt does not connect on Wednesday morning, the odds are good that he’s back in the same timber Wednesday night. Reset, adjust your setup based on what you observed, and go again. Patience and persistence, built on solid knowledge of how to roost a turkey, is a formula that works.
The Turkey Roosting System That Fills Tags
Learning how to roost a turkey doesn’t have to be complicated. But it does require discipline. The best turkey hunters in the country are not necessarily the loudest callers or the most aggressive setup artists. They’re the ones who do the work the evening before, who know where their birds are sleeping, and who are already in position when the gobbling starts at first light.
The full system comes down to this: understand turkey roosting timing, identify the habitat features that draw birds to specific areas, read the ground sign that confirms active roost use, know local regulations, and execute a quiet, well-planned morning setup.
Do that consistently, and your success rate in the spring turkey woods is going to climb in a meaningful way.
Spring turkey season rewards preparation above all else. Roost the turkey tonight; hunt it tomorrow.
Find Your Own Slice Of Turkey Hunting Property
All of this knowledge, every turkey roosting technique and habitat insight in this guide, performs best when you’re hunting the right ground. Access to quality turkey habitat with mature timber, creek bottoms, field edges, and productive ridge country makes every strategy more effective and every season more rewarding.
That is exactly where Hayden Outdoors comes in. As one of the best land brokerages in the country, Hayden Outdoors has been connecting people with farm, ranch, and recreational properties since 1976.
Our team of over 200 agents and brokers across turkey country know what to look for in a property that will hold and grow bird populations year after year.
Owning turkey hunting ground changes everything. When you control access to a property with the right mix of roosting timber, feeding areas, and water, you can manage that habitat, reduce pressure, and build a relationship with the birds on that land across multiple seasons. You can roost the same toms year after year, watch them grow, pattern their movements, and hunt them on your terms.
Fly Fishing Techniques, Methods, And Tips For Beginners: Basics Guide
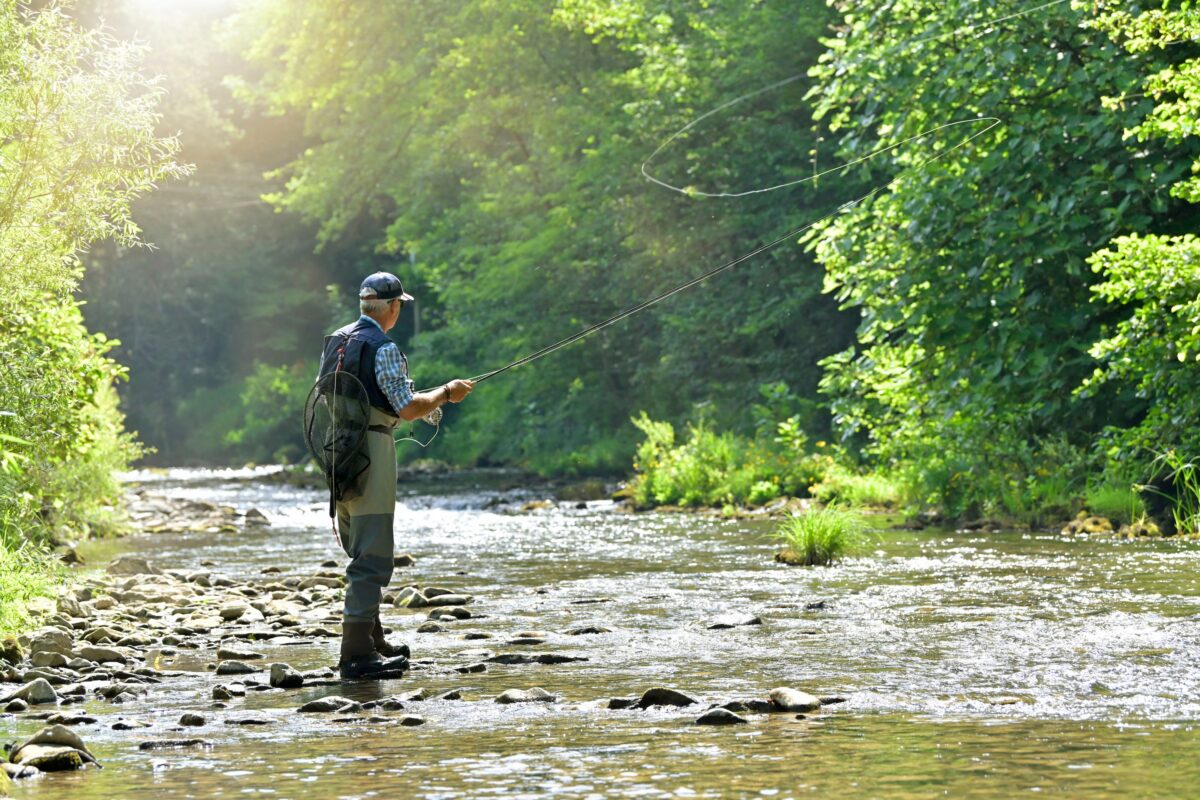
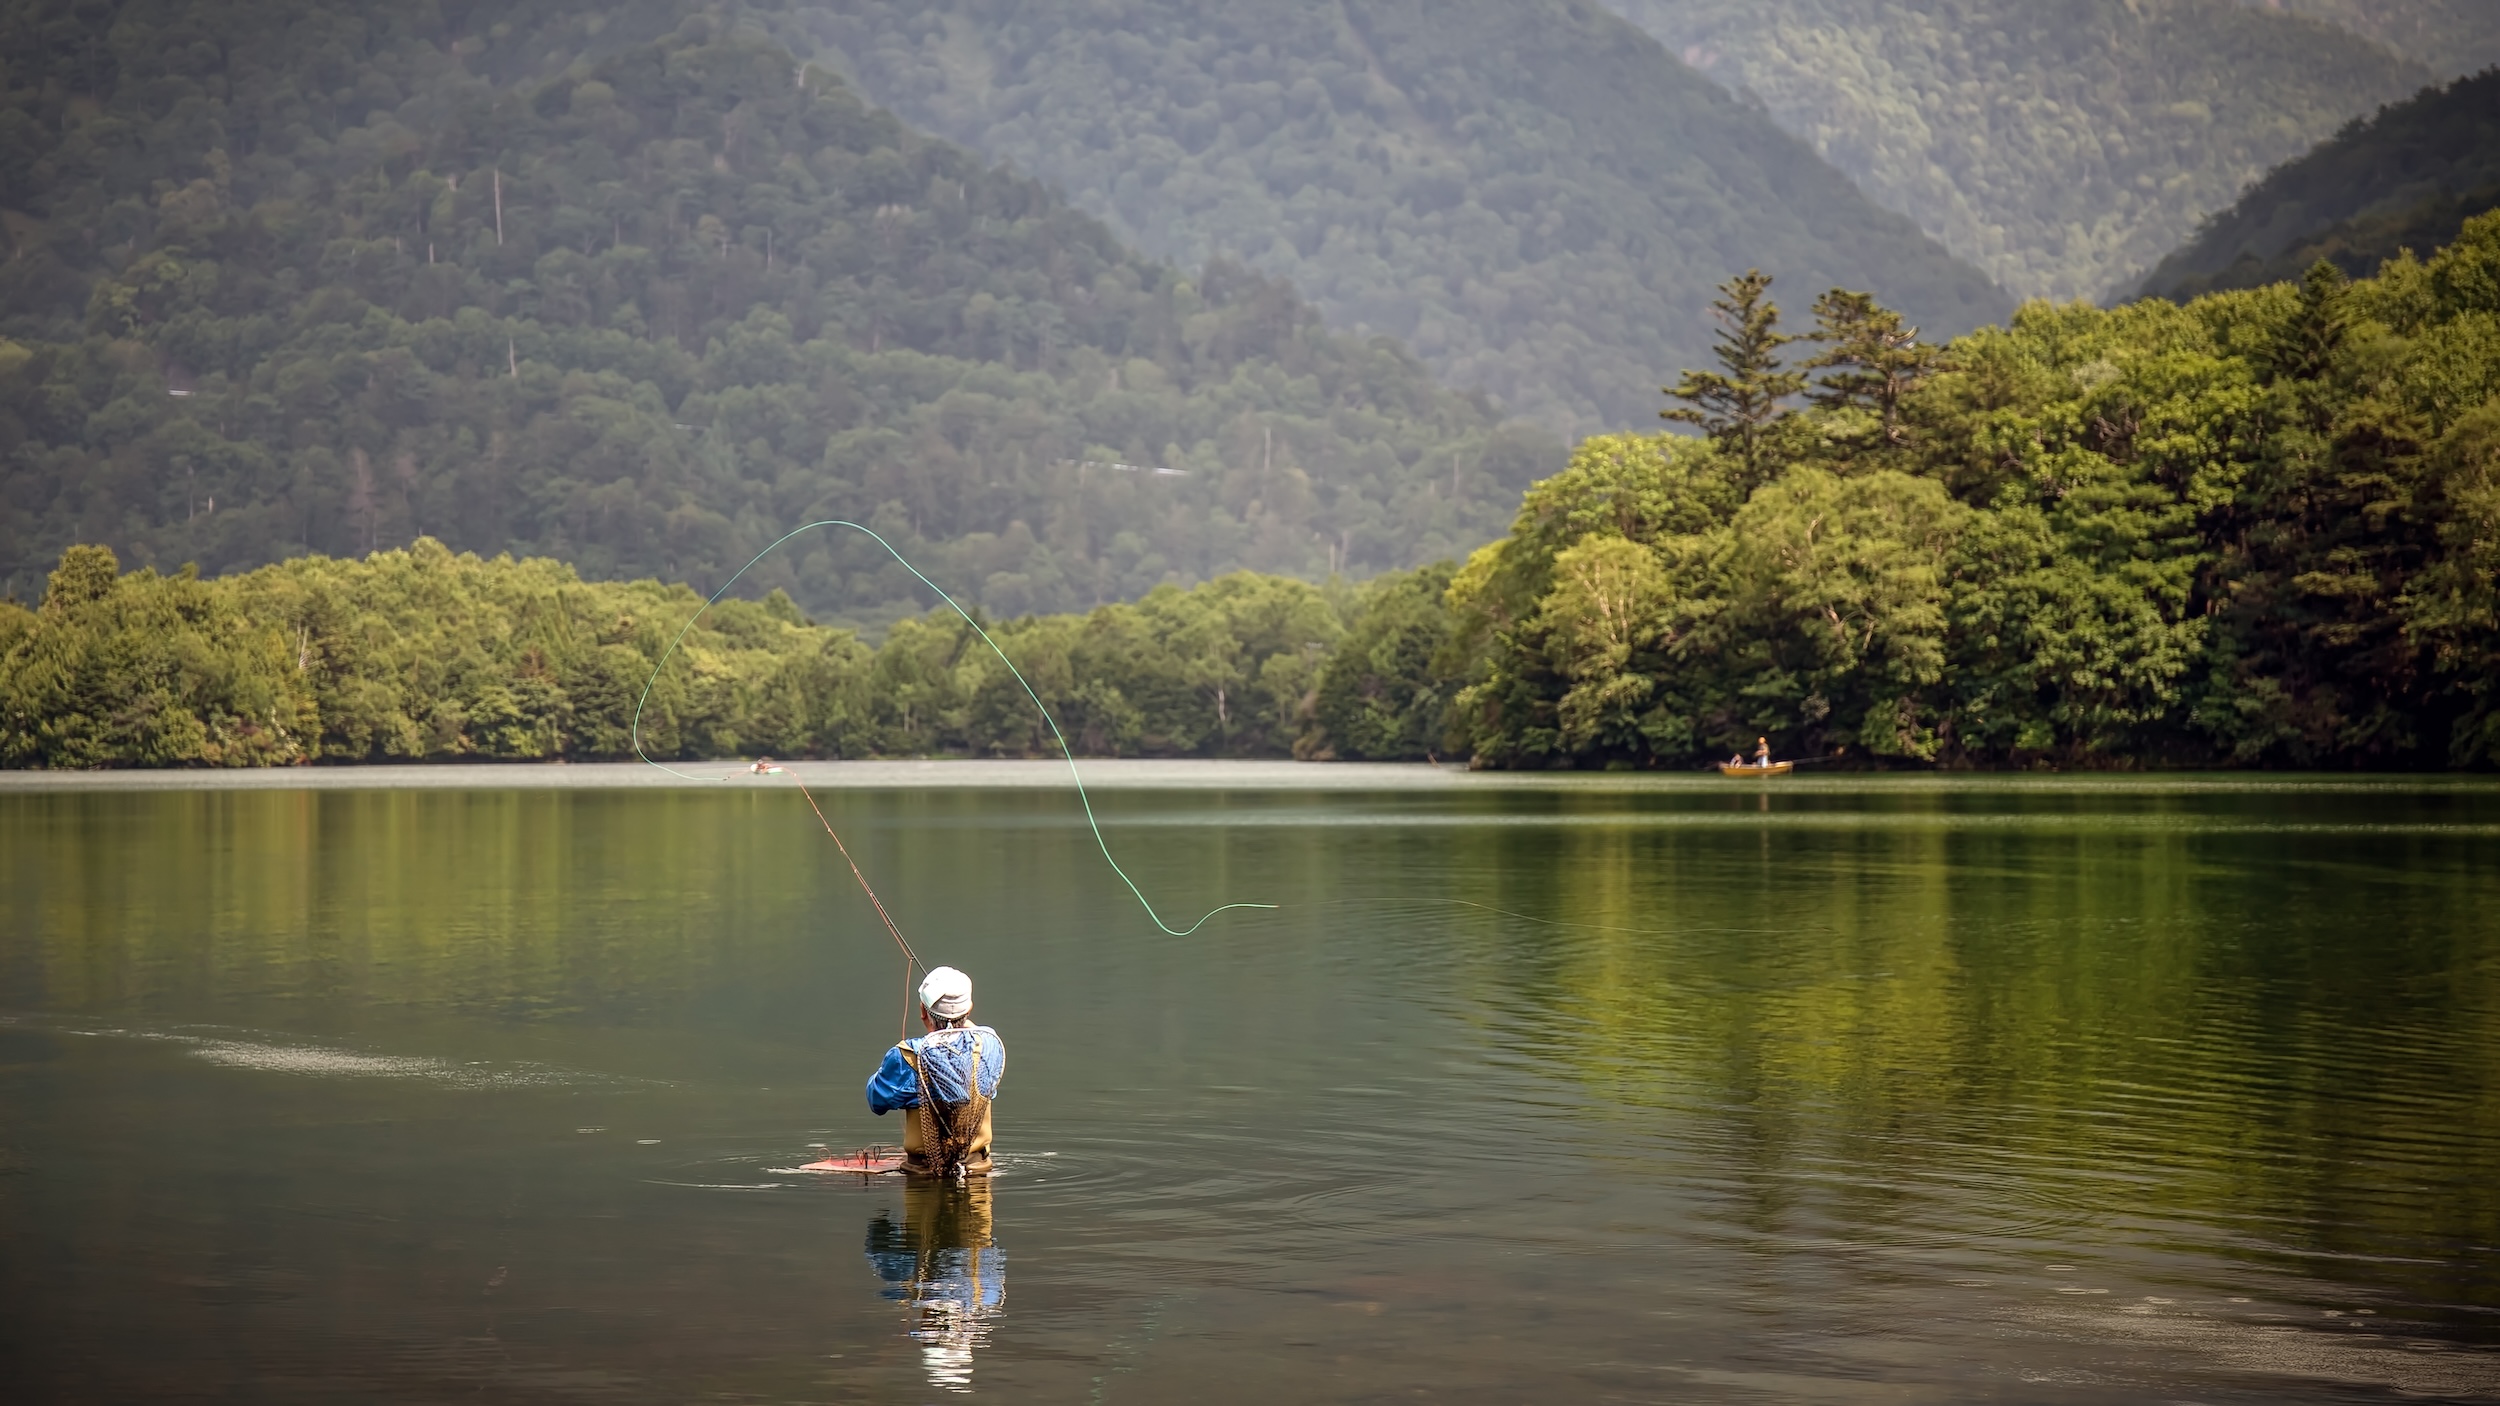
Picture it: early morning, a cold clear river, a dry fly drifting along a current seam, and a trout breaking the surface. That image is what draws people to fly fishing, and the fly fishing techniques that make it happen are closer within reach than most beginners expect.
Fly fishing is built around a unique set of fly fishing methods where the line itself carries the weight of the cast, delivering a nearly weightless fly with precision that no other fishing approach can quite replicate. It is a fly fishing basic worth understanding from the start, and it shapes every technique in this guide.
Whether you are picking up a fly rod for the first time or working to sharpen your foundation, we’ll cover the fly fishing basics, fly fishing tips and techniques for beginners, and the methods that produce consistent results across all types of water. Everything you need for learning to fly fish the right way starts here.
We teamed up with Ben Boehmig to craft this article, and he’s provided his own fly fishing pro tips, tricks, methods, and techniques. Ben’s passion for fishing began at just three years old and has grown into a lifelong pursuit that shapes his perspective and expertise today.
Raised bass fishing outside of Atlanta and later immersed in fly fishing after moving to Colorado, he has developed a deep appreciation for a wide range of fisheries—from saltwater species around the world to trout streams across the western United States.
Before transitioning into real estate, Ben spent several years as a professional fly fishing guide, teaching these techniques and methods, including in Estes Park on Rocky Mountain National Park waters and multiple seasons in the remote wilderness of Bristol Bay, Alaska. These experiences refined his technical skills, adaptability, and ability to connect with people—qualities he brings into every aspect of his work.
Fly Fishing Basics For Beginners: Fundamental Techniques To Learn
The fly fishing techniques you master as a beginner will shape every experience you have on the water for years to come. A strong collection of fly fishing basics will give you a repeatable foundation to build on, and each technique introduced in this section connects to the next.
How The Techniques For Fly Fishing Differ From Other Fishing Methods
The most essential fly fishing basic to understand before learning anything else is how fly fishing techniques work mechanically. In other styles of fishing, the weight of the lure or sinker carries the line.
Fly fishing works differently: many flies are nearly weightless (excluding streamers, which may warrant upsizing your rod choice), so the fly line carries the weight and delivers the fly to its target. Every fly fishing method you learn from this point forward is built on that concept.
This particular fly fishing basic changes how you hold the rod, how you think about the cast, and how you approach every piece of water you step into.
The Overhead Cast: The Foundation Of All Fly Fishing Techniques
The overhead cast is the fly fishing technique that underpins all others. Every advanced fly fishing technique and method you add over time builds on the muscle memory you develop here.
The goal of this particular fly fishing technique is a tight, efficient loop of fly line moving back and then forward, with the rod loading and releasing energy at each stop.
Stand with feet shoulder-width apart and your rod-side foot slightly back. Hold the cork grip firmly but without excess tension. Begin the back cast by lifting the rod smoothly and accelerating to a crisp stop at roughly the two o’clock position. That sharp stop is what loads the rod and is the core action behind this fly fishing technique.
Pause a beat for the line to straighten behind you, then drive the rod forward and stop at ten o’clock. The line unfurls in front of you, and the fly settles onto the water.
The most common fly fishing mistakes beginners make with this technique include breaking the wrist too early, rushing the forward stroke before the back cast has fully extended, and gripping the handle too tightly.
Before you ever stand in a river, practice this fly fishing method on a lawn. The mechanics of the fly fishing technique are identical to on-water casting, and dry-land practice builds the timing and muscle memory that makes learning to fly fish much faster.
Pro Tip: Stay aware of your back cast to be mindful of trees, river banks, and other people that might be behind you to avoid snagging something you don’t want and to reduce unwanted line breaking of the leader.
The Roll Cast: A Fly Fishing Technique Built For Real-World Conditions
Real fishing water rarely offers open space behind you. Trees, brush, cutbanks, and other anglers all limit your back cast. The roll cast solves this problem and one of the most important fly fishing techniques for beginners to prioritize.
There is no back cast involved. You draw the line back slowly across the water surface until a small curve called a D-loop forms alongside the rod, then drive the rod forward and down. The line rolls out in front of you in a smooth arc.
This fly fishing method requires some repetition before it feels natural, but it quickly becomes one of your most-used techniques.
The roll cast fly fishing technique is required at the majority of productive holds on any trout stream. Learning this method early means you will rarely encounter a situation where your fly fishing techniques fail you because of space.
Mending: The Fly Fishing Technique That Unlocks A Natural Drift
Once the fly is on the water, drag is the main obstacle to productive fly fishing. Drag happens when the current catches the fly line and pulls the fly at a different speed than the natural food drifting around it.
Fish recognize this instantly and will typically pass on a dragging fly. Mending is the fly fishing technique used to solve this problem. After the fly lands, use a rolling flick of the rod tip to reposition the fly line upstream or downstream, creating slack that allows the fly to drift at the speed of the current.
When faster current between you and the fly is dragging the line downstream ahead of the fly, an upstream mend is the fly fishing method that corrects it. This fly fishing technique may deliver more results per unit of practice time than any other fly fishing method in this guide.
More natural drifts produced by sound mending techniques mean more strikes, a fly fishing basic that pays off on every cast.
Ben tells us, “Mending is the cornerstone of a good drift and accurate presentation. This is probably the first thing a new angler should focus on. I would constantly tell clients that fish don’t care about the cast, they care about the drift.”
The False Cast: Managing Distance With This Fly Fishing Technique
The false cast is a fly fishing technique for extending line, drying a waterlogged fly, or repositioning before the presentation. To use this fly fishing method, continue the back-and-forward casting stroke without letting the fly touch the water. Each pass allows you to work more line out through the guides.
A key fly fishing tip here: beginners tend to false cast far more than is productive. Extra repetitions of this fly fishing technique give fish additional chances to detect movement overhead and give slack more chances to form in the line.
Experienced anglers applying clean fly fishing techniques limit themselves to two or three false casts before presenting the fly. Efficiency with this method is the mark of a developing angler.
Presentation And Reading The Drift
Casting is only half of learning to fly fish. Presentation, where and how you place the fly, is a fly fishing technique in its own right and just as important as the cast.
The most productive fly fishing method for presentation is to cast slightly upstream of the water you want to cover, then let the fly drift naturally with the current past the location where you expect fish to be holding. The fly should move at the same speed as the surrounding water with no drag.
Watch the leader and the tip of the fly line for any twitch or hesitation that signals a strike. In rivers, fish position themselves in predictable spots: the seams between fast and slow current, the tail of pools, behind boulders and submerged logs, and anywhere the current delivers a steady supply of food.
Reading these features and knowing which fly fishing technique to apply at each location is one of the most satisfying basics to develop over time.
Pro Tip: Fishing downstream is generally discouraged because it causes you to spook fish, which face upstream, by alerting them with your silhouette, casting line, or stirred-up sediment. It also makes achieving a natural, drag-free drift difficult, ultimately ruining your presentation.
What Are The Best Types Of Places To Go Fly Fishing When You’re A Beginner?
Choosing the right water is just as important as applying the right fly fishing techniques. Certain environments are far more forgiving for beginners, and matching your skill level to appropriate water makes learning to fly fish faster and more enjoyable.
These are the tried-and-true, best options for putting your beginner fly fishing basics into practice.
Tailwaters: Consistent Conditions For Learning
Tailwaters are rivers fed by regulated dam releases, and they rank among the best environments in the country to develop fly fishing techniques for beginners. They often contain a unique set of bugs (flies) that other river sections won’t, including scuds, sowbugs, midges, and leeches. Other important tailwater staples are Caddis larvae/pupae, Annelids (worms), and Mysis shrimp.
Stable water temperatures and high nutrient levels support dense, year-round fish populations, which means more opportunities to practice the different fly fishing methods and receive real feedback on your presentation techniques.
Many tailwaters include designated catch-and-release sections, which protect fish populations and keep the fly fishing productive through every season. For beginners working through the fly fishing basics, tailwaters provide a patient and consistent classroom.
Spring Creeks And Small Streams: Ideal For Learning Core Fly Fishing Methods
Spring creeks are fed by consistent groundwater and stay clear, cold, and steady regardless of rainfall or season. Their clarity makes them excellent environments for sight fishing, where you identify individual fish and present your fly to a specific target.
The feedback is immediate: you can watch the fish respond to your fly fishing technique in real time. Small streams reward short, accurate casts over distance, making them ideal for drilling the fly fishing casting techniques we introduced earlier. These are some of the best waters for developing core fly fishing methods from the ground up.
Pro Tip: Due to size, less casting is often needed to reach your targets, making for easy introductions. These types of waters are often best for dry fly fishing. Not sure about rods? 3wts are often the rod of choice for this type of water.
Lakes And Ponds: The Best Spots For Beginners To Hone Their Stillwater Fly Fishing Techniques
Fly fishing techniques on stillwater work differently than on moving water. Without current, stillwater fly fishing methods rely on retrieving the fly in a way that imitates the natural movement of baitfish, leeches, or hatching insects.
Stripping streamers along weed edges, fishing chironomid patterns under an indicator, and swinging wet flies are all effective stillwater fly fishing techniques.
Lakes and ponds are also great environments for practicing casting, given that open, flat water removes many of the obstacles that challenge beginners on rivers.
How To Read Water
One of the most transferable fly fishing basics a beginner can develop is the ability to read water and anticipate where fish are holding.
Fish in rivers are always balancing food availability against energy expenditure. That balance consistently draws them to the same types of locations, and knowing those locations tells you where to go to use those hard-earned fly fishing techniques.
Riffles are shallow, broken sections with high oxygen content and abundant insect life. The riffles often develop foam lines, which are great to look for for that abundant bug life.
Runs are deeper, smoother channels where fish hold with minimal effort and wait for food to come to them.
Pools are the deep, slow sections that collect at the base of a riffle or behind a large structure.
The seam between fast and slow currents is often the single most productive location to apply any fly fishing technique.
Each of these features calls for specific fly fishing techniques and methods, and developing the habit of reading water before you fish it is a fundamental basic that improves every outing.
It’s important to be observant when you get on any water source. Watch what the fish are doing. Are they rising to eat dry flies? Can you see them feeding in the channel (indicating sub-surface feeding)?
Keep an eye out for any bug “hatches” (which are most common at dusk and dawn) that might be going off, where bugs can be seen hatching, and fish will be keen on that food source. Even try to catch a few and compare them to flies you may have in your box.
Pro Tip: Look for boulders in the river where fish will be behind or in front of. Shelves under river banks are also good spots to look for those deep pools. And it’s also always a great idea to flip some rocks over to see what bug life is currently present that time of year in the water, so you can get a direct idea of how to “match the hatch.”
Ben’s rule of thumb: Water temperature is going to determine where the fish are in the run. Simply put, warmer water holds less oxygen. Therefore, during summer months, fish need to acquire more oxygen, and can be found in more turbulent water. Vice versa, in cooler months, they may all be laying at the bottom of the deepest pool.
Public Access vs. Private Water
Most beginners start on publicly accessible water, which is a solid way to build your experience in the fly fishing basics and develop techniques across a range of conditions.
State fish and wildlife agencies are a great source for finding out about fishing areas, access points, and any boat ramps available to use. Public water provides variety and accessibility, two things that matter greatly when you are learning to fly fish.
Private water provides a different fly fishing experience. Lightly fished water holds fish that respond more freely to fly fishing techniques, and the absence of competing anglers means you can work a piece of water at your own pace and apply each fly fishing method without interruption.
Many anglers who develop a serious investment in fly fishing eventually pursue private access through guided outings, fishing clubs, or land ownership.
Pro Tip: “Blue Ribbon” represents one of the highest tiers of fisheries, often containing 600+ pounds of fish per mile (e.g., in Wyoming). Other classifications include Gold Medal (Colorado), Class I (Wisconsin/Michigan), and Class A Wild Trout Waters (Pennsylvania). Keep this in mind when choosing the best locations to go fly fishing.
How Fly Fishing Gear Varies From Typical Fishing Gear
The fly fishing basics extend well beyond casting and presentation techniques. Understanding your gear is also a core part of learning to fly fish effectively, and fly fishing equipment is purpose-built around the techniques it needs to support.
Here is what every beginner should understand about fly fishing gear before making any purchases.
How To Choose The Right Rod
A fly rod is engineered to flex in a specific way that loads and releases energy during casting. Fly rods are rated by line weight, from 1-weight for small streams up to 12-weight for saltwater species.
For beginners developing their understanding of the freshwater fly fishing basics, a 5-weight rod is the most versatile starting point. It handles trout, bass, and panfish across a range of conditions and is forgiving enough to develop sound fly fishing techniques without fighting the gear.
A 9-foot rod length is standard for most river fly fishing and provides enough reach to execute the mending fly fishing technique and keep back casts elevated.
Medium-fast action is the most beginner-friendly rod because it offers enough flex to feel the rod loading during casting, without the stiffness of fast-action rods designed for experienced casters applying more advanced fly fishing techniques.
Ben’s Pro Tip: You don’t need to spend a fortune on your first fly fishing setup. All big box outdoor retailers (Cabelas, Bass Pro, Scheels etc.) will have a full setup in the $100-200 range. Start with that, and learn what you want when it comes time to upgrade!
Fly Reels: What Every Beginner Learning To Fly Fish Should Know
In freshwater fly fishing, the reel plays a more straightforward role than in conventional fishing. Its primary purpose is storing fly line and backing, the braided reserve line that gives you capacity when a large fish runs.
When fly fishing, you will often fight fish by managing the line by hand rather than with the reel. A simple click-and-pawl drag is adequate for most beginner fly fishing situations.
Match the reel size to your rod weight and keep your focus on developing your fly fishing techniques and mastering the basics, rather than chasing expensive equipment.
Line, Leader, And Tippet: The Delivery System
The fly line is the engine behind every fly fishing technique. A weight-forward floating line is the standard for beginners because it is the most castable configuration and works across the widest range of fly fishing methods. The thick front taper of the line carries energy from the rod tip through the cast and is what makes fly fishing techniques mechanically possible.
Attached to the end of the fly line is the leader, a tapered length of monofilament that transfers energy from the thick fly line to the thin tippet. Tippet is the final section that connects directly to the fly. Matching tippet diameter to fly size is a fly fishing basic that affects fly presentation and how naturally the fly behaves in the water.
Knots hold the entire system together, and learning a core set of reliable knots is one of the most actionable fly fishing tips for beginners.
Flies: The Four Categories To Know About
The category of fly you are using determines which fly fishing techniques and fly fishing methods apply on the water.
Dry flies float on the surface and imitate adult insects, calling for surface presentation.
Nymphs sink below the surface to imitate larvae or pupae and are fished with dead-drift fly fishing methods.
Streamers imitate baitfish or leeches and are fished with active stripping.
For beginners working through the basics of fly fishing, a short list of versatile patterns covers most freshwater situations: a Parachute Adams and Elk Hair Caddis for dry fly fishing, a Pheasant Tail Nymph and Hare’s Ear for subsurface fly fishing methods, and a Woolly Bugger as a productive all-around streamer fly fishing technique for nearly any freshwater species.
Essential Gear Every Beginner Needs
Waders and wading boots expand access to water that cannot be fished from the bank and keep you comfortable during long days applying newly learned fly fishing techniques on the river. That said, in peak summer, you can opt for “wet wading” and bypass the waders. Just use wading socks or Tevas, especially when fishing smaller streams and alpine lakes.
Polarized sunglasses are one of the most important gear basics to keep in your fly fishing kit, cutting surface glare so you can see fish, read current structure, and navigate underwater hazards safely while wading.
A chest pack or vest keeps fly boxes, tippet spools, forceps, and floatant within reach so you can keep fishing without stopping to dig through a bag.
And lastly, forceps remove hooks quickly and safely, which is especially important when practicing catch-and-release fly fishing methods.
Sage Advice From Ben: A wise man once said “It’s not the rod, reel, or waders that catch the fish, It’s the hook that your fly is tied on.” In so many words, your gear doesn’t matter if your hook breaks.
Our Best Fly Fishing Tips And Techniques For Beginners
Knowing the best fly fishing techniques on paper is a productive start. But knowing how to apply these fly fishing tips and techniques in real situations is what produces actual results on the water.
Our beginner tips are drawn from the kind of practical, hands-on experience that most people only accumulate after seasons of trial and error. Apply these fly fishing tips and fly fishing basics alongside the techniques we covered earlier and you’ll accelerate your development significantly.
Fly Fishing Tip #1: Start With Lessons From A Pro (Cut The Learning Curve)
The highest-impact single fly fishing tip we could give to beginners is to invest in a lesson or a guided day on the water before any self-taught habits set in.
Fly fishing techniques like the overhead cast are learned most efficiently with direct feedback from someone watching your stroke. An instructor can identify the timing flaw or loop problem in your approach in a few minutes and correct it before it becomes a habit.
Most fly shops offer casting clinics, and guided fishing trips almost always include instruction in fly fishing techniques specific to the water you are fishing.
Fly Fishing Tip #2: Build One Fly Fishing Technique At A Time
The overhead cast is a fundamental cast when learning how to fly fish. Until this fly fishing technique is automatic, adding any new fly fishing methods can slow down your development. This is why we recommend spending your first sessions focused entirely on this one fly fishing method before introducing the roll cast, reach cast, or any other method.
Fly fishing basics built on a solid foundation develop much faster than techniques layered on shaky fundamentals. Mastery of one fly fishing technique at a time is the most efficient path through the fly fishing basics as a whole.
Fly Fishing Tip #3: Start By Fishing Close
One of the most consistently overlooked fly fishing tips for beginners is that distance is not the measure of effective fly fishing. The majority of fish are hooked well within 30 feet, even by experienced anglers.
Casting beyond your ability to control introduces slack, poor fly fishing technique execution, and missed hooksets. A crisp 20-foot presentation using clean fly fishing techniques will consistently outperform a sloppy long cast.
Learning to work the water close to you before extending your range is a basic fly fishing tip that pays off on every outing and in every fly fishing method you apply. Fish the water before you walk through it.
Fly Fishing Tip #4: Your Approach Should Be Viewed As A Technique
Fish respond to vibration, movement, and shadow well before they see a fly. Wading carelessly, casting a shadow over holding water, or approaching from the wrong angle will scatter fish before you even have the chance to catch one.
Move slowly, crouch as you approach fish, and position yourself downstream whenever the water allows. Wearing muted, earth-tone clothing is a fly fishing basic that beginners often overlook but experienced anglers consider as important as any fly fishing casting technique.
Your approach to the water is a fly fishing technique in itself, and it sets up every other method you will use once you are in position.
Fly Fishing Tip #5: Use A Log To Keep Tabs On The Methods That Get Results
Keeping a simple log is one of the best fly fishing tips for beginners. Record date, location, water temperature, weather, fly selection, and results for every outing.
Over time, the data reveals which fly fishing techniques produce on which water types, which hatches trigger active surface feeding, and how conditions affect the fly fishing methods that draw strikes.
A log transforms random experience into organized knowledge and is one of the most effective fly fishing basics for accelerating the learning process.
Fly Fishing Tip #6: Get Comfortable Learning Your Knots
The fly fishing techniques you implement on the water are only as reliable as the knots connecting your system.
Three knots cover the majority of fly fishing situations: the improved clinch knot for attaching a fly to the tippet, the surgeon’s knot for joining tippet sections or extending a leader, and a loop-to-loop or nail knot for attaching the leader to the fly line.
Practice these at home until you can tie them quickly in low light or cold conditions. Solid knot work is a fly fishing basic that’s key to every fly fishing technique you apply once you are on the water.
Fly Fishing Tip #7: Opt For Catch-and-Release
Methods that protect fish populations (like catch-and-release) are just as important as any of the other fly fishing techniques.
Wet your hands before handling fish to preserve their slime coat. Minimize air exposure, use barbless hooks when possible, and revive fish fully in moving water before release.
These fly fishing tips are not only about conservation. They directly protect the fisheries you will return to season after season and the quality of fly fishing available to every angler who follows you onto that water.
Fly Fishing Tip #8: Get To Know The People At Your Local Fly Shop
Local fly shops are among the most underused resources for fly fishing beginners. Staff members know current conditions, active hatches, and which fly fishing methods have been producing in the past week.
Building a genuine relationship with a local fly shop is a fly fishing basic that rewards you at every stage of learning and sharpens your technique as you build a strong foundation.
Fly Fishing Is Best When It Happens On Your Own Waterfront Property
There is a version of fly fishing that exists beyond crowded public access points and busy tailwaters. It happens in the early morning hours before anyone else is on the water, on private water that holds fish no one else has been working, steps from the door of a property you own.
For anglers who have developed a genuine passion for fly fishing and all the techniques it involves, private waterfront ownership is the natural next step.
At Hayden Outdoors, we’ve spent decades specializing in rural, recreational, and waterfront land across the West and beyond. Our agents are not generalist brokers who occasionally handle land transactions.
They are outdoors people themselves, many of them lifelong hunters and anglers with genuine working knowledge of what makes waterfront property valuable from a fly fishing standpoint. They understand which features produce lasting fly fishing quality and which are seasonal or superficial.
When you work with a Hayden Outdoors agent, you work with someone who understands the difference between senior and junior water rights, who can evaluate stream health and fish habitat, and who has a regional network capable of surfacing off-market listings that never reach public real estate platforms.
Waterfront properties with genuine fly fishing value move quickly. Having an experienced Hayden Outdoors agent means you hear about those opportunities first. The right water is out there, and the right team knows how to find it.
Where To Find And Pick Morel Mushrooms: Foraging And Hunting Season Guide
If you’ve been trying to figure out where to find morel mushrooms, you’ve probably noticed how elusive they can be. You can smell a good morel spot before you see it. There’s something about damp leaf litter, decaying hardwood, and the particular warmth of a forest in mid-April that carries its own kind of promise. And somewhere in that landscape, if you know what you’re looking for, morel mushrooms are waiting.
Morel mushroom foraging rewards knowledge far more than luck. The hunters who come home with full bags year after year aren’t just wandering the woods hoping for the best. They understand where morel mushrooms grow, they know where to find morels to pick in their region before the season even opens, and they can read the environmental signals that tell them conditions are right for foraging before they ever leave the truck. This guide covers all of it.
By the time you’re done reading, you’ll know the best regions and specific habitats for morel mushroom hunting, exactly where to pick morel mushrooms once you’re in the woods, when and how to time your morel mushroom foraging season, and which natural signs to watch for before heading out.
Disclaimer: This guide on where to find and pick morel mushrooms is intended for general informational purposes only and does not substitute for hands-on training with a qualified mycologist or experienced mushroom forager. Mushroom identification carries real risk, and no written guide, photo, or description should be your sole basis for eating any wild mushroom. If you’re new to morel mushroom foraging, go out with someone who has direct field experience before foraging independently. When in doubt, leave it.
Where To Find Them: Where Do Morel Mushrooms Typically Grow?
Knowing where to find morel mushrooms comes down to understanding two things: which regions of North America grow them most reliably, and which specific habitats within any given forest concentrate them.
Both matter, and neither is enough on its own. Most people researching where morel mushrooms grow and where they can find them start at the regional level, and that’s the right place to begin.
The Best Regions In North America For Morel Mushroom Foraging And Picking
Not every corner of North America grows morel mushrooms equally. Climate, soil composition, and native forest structure all play a role, and certain states have developed near-legendary reputations among mushroom foragers for good reason.
Michigan’s morel mushroom season runs from late April into mid-June, depending on location, with southern Michigan offering some of the earliest and most consistent fruiting in the state.
Michigan, Indiana, Missouri, Illinois, Ohio, and Wisconsin collectively form the heartland of morel mushroom hunting places in North America, and these states are where foragers benefit from rich loamy soils, abundant hardwood forests, and spring weather patterns that regularly deliver the warm, wet conditions morels need.
Indiana has emerged in recent seasons as one of the most productive morel mushroom foraging states in the country. Its river bottom hardwood stands deliver consistently strong results, particularly in years with adequate spring rainfall.
Missouri’s another standout, with a long-established foraging culture and public land that draws morel mushroom hunters from neighboring states every April.
For hunters wondering where to find morel mushrooms in the eastern part of the country, the Appalachian corridor deserves serious attention. West Virginia, Tennessee, Kentucky, Virginia, and Pennsylvania all offer the kind of deep, hardwood-dominant forests where morels concentrate. The hollows and creek drainages of Appalachia hold moisture well into spring and develop the organically rich, loamy soil conditions that morel mycelium prefers.
Out west, the story of where to find morel mushrooms shifts a bit. Washington, Oregon, Idaho, and Montana all produce morels, but the most celebrated morel mushroom foraging spots in the Mountain West tend to be in post-wildfire burn zones.
When fire moves through timber at moderate intensity, it creates disturbed, ashy, mineral-rich soil conditions that can trigger explosive morel mushroom flushes the following spring hunting season. First-year burns are typically the most productive. After that, as vegetation regenerates, the flush diminishes.
Cottonwood river bottoms and aspen stands in the intermountain states are also reliable targets for anyone figuring out where to find morel mushrooms in that part of the country.
Here’s what drives the difference between regions: three things have to work together. You need spring weather with adequate rainfall, loamy and well-drained soils high in organic matter, and the presence of the specific tree species that morels associate with.
The Specific Habitats To Target When You Go To Pick Morel Mushrooms
Knowing which state to hunt is only the first step. Knowing where to pick morel mushrooms within a specific forest is what actually fills the foraging bag.
Within any given stand of timber, morels aren’t distributed evenly. When determining where to find morel mushrooms, keep in mind that they concentrate around specific trees and in specific soil conditions, which is why two foragers walking the same woods can have completely different results, depending on what they know to look for when foraging. Learning to identify these micro-habitats is the skill that separates consistent morel hunters from those who come home empty-handed.
The single most reliable habitat indicator for where to find morel mushrooms in the eastern United States is the presence of dying or recently dead elm trees. As an elm begins to decline, whether from Dutch elm disease or natural aging, it alters the soil chemistry around its root zone in ways that morel mycelium responds to.
Dead elms where the bark is just beginning to loosen and peel are worth approaching slowly and searching carefully. Ash trees function similarly, as do apple trees and tulip poplars. Old orchards with gnarled, declining apple trees have produced legendary morel mushroom hunting spots for generations of foragers and are worth tracking down on topographic or satellite maps before your trip.
Post-fire burn zones deserve special attention in the West. When a fire burns through timber at moderate intensity, the resulting disturbed, ashy soil triggers massive morel mushroom flushes the following spring season. The first year after a burn is typically the peak. After that, production tapers as ground cover returns. Carry fire perimeter maps or use satellite imagery from the previous summer to identify promising burn sites before the season opens.
Creek bottoms and river floodplains are consistently productive throughout the morel mushroom hunting season. These areas collect organic material, stay moist longer than adjacent hillsides, and build the loamy, well-draining soil composition that morels favor. They also warm slightly later than upland areas, which can extend your local mushroom picking window by several days after nearby slopes have already peaked.
Early in the morel mushroom hunting season, prioritize south-facing slopes when determining where to find these delicious morsels. These areas catch more direct sunlight as the spring sun angle increases and warms ahead of north-facing terrain.
When choosing where to find and pick morel mushrooms, start low and south-facing at the beginning of the season, then move progressively to north-facing slopes and higher elevations as the weeks advance. That single adjustment can add meaningful days of productive morel mushroom hunting at any given site.
Forest edges, old logging roads, and areas of mild soil disturbance are also worth checking when you’re working a property. The transition zone between timber and open land concentrates both moisture and sunlight in ways that can favor morel growth. Disturbed ground along old access roads through hardwoods is a consistent producer that a lot of foragers overlook.
The practical takeaway: When zoning in on where to find morel mushrooms, stop wandering and start mapping. Identify the target trees and habitat features before you go. Each dying elm or old apple tree is its own micro-site. Work them methodically, and you’ll understand where to find morels in your area better after one serious season than most casual hunters ever do.
What Is The Best Season For Hunting And Foraging For Morel Mushrooms?
When it comes to determining where to find and pick morel mushrooms, timing is critical. Miss the window at a given location, and you’re waiting a full year to try again.
Understand how the morel mushroom season moves, though, and you can chase it across regions and elevations to extend your productive time considerably. And no matter where you go to find morel mushrooms in your part of the country, the seasonal logic follows the same fundamental pattern.
The General Window: The Spring Season Is For Morel Mushroom Hunting
Morel mushroom hunting season in North America is a spring event, full stop. The productive window across most of the continent runs from late March through May, but the exact timing at any specific location depends on latitude, elevation, and the weather pattern of a given year.
The morel mushroom growing and foraging season moves like a slow wave from south to north and from low elevation to high. It starts in the Deep South and at lower Gulf Coast elevations in mid-to-late March, pushes through the Midwest through April, and reaches upper Midwest states and higher mountain elevations through May into early June.
The primary trigger for morel mushrooms to emerge and grow is soil temperature. Research highlighted by the Iowa State University Extension identifies soil temperature as a reliable predictor of mushroom emergence timing.
Most experienced foragers and mycologists point to a soil temperature of 50 to 55 degrees Fahrenheit measured at 4 to 6 inches depth as the sweet spot for morel emergence.
Air temperature works as a useful proxy: when daytime highs are consistently reaching 60 to 70 degrees and nighttime lows are staying reliably above 40 degrees, soil temperatures are likely approaching that range where you can expect to find morel mushrooms.
Regional Timing Breakdown
Understanding how morel mushroom hunting season shifts by region helps serious hunters extend their productive window well beyond what a single location offers. The timing for where to find morel mushrooms isn’t fixed from year to year, but these ranges hold fairly consistently across typical seasons.
Foragers in the Deep South and southern Appalachians should plan for mid-March through early April as their primary morel mushroom hunting season.
The Midwest core states, including Missouri, Illinois, Indiana, and Ohio, typically see peak morel mushroom hunting activity during early to mid-April, though a cool, wet spring season can push that several days to a week later.
The Great Lakes region, including Michigan, Wisconsin, and Minnesota, peaks from late April through mid-May.
If you’re determining where to find morel mushrooms in northern states and the Mountain West, May and into early June is your window, with elevation playing a major role in pushing timing later.
Pacific Northwest morel mushroom hunters often work through May and June, and at high-elevation sites in the Cascades or Rockies, productive hunting can push into July.
One practical approach for hunters who want to maximize their morel mushroom foraging season: start at the southern end of your accessible range early in the season and move northward or upward in elevation as the weeks pass.
A hunter based in the Midwest might open their morel mushroom hunting season in Missouri in early April, work central Indiana through mid-April, and finish in Michigan’s Upper Peninsula in late May. That kind of intentional approach can turn a two-week local window into six weeks of productive morel mushroom foraging.
The Window For Morel Mushroom Hunting Is Short
One of the most important things to understand about morel mushroom hunting season is just how brief the productive window at any single location can be. Under ideal conditions, a flush can move from tiny pinhead emergence to fully mature, prime-condition mushrooms in two to three days.
Once morels elongate past peak, they dry out, become brittle, and lose most of their culinary value within days. A late discovery can mean a basket of mushrooms that are already past their best.
This is why dedicated morel mushroom hunters stay close to the season rather than waiting for it to come to them. Soil thermometers, weather tracking apps, and online foraging communities that share real-time reports from the field are all tools that serious hunters use to stay one step ahead of the flush and help them zone in on where to find those elusive morel mushrooms.
Sustainability Note: When picking morel mushrooms, only take what you need from a patch. Morels should be harvested at the fruiting body with a knife instead of digging them up. This avoids damaging the soil and mycelium. A common forager guideline is to leave 50% of the patch to ensure that the patch will continue to grow as spores and morel mushrooms will grow for future seasons and generations.
Signs To Look For To Know It’s The Right Time to Start Foraging And Picking Morel Mushrooms
Understanding where morel mushrooms grow and knowing the general season window are both starting points. Knowing whether conditions are right on any specific day is what actually puts morels in your hunting bag.
Experienced morel mushroom foragers read a combination of soil conditions, plant activity, and weather patterns before heading out, and that combination of signals is far more reliable than relying on the calendar alone to find where they grow.
Read The Soil Temperature Directly
The most reliable method for timing your morel mushroom hunting season is checking soil temperature directly, and it doesn’t require anything more sophisticated than an inexpensive soil thermometer from any garden supply store.
Insert the probe 4 to 6 inches into the forest floor near your target trees. When you’re consistently reading 50 to 55 degrees Fahrenheit, hunting conditions for picking morel mushrooms are right.
Readings in the mid-40s mean you’re a week or more early at that elevation. Readings approaching 60 degrees and climbing suggest you may be at the tail end of the flush.
Air temperature readings serve as a reasonable proxy when you’re planning ahead without access to the field. Daytime highs consistently in the 60 to 70 degree range, combined with nighttime lows holding reliably above 40, typically indicate soil temperatures are approaching or within the target zone for when it’s optimal to pick those morel mushrooms.
Watch The Plants: Nature Has Its Own Calendar
Here’s something experienced foragers have known for generations: the forest itself tells you when it’s time to go foraging for morel mushrooms. Phenological indicators, which are the seasonal behaviors of plants, track closely with the same soil and temperature conditions that trigger morel emergence.
In the Midwest, watch for Mayapple umbrellas pushing up through the leaf litter on the forest floor. Their emergence reliably tracks the soil temperature threshold for morel hunting in the region.
In the eastern states, blooming redbud trees and flowering spicebush are classic signals that conditions are right to pick morel mushrooms. An old piece of forager folklore that has held up across generations says that when oak leaves have reached the size of a squirrel’s ear, the season is underway. Trillium blooms, spring beauty, and other early forest wildflowers emerging in force are additional confirmation that the morel mushroom hunting season has opened.
It all works for the same reason: the warming soil and adequate moisture that trigger early spring wildflowers also trigger the emergence of morel mushrooms. When the forest floor is waking up, so are the morel mushrooms, and this is where you’ll find them.
Watch Weather Patterns
Soil temperature sets the baseline for morel mushroom foraging season, but the specific weather sequence leading up to your hunt makes an enormous difference in what you can forage for and pick.
The ideal setup is a soaking rain event of at least one inch, followed by two to three days of mild, overcast conditions in the 55 to 65 degree range with sustained humidity. Morels need moisture to develop the fruiting body, and mild temperatures protect them from drying out before they can be found.
A late frost after initial emergence can temporarily set a flush back, but morels are more resilient than most mushroom foragers expect. If temperatures dip hard after the first signs of morel mushroom emergence, don’t abandon the spots where you are looking to find them. Once warmth returns, activity typically resumes and can be even more productive than if the frost hadn’t occurred.
One thing to avoid: heading out immediately after a hard freeze that follows several days of 70-plus degree heat. That combination tends to end a flush quickly. Stable, mild conditions are your friend.
How To Spot The Difference Between Real Morel Mushrooms and False Morels When Hunting
This is the part of morel mushroom foraging that demands the most careful attention. Several species that grow in the same forests as true morels can cause serious illness, and at least one genus has been linked to fatalities.
Knowing the difference isn’t just a cautionary footnote. It’s a core skill for anyone serious about morel mushroom hunting, and it matters just as much as knowing where to find and pick morel mushrooms in the first place.
Identifying True Morel Mushrooms
True morels belong to the genus Morchella, and they share three consistent identifying characteristics regardless of color or size.
Cap pattern. A true morel cap is covered in a deeply pitted, geometric honeycomb of interconnected ridges and pits. The pits face outward. The ridges connect continuously across the cap surface. This is a structured, regular pattern. It’s not wrinkled, lobed, folded, or brain-like. If the cap looks more like a crumpled piece of paper than a honeycomb, it’s not a true morel.
Cap attachment. On most true morels, the cap attaches directly to the stem at the base, forming one continuous structure from the tip of the cap to the bottom of the stem. It doesn’t hang loosely or connect only at the top of the stem like a hood placed over a post.
The hollow interior. When you slice a true morel mushroom lengthwise from cap tip to stem base, the inside is completely and uniformly hollow. No chambers, no partial walls, no cottony material. Just open, unobstructed interior from top to bottom. This is often cited as the most reliable test for distinguishing true morel mushrooms from dangerous lookalikes.
True morels come in several color forms. Black morels tend to grow and emerge first, early in the season, and are sometimes overlooked by hunters focused on the larger yellow morel. Yellow morels are the most recognized form, typically larger and fruiting at peak season.
Note on half-free morels: One true Morchella species, the half-free morel, has a cap that is only partially attached to the stem, with the lower half hanging free. This can create visual confusion with Verpa species.
For this specific comparison, the cap surface is a more dependable test: a half-free morel has a true geometric honeycomb pattern, while a Verpa cap is wrinkled, ribbed, and brain-like with no real pits.
Cap attachment also helps. A half-free morel’s cap fuses to the stem from roughly the midpoint up, while a Verpa’s cap hangs completely free and connects only at the very top. Note that while young Verpa specimens typically contain cottony pith in the stem, older specimens can become hollow, so interior alone is not a fully reliable test for this pairing.
Safety Note: When you do identify and pick those true morel mushrooms, always cook them thoroughly. Thorough cooking, whether sauteed in butter, pan-fried, or incorporated into a fully cooked dish, reduces your risk of illness significantly. You’ll also want to look out for common bugs or pests when harvesting or preparing to eat these mushrooms, particularly springtails, tiny beetles, or maggots, which can feed on them.
Find Your Own Slice Of Morel Mushroom Hunting Heaven
You now have a full picture of where to find morel mushrooms, how morel mushroom hunting season moves across latitude and elevation, where to pick morel mushrooms more productively once you’re in the right forest, and how to make every morel mushroom foraging trip count.
Here’s the thing: what separates foragers who find morels consistently from those who come home empty-handed isn’t superior luck or some inherited talent for reading the woods these mushrooms live in. It’s familiarity with a specific piece of land.
The hunters who fill their bags year after year know their ground and where to find morel mushrooms on it. They know which creek bottom holds the old elm trees, which hillside faces south and warms first, and which recently burned slope is entering its most productive spring. That kind of knowledge doesn’t come from one trip. It comes from returning to land you know, season after season, learning its rhythms.
If you’re serious about the outdoor life, whether that’s morel mushroom hunting, deer hunting, turkey hunting, or simply wanting a place to step outside and call your own, owning timberland changes the equation entirely.
At Hayden Outdoors, we specialize in timberland properties across the country. These are properties built around the habitat features described throughout this guide: hardwood timber, creek drainages, mixed forest composition, and the kind of ground that produces results not just during morel mushroom season but across every season of the outdoor year.
More than an investment, these are places to build a genuine outdoor life. Browse timberland for sale at Hayden Outdoors and find the land where your morel season begins.
The Best Turkey Hunting States: Top Places In 2026
Turkey hunting represents one of America’s most treasured outdoor traditions, connecting modern hunters with a heritage stretching back generations. And there’s no denying that finding the best turkey hunting states can easily transform your season from ordinary to extraordinary.
From the hardwood bottoms of Alabama to the ponderosa pines of Montana, hunting wild turkeys on quality ground creates memories that last a lifetime. Whether you’re chasing your first gobbler or working toward completing a Royal Slam, location makes all the difference in your success and enjoyment.
What separates the best states for turkey hunting from every other place? It’s more than just bird numbers. The most exceptional turkey hunting states offer diverse habitat, reasonable access to quality ground, and regulations that support both conservation and hunter opportunity.
Here at Hayden Outdoors, our team knows a thing or two about hunting turkeys, and our guide breaks down the best turkey hunting states by region. We’ll help you identify prime turkey hunting destinations, whether you’re planning a weekend trip close to home or considering a property investment in prime turkey country.
What Qualities Make A Place Good For Turkey Hunting?
Yes, understanding what makes a state exceptional for turkey hunting can help you evaluate potential hunting places. But if you’re a landowner, this knowledge can also help you manage your property to its full potential.
Turkey Subspecies Across The Best Turkey Hunting States
North America hosts five distinct wild turkey subspecies, each perfectly adapted to its home range.
The Eastern Wild Turkey dominates from Maine to Florida and west to the Mississippi River. These birds have evolved in mature hardwood forests, thriving where rolling hills meet agricultural edges and creek bottoms offer the diversity they need.
Rio Grande Turkeys have historically called the south-central plains home, including states like Texas, Oklahoma, Kansas, and Nebraska. That said, Rio Grande turkeys exist in about 12 states total (including several western states like Colorado, New Mexico, Nevada, and California). They’ve adapted to more open landscapes where scattered trees line creek corridors and mesquite thickets provide cover. These birds handle drier conditions better than their eastern cousins and will travel greater distances between roosting and feeding areas.
Merriam’s Turkeys inhabit the mountainous terrain of the West. You’ll find them in Montana, Wyoming, Colorado, New Mexico, and scattered populations across other western states. They favor ponderosa pine forests and mountain meadows at elevations typically between 6,000 and 9,000 feet, displaying unique adaptations that let them thrive in the high country.
The Osceola (or Florida Wild Turkey) exists only in peninsular Florida. This subspecies has the most limited geographic range of any turkey, meaning completing a Grand Slam requires making the trip to the Sunshine State.
Gould’s Turkeys find their home exclusively in the states of New Mexico and Arizona. They’re known for their white-tipped tail feathers and long legs.
Why does subspecies matter beyond collecting slams? Each turkey subspecies displays different behaviors, vocalizations, and daily patterns that will influence your hunting strategy. For property owners, knowing which turkey subspecies lives on your land shapes every habitat management decision you’ll make.
Turkey Habitat Requirements
When it comes to the best turkey hunting states, it’s worth noting that the best turkey habitats strike a balance between several critical elements. Mature roost trees provide nighttime safety from predators. Turkeys prefer large trees near water sources, selecting oaks, sycamores, cottonwoods, or pines, depending on what grows in their region.
Strut zones need relatively open ground where gobblers can display for hens. Old logging roads, field edges, ridgetops, and pastures all serve this purpose well. These types of places give turkeys the visibility they need while keeping escape cover close at hand. Nesting habitat requires dense understory vegetation that provides overhead cover while still allowing hens good visibility at ground level to detect predators.
Food sources shift with the seasons. Spring brings fresh green vegetation and insects that turkeys crave. Summer emphasizes insect-rich areas that growing poults depend on for survival. Fall features mast crops like acorns and beechnuts. Winter demands accessible food when snow blankets the ground, making agricultural grain fields particularly valuable. If you’re trying to make your land a great place for turkey hunting, these are all factors you’ll want to keep in mind.
Water availability matters more than many turkey hunters realize. Turkeys need daily water access and will concentrate near reliable sources during dry periods. Creeks, ponds, stock tanks, and springs all attract and keep birds on the land.
Turkey Hunting Land Access Considerations
The best turkey hunting states come with a balance of public and private land hunting opportunities. Extensive public holdings through national forests, BLM parcels, and state Wildlife Management Areas give turkey hunters without property of their own solid options for places to hunt. Walk-in programs have expanded hunting opportunities in several plains states, creating win-win situations where private landowners allow public turkey hunting access.
For those considering land ownership, investing in a property in a top-notch turkey hunting state offers something special. Managing your own habitat and building family traditions on private ground provides rewards that turkey hunting on public lands simply can’t match.
Turkey Hunting Regulatory Environment
State hunting regulations shape the quality of your turkey hunting experience in some pretty significant ways. Over-the-counter tag systems provide flexibility and ease of access. Draw systems can maintain quality by limiting hunter numbers, though they require advance planning and sometimes a bit of luck.
Bag limits are key to understanding if a state is one of the best places for turkey hunting. States with robust turkey numbers often allow two or more birds per season. However, recent turkey population declines in some regions have prompted more conservative limits to protect breeding populations, a necessary step to ensure future turkey hunting opportunities in these states.
Season timing plays a big role in the optimal time window for turkey hunting in different states across the US. Southern states often open in March when birds begin gobbling in earnest, while northern states may not start until mid-April or early May. Understanding these state based turkey hunting patterns helps you plan trips to these places when gobbling activity peaks.
Nonresident opportunities and associated costs vary widely between states. Some states welcome out-of-state turkey hunters with reasonable fees and unlimited tags. Other states limit nonresident turkey hunting participation through quotas, higher costs, or both. These state policies shape where traveling turkey hunters focus their efforts and their budgets.
Turkey Hunting Season Tip: Typically the Fall is not peak season for turkey hunting , but most states (41) also offer a fall season for turkey tags. In the Fall calling for birds is not a viable hunting method since they mate in the Spring. However, the Fall season allows turkey hunters to be able to bag a another bird in a year. The fall seasons are usually the only season allowing the harvest of either-sex birds (hens or gobblers).
Are There Certain Regions In The US That Are Best For Turkey Hunting?
Regional characteristics play a huge role in determining turkey hunting quality and the overall experience in different states. Each major US region brings its own distinct advantages to the table.
Regional Turkey Habitat Differences: How Place Impacts Hunting Opportunities
The Southern region of the US features hardwood bottomlands and extensive pine forests that benefit from early vegetation green-up. Spring arrives weeks earlier here than up north, triggering turkey breeding activity as early as March. The longer growing season in the South supports robust insect populations that prove critical for turkey survival (one of the many reasons that southern states are some of the best for turkey hunting). Mixed pine and hardwood forests create the ideal habitat mix, with oaks producing the mast crops turkeys need and pines offering valuable winter cover.
Midwest states present agricultural landscapes beautifully interspersed with timber. River corridors and creek bottoms hold concentrations of birds, while crop fields provide abundant food sources throughout the year. The region’s oak ridges and diverse hardwood forests create exceptional turkey habitat, making the region great for turkey hunting. This agricultural-forest combination supports impressive turkey densities in many areas.
Western states offer dramatically different terrain that creates a unique turkey hunting experience. Ponderosa pine forests on mountain slopes, aspen groves, and scattered juniper woodlands create some of the best turkey hunting country out West. Elevation changes create distinct habitat zones, with birds often moving between areas as the seasons shift.
The Northeast states combine mixed hardwood forests with steep, often challenging terrain that tests your turkey hunting skills. Maple, beech, birch, and oak dominate these forests, creating diverse mast opportunities throughout the year. The later spring timing means turkey breeding activity peaks in May, offering hunters in these states prime hunting conditions when other areas have already closed their seasons.
Climate And Timing Advantages In The Best Turkey Hunting States
Southern states benefit tremendously from early green-up, with vegetation emerging in late February and March. That means turkey breeding activity begins earlier in these states than anywhere else in the country. You can pursue gobblers in Alabama or Georgia in late March, then travel north to catch peak activity in Midwest states like Kansas or Nebraska several weeks later, extending your season considerably.
Peak gobbling periods align closely with breeding activity across the country. Southern states see their most vocal birds from late March through mid-April. Midwest states typically peak in mid to late April. Western states often see their best turkey hunting days in late April and early May due to elevation and latitude. Northeastern states typically peak in early to mid-May, giving hunters there the final opportunities of the spring season.
The Best Turkey Hunting States In The Southern US
The Southern states rightfully claim their title as the heartland of turkey hunting. With extensive forests, mild spring weather, and robust populations of Eastern and Rio Grande subspecies, the South delivers exceptional opportunities from late March through May. When it comes to the best turkey hunting states in the South, these are our top picks.
1. Alabama
Alabama consistently ranks among the best turkey hunting states in America, and the reasons become clear the moment you step into Alabama turkey woods. Alabama’s diverse landscape, from the Appalachian foothills in the north to the coastal plain in the south, provides the kind of habitat Eastern Wild Turkeys thrive in.
Turkey License Cost: Resident hunters in the state of Alabama pay $34.35 for an All Game License, and this includes turkey hunting privileges. Nonresident hunters need a $246.60 All Game 10-Day Trip License. Youth hunters under 16 hunt free. Public land hunters also need a $22.75 WMA License.
Turkey Hunting Seasons: Alabama divides into three zones with staggered spring turkey seasons. Zone 3 (south) typically opens mid-March, Zone 2 (central) late March, and Zone 1 (north) early April, all running into early May. This zoned approach allows hunters to follow progression northward.
Best Places in Alabama to Turkey Hunt: Bankhead National Forest in northwest Alabama offers over 180,000 acres of prime habitat. Talladega National Forest’s 392,000 acres across central Alabama provide diverse terrain and strong populations. Forever Wild properties, including Perdido River, Cahaba River, and Skyline WMA offer quality hunting with fewer crowds.
Landowner Opportunities: The state of Alabama’s combination of relatively affordable land prices and excellent habitat makes it particularly attractive for those considering turkey hunting land ownership. The state’s long season and generous two-bird limit reward landowners who invest thoughtfully in habitat improvements.
Missouri stands tall among the best turkey hunting states, bridging the southern and central regions. The Show Me State’s diverse landscapes support robust turkey populations across both public and private lands, giving hunters at every level solid opportunities.
Turkey License Cost: Missouri resident spring turkey permits cost $19.50, while nonresident permits ($304.50 for nonresidents and $190.50 for nonresident landowners) run significantly higher. Resident hunters can purchase up to two spring permits.
Turkey Hunting Seasons: The spring season typically opens mid-April and runs through early May. The state operates a two-bird limit for residents, though regulations restrict taking more than one during the first week, protecting breeding-age gobblers in the state, while providing excellent turkey hunting opportunities.
Best Places in Missouri to Turkey Hunt: Mark Twain National Forest’s nearly 1.5 million acres across the southern portion of the state of Missouri offers exceptional turkey hunting. The Ozark region’s rugged hills and oak forests hold some of the state’s highest densities. Conservation Areas like Poosey, Schell-Osage, and Swan Lake National Wildlife Refuge provide consistent success.
Landowner Opportunities: Missouri’s rich agricultural landscape, mixed with extensive timber, makes it an ideal place for turkey hunting property ownership. The Conservation Department offers valuable technical assistance to landowners interested in habitat improvement. Food plots, timber stand improvement, and prescribed burning all enhance turkey habitat in meaningful ways.
Missouri’s central location also makes it accessible to hunters throughout the Midwest, and properties with good turkey habitat and solid access command strong interest in the real estate market.
The state of Georgia delivers outstanding turkey hunting opportunities across diverse habitats, from the mountains to the coastal plain, securing its place among the best turkey hunting states in the Southeast. The Peach State is a place that offers something for every style of turkey hunter.
Turkey License Cost: Georgia residents pay $25 annually for a Big Game License (that includes turkey hunting), along with a Hunting License ($15 annually for non-seniors and $7 annually for seniors). Nonresidents need both a hunting license ($100) and Big Game License ($130) for a combined $230 annual cost.
Turkey Hunting Seasons: The 2026 spring season opens March 28 on private land and April 4 on public land, running through May 15 statewide. Hunters may harvest two gobblers per season, but only one per WMA on public land.
Best Places in Georgia to Turkey Hunt: Chattahoochee National Forest in north Georgia provides extensive public access with good turkey populations. Piedmont National Wildlife Refuge in central Georgia offers quality hunting. Oconee National Forest and numerous Wildlife Management Areas across the state also provide accessible turkey hunting options.
Landowner Opportunities: Georgia’s varied terrain, from mountains to piedmont to coastal plain, creates a wonderfully diverse place for turkey hunting. The state’s early season and strong Eastern turkey populations make Georgia attractive for property ownership focused on heritage and building family traditions that last for generations.
The Midwest is home to some of the best turkey hunting states in America, where diverse landscapes ranging from agricultural plains to hardwood river bottoms support healthy populations across multiple states.
4. Nebraska
Nebraska has earned its reputation as one of the best turkey hunting states in the Great Plains, offering something you won’t find many other places: unique hybrid turkeys displaying characteristics of both Merriam’s and Eastern subspecies. The state’s million-plus acres of public hunting ground and liberal regulations make it attractive to both resident and traveling hunters.
Turkey License Cost: State resident turkey hunting permits cost $34, while nonresident permits run $158. All hunters also need a $25 Habitat Stamp. Youth permits are just $8.50.
Turkey Hunting Seasons: The 2026 spring turkey season opens March 25 for archery, with youth shotgun starting April 11 and regular shotgun beginning April 18, closing May 31. Hunters may harvest two turkeys in spring, though nonresident permits are limited to 10,000 and typically sell out quickly.
Best Places in Nebraska to Turkey Hunt: The Pine Ridge region in northwest Nebraska offers exceptional Merriam’s turkey hunting in ponderosa pine forests. The Niobrara River valley holds good populations in mixed habitat. Ponca State Park and Indian Cave State Park provide accessible turkey hunting. And the Republican River valley attracts birds to WMAs like Red Willow and Harlan County Reservoir.
Landowner Opportunities: Nebraska presents exceptional value for turkey hunters considering land ownership. Properties featuring creek bottoms, pine draws, and adjacent crop fields create the ideal habitat mix turkeys need.
Kansas is a state that represents the fascinating transition zone where eastern hardwood forests meet the Great Plains, creating unique turkey hunting opportunities. The state supports both Eastern Wild Turkeys in the eastern third and Rio Grande Turkeys across central and western Kansas, with some impressive hybrid birds in the transition zone.
Turkey License Cost: Kansas residents pay $40 ($32.50 for the permit and $7.50 for a nonrefundable application fee) for a spring turkey permit. Nonresident spring turkey permits cost $85 ($75 for the permit and $10 for a nonrefundable application fee), making Kansas one of the more affordable turkey hunting states for out-of-staters. Youth permits (for Kansas residents) are available at $7.50.
Turkey Hunting Seasons: The 2026 spring season runs mid-April through late May across most units. Kansas divides into hunting units, with Unit 4 requiring lottery draw for all hunters. Nonresident hunters must enter a draw for Units 1, 2, 3, 5, and 6.
Best Places in Kansas to Turkey Hunt: The Flint Hills region of east-central Kansas offers outstanding hunting with tallgrass prairie and oak woodlands. Public areas like Clinton State Park, Perry State Park, and Fall River State Park provide access. Cimarron National Grassland in southwest Kansas is a great place for hunting Rio Grande turkeys.
Landowner Opportunities: Kansas offers excellent land ownership possibilities for turkey hunters. Properties featuring creek bottoms, scattered timber, and agricultural fields create the ideal habitat combination. The presence of both Rio Grande and Eastern subspecies makes Kansas a particularly attractive state for turkey hunters working on various slam achievements, adding another dimension to the property’s recreational value.
Iowa consistently ranks among the best turkey hunting states in the Midwest, with excellent populations supported by the state’s rich agricultural landscape beautifully interspersed with quality timber. This combination creates ideal conditions for both turkeys and the hunters who pursue them.
Turkey Hunting Seasons: Spring seasons typically run early April through mid-May, with exact dates varying by season and zone. Iowa allows archery hunting earlier than shotgun seasons, dividing into multiple seasons to distribute pressure.
Best Places in Iowa to Turkey Hunt: The southern tier counties including Decatur, Wayne, and Davis hold excellent numbers. The Loess Hills region along the Missouri River offers unique topography and good turkey populations. Timber along the Des Moines, Iowa, and Cedar rivers provides prime turkey habitat. Public areas like Stephens State Forest, Yellow River State Forest, and Shimek State Forest offer quality turkey hunting opportunities in the state.
Landowner Opportunities: Iowa state’s combination of productive farmland and quality turkey hunting potential makes it attractive for recreational property ownership at every level. Creek bottoms featuring mature oaks, adjacent cropland, and well-managed food plots create exceptional habitat that also benefits whitetail deer, making these properties valuable for multiple species management and extending your hunting opportunities throughout the year.
The states in the western US offer a distinctly different turkey hunting experience from any other region. Merriam’s turkeys inhabiting mountain ranges and ponderosa pine forests provide hunters with spectacular scenery alongside their pursuit of spring gobblers.
7. Montana
Montana ranks among the best turkey hunting states in the West, offering expansive public lands and healthy Merriam’s turkey populations set against some of the most dramatic landscapes you’ll find anywhere in the country. Big Sky Country delivers the quintessential western turkey hunting experience.
Turkey Hunting Seasons:Spring season runs April 15 through May 31, with shotgun and archery allowed. Fall season runs September 1 through January 1 in most regions, with either-sex harvest permitted.
Best Places in Montana to Turkey Hunt: The Long Pines and Ashland areas of Custer National Forest in southeast Montana have excellent populations and extensive public access. The breaks country along the Missouri River, particularly in Charles M. Russell National Wildlife Refuge area, offers unique turkey hunting. Fergus County in central Montana supports good numbers.
Landowner Opportunities: The state of Montana’s turkey hunting lands offer spectacular settings for those considering property ownership with a long-term vision. The combination of Merriam’s turkeys, mule deer, elk, and other big game species makes Montana properties attractive for comprehensive wildlife management that serves multiple generations. Properties featuring southern exposures, established ponderosa pine stands, and reliable water sources hold the most appeal for serious turkey hunters and their families.
The state of Colorado provides diverse Merriam’s turkey hunting opportunities across spectacular Rocky Mountain landscapes, earning its rightful place among the best turkey hunting states in the West. The Centennial State combines challenging terrain with rewarding hunts.
Turkey License Cost: Colorado state resident turkey hunting licenses cost $38.48 for spring and $32.11 for fall (with an $8 nonrefundable application fee). Nonresident licenses cost $194.21 (with an $11 nonrefundable application fee). Youth licenses under 18 are available for reduced rates of $20.62 for residents and $130.39 for nonresidents.
Turkey Hunting Seasons: Spring licenses are limited and awarded through a draw system. Both over-the-counter licenses and draw licenses are available depending on the hunting unit. Fall licenses provide additional opportunities through a separate draw.
Best Places in Colorado to Turkey Hunt: The Front Range foothills from Fort Collins south to Colorado Springs hold good Merriam’s populations. The South Platte River is one of the best turkey hunting places, along with the Arkansas River basin, and the Western slope areas, including around Grand Junction, offer quality hunting.
Landowner Opportunities: Colorado properties with quality turkey habitat typically also support elk, mule deer, and other big game species, creating comprehensive recreational value that extends across multiple seasons. Elevation, aspect, and water sources all play crucial roles in turkey distribution, making local knowledge invaluable when evaluating properties in the state for their turkey hunting potential.
Pro Hunting TIp: Acquiring turkey hunting licenses in the state of Colorado is quite accessible and straightforward, which is one of the big reasons it makes it on our list. That said, we’d be remiss if we didn’t also mention that Wyoming is also one of the best turkey hunting states in the Mountain West, especially if you’re looking for less crowded public land access.
The Best Turkey Hunting States In The Northeast US
The Northeast offers excellent turkey hunting across states where dedicated conservation efforts have created thriving populations in challenging terrain. Late spring timing and mature hardwood forests characterize this region’s unique hunting experience.
9. Pennsylvania
Pennsylvania stands proudly as one of the best turkey hunting states in the US. With robust populations distributed across diverse landscapes from the Pocono Mountains to the Allegheny National Forest, the Keystone State’s successful turkey restoration represents one of wildlife management’s greatest achievements.
Turkey License Cost: Pennsylvania residents pay $20.97 for an adult hunting license, including one spring turkey tag. Hunters wanting a second spring gobbler can purchase a special spring turkey license for $21.97. Nonresidents can pay $101.97 for the adult hunting license, which includes one spring turkey tag and one fall turkey tag.
Turkey Hunting Seasons: The typical turkey hunting season in the state of Pennsylvania is from late April through late May.
Best Places in Pennsylvania to Turkey Hunt: Allegheny National Forest in northwest Pennsylvania offers over 500,000 acres with excellent turkey populations. State Game Lands across the state provide accessible hunting, with units in south-central and north-central regions known for consistent success. The ridge and valley region of central Pennsylvania holds high turkey densities in oak-dominated forests.
Landowner Opportunities: Pennsylvania’s extensive forests and relatively affordable rural land make it attractive for turkey hunting property ownership with real staying power. The state’s central location makes properties here accessible to hunters throughout the Northeast and Mid-Atlantic, and land with good turkey habitat and established populations commands strong interest when it comes to market.
12. Maine
Maine’s turkey population has grown steadily since reintroduction efforts began, with the Pine Tree State now supporting hunting across most of the state. Populations run strongest in the southern and western regions, where habitat conditions favor turkey success.
Turkey License Cost: Turkey hunters can get a small game hunting license ($15 for residents and $75 for nonresidents), along with a turkey permit ($20).
Turkey Hunting Seasons:Spring turkey season runs May 4 through June 6, 2026, with most Wildlife Management Districts allowing harvest of bearded birds. Youth spring turkey day occurs May 2, 2026.
Best Places in Maine to Turkey Hunt: Southern Maine counties hold the highest turkey densities. Areas around Portland, Augusta, and Bangor regions offer quality hunting. Public lands including state forests and WMAs provide access, though much of Maine’s prime turkey habitat exists on private land.
Landowner Opportunities: The state of Maine’s rural character and strong conservation ethic create excellent opportunities for habitat management and building sustainable turkey hunting traditions that last. Maine’s later spring timing means breeding activity continues well into late May and early June, extending your opportunities compared to southern states and giving you more time to work birds.
11. New York
New York rounds out the best turkey hunting states in the Northeast with strong populations distributed across varied terrain from the Adirondacks to the Catskills and beyond.
Turkey License Cost: New York state resident hunting licenses cost $22 for adults, with turkey hunting permits available for $10. Nonresident turkey hunting permits are $20, and the hunting license is $100. Both are necessary in order to hunt.
Turkey Hunting Seasons: Spring seasons typically open early May and run through the end of the month. New York divides the state into zones with slightly different season dates to account for regional variations in habitat and bird behavior.
Best Places in New York to Turkey Hunt: The Southern Tier counties including Allegany, Steuben, and Chemung hold excellent turkey populations in mixed forest-agriculture landscapes. The Finger Lakes region offers quality hunting with good public access on state forests and WMAs. Central New York’s agricultural regions, particularly around Cayuga Lake and Madison County, provide productive turkey hunting.
Landowner Opportunities: New York offers diverse landownership opportunities, ranging from agricultural lands in central regions to forested mountain terrain in the Adirondacks and Catskills. Managing turkey habitat means maintaining oak forests for reliable mast production, creating strategic openings for nesting and brood rearing, and establishing food plots that provide critical nutrition during key periods. The state of New York’s turkey hunting heritage runs deep, and well-managed properties create legacies that families treasure for generations.
Managing Your Turkey Hunting Property
There’s nothing quite like having your own turkey hunting land. Whether you’re managing a small tract or substantial acreage, thoughtful habitat work can dramatically improve your turkey hunting experience and your property’s long-term value.
Habitat Improvements For Turkey Hunting Landowners
Creating a quality roosting habitat starts with protecting and enhancing mature trees on your property. Turkeys prefer large trees with trunk diameters exceeding 14 inches, typically located near reliable water sources. A selective timber harvest improves roost sites by thinning surrounding competition and allowing your preferred species to grow larger and stronger.
Food plot strategies for turkeys differ significantly from those focused solely on deer. Turkeys benefit from diverse plantings that provide nutrition across multiple seasons. Spring plots featuring clover, chicory, and annual ryegrass attract hens during the critical breeding season. Fall plots incorporating grain sorghum, corn, and winter wheat provide valuable food sources when natural mast crops run thin.
Managing nesting and brood-rearing cover requires maintaining areas with dense understory vegetation that provides the security hens need. Prescribed burning in late winter creates the patchy, diverse vegetation structure ideal for nesting success. And the fresh growth following a burn attracts the insects that young poults depend on for survival.
Water source development can also enhance your property’s value for turkeys and other wildlife species you’re managing for. Small ponds, seasonal wetlands, and reliable springs all attract turkeys, particularly during dry periods.
Turkey Hunting Habitat Pro Tip: Leverage land clearing to create strutting zones, along access lanes that help with bird movement and shooting lanes.
Scouting And Monitoring Your Turkey Hunting Land
Using trail cameras effectively helps you pattern turkey movements and identify the key areas on your property that matter most. Unlike deer hunting where cameras aim to capture specific individuals, turkey scouting focuses on identifying travel corridors, preferred feeding areas, and roost locations that the birds use consistently. Place cameras strategically along field edges, near food plots, and at potential strutting areas where gobblers like to show off.
Identifying your property’s key turkey hunting areas comes from combining trail camera data with direct observation in the field. Spring scouting several weeks before season opens can help you identify where gobblers are roosting and where they fly down to strut each morning. Morning listening sessions from strategic points can help you map gobbler locations and understand their daily patterns.
Turkey Hunting As Part Of Your Recreational Property
Building family traditions around turkey hunting can create lasting value that extends far beyond any economic measure. Spring turkey season provides the perfect opportunity to introduce young hunters to the outdoors during mild weather and comfortable conditions. The interactive nature of calling turkeys engages new hunters in ways that passive stand hunting simply cannot match, creating memories and skills that last a lifetime.
Recreational properties in the best turkey hunting states, with documented turkey populations, command premium prices in today’s market. Buyers seeking turnkey hunting operations willingly pay more for properties with established food plots, known roost areas, and a proven track record of success.
Multi-species management opportunities make turkey hunting properties particularly attractive investments. Habitat improvements that benefit turkeys simultaneously enhance conditions for deer, creating opportunities for both spring turkey hunting and fall deer seasons.
Upland bird habitat, particularly for pheasant hunting, shares many characteristics with turkey brood-rearing cover. Properties supporting healthy turkey populations often provide excellent dove hunting in late summer and early fall, extending your hunting calendar across multiple seasons and giving you more reasons to enjoy your land.
Key Takeaways For Turkey Hunters
The best turkey hunting states span America from coast to coast, each offering unique opportunities and experiences worth pursuing.
Southern states like Alabama, Missouri, and Georgia provide extensive public access, robust populations, and early season turkey hunting when birds are fired up.
Midwest states including Nebraska, Kansas, and Iowa combine agricultural abundance with quality timber to support excellent turkey numbers and accessible hunting.
Western states like Montana and Colorado deliver the quintessential Merriam’s turkey hunting experience set against spectacular mountain landscapes.
And northeastern states such as Pennsylvania, New York, and Maine offer challenging terrain and late spring hunting when birds remain vocal into May.
Choosing the best places to turkey hunt will depend on your specific goals, the time windows you have available, and how far you’re willing to travel. And if you’re feeling particularly ambitious, traveling turkey hunters can experience different subspecies and landscapes by targeting multiple states and regions throughout the spring.
The heritage and legacy of turkey hunting continue growing stronger as new generations discover this challenging and rewarding pursuit. Whether you hunt public lands close to home or own a place in one of the best turkey hunting states, pursuing wild turkeys connects you with a tradition stretching deep into American history.
Find Your Perfect Plot Of Turkey Hunting Land
Owning turkey hunting land is so much more than acquiring real estate or making an investment. It’s about building something lasting: tradition, family heritage, and a lifestyle deeply connected to the land and its wildlife. Whether you’re searching for a small parcel near home or a larger tract in one of the best turkey hunting states, finding the right property can provide decades of enjoyment and memories.
Hayden Outdoors specializes in connecting hunters with properties across the best turkey hunting states in the US. Our agents understand the unique characteristics that make turkey hunting lands valuable and productive, from southern hardwood bottoms to western ponderosa pine forests and everything in between.
Whether you’re seeking a weekend retreat in one of the best turkey hunting states or a substantial property for comprehensive wildlife management and family gatherings, our Hayden agents can help you find your perfect piece of ground where turkey hunting traditions take root and memories are made.
Connect with a Hayden Outdoors agent today to discuss your turkey hunting land goals and start turning your vision into reality, no matter which state you’re looking to establish your hunting legacy in.
Enhancing Pheasant Hunting with Effective Habitat Management
Drew Larsen knows a thing or two about pheasant hunting – the calls and cackles, the flush, the sweeping prairie lands that beckon hunters and their dogs to walk this way. He knows it all like it’s his backyard. Maybe that’s because, at least for most of his life, prime pheasant hunting has been Drew’s backyard. “I grew up in South Central Nebraska, a town called Minden, a small town of about 2,000 people, in what they call the rainwater basin of the state. I cut my teeth pheasant hunting in those areas.” Enhancing Pheasant Hunting Through Effective Habitat Management
Drew’s early days chasing birds through the Nebraska wetlands was the beginning of a life-long love story with pheasant hunting. Today, he’s Vice President of Conservation Delivery at Pheasants Forever, a non-profit organization dedicated to conserving pheasants, quail, and other wildlife through habitat improvements, public access, education, and conservation advocacy. He’s been with the organization for nearly 20 years working his way from regional biologist to the person who now oversees 400 wildlife biologists in 41 states across the country. It’s fair to say Drew understands the importance of habitat management for sustainable pheasant populations.
Drew recently sat down to talk all things pheasant hunting and habitat. Here, Drew provides some insight into the optimization of land for pheasant hunting and habitat.
The Pheasant’s Habitat Requirements
Drew points out that pheasants thrive in a mix of habitats including grasslands, croplands, wetlands, and shrub areas. This provides pheasants with food sources, nesting sites, and cover. “Pheasants spend a vast majority of their time on the ground foraging for seeds, so they like weedy types of cover, like sunflowers and things that provide really good aerial protection from predators above.” Here are four key factors that affect a pheasant’s survival and reproduction:
Nesting Cover: Undisturbed low- to medium-high grasses and legumes for nesting and brood rearing.
Brood Cover: Undisturbed native forbs and annual weeds that provide bare ground and aerial protection.
Winter Cover: Tree windbreaks and dense covers of cattails or switchgrass to protect the birds from heavy snow and cold winds.
Food sources: Pheasants enjoy a dietary mix of insects, grains, berries, seeds, and flora with nutrient-dense grains making up the bulk of the adult diet in the winter.
Creating a Favorable Pheasant Habitat
Habitat Diversity
When it comes to creating the ideal bird hunting habitat, Drew boils it down to one key concept: diversity. “Pheasants are really an agricultural bird,” he says. “So what you’re looking for is a good mix of ag lands and perennial grass and wildflower cover.” This serves multiple purposes. “A weedy-type habitat attracts the insects chicks and adult birds are feeding on in the spring and summertime of the year. In the fall, those crops are harvested and the birds have an opportunity to switch to a more crop-based diet.” A varied habitat also affords the birds plenty of places to nest and find cover. Successful pheasant habitat includes grasslands, croplands, wetlands, and shrub areas.
Native Vegetation
When optimizing pheasant habitat, native vegetation provides natural food sources and cover. These plants are adapted to the local climate and soil conditions, and won’t disrupt the birds’ ability to attain proper nutrition and shelter and nest.
Food Plots
When it comes to food, Drew reiterates the importance of a weedy habitat for pheasants. “Pheasants will key in on grains in the winter, such as corn, soy beans, and winter wheat, but you’ve gotta remember, in the spring and summer months, they’re primarily feeding on insects and weed seeds. That’s why a weedy habitat is so important.” Maximize your property’s pheasant food opportunities by creating food plots with crops like corn, sorghum, millet, sunflowers, and wheat, which rotate through seasons to provide a consistent diet.
Cover, Shelter, and Nesting Habitat
Pheasants need quality cover and shelter year-round. Colder temperatures will push birds into more thermal cover and winter cover while warmer climes allow them to spread out and thermoregulate in lighter cover. You can improve pheasant cover by planting a mixture of native grasses and shrubs that can withstand a warmer and colder season. Grasses should be at least 15 inches tall – the magical number for nesting habitat. Winter wheat can provide excellent nesting habitat while forbes and annual weeds make for good brood cover, which should allow for bare ground so chicks can move around and still remain unseen by aerial predators.
Cattail wetland sleuths offer good thermal cover in the winter and can hold up to snow storms and then there’s the shelter belt. A proper pheasant shelter belt combines tree rows, thickets, and woody vegetation, reducing predation.
Pheasant Habitat Management Practices
Water Sources
Pheasants require easy access to clean water for drinking and bathing. If your property doesn’t have a water source, consider installing small ponds or water troughs.
Preserving Riparian Zones
To help maintain a viable pheasant habitat, it’s important to protect and enhance riparian zones – lands that abut streams, rivers, and wetlands. This unique environment interface provides a variety of elements, including clean water, vegetation, ground cover, and food.
Landowners can enhance riparian areas on pheasant hunting property by limiting stock access, mitigating development, removing any levees or small dams, and controlling invasive plants and animals.
Minimizing Chemical Use
Pesticides and herbicides can be very harmful to pheasant populations and their food sources. When it comes to effective pheasant habitat management, strictly limit the use of these chemicals near pheasant habitat.
Predator Management
Maintaining a balanced ecosystem is essential to all healthy habitats, however, excessive predator populations can impact pheasant survival. Bird hunting landowners should consider responsible predator management as necessary.
Sustainable Hunting Practices
Selective Hunting
As a devout pheasant hunter, Drew has chased his passion for upland birds all over the country. “Since I started working for Pheasants Forever, I’ve broadened my hunting horizons quite a bit. Now I get to take advantage of some other upland bird hunting opportunities beyond Nebraska. Last year, I got to hunt out West in Arizona. I’ve also hunted sage grouse and ruffed grouse out that way. And then I’ve had the opportunity to do quite a bit of sharp tailed grouse and prairie chicken hunting in Nebraska, South Dakota, and North Dakota.”
Which is all to say he understands the importance of sustainable hunting practices that ensure population longevity and hunting success into the future. Avoid excessive hunting pressure that could negatively affect pheasant populations and practice selective harvesting of birds. This can mean harvesting only males to allow hens to breed the following year.
Hunting Ethics and Regulations
Even on private hunting property, hunters need to adhere to regional hunting laws and guidelines. Talk with your guides and visiting hunters about hunting ethics and rules for your property.
Collaborative Conservation Efforts
You might say Drew is a wildlife biologist first and a hunter second, acknowledging that he understands a successful pheasant hunt starts with healthy habitat and habitat management. “A lot of the country that’s producing pheasant and quail is part of the CRP – Conservation Reserve Program. This is a USDA program that pays landowners to take crops out of production and plant perennial cover instead. So the areas where we have our best feathered populations in the country are areas where there’s a really good mix of row crop, CRP, and native grasslands. That’s where we have the highest bird numbers.”
It can be daunting to create such a successful bird hunting habitat alone, which is why it’s important to work with local conservation groups, like Pheasants Forever, and wildlife agencies to define specific improvements you can make to your property. Talk with local wildlife experts and professionals about tailoring habitat modifications to the local ecosystems.
Conclusion
Owning your dream hunting property can be a generationally rewarding endeavor. Working with local wildlife management entities and conservation groups to ensure long-term habitat wellness is key to providing pheasants and sportsmen sanctuary for years to come.
It’s important to keep in mind that producing proper pheasant habitat doesn’t happen overnight; it takes time, possibly several seasons until you realize the full benefits. Creating a diverse and suitable habitat enhances land for pheasant hunting while also contributing to the health of overall wildlife populations.
“Any passionate hunter knows the importance of land conservation and improvement,” says Hayden Outdoors Managing Partner Dax Hayden. “As someone who spends the majority of my time walking some of the country’s last great swaths of ranching, farming, recreational, and hunting land, I can tell you first-hand – conservation matters. At Hayden, we’re proud to partner with Drew and the dedicated folks at Pheasants Forever; they understand what it takes to keep these great places of ours healthy for wildlife and productive for those of us who live, work, and play on them.”
Pheasants Forever: An Amazing Resource
Becoming a member of Pheasants Forever is a great way to stay in the know about bird hunting and managing of your property for pheasant hunting. Visit the website and simply enter your ZIP code to find the chapter nearest you. Landowners can find their nearest farm bill wildlife biologist for a one-on-one consultation about habitat management. Volunteers can help with local habitat projects and participate in youth or adult hunts.
Pheasants Forever is vital to the health of the country’s pheasant hunting. Drew drives the point home. “If you’ve hunted pheasants, you’ve most likely hunted in an area that we’ve either helped put on the ground, or advocated for in Washington, D.C., like CRP. If you hunt pheasants, we’ve absolutely had an impact in helping provide areas for people to hunt.”
Pheasant in flight
Secure Exclusive Private Land Access For Pheasant Hunting
Hayden Outdoors Hunt For Habitat 2025 kicks off on November 7th in Goodland, KS. Hunter tickets include two days of exclusive private land access for pheasant hunting, along with live music performances featuring Aiden Logsdon and Grand Ole Opry artist Chancey Williams.
How to Set Up a Trail Cam for Success: Regional Strategies Across the United States
Trail cameras have transformed wildlife observation, hunting preparation, and property monitoring. Success requires understanding both fundamental principles and regional variations across diverse US landscapes. From Pacific Northwest forests to Southwest deserts, each region presents unique challenges and opportunities. The key to success is understanding how to set up a trail cam in each unique region to achieve the maximum benefits of having a trail camera on your property.
Understanding Your Environment
Trail cam set up success depends on wildlife patterns, weather conditions, terrain features, and human activity. Each US region presents distinct combinations requiring tailored approaches. The key lies in adapting strategy to match specific area conditions while maintaining core principles.
Weather patterns, vegetation density, wildlife migration routes, and seasonal behaviors vary dramatically nationwide. Regional knowledge becomes essential for optimal results. Understanding local conditions separates successful deployments from disappointing outcomes.
The Northeast: Navigating Dense Forests and Seasonal Extremes
The Northeast’s dense deciduous and mixed forests create both opportunities and challenges. Dramatic seasonal changes require cameras withstanding temperature extremes and moisture. Harsh winters and humid summers demand robust equipment selection.
Focus on natural funnels created by dense forest structure. Deer trails, creek crossings, and ridge lines become wildlife highways. Position cameras along these corridors, particularly where multiple trails converge for maximum activity.
Thick canopy creates darker conditions even during daylight hours. Ensure cameras have strong infrared capabilities for nighttime photography. Winter snow loads can shift camera positions, so secure mounting proves crucial.
Use heavy-duty straps and consider mounting slightly higher than normal. Account for snowfall when positioning equipment. The region’s hunting pressure makes wildlife more nocturnal during hunting seasons.
Consider the Northeast’s abundant water sources when positioning cameras. Stream crossings, pond edges, and seasonal wetlands attract diverse wildlife. Be mindful of spring flooding that can damage or relocate equipment.
The Southeast: Dealing with Heat, Humidity, and Dense Vegetation
The Southeast’s hot, humid climate and dense vegetation create unique challenges. High humidity can fog lenses and damage electronics. Lush growth can quickly obscure camera views, requiring frequent maintenance. Check cameras frequently for moisture damage and clear vegetation growth.
The Southeast’s abundant food sources and water create more dispersed wildlife patterns. Focus on travel corridors between bedding areas and food sources. Target early morning and late evening hours when animals are most active.
Swamp edges, hardwood bottoms, and pine plantation borders create excellent edge habitat. These transition zones often funnel animals along predictable routes. Be prepared for seasonal flooding in low-lying areas. Elevated positions near water sources provide excellent vantage points while protecting equipment.
The Midwest: Mastering Agricultural Landscapes
The Midwest’s agricultural landscape offers unique opportunities for trail camera success. The region’s mix of farmland, woodlots, and waterways creates distinct wildlife movement patterns. These patterns change with farming cycles and seasons.
Position cameras along fence lines, creek bottoms, and woodland edges bordering agricultural fields. These areas serve as natural highways for wildlife moving between cover and food.
The Midwest’s relatively flat terrain means wind can significantly impact camera stability. Use robust mounting systems and consider prevailing wind direction when positioning cameras.
Seasonal agricultural activities dramatically influence wildlife patterns. Corn and soybean harvest times create temporary food source abundance. Tillage operations can disrupt normal movement patterns throughout the region.
The Mountain West: Altitude, Weather, and Terrain Challenges
The Mountain West’s extreme elevation changes and harsh weather conditions present unique challenges. The temperature can swing dramatically between day and night. Equipment must withstand summer heat and winter blizzards.
At higher elevations, focus on natural travel corridors. Saddles, ridge lines, and valley bottoms become animal highways. Animals follow these routes to conserve energy while moving through mountainous terrain.
Water sources become even more critical in this environment. Springs, streams, and seasonal water holes are prime camera locations. Battery performance decreases significantly in cold conditions, so consider lithium batteries.
Animals move to higher elevations in summer and lower elevations in winter. Position cameras along these migration routes for seasonal success. Be prepared to relocate equipment as animals move between zones.
The Southwest: Water Sources and Extreme Conditions
The Southwest’s arid climate makes water sources the key to success. Unlike other regions, water becomes the critical factor for wildlife activity. Food sources take secondary importance in desert environments.
Focus camera placement around springs, seasonal water holes, stock tanks, and permanent water sources. These locations concentrate wildlife activity and provide predictable patterns for successful photography. Water sources attract both wildlife and livestock.
The region’s extreme temperature variations between day and night can stress electronics. Choose cameras rated for these conditions and consider positioning away from direct sunlight. Natural shade from rocks or vegetation can extend equipment life.
The Pacific Northwest: Rain, Dense Forests, and Unique Wildlife
The Pacific Northwest’s heavy rainfall, dense forest cover, and diverse wildlife create distinct requirements. The region’s wet climate demands cameras with superior weather sealing and moisture resistance.
Position cameras along ancient game trails winding through dense forest understory. You can easily identify these well-established routes by their worn paths. The region’s thick canopy creates darker conditions requiring superior low-light performance.
The Pacific Northwest’s abundant water sources mean wildlife is less concentrated around specific holes. Instead, focus on travel corridors, feeding areas, and seasonal gathering spots. Berry patches and salmon streams during spawning seasons provide excellent opportunities.
Consider the region’s diverse wildlife when selecting camera settings. Everything from black bears and elk to smaller species like martens and lynx abound. Varied fauna may require different trigger sensitivities and camera heights.
Universal Best Practices for All Regions
Certain principles apply to successful trail camera deployment across the United States. Understanding these fundamentals provides the foundation for regional adaptations and consistent results.
Camera height and angle significantly impact success rates. Generally, position cameras 3-4 feet high and angle them slightly downward to capture movement. However, adjust this based on target species and local terrain features.
Use gloves when handling cameras and consider scent-eliminating sprays to minimize human odor. This is especially crucial during hunting seasons when animals are more alert.
Above all, ensure you perform regular maintenance on your cameras. Check cameras monthly at minimum, more frequently in harsh conditions. Clear vegetation, check battery levels, ensure secure mounting, and verify appropriate camera settings.
Seasonal Adjustments and Strategies
Each season brings unique opportunities and challenges for trail camera deployment across all regions. Spring offers opportunities to capture animals with young, but changing weather patterns require adjustments.
Summer’s longer daylight hours and predictable weather patterns often provide the most consistent results nationwide. However, heat can stress equipment and batteries in many regions.
Fall hunting seasons can disrupt normal wildlife patterns, but they also concentrate animals in security cover. Adjust camera positions to focus on heavy cover areas and nighttime activity patterns.
Winter presents equipment challenges but can provide unique photography opportunities across most regions. Snow cover can reveal animal tracks and travel patterns while creating stunning backgrounds. However, cold temperatures and snow require more frequent maintenance visits.
Finding the Best Trail Cams
When it comes to reliable trail camera equipment that can handle the diverse challenges across America’s landscapes, Hayden Outdoors partners with Moultrie to bring you proven performance in the field.
From the humid Southeast to the harsh Mountain West winters, Moultrie’s trail cameras are engineered to deliver consistent results in every region we’ve covered. Their cameras feature:
Weather-resistant construction – Built to withstand endure Pacific Northwest rainfall to Southwest desert heat
Superior battery life – Critical for remote monitoring across vast properties
Advanced trigger technology – Ensuring you capture the wildlife activity that matters most
Easy setup and maintenance – Perfect for landowners managing multiple camera sites
Whether you’re monitoring wildlife on your hunting property, conducting habitat management, or keeping an eye on remote areas of your land, Moultrie’s reliable technology helps you make informed decisions about your property.
Ready to upgrade your trail camera setup? Visit our partner Moultrie to explore their full range of trail cameras designed for serious land management and wildlife observation.
Conclusion
Successful trail camera deployment requires understanding both universal principles and regional variations across the United States. Each region presents unique challenges and opportunities that demand tailored approaches to camera placement and maintenance.
The key to success lies in adapting these strategies to your specific location. Maintain consistent monitoring and adjustment practices regardless of your region. Whether dealing with Northeast forests, Midwest agricultural landscapes, or Southwest arid conditions, understanding regional patterns improves success.
With proper planning, appropriate equipment selection, and regional awareness, you can glean many benefits of setting up trail cams. The investment in time and effort to understand your specific region’s requirements pays dividends. Success comes through understanding diverse landscapes of the United States and adapting accordingly.
What You Need to Know When Applying for a Private Landowner Tags & Private Land Licenses
Owning recreational or ranch property comes with many perks, but it’s also a job in and of itself to manage the land, and for some, turn a profit on it. As cattle revenues continue to fluctuate, many large landowners have turned to private hunting leases in recent years as a predictable source of income, not to mention the added benefit of cultivating trophy big game and offering premium hunting opportunities to family, friends, and clients. In many states, private landowners can apply with the Game and Fish offices to receive landowner hunting tags for big game species to use for themselves, family, friends or to sell (depending on the state laws). Before you go down the road of applying for a private landowner hunting tags, here are a few things to know.
Eligibility Requirements for Landowners
There are a variety of things to consider regarding landowner hunting tags. The first, and perhaps most obvious, is the land. How many acres qualifies for a private landowner hunting licenses? The specific number varies from state to state, but generally falls within the range of 160 to 640 contiguous acres or more.
Additionally, you will need proof of land ownership such as property deed, tax bill, or contract to purchase and any lease agreements or easements associated with the property. Land owners might also need to show residency within the state in which they wish to offer their private land for hunting. Confirm your state’s regulations, but this typically requires a property owner to live in the state for at least 180 consecutive days before applying for a license. In all cases, make sure to check with your local and state agencies to ensure you meet all requirements. If you’re a non-resident landowner who can not apply for landowner hunting rights, you might still be able to sponsor hunters who live in the state to hunt on your land. Again, review this request with your wildlife management agencies.
Bull Elk at Sunrise During the Fall Rut in Wyoming
Understanding State and Local Hunting Laws
Each state has a different set of rules and regulations for hunting private land. If you plan on applying for landowner hunting tags to hunt your own land, you’ll need to understand these rules as they relate to your property. In some states, deer require a certain number of contiguous acres whereas larger game, like elk, might require more. And these rules can change from year to year.
Most public land hunting restrictions also apply to private landowners. This can include protected species and seasonal restrictions. If you allow others to hunt your property, make sure all those hunting your land understand these rules and regulations, and know how to identify any protected species and their habitat.
You can stay informed about local hunting laws by visiting agencies and organizations in your region such as Game and Fish associations, DNR offices and Wildlife & Parks.
The Application Process: Step-by-Step Guide
Private landowners should collect all necessary information before applying for their permit. This information will vary by state, but can include the following:
Name
Date of birth
Address
Email
Which type of permit you’re applying for
Name in which the land is deeded
Contact name (if someone other than the landowner, such as a property manager or outfitter, is the primary point of contact)
County
Hunting district (township, range, section)
Tax bill information
Some states provide an online licensing system that allows landowners to submit all materials through the wildlife management website. Others might require hard copy materials and an in-person application.
If you plan to apply for a landowner hunting tags, make sure you know the deadline for the upcoming season. In many cases, the deadline for the next season is the last day of the current year, e.g. December 31, 2024 for the 2025 hunting season. Timeline for approval varies, but most states provide a contact phone number, tracking website, or other form of knowing when you can expect to know the status of your application.
UPCOMING DEADLINES FOR LANDOWNER TAG APPLICATIONS:
No set deadline, recommend applying before January 1st, 2025.
New Mexico:
Register by January 5th, 2025 (Primary Zone), June 30th, 2025 (Secondary Zone)
Montana:
Register by April 1st, 2025 at 5:00pm MST
Private Land Tag Costs and Fees
Fees for private landowner hunting vary widely depending on a variety of factors, including the state, type of game, hunting district regulations, and total acreage. For landowners the cost for landowner tags can be minimal, but if legal in your state, the landowner may sell these landowner tags to the general public for market rate.
Keep the following in mind:
State in which you’re applying
How much land you own, the more land usually means you can apply for more licenses
Which type of game you plan to hunt
Whether or not your application will require a property survey
Recent property tax bills
Some states like New Mexico offer a bonus or incentive tag for responsible and sustainable land ownership, rewarding those who steward the land, do not overgraze, and oversee good water disbursement.
Responsibilities of the Private Landowner
As a private landowner with hunting permits for your property, it’s important to be mindful of the responsibility that comes with it. To help ensure the safety of you, hunters on your land, and those hunting bordering properties, make sure you:
Maintain property boundaries and safety standards
Set clear rules for hunters on your land
Establish clear property boundaries and no-trespass points
Consider legal liability and insurance measures
Hayden Outdoors Agent & Partner Greg Liddle
Hayden Outdoors recreational real estate professional Greg Liddle sums up the benefits of hunting on private land. “In 1985, you could walk into your nearest hardware store and get your deer or elk tag right over the counter. It was good for the entire season. Nowadays, there are units in Colorado that could easily take 25 – 30 years to draw.” He notes that in 2021, an additional 60,000 applicants applied for big game deer and elk tags in the state of Colorado alone as compared to the previous year.
“This makes hunting on private land pretty appealing to those who have access to it.” Private hunting land is certainly a luxury, but it’s much more than that in today’s world. It’s a legacy for future generations of hunters. It’s added financial value in your recreational real estate investment. And it’s a way to preserve the land for all those who value the art of big game hunting. To learn more about securing a private land hunting application for your recreational property, or if you’re interested in purchasing private hunting land, contact Hayden Outdoors.”
*Don’t forget to visit us at a trade show to discuss Landowner Tags!*
Hayden Outdoors will attend a number of hunting and sporting trade shows every year. Stop by one of these shows to discuss how we can help you with your private landowner tag application, property and wildlife management and learn about some amazing sporting properties we have for sale from coast to coast.
Keys to a Successful Whitetail Deer Hunting Season
With whitetail deer hunting season just around the corner, we turned to Hayden Outdoors’ resident whitetail expert, John Tate. John is a lifelong hunter and avid outdoorsman, cutting his teeth in the Piedmont of North Carolina. He’s spent countless hours honing his hunting craft throughout some of the most desirable whitetail deer hunting regions in the country. It’s a passion, and one he’s happy to impart on up-and-comers. Here are some key takeaways from our talk with John in which he walked us through the key steps for a successful whitetail hunting season.
John with a Whitetail Buck. Photo Courtesy of John Tate.
The Importance of Preparation for a Successful Hunt
Whitetail deer hunting is one of the most popular hunting tags, mainly because the animals are so prolific across the country. Nearly all U.S. states have a whitetail deer hunting season, with some opening as early as August. The animals gravitate toward food plots, cropland, pasture, wooded areas, and brush. But don’t be fooled into thinking the abundance of whitetail deer makes them easy to hunt. John advises treating your whitetail deer hunting as a year-round game. “In the off-season, you need to be practicing with whichever weapon you plan to hunt with. Study onX maps, read hunting articles, watch video clips, and call your local or regional hunting division to see what the local tag regulations are.”
Preparation is essential for successful whitetail deer hunting. John recommends taking these steps to help ensure you’re prepared when opening day rolls around:
Set a hunting goal. If this is your first season, it could be as simple as getting out and testing your equipment. Newer hunters might care less about rack size and more about securing some meat for the upcoming year. Whatever your aim, vocalizing it can help frame your approach to the season.
Find a friend and then practice with that person – make it a team effort.
Pick a spot and plan the trip.
By doing these things, John points out that you become the guide and the outfitter. You get to do it all. “For me, I truly appreciate when it all comes together and I do shoot a deer, knowing I’ve done the work from start to finish.”
Understanding Whitetail Behavior: Patterns and Habits
For the most part, food sources dictate whitetail deer movement, which typically is most active in the morning and evening. “Whitetails don’t move a whole lot mid-day,” John says. “They’re going from their bedding to their food source. When it starts to get warm during the day, they’re not going to expend a lot of energy.”
This movement pattern extends as fall begins to turn to winter and the weather gets colder. “When temperatures start to drop, the deer are starting to roam around, making scrapes, rubbing trees. Bucks will be on the move, especially in the October timeframe, looking for does. That’s when you’ll see the bucks moving around pretty aggressively.”
By late October, whitetail bucks will begin aggravating the does at the onset of the rut (mating season). In addition to mating season, food, weather, and shelter also affect whitetail behavior as they prepare for winter.
Food plots, areas of well-tended crops near tree cover, help to sustain a local whitetail population. Photo courtesy of John Tate.
Preparing Your Land: Ensuring a Whitetail-Friendly Habitat
One of the best ways you can make your property appealing to whitetail deer is by creating food plots. According to John, there are typically two different kinds – spring/summer food plots and fall food plots. Learn more about which plants and minerals appeal to the deer in your area, then create a food plot with John’s guidelines in mind:
Establish your food plots within close proximity to a bedding area or corridor.
Provide enough buffer that you’re not getting too close to the bedding area and running the deer off.
The more food you have, the more deer you’ll pull from other properties and nearby hunting zones.
If you have to create a food plot in a newly-established area, use the modification to the habitat in a way that benefits the deer. “We don’t have as much agriculture here in the South as in the Midwest, so we have to create our food plots for whitetails. We’ll take a barren field or even some section along a creek that doesn’t have a lot of trees and clear the area where there’s good, fertile soil.”
Downed trees can provide excellent cover for deer. These trees also allow you to create access corridors in the food plot, helping to predict movement. “You can structure your food plot based on the predominant wind and better soil.” The bottom line: Plant the food and give the deer a natural source of nutrients that is protected and close to water.
Proper Gear: Must-Have Equipment for Whitetail Hunting
“When I first started hunting, it was good enough to just have enough clothes on to stay warm. And it was all cotton! No hand warmers or battery-operated gloves and socks. I was just happy to be out there, hunting with my dad.”
While we sometimes yearn for a more minimalistic approach to our favorite activities, the truth is that modern equipment keeps us more comfortable and allows us to get closer to the animals without being noticed. These days, the gear checklist is a little longer, but you’ll be that much happier when your hands are warm and the deer can’t smell or see you.
John’s essential gear checklist includes:
Rifle and ammunition or bow and quiver – If you’re bow hunting, pack an extra release
Camo
Well-fitted boots
A good backpack – John recommends a 2,000 – 3,000-cubic-inch pack to accommodate packing out meat
Range finder
Deer call
Flashlight or headlamp
Binoculars
Plenty of food and water – you might be out all day
“That’s the minimalist list I would put together and say, ‘Go to the woods.’”
A layout of gear needed for bowhunting whitetail. Photo courtesy of John Tate.
Additionally and conditions-dependent, it’s worth adding the following to your hunting kit:
Bug repellant
Binocular harness
Safety vest
Two pull-up ropes
Small set of allen wrenches
Extra hat
Gloves
Face net
Camo face paint
Ozone machines that kill scent
Extra batteries for any battery-powered items
Pay special attention to scent control and camouflage. Consider washing hunting clothes with scent-free detergent and using a scent-killer treatment. Avoid body products (shampoos, soaps, and deodorants) that have perfumes or scents. Talk with your local outfitter or sporting good store about the best camo for your hunting region.
The preparation is no joke. “It’s honestly like packing for a two-month long trip every time you go in and come out,” John says. “It might seem like overkill, but I’ve been on so many trips when I wasn’t prepared or forgot my flashlight, and it was really frustrating. I decided I’d rather be over prepared than not.”
The Role of Timing: Best Times of Day and Season to Hunt
If you’re hoping to get into whitetail deer, early morning and twilight when they’re browsing food are your best bets. If you’ll have to pack any meat out, err on the earlier side to give yourself plenty of time. As far as what time of year you should go, John recommends this well-known prime time, but with some parameters: “During the fall rut is the most entertaining time to whitetail deer hunt. But it’s also the most frustrating because deer are as unpatternable as they will ever be during this time. Every successful bowhunter will tell you the best time to go is the first three to five days of the season, or during a good cold snap. Late season when the rut has phased out and the deer are having to focus on food again is another prime time.”
Ultimately, it comes back to John’s hunting credo: Do your homework. Study trail cams and work hard to understand how the deer are traveling and behaving.
John with a buck he shot with a rifle at night. Photo courtesy of John Tate.
Mastering the Art of Stealth: Staying Hidden and Undetected
When you’re on the move during hunting season, strive to do so as quietly as possible. It can be hard to contain the excitement and enthusiasm to get out to your stand or hunting spot, but slowing down a little bit is a great way to stay out of the deer’s earshot.
Watch where you’re walking and avoid anything that might snap, crunch, or crumble as you step.
Wear quiet materials that don’t swish or rub as you walk.
Same goes for boots – opt for footwear that doesn’t have any obvious squeaks or other noises.
Make sure pieces of gear are protected and not clanging against each other. Harnesses work well for gear placement on your body.
Before the season starts, make sure your stand is primed for hunting. Replace any ripped materials and other structural apparatus.
Common Mistakes for New Hunters
Going back to his initial points, John notes again the importance of having a goal in mind for this season’s whitetail deer hunt. Keep it realistic (although we can all dream of that Boone and Crocket buck), and make sure you have the proper equipment to make it happen.
Then, don’t be afraid to take small chances and follow your instincts. “I think one mistake hunters make is giving the deer a little too much credit – not that they don’t deserve it. But there are times when we’re too cautious; I know I have been. You’re walking a fine line between alerting a deer and not wanting to blow your chances. But if you’ve done your homework and you know the wind and the range – and you’ve got the wind in your favor – that right there is a huge bonus and a big jump on staying ahead of the animal.”
Of course, the opposite can be true, too. “On the flip side, some hunters push it too much. They get impatient. I’m also guilty of that. If I have limited time, I push it, when in retrospect, I could have waited. Honestly, it’s just a gut feeling. If you’ve done your homework and studied it 17 different ways, your gut’s going to tell you what to do.”
John with a buck he took down with a bow. Photo courtesy of John Tate.
Conclusion
In the end, the art of whitetail deer hunting boils down to a simple truth – and a simple pleasure – for John. “I’ve been blessed to have hunted and seen a lot of really beautiful places and met a lot of great people along the way. And I hope that’s what others get out of it. At the end of the day, if you go out and give it your all, whether you tagged out on an animal or not, you got to reconnect with nature and enjoy being outdoors.”