Sign in to save favorite properties and equipment, save your search parameters and more
Don’t have an account yet? Sign Up Now
Sign up
Already have an account? Login Now
Login
×
Sign in
Sign in to save favorite properties and equipment, save your search parameters and more
Don’t have an account yet? Sign Up Now
Sign up
Already have an account? Login Now
Buying Your Own Hunting or Fishing Lodge in Alaska
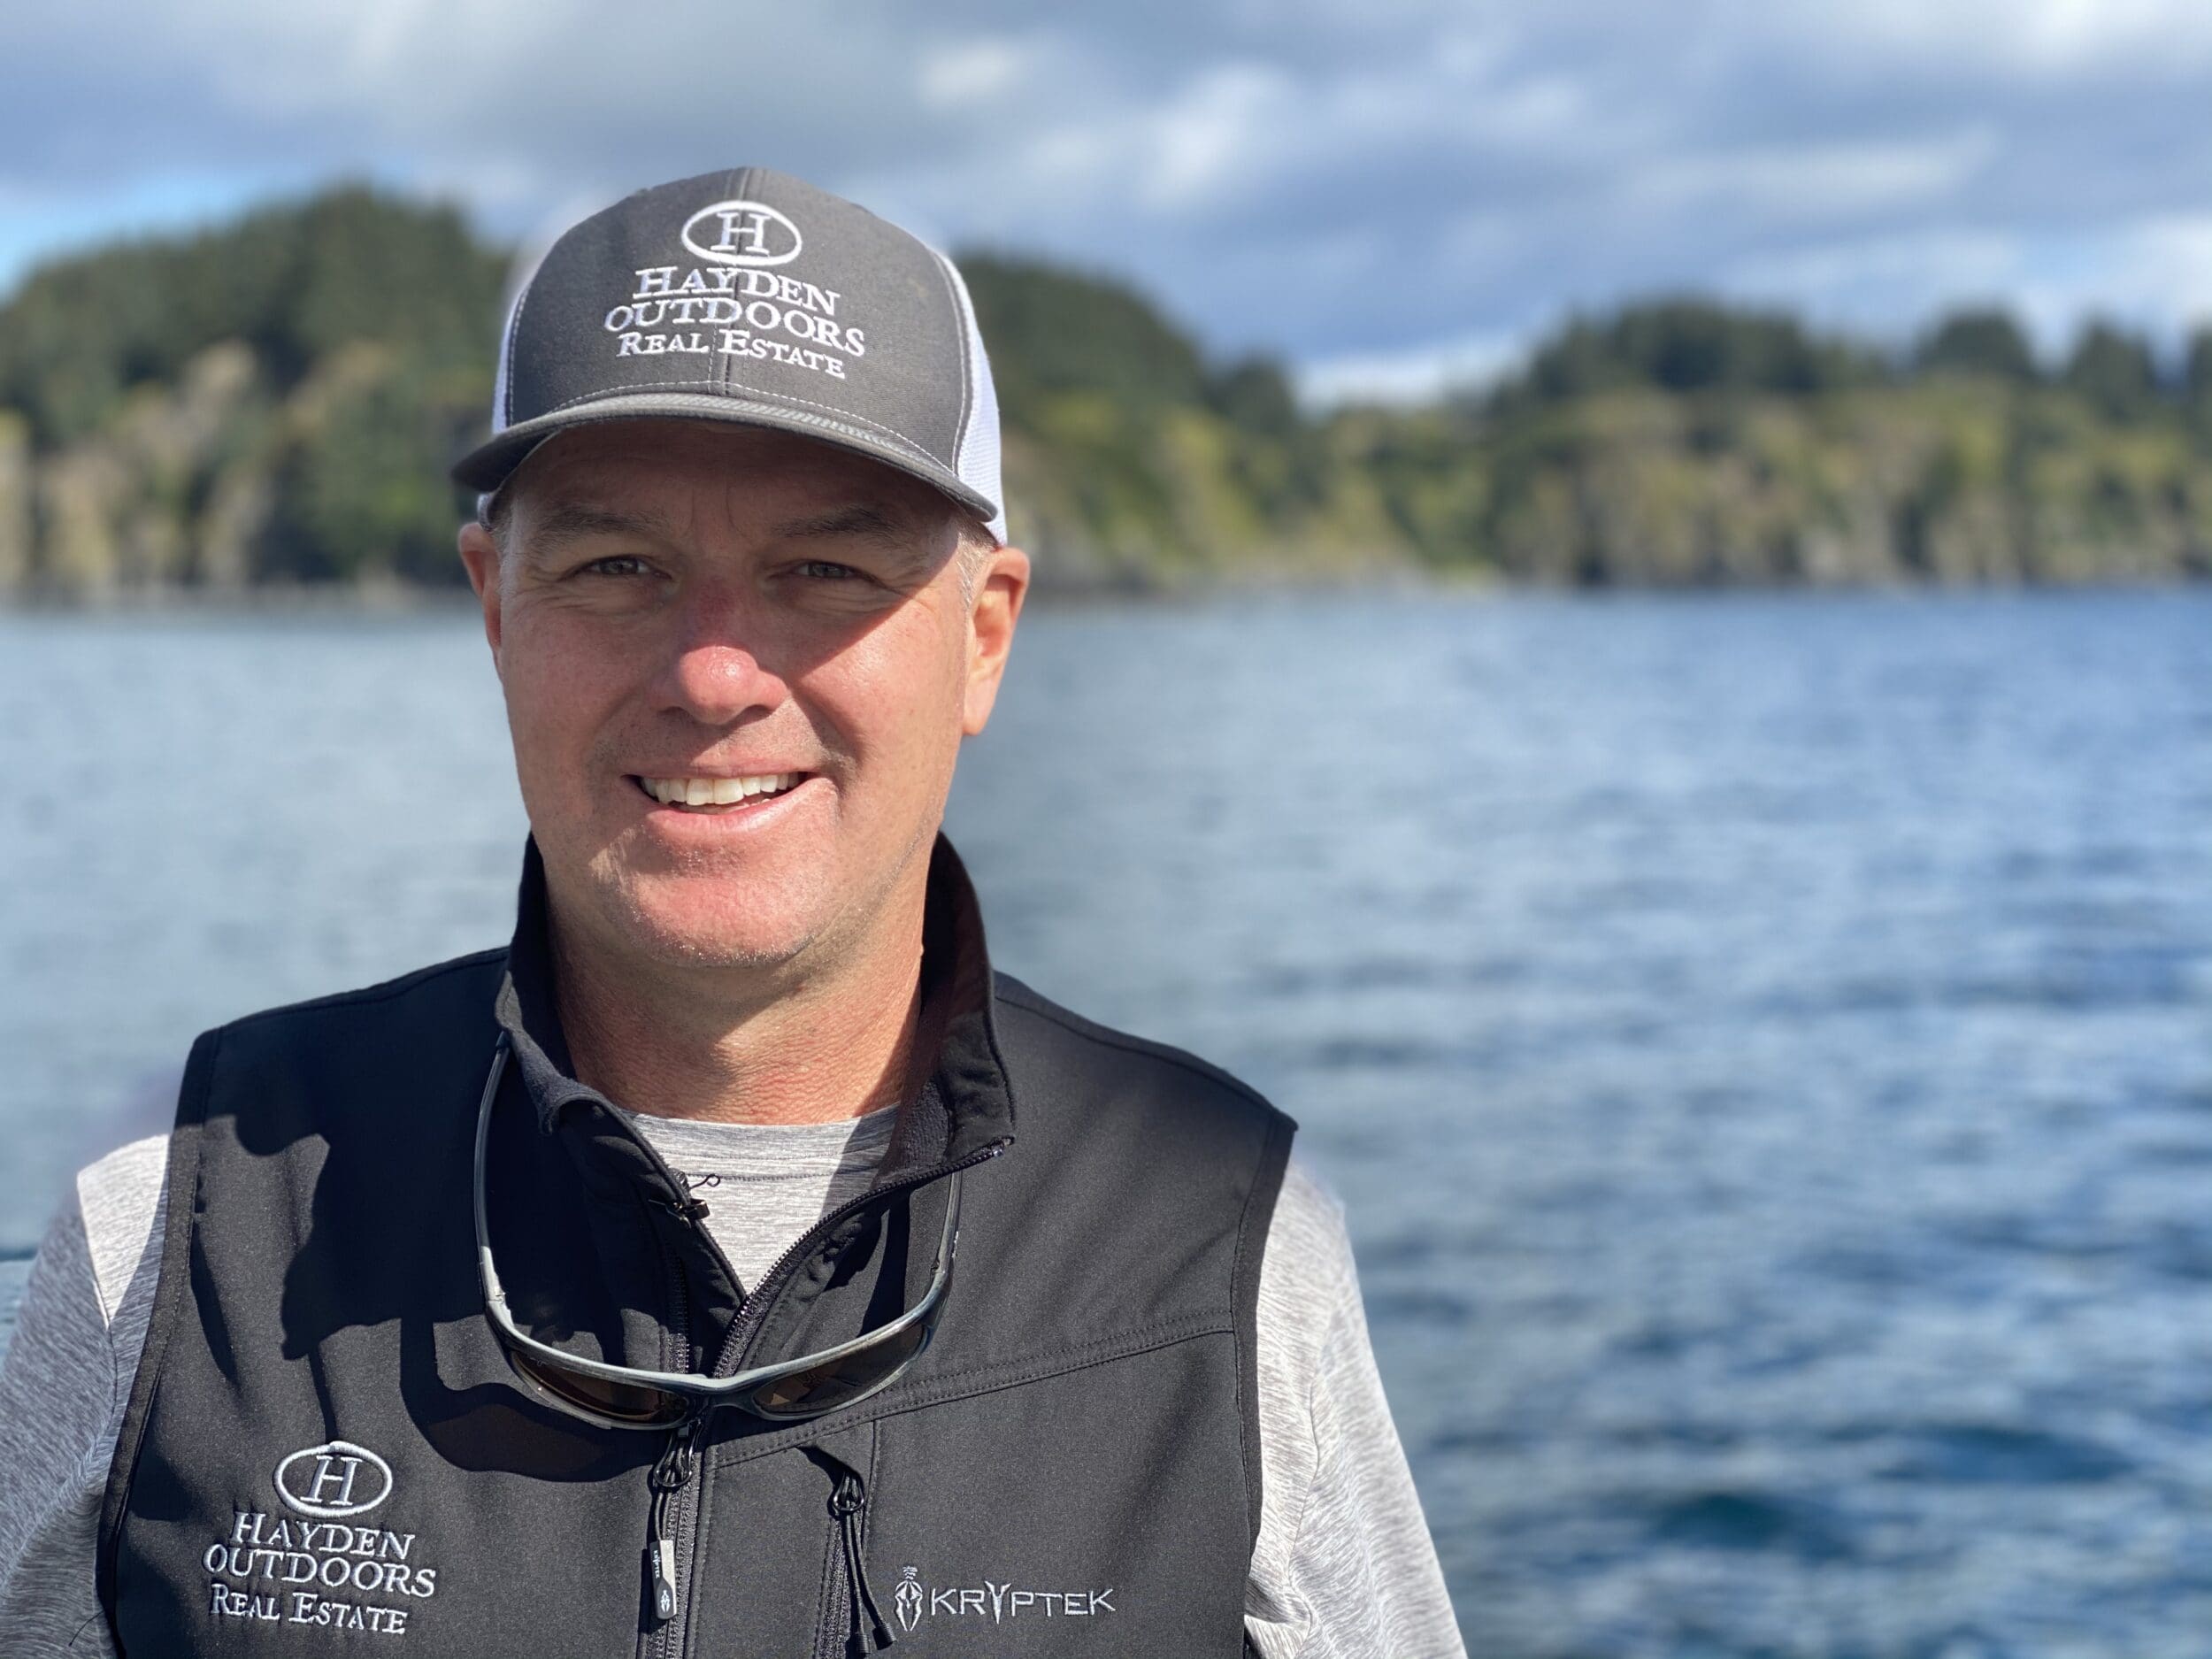
John Herrity fell in love with Alaska back in the summer of ‘91 when he convinced his college roommate to spend a season on a fishing boat. He fell in love with the place. Four years later, he ended up buying the same fishing operation where his Alaskan adventure began. We asked him to share valuable tips with us for those interested in buying a lodge in Alaska. John is now spending his 34th summer in a row up in the Land of the Midnight Sun. On a recent summer afternoon, that’s exactly where we found him.
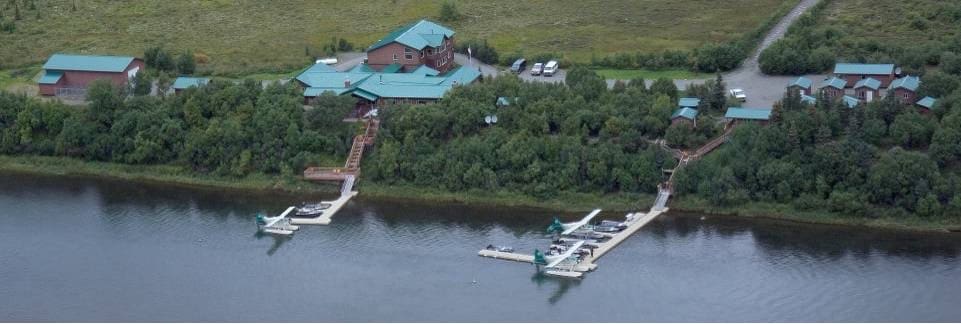
“I’m sitting on my boat up the Naknek River in the Bristol Bay region of Western Alaska – the northern part of the Bering Sea.” He’s up there to fish, first. But he also represents HaydenOutdoors in the northernmost part of the U.S., helping clients buy and sell lodges in Alaska. “Last year, I listed King Salmon Lodge, about five miles up river from where I’m sitting right now.”
The Alaska recreational real estate specialist, who calls the great state his second home, can be found in Colorado and South Dakota the rest of the year selling lodges, ranches and farms. He provided some insight into the unique research and acquisition process of buying and selling some of the best fishing and hunting lodges in the last frontier.
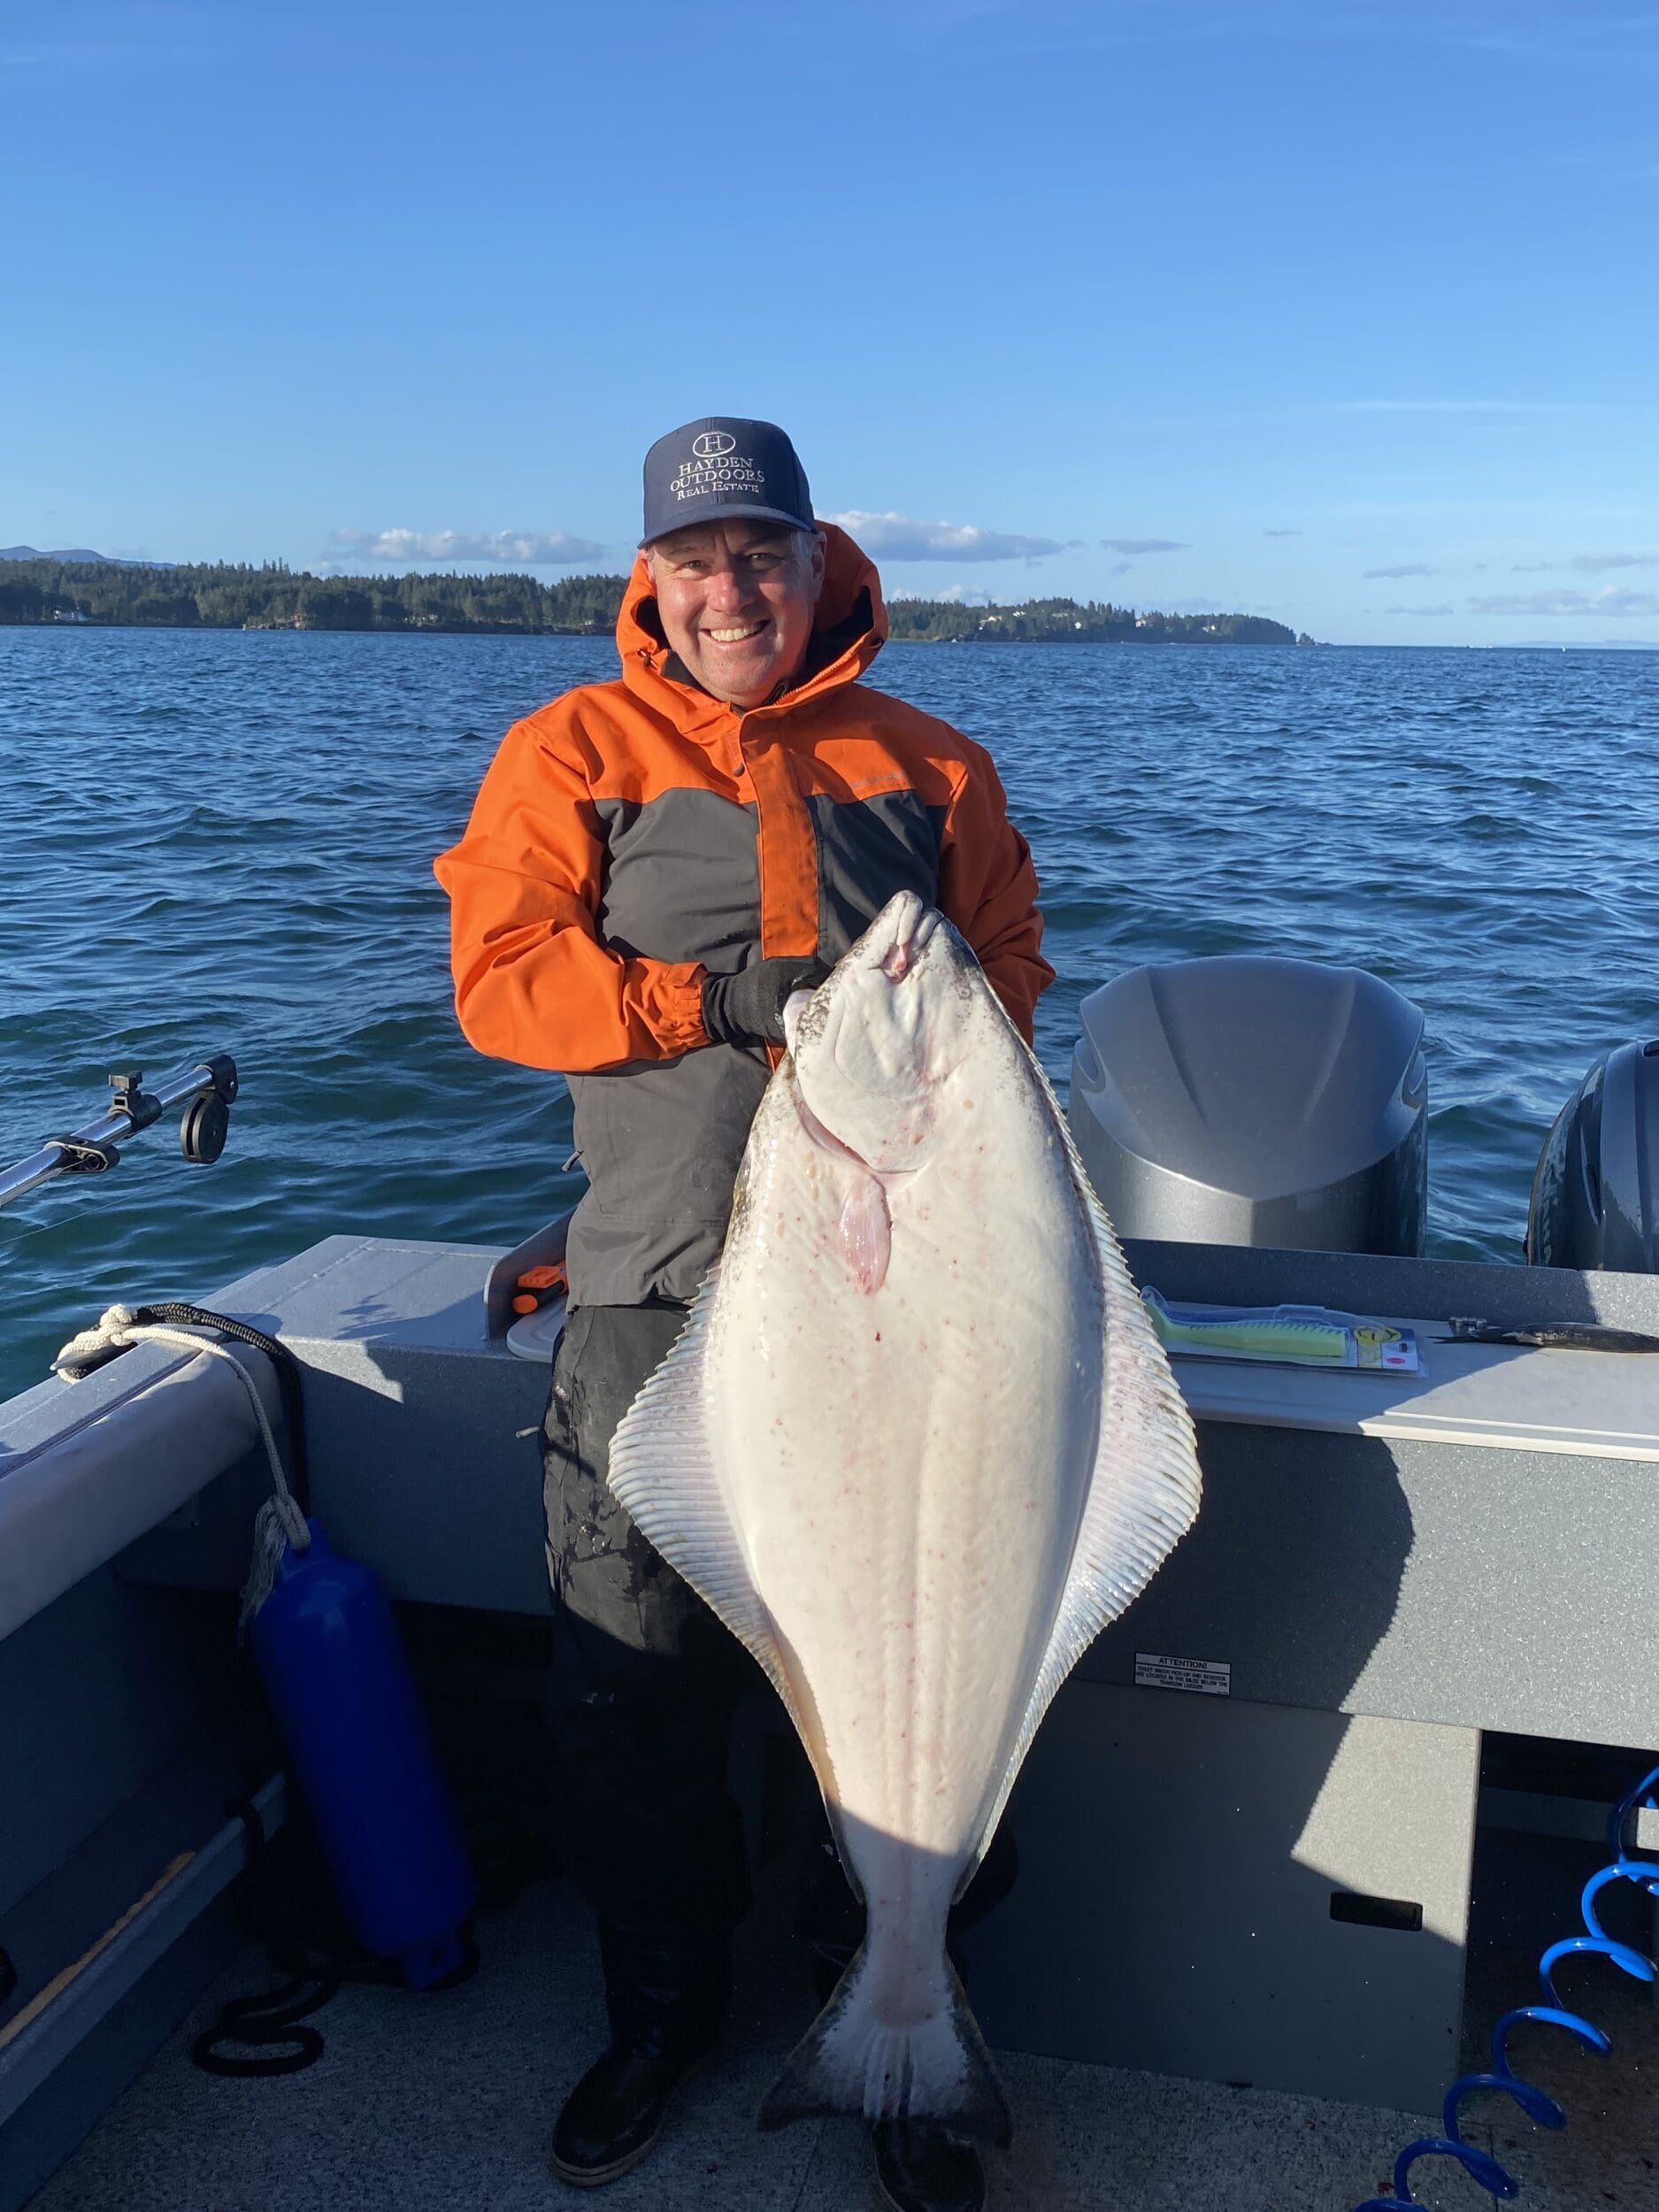
John Herrity with a successful catch in Alaska. Photo courtesy of John Herrity.
Benefits of Owning a Lodge in Alaska
To John and others who have spent time hunting and fishing the Alaskan wilderness, the benefits of owning a small part of the magic are clear, but to clarify, it’s really about accessing places very few others do. “I really like being off the road system.” Not off the grid, but off the road system. John clarified, “Kodiak is off the road system, meaning you have to fly in there, but there’s still a Walmart, Safeway, and other amenities. I’ve found that in Alaska in general, the roads are jam packed on the weekend, so it’s special to get off of it. You get to see places few others have seen if those places are harder to get to.”
The access to pristine wilderness and abundant wildlife is certainly one of the major benefits of owning an Alaskan lodge. But there’s also the potential for a personalized outdoor experience. From rustic to five-star you can cater the lodge experience to the needs and wants of your clientele, offering visitors a trip of a lifetime they simply can’t get anywhere else.
Financially, lodges present unique investment opportunities in eco-tourism and hospitality. According to John, guests typically expect good housekeeping, good food, and good guide service, with emphasis on the latter two. Having ownership in such a premier investment, which can double as a corporate retreat, lets you direct the escape you and your visitors enjoy while living off the road system.
Factors to Consider Before Buying
The biggest factor to consider before buying your Alaskan hunting or fishing lodge is its location. Obviously, it needs to be in the midst of world-class fishing and/or hunting grounds. Accessibility to the experience you’re offering is essential. “I know of lodges on the shore that do both ocean and river fishing. They fish salmon in the rivers in the morning. The other part of the day, they’re out in the ocean trying to catch halibut, lingcod, things like that.”
Legal considerations also play a major role. There are, of course, hunting and fishing permits. In Alaska, John notes that these have become a buying-and-selling game all their own, requiring specialists and brokers. A “six-pack” fishing license is currently going for about $110,000. John provides some additional guidelines to consider, including:
Adhering to local municipal codes for cooking
Fishing boat captains must be licensed per Coast Guard regulations
National or state park access permits
In the course of a potential sale, don’t overlook infrastructure. This includes utilities, maintenance, and amenities. “The more remote lodges will have aircraft and float planes to get guests and supplies in and out – or at least have a good relationship with a float plane service.” Cabins, boats, storage structures, and the main lodge all require consistent maintenance.
Costs Involved
John has managed enough lodge sales to know they require a specific approach and come with many potential built-in costs. “Lodges are intricate sales; there are a lot of components. The first thing I do from a broker standpoint is assess if it’s an asset sale or a real estate sale.” By this, he means it’s not just a beautiful shore-line lodge you’re buying. It’s also the client list, website, intellectual collateral, aircraft, cabins, boats, access permits, fishing permits, and captain licenses.
There’s the initial purchase price versus the ongoing operational expenses, including the maintenance and upkeep costs for remote properties. Buyers and sellers also need to consider the tax implications of such a major transaction. John helps clients with 1031 exchanges. An IRS exception 1031 exchange allows real estate investors to sell one investment property and buy another without paying capital gains taxes. John notes that he works with the premier 1031 agency in the country, located in Denver.
Finding the Right Property
Owning a fishing or hunting lodge is a special way of life, so it’s important to find the right fit if you’re in the market – or to work with an experienced recreational real estate agent if you want to sell.
You can start by researching online listings or auctions, but the best way to find the right fit is to develop a relationship with an agent who specializes in Alaska lodge real estate sales. John has even known potential buyers who have gone incognito, spending their vacation at a lodge in which they’re interested as a client to size up the experience.
If you’re in the market, talk with your agent about leasehold versus freehold options. Leases allow owners to own the lodge but not the land on which it’s built, which is leased for a set period of time, while freehold means the owner owns both the land and the lodge.
Operating Your Lodge
As John mentioned, good housekeeping, good food, and a good guide are what typically make the lodge experience. If you’re looking to buy a lodge, it’s important to understand the local employment market and current lodge staff.
“Staff are a hidden asset in a lodge sale. Most lodge sellers are very concerned about their clientele and staff when they list a property, and most lodges don’t miss a beat if this aspect of the sale is handled properly.” Transitioning a long-time manager from one owner to the next can help with a seamless guest experience and ensure the new owner does not lose talent.
You will also need to consider seasonal versus year-round operation challenges. Some lodges stay open all four seasons. Others maximize the summer months and then close up for the winter. Potential buyers need to account for this ebb and flow of income and expenses.
Another possibly overlooked expense of running an Alskan lodge is marketing and attracting clientele. In the winter, many lodge owners or managers will spend time at tradeshows trying to solicit summer business.
To get a better handle on the costs of running a lodge, John recommends looking at the history of the lodge. “Most importantly, review bookings, including future bookings, and financials. This can require a forensic accountant. Lodges – especially ones with aircraft and boats – can have a lot of depreciation, which can skew the financial overview of the property.”
Legal and Regulatory Challenges
Given Alaskan lodges’ proximity to vast wild spaces, it’s key to understand local, regional, and statewide zoning laws and land use regulations. Make sure you hire guides who have a firm grasp on hunting and fishing quotas, and consider incorporating wildlife conservation into your business philosophy. Navigating federal versus state regulations is also an essential part of running a successful, above-board hunting or fishing lodge.
Community and Cultural Integration
New lodge owners also need to be mindful of the surrounding communities. This is particularly important for lodges that rely on local populations for their workforce and guide services. Building relationships with these communities helps support local businesses and economies and respect indigenous cultures and traditions.
Conclusion
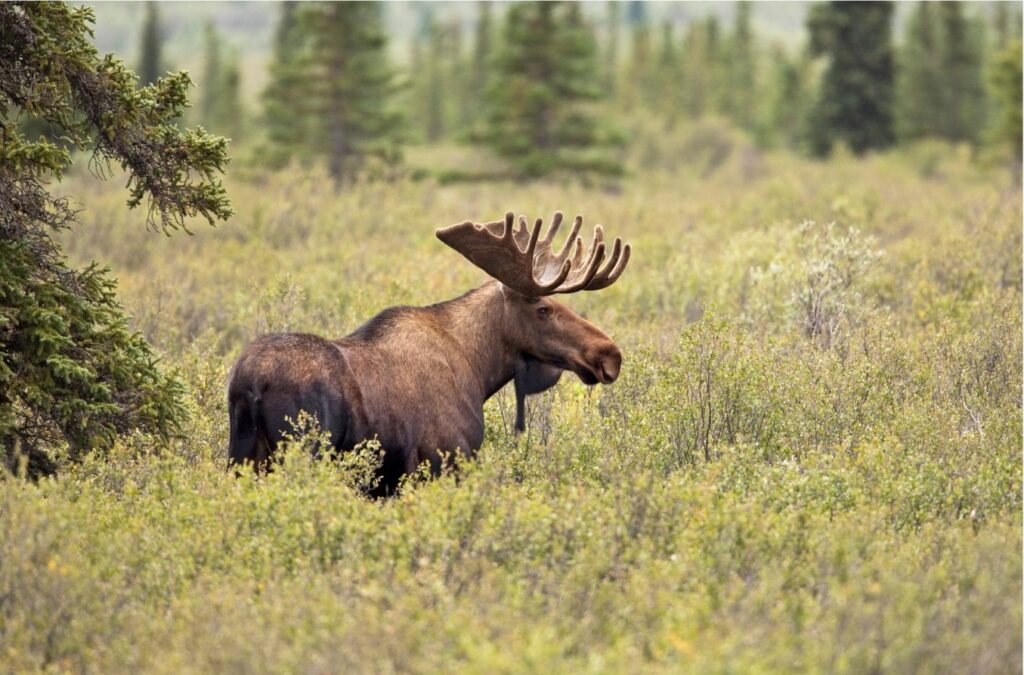
Owning an Alaskan hunting or fishing lodge is a special way of life. Many have been a part of the local history for decades or longer. They have a storied history that is often a part of the larger fabric of the Alaskan lifestyle. “I want to list properties that I want to own myself and work with people I can be friends with for a long time.” John has become an established part of both life in Kodiak and buying and selling lodge properties in Alaska. He knows the fish, river systems, moose, caribou, and bear just as well as he knows CPAs, attorneys, and lenders who specialize in lodge sales. “When you’re buying a lodge, in most cases, you’re buying yourself a job. There’s a great return, but there’s also a lot to it. It’s not a hands-off investment.”
Such was the case of the King Salmon Lodge John brokered. “We had multiple offers so we asked for the highest and the best offer because ultimately, the highest offer might not be the one the seller takes.” And that was the case with the King Salmon. The seller opted for an offer that didn’t bring in the most money, but it did provide the most value for the property going forward. “He went with the offer he felt would be the best fit for the lodge and the community.”
It’s why it’s so important to work with someone who knows the ins and outs of it. Someone who understands the Alaskan way of life and what it means to people who visit the lodge and who live in the area. Someone who’s most likely on his boat right about now. When we ask if we can reach out with follow-up questions, John says sure. “I might not get back to you right away though; gonna start fishing in the next day or two.”
Hayden Outdoors Broker John Herrity
Dove Hunting Season Hot Spots
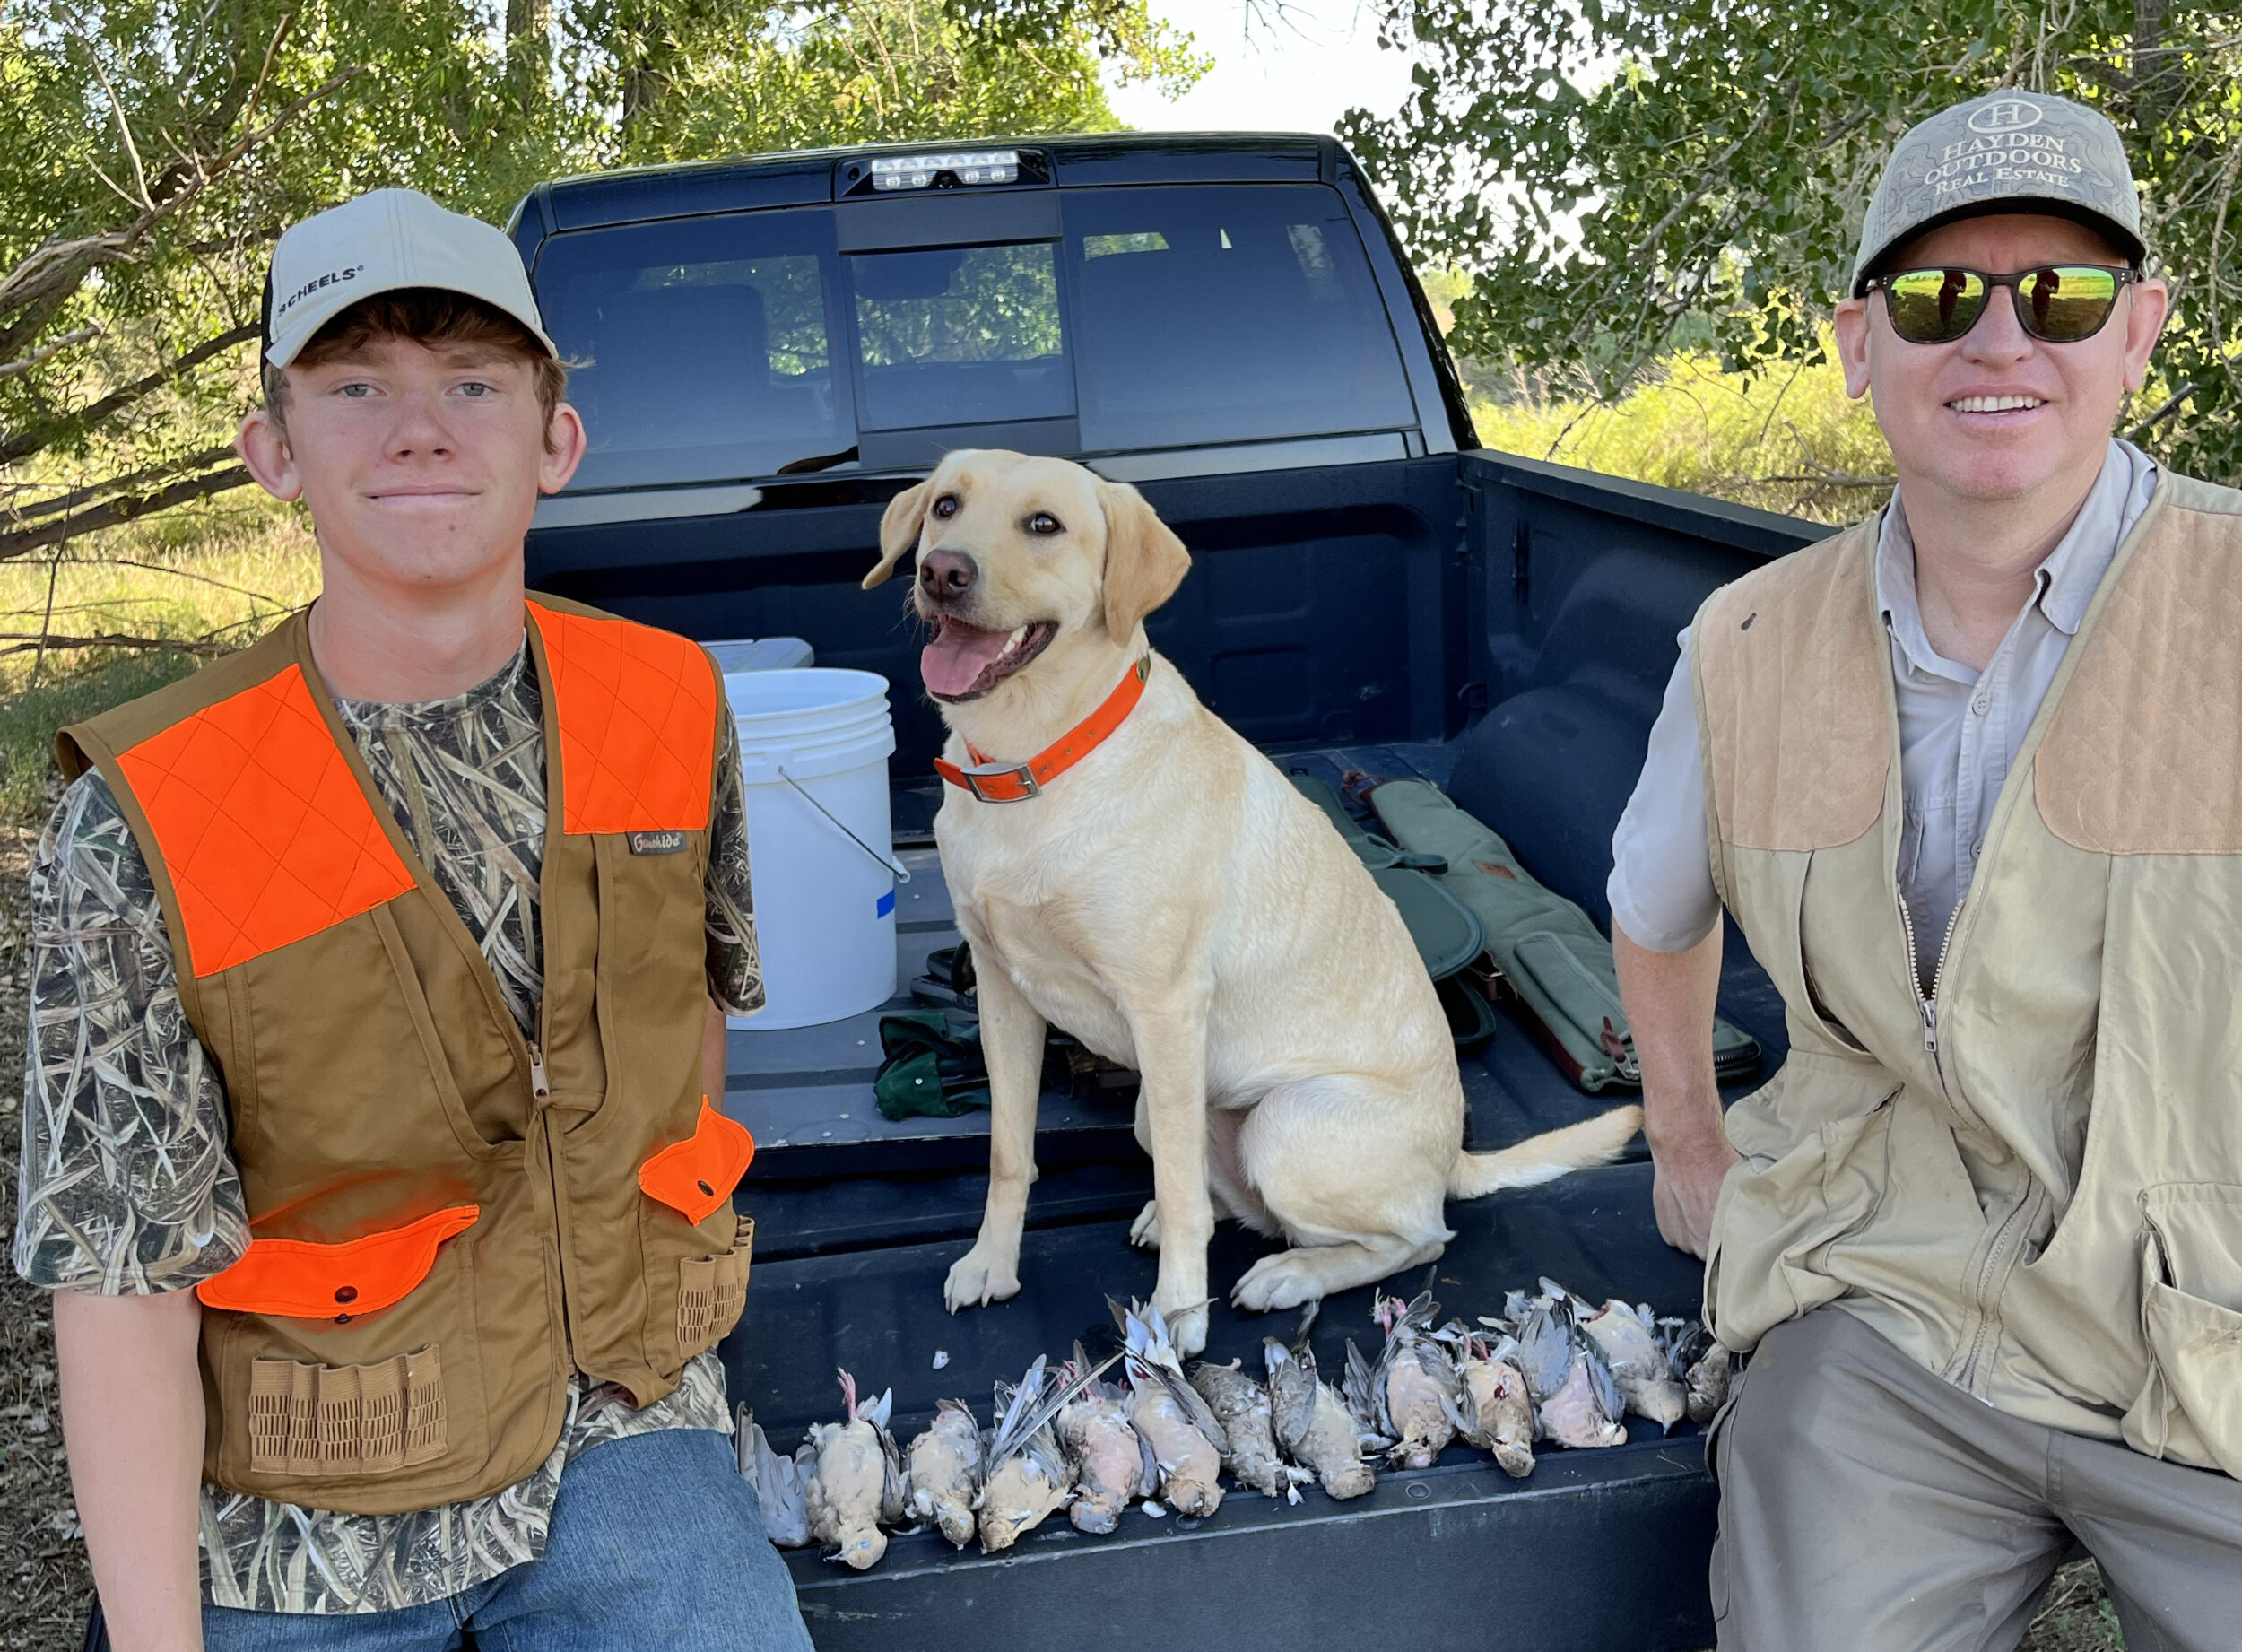
There are two types of people in this country – those who have been dove hunting and those who haven’t. If you fall into the latter category, you’re definitely missing out, at least according to Hayden Outdoors Director of Marketing Dan Brunk and broker Heath Thompson. These boys – or men, really, but to listen to them talk about dove hunting season evokes a fever pitch-level of enthusiasm typically reserved for our youth – know their birds and how to hunt them on both public and private hunting property. And they love to share their knowledge of the sport. In fact, Heath believes it’s one of the most social field activities out there. “Dove hunting is one of those sports where you can holler at each other, jab each other. It’s vocal. It’s loud. There’s no other sport where you can take 30 to 50 people and put them in a field and watch every one of them have a good time.”
Dove hunting is great for beginners and families, too – both Dan and Heath say some of their earliest memories are shooting birds with their dads, siblings, and cousins. Days in the field or rolling foothills are followed by cleaning and cooking the birds, drinking some refreshments, hanging out with everyone. Says Dan, “It’s a great tradition and just a great time. There are family traditions, but dove hunting is the one event everyone comes to. Anyone can do it so everyone comes together. Seeing people you don’t see but a couple times a year – that’s the most memorable part.”
Dan and Heath imparted their extensive knowledge and wisdom of the sport. Here are some of their dove hunting tips, tricks, and hot spots.
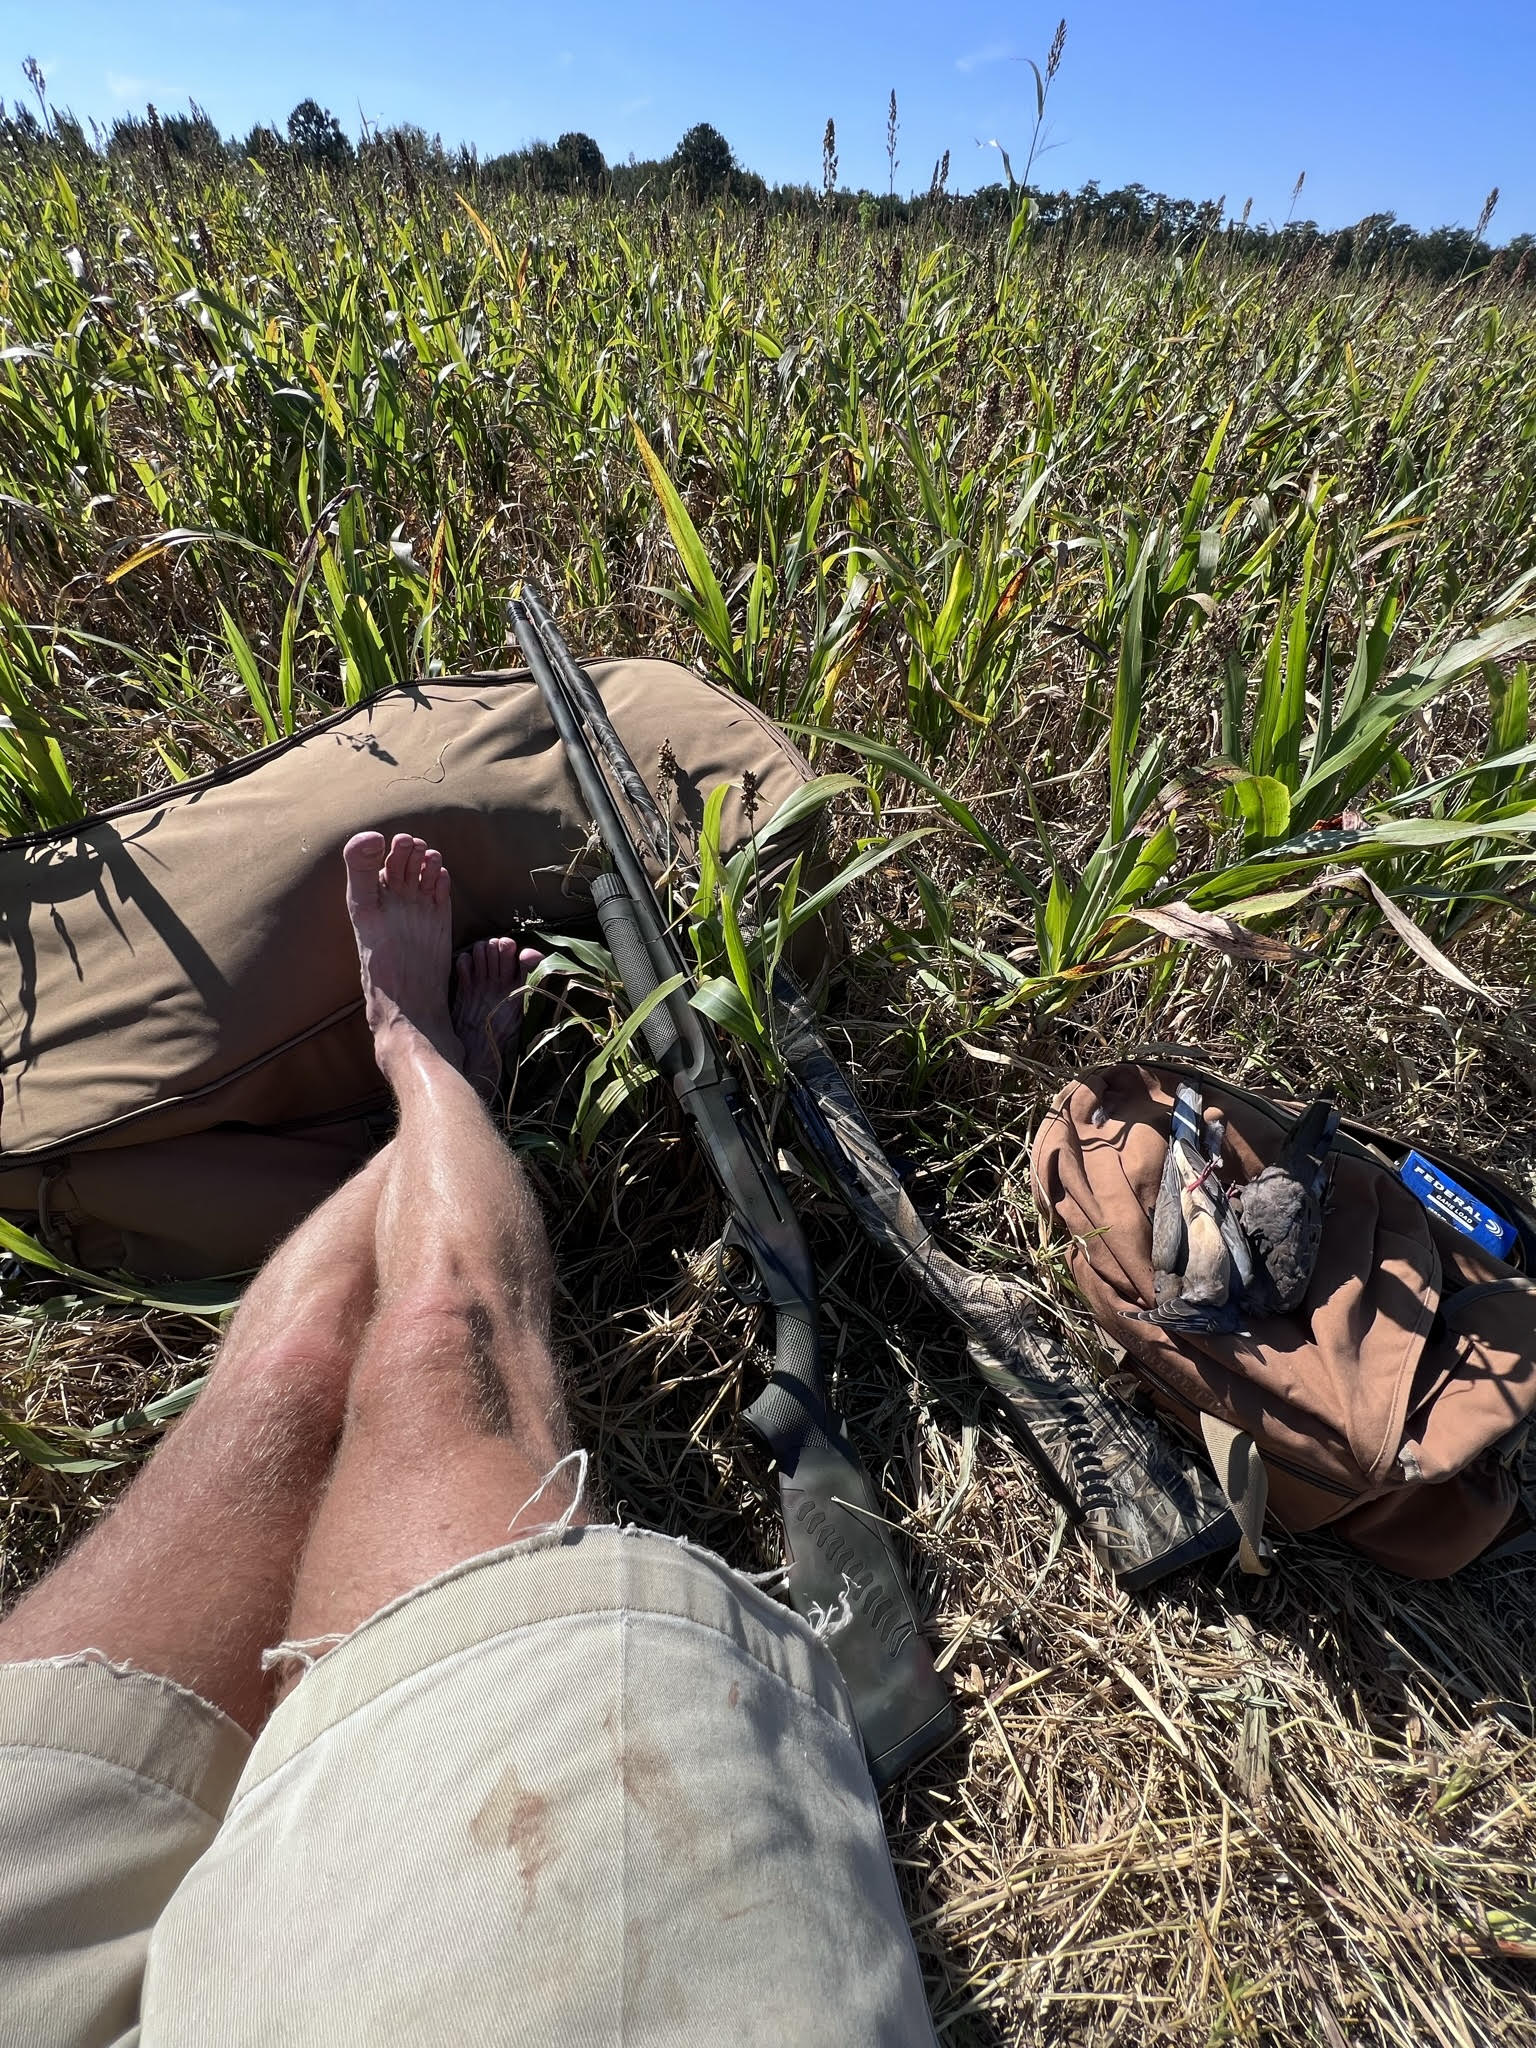
Heath Thompson relaxing during a successful dove hunt. Photo courtesy of Heath Thompson.
Essential Gear for Dove Hunting
Before you step into the field, make sure you have the proper hunting license for doves if one is required. Additionally, you’ll need the following for a successful dove hunt:
Ammunition – You can go through a lot of shells when you’re dove hunting, so make sure to bring plenty. “You need to carry as many shells as possible if you’re going for a walk or sitting on a bucket,” Dan says. “The last thing you want to do is run out of ammo., after all these birds are tough to shoot!”
Clothing – Camo is great, but if required in your state, make sure you’re wearing the right amount of orange to make yourself visible to other hunters. Also prepare for the day’s weather. If you’re going to be spending hours in a blind or out in the field, wear light, breathable clothing that can double as sun protection. Dove have incredible eyesight, so everything beyond your orange should blend well with the surroundings.
Eyewear – Eye protection is an essential part of hunting. Choose a pair of glasses that provide adequate coverage.
Footwear – If you’re going for a walk, choose the right shoes or boots for the job. Look for sturdy soles and ample ankle support that will fare well over uneven ground.
Water, Drinks and Snacks – Hot September days means you’ll need to pack water and some jerky or snacks to hold you over until lunch.
A Note on Guns
Both Dan and Heath remember their first dove hunting firearms fondly. “I had a .410 hammer cock single shot shotgun,” says Dan. Heath switched over to an over-under Winchester 20 gauge when he was about seven- or eight-years old. “It was like a safari every day out there. You’d go out and shoot a bunch of stuff and come back with a sack full.” A scattergun is the best option for dove hunting. Says Heath, “I always recommend a 12 gauge – you’ll shoot a squarer pattern. There have been studies that show anything a 20 gauge can do, a 12 gauge can do better. You want a bigger, more square pattern.” Dan chimes in, “I would recommend women and younger hunters shoot a softer-kicking 12 gauge instead of a pump gun if they can afford it, something that’s a semi-automatic. After the single shot, I moved to a pump 20, then to a 12 gauge.”
Understanding Dove Behavior
Migratory habits
Dan notes doves are a migratory bird, “You can hunt them coast to coast.” This also means your time to harvest doves can be very limited. Heath continues, “A dove is the worst roosting animal God ever created, so during a really wet summer, your young and native birds won’t be as plentiful. You’re waiting on the migratory birds, which means you have to wait until the first cold snap up north when the birds start to head south.” In northern parts of the country, doves will migrate after the first freeze and they’ll continue south at a pretty quick clip. Heath and Dan put forth this rule of thumb: if you see doves that day, you shoot them that day (within season) because you don’t know how long they’ll stick around.
Feeding habits and preferred habitats
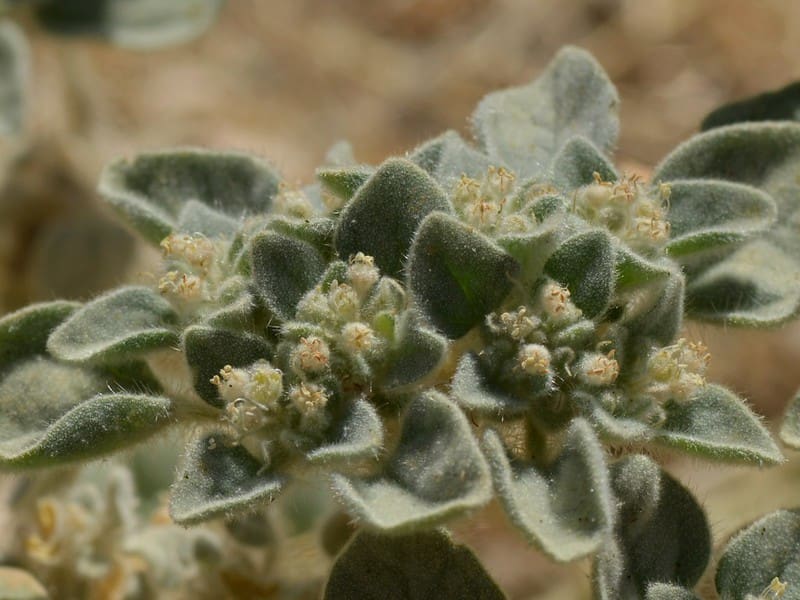
Sunflower seeds are a favorite food source for doves, especially after harvest (right). Photos courtesy of Heath Thompson.
Doves subsist almost entirely on a variety of seeds and grains. Favorites include sunflowers, peanuts, sesame, corn, pigweed, ragweed, hemp, wheat, foxtail, and millet. Heath chimes in “Dove hunting is best in ag fields that have been harvested or prepared for doves.” Occasionally they will feast on berries, fruits, or some greens. Doves also like grit. In order to survive, they need to have grit in their craw to digest their food, hence sandy rings, open fields, and rolling foothills with sandy soil. In the West, Dan has hunted dove near almond orchards or pasture ground where plenty of dove weed grows.
Fields full of Dove Weed on the West coast provide excellent attractants for dove.
Selecting a Perfect Hunting Location
Where you choose to hunt depends on what kind of land you have access to. Heath notes doves like to see their feet, which means they favor more open, recently harvested land, watering holes, canals, or orchards. “If I’m dove hunting on private land, I want to be on top of a sandy hill where I can see the ground with plenty of seeds. On public land, I’m looking for Texas millet or a water hole with a sandy ring around it.” When scouting dove hunting locations, keep an eye out for popular perching spots – the place where doves sit just before they land. In hunting areas with trees, doves will opt for tall stands with sparse coverage. As well as you can, monitor the birds’ flight patterns and behavior. Watch for early birds – the birds that fly over a spot before the rest of the flock arrives. These can be key indicators for when it’s time to shoot.
As both Dan and Heath mention, finding higher ground, even if it’s just slight elevation, can be to your benefit. Dirt and freshly plowed land are also enticing to doves – any habitat that provides seeds and a relatively clear line of sight for the birds. “I’ve walked dirt roads, railroad tracks and canals and filled my limit…the sandy soils and nearby water make these for hot spots if you’re looking for a walking hunt,” says Brunk.
Hunting Seasons and Regulations
Dove hunting is a federal season, and September 1st kicks it off. Make sure to check your state regulations – some states offer early and late dove hunting seasons as well. In addition to a regular hunting license, dove hunters also need to participate in the Harvest Information Program (HIP), which might require buying an additional permit or stamp for hunting migratory birds. Make sure you’re hunting doves in a designated and safe area. Don’t ever shoot the birds off power lines or other common use infrastructure.
These wily migratory birds are small and can be hard to hit but easy to injure. Heath says, “Don’t shoot a dove until you can see its eyes. If you can look up and see its eyes, then you can shoot. If not, it’s too far away.”
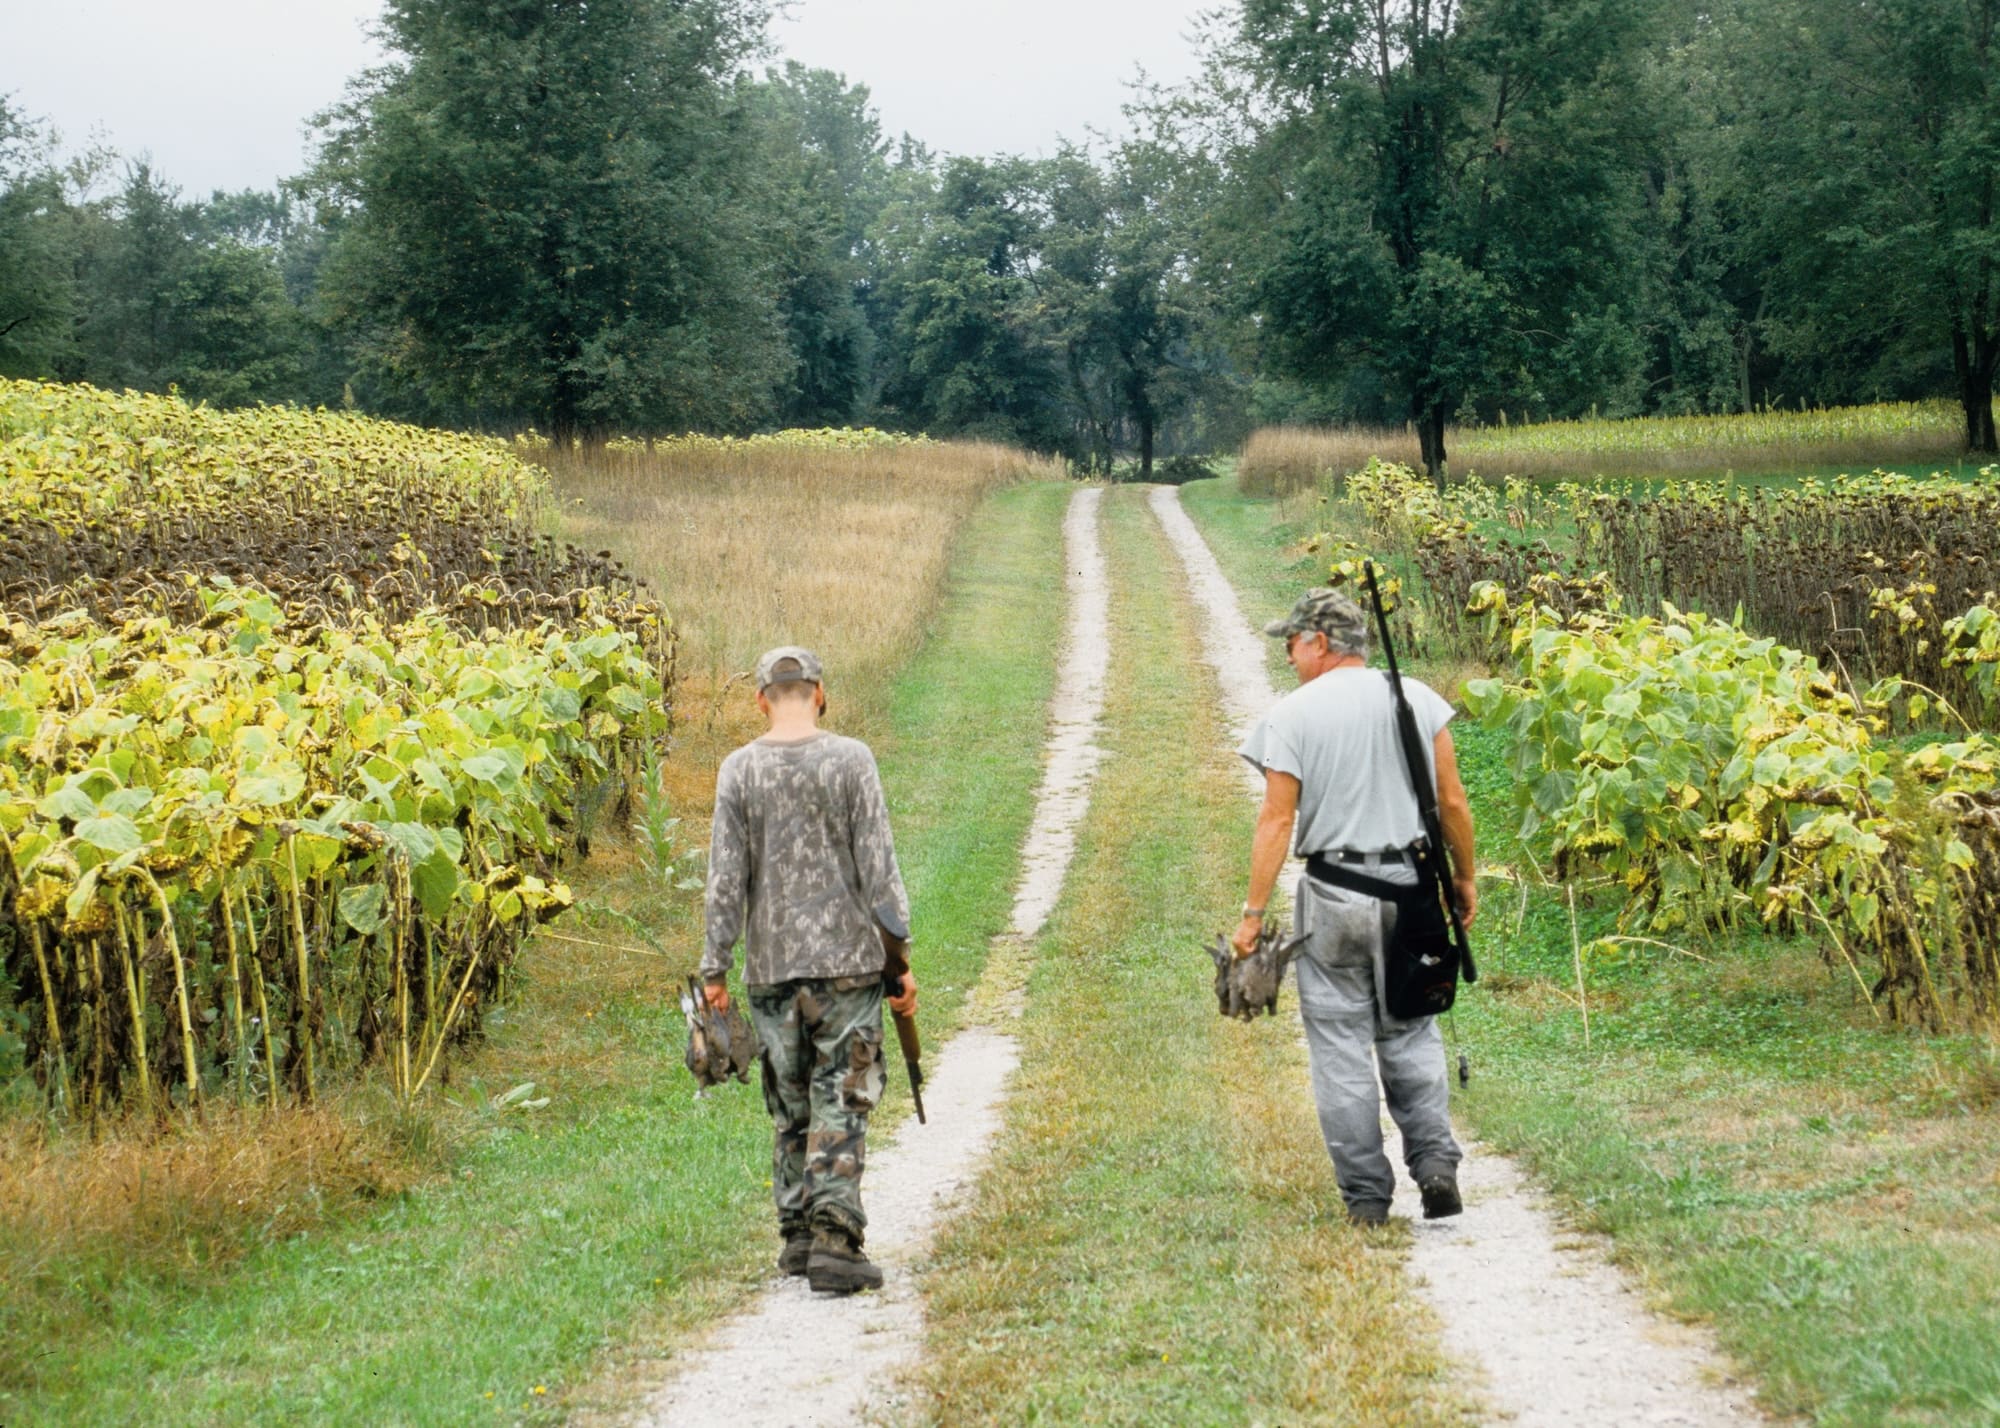
Dove Hunting is a great activity to share with young hunters.
Preparing for the Hunt
Getting ready for your dove hunt requires gathering your gear, gun, and ammunition. You’ll also want to come up with a plan with your hunting party, deciding how early in the morning you’ll head into the field, foothills, or orchard. If you can, consider setting up your hunting area the day before. Some people even build shooting blinds above the treeline. Pack plenty of food and water for a day in the field.
Safety precautions and first aid:
Heath and Dan both stress the importance of hunter safety, especially when participating in a sport as social as dove hunting. Here are a few of their tips:
Give everyone plenty of space. Heath relies on this rule when planting his dove hunting fields: “I want everyone at least 70 yards apart, so I place a flag at 70-yard intervals. As the rule goes, if you get shot by a shotgun at 40 yards, you’re going to the doctor. At 15 yards, you’re going to the hospital. At 70 yards, you’re just gonna cuss.”
Children shooting doves should have an improved cylinder, and hunters should always be mindful to never let the end of their barrel get below their head.
Again, wear adequate eye protection and hunter’s orange if regquired.
Have a first aid kit handy, and make sure everyone in the group is familiar with the nearest medical facility.
Techniques for a Successful Hunt
There are a variety of tactics you can use to up your dove hunting game and increase your odds. Some people use decoys, although this technique wasn’t available to the boys back in the day, as Dan says. “We didn’t have any decoys growing up. Now, you can put a couple of MOJO decoys in a grave pasture and the doves are attracted to it.” Try elevating your decoy slightly for better visibility and attractiveness. Game bird calls are another way to draw doves in, but consider using these more sparingly in heavily birded areas as they can also attract other birds, some of which might be threatened or endangered.
A row of doves after a successful hunt. Photo courtesy of Heath Thompson.
Other tips for improving your odds include:
Use an improved cylinder choke tube to hone your pattern.
Look for corner spots in a field, a point at which the field abuts another parcel of land or water, or a fence line. This will often be a place where birds enter the property.
Position yourself to the left or right of their flight pattern to allow for crossing shots.
Mark your birds with a visual cue that will help guide you to where the bird fell. This helps ensure you are able to recover your doves.
If this is your first time out this season, clean your gun before you go.
Go for one bird at a time. Finding multiple birds once they’ve fallen can be tricky and time consuming.
Shoot high. Going low in a crowded field can be dangerous for bird dogs and other hunters.
Conclusion
One conversation with two avid dove hunters and it’s clear this isn’t just a sport; it’s a lifelong love. It’s a fellowship. For many, it’s their first experience hunting. After that, it’s some of the best times they’ve ever had in the field. Heath thinks back. “I remember the first dove hunt I ever went on. My daddy took me and it was foggy early in the morning. I wasn’t big enough to shoot a gun yet, but I could tell what was going on.” Over on the West coast, Dan remembers early mornings with his dad and brothers. The tradition still stands, decades later. “I’m in Colorado now, but every September 1st, family and friends post up on my brother’s 40 acres and wait for the birds to come in. Every hunter has that picture somewhere in their house – family, friends, a dog and some birds.”
Dan Brunk and his son Salem after a quick morning shoot. Photo courtesy of Dan Brunk.
Spring Habitat Management for Better Deer Hunting in the Fall
When it comes to buying hunting property, Jake Hyland of Hayden Outdoors knows plenty about both. As a broker associate specializing in farm, ranch, dairy stockyards, timberland, and hunting properties, he’s walked thousands of acres on hundreds of farms and ranches throughout the U.S. He’s your go-to guy if you have questions about water and mineral rights, especially in his territories of Colorado, Wyoming, and South Dakota. And when it comes to hunting, his knowledge runs just as deep. Jake has guided trophy elk and deer hunts, pheasants hunts, and waterfowl hunts on some of the most coveted private hunting land in the country. Recently, Jake took a minute to venn diagram his extensive understanding of recreational real estate and spring deer habitat management to talk about spring habitat management for deer hunting to ensure you have a successful hunting season in the fall.
Photo courtesy of Jake Hyland.
Understanding Deer Behavior in Spring
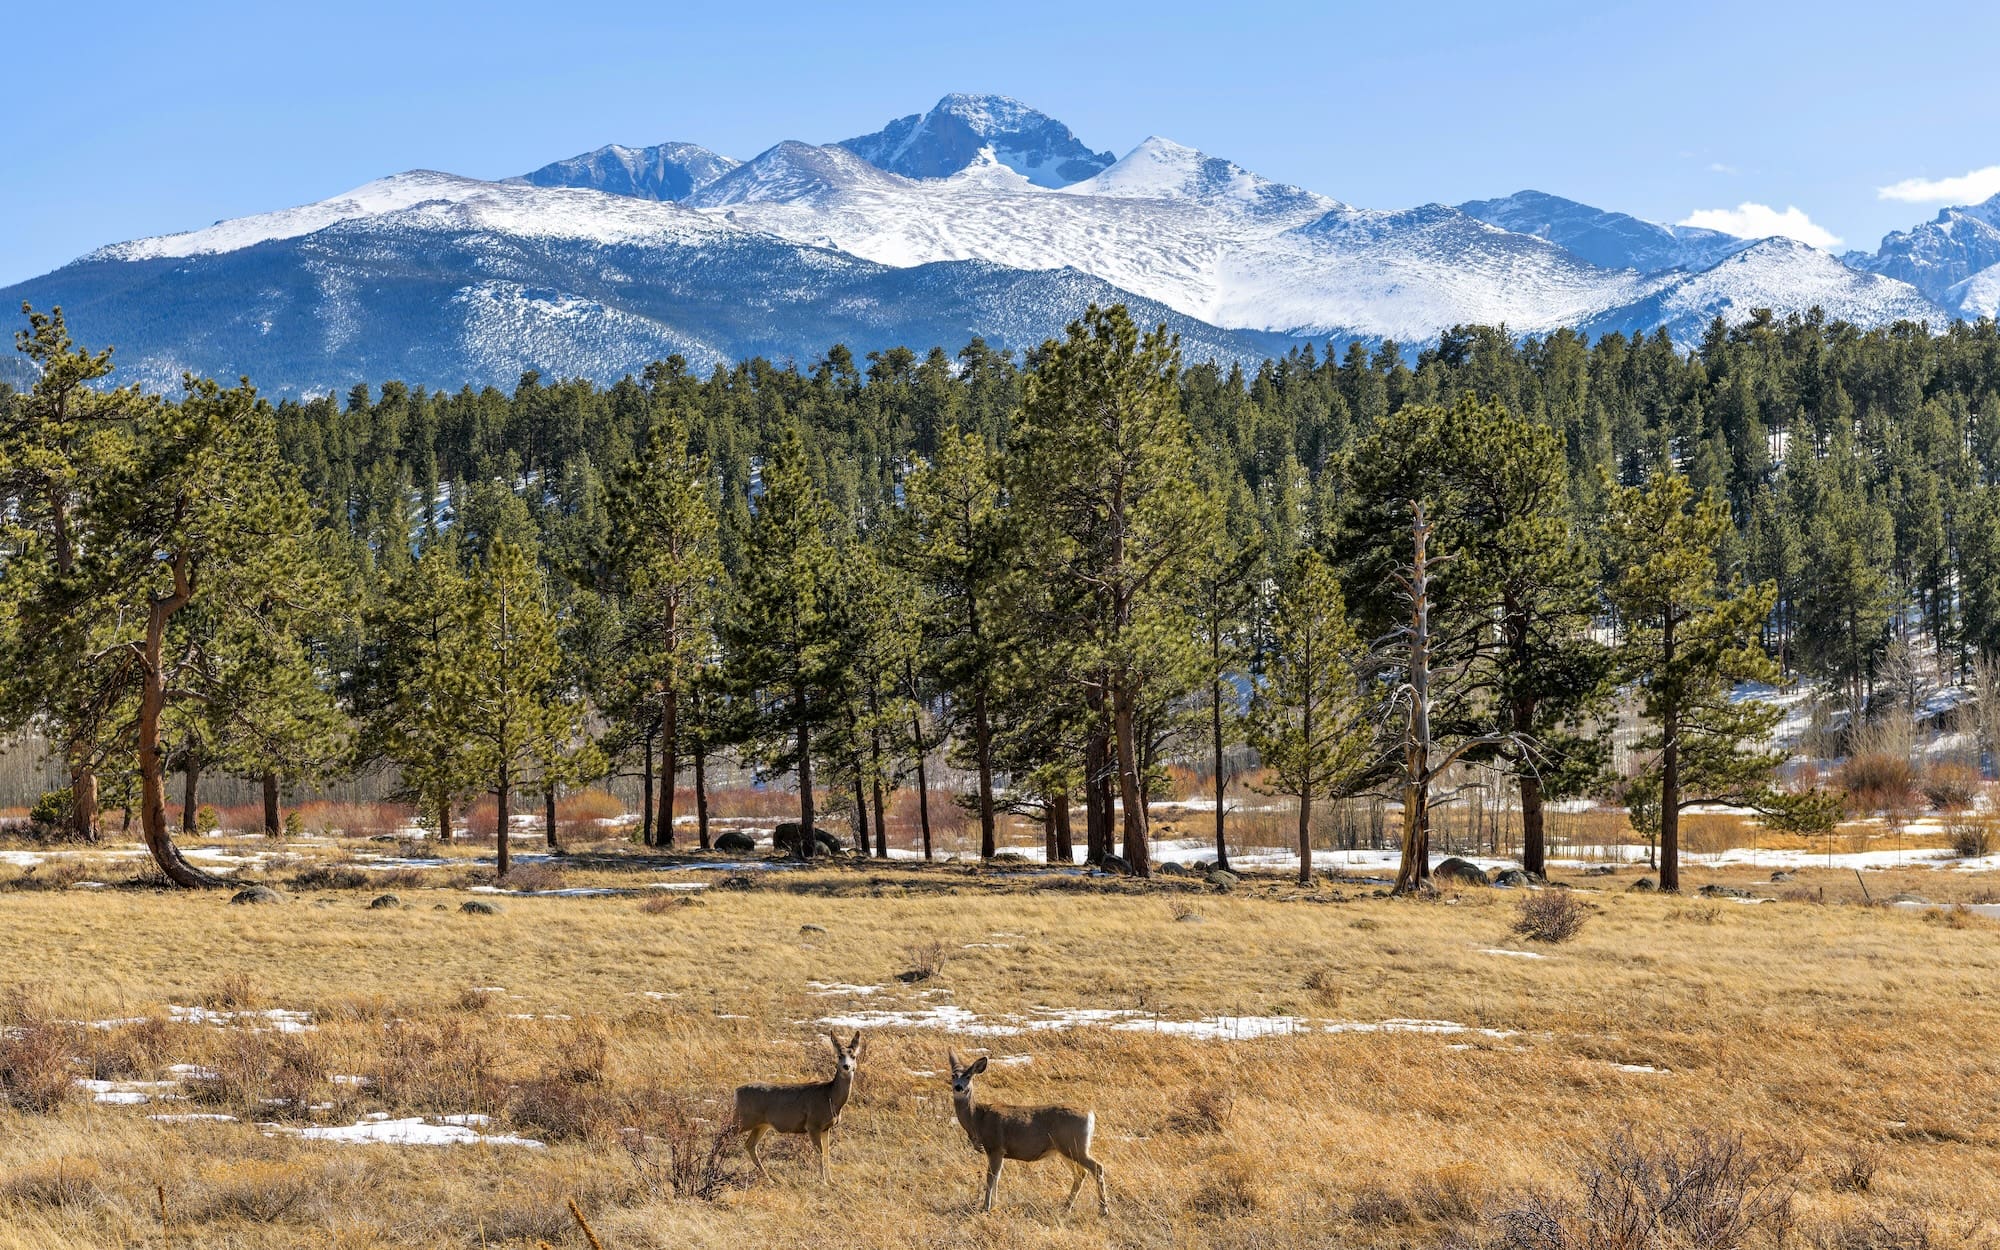
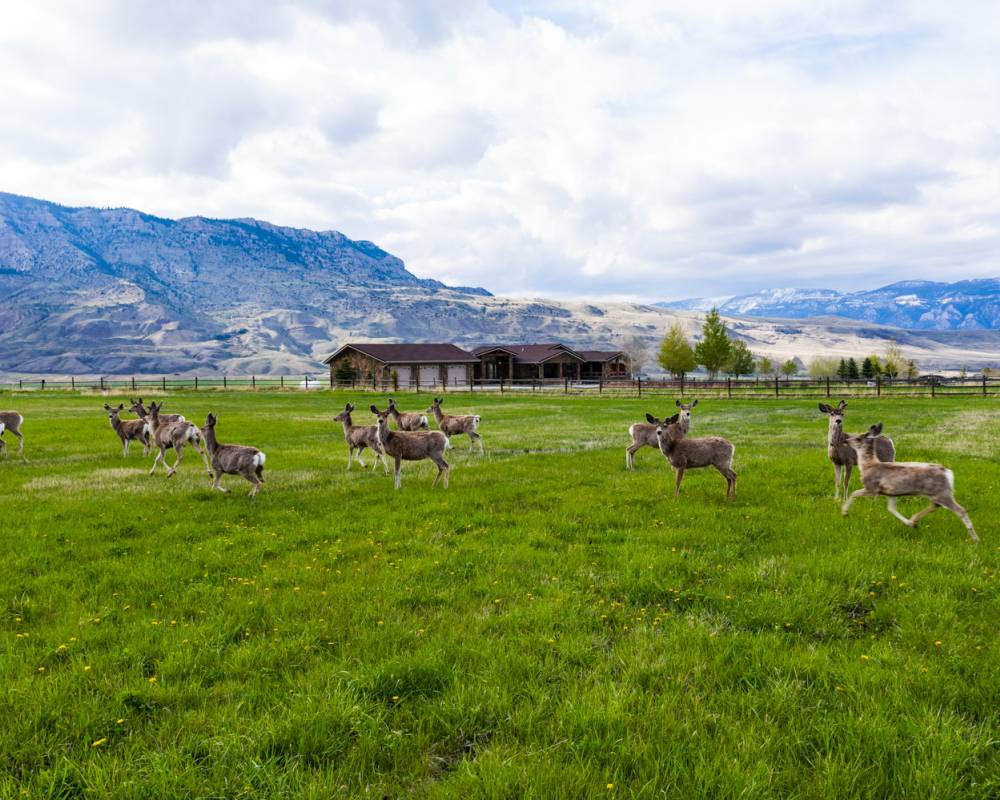
Jake notes that deer behavior in the spring is very regionalized. “If you’re in Colorado, Montana, or Wyoming, those big game animals – it doesn’t matter if it’s mule deer, elk, whitetail, or pronghorn – they’re going to be migrating. In the spring, these animals are still in their winter range and they’re getting ready to start the reverse migration back up to where they’re going to spend most of their summer.” Jake contributes this nomadic behavior to weather patterns. The more snow in the mountains, the more likely deer are to move to areas with less snow and more exposed food.
Conversely, when you get to Eastern Colorado, Nebraska, and South Dakota, deer tend to be less nomadic. “They have a more regionalized home base, which still may be a few miles, but you’re not talking about hundred-mile migrations. So on properties in this region, the deer have just been hunkered down for the winter. Generally, you’ll find them congregating around large agricultural fields and places with a lot of good thermal cover.”
Other things to consider are that does can be pregnant during this time, trying to consume and conserve calories, so they will need to be near ample food and water sources. As spring progresses, big agricultural fields where many deer find safe haven will be plowed up, which will influence the animals’ patterns. “At that point the deer will switch to their summer patterns, browsing newly budded tree limbs and wild plants before transitioning back to row crops.”
Assessing Your Hunting Property
It’s a well known sales tactic to show property mid-summer. Trees are full, flowers are blooming, prairie grasses sway in the breeze. But Jake takes a different approach. “March 1st until mid-May is my favorite time to look at hunting property with potential buyers. From a hunting perspective, that’s the time of year I want to see it.” He feels spring is the best time to look at potential hunting properties for a number of reasons, including:
You’re not intruding into special bedding areas.
You’re not impairing any fall hunting conditions or habitats.
Spring conditions most closely mirror those of the fall, when branches are bare and wildlife travel corridors are most visible.
When assessing a hunting property:
Make note of how the animals move through the land.
See which food sources they’re accessing.
Learn where they’re bedding and how they’re traveling.
Look for scrapes, rubs, and other rut indicators.
Keep an eye out for antler sheds.
When he’s scoping the land, Jake works with his clients to walk it corner to corner, and then begins coming up with a plan for how to make the property better, which leads us to ways to improve the land.
Habitat Improvement Techniques
Like all animals, a deer’s survival depends on three key fundamentals. “Food, cover, and water are the three ingredients animals need. They want food. They need cover and water.” These three necessities provide an excellent framework for your deer hunting land improvement plan.
One of the main ways you can improve your deer hunting property in the spring is by planting and maintaining food plots. Jake notes that food and mineral plots for wildlife are very specific region by region, so make sure to check the regulations in your area. The regional characteristics also determine what kind of food your deer will be looking for. For example, in plains areas like Nebraska, your hunting property might border a large corn field where the deer get plenty to eat. In the West, the food plot you plant can entice the animals onto your property. Jake’s rule of thumb is, “Offer your deer something they’re not getting on the neighbor’s property. If you can’t compete with your neighbor’s bedding, then offer the deer a better food plot or water source, such as a pond, spring, or installing an artificial tank.”
If the deer can find a belly full of corn and grain not far away in an open field, consider providing better cover and water sources that draw them onto your land. Alternatively, if the nearby state forest has an abundance of places to hide, think about putting in a small pond or food plot.
Creating Edge Habitat
You can also improve edge habitat for the deer. Edge habitat is where two different habitat types come together, and deer spend a lot of their time in this type of area. Some things you can do in the spring to improve edge habitat for the deer are:
Hinge cut trees
Prescribed burns
Thin dense forest
These methods allow new foliage to grow, providing fresh cover and food for the animals. If you’re weighing the time, money, and energy costs of both methods, Jake recommends the latter. “Strategies like clearing out trees and prescribed burns require a lot less equipment than food plots. Food plots are invaluable, but there are other more cost- and time-effective methods for improving your deer hunting land.”
Ensure Water Access
Water sources are another key feature of any successful deer hunting property. “Water is something that is overlooked in most regions. Deer will need to hit a water source every day at a minimum.” If you don’t have natural water sources on your property, you’ll want to create or install one. Deer-friendly, man-made water sources can include:
Small ponds
Springs
Artificial tanks
Rainwater capture systems
Finally, make sure the deer can move freely and easily throughout your property. Clear barriers to entry onto your land, such as old fencing and large downed trees and roots. Providing animals logical and accessible ways to move through your land will help ensure they return year after year.
Creating a Hunting Oasis
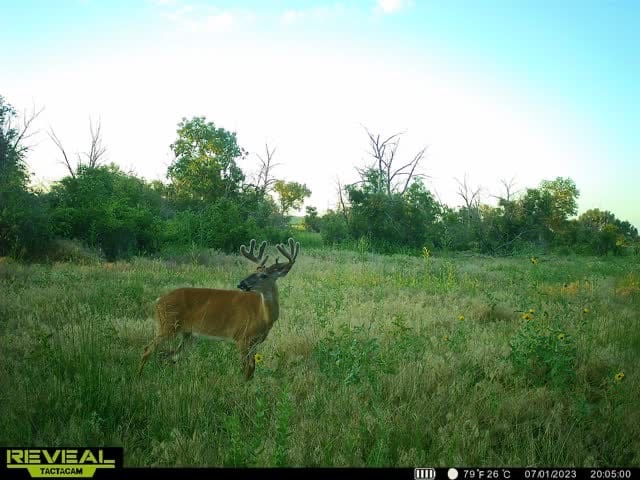
The trail cam industry has come a long way in recent decades. What used to require a trip wire and a visit to your local photo developer now relies on real-time technology and movement-triggered images. “I leave my trail cams out on my farms year-round. If you can help build the full story of the deers’ existence on your property, starting in the spring, you can put the pieces of the puzzle together and learn how you can make your property better.”
Spring is also a great time to assess the conditions of your hunting blinds. Most branches are still free of leaves and other obstructions, similar to how they will be in the fall during hunting season. “Your chances of disturbing deer go way down if you move big blinds around in April or May versus later in the year.”
Managing Risks
One of the biggest factors when it comes to ensuring a healthy deer population on your property is predator control. Jake emphasizes the importance of checking with your local regulators on what is allowed. “Coyotes can have a very big impact on doe retention rates and fawning. If coyote numbers are really high and deer have had a tough winter, predation can make a really big swing in the pendulum in just one year.” He recommends reaching out to your local NRCS to find information on local trappers. Most organizations will offer a cooperative agreement with state and local government agencies, sharing the costs of the effort with the land owner.
You’ll also want to patrol your property for invasive plants. While deer typically avoid eating invasive plants in favor of more flavorful, nutrient-rich naturally occurring plants, a deer population can alter the biodiversity of your land. Work with local organizations and ecologists to ensure your property is free of harmful invasive species.
Additionally, be mindful of diseases in your area that can impact deer herds. Jake makes the point to rely on trail cams to help monitor deer populations. “If you’re in an area that has suffered a disease and you feel your herd numbers are going down, you can mitigate how many animals you harvest in the fall.”
Deer Population Monitoring
Tracking deer populations on your hunting property is a good way to help maintain healthy herd sizes. Make sure to be diligent about collecting annual data. Jake encourages hunters and property owners to be mindful of herd numbers and demographics and adjust their hunting limits accordingly. “If you’ve historically taken two mature bucks and five does, maybe switch that up and not take any does in years when herd numbers are down. Or maybe you leave one management buck but still go after two trophy-class deer. In other years, it might be the opposite and you need to up your management plan and harvest more does because they’re hounding the resources on the land.”
Jake once again relies on trail cams and property data to create a complete 12-month synopsis. As your deer hunting property grows and matures, it’s important to make continual improvements to the land, helping to cultivate healthy deer habitat and populations.
Photo courtesy of Jake Hyland.
Conclusion
Deer hunting property is a specific kind of real estate. But to Jake, it’s much more than that. “This is probably one of the biggest investments of your life, but it doesn’t do any good if you go buy 100 acres and it doesn’t have any animals on it.” He’s a big believer in working with a recreational real estate agent who not only knows the area, but hunts in the area. “Someone who’s familiar with the area. Someone who maybe even owns land in the area. That means they’re personally invested in it.”
If you’re in the market for a viable, successful deer hunting property – one that can become a legacy property, passing from this generation to the next – make sure you look to the experts; people who know a thing or two aboeut ranch and recreational properties because that’s where they grew up, and that’s where they live and hunt today.
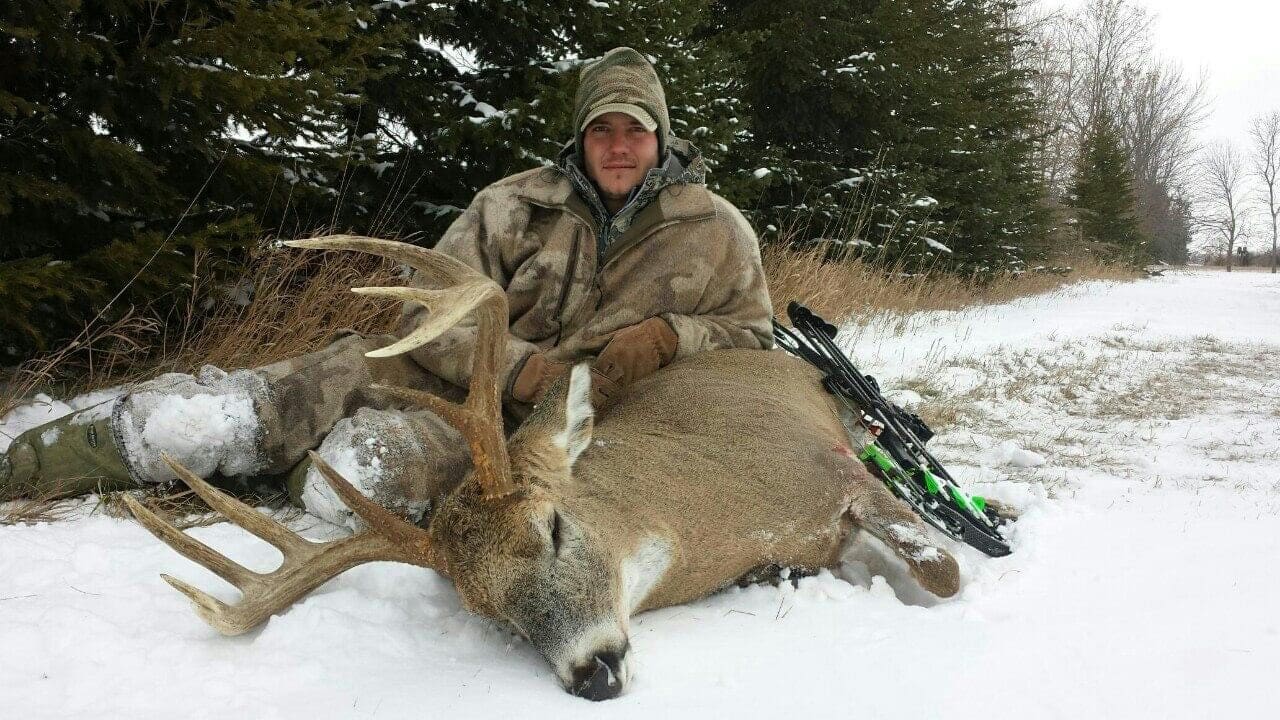
Jake Hyland of Hayden Outdoors with his Archery Whitetail
How to Increase the Value of Your Whitetail Hunting Land
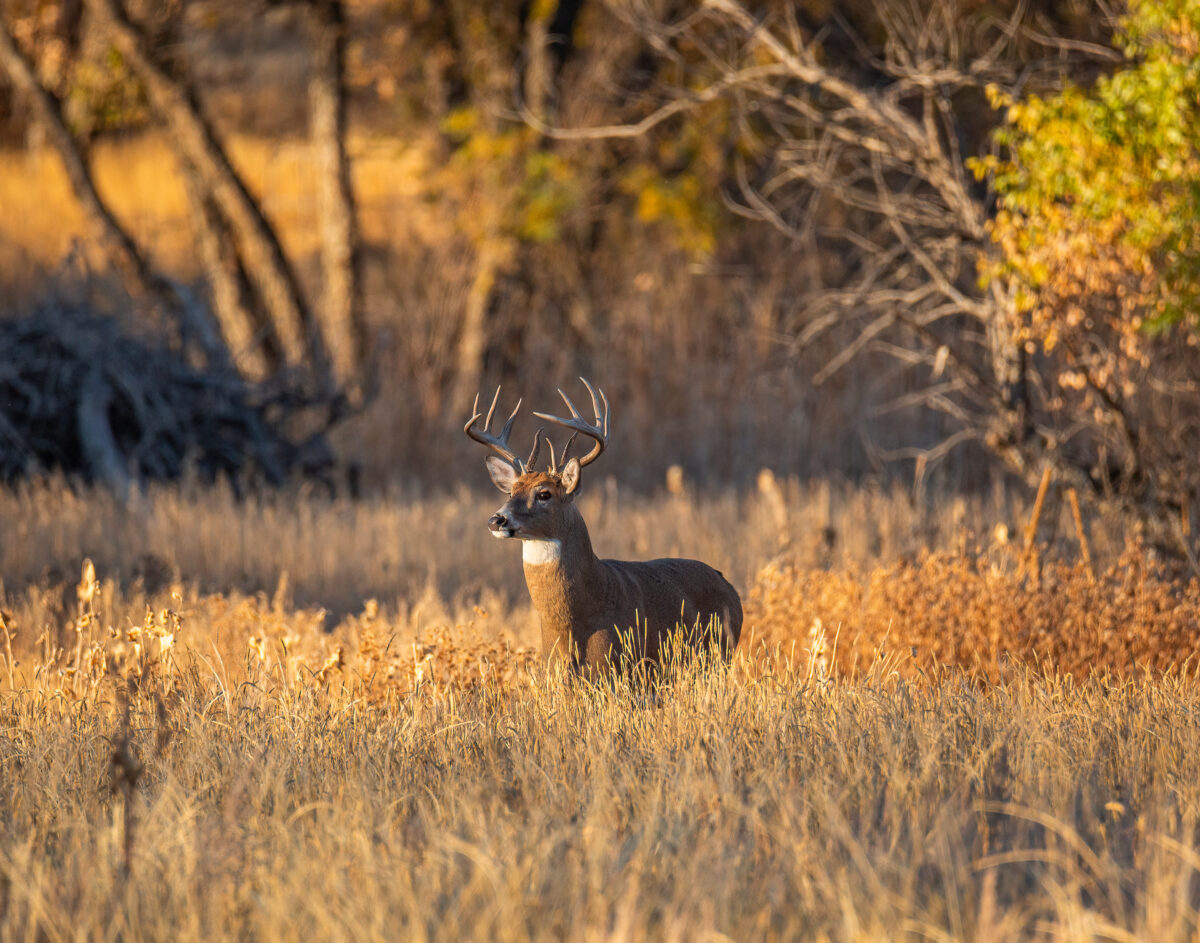
Whether you’ve been hunting most of your life or you’re just out for a walk in the late-fall woods, there’s something magical about spotting those towering whitetail tines. Elegant, quick, and agile, whitetail deer provide plenty of hunters with an exciting challenge. Many hunters prize these beautiful animals, with a specific goal in mind: to increase the value of their whitetail hunting land.
Two of those hunters, John Tate and Shad Sheldon, have hunted whitetail throughout much of the country. John watched his dad bag a buck in the woods of South Carolina when he was just 6 years old and the love of the hunt grew from there. “I was hooked after that and grew up hunting and fishing – doves and trout and bass and deer.” It was a passion that led to a job as a cameraman, editor, and producer for Realtree Outdoors on the Outdoor Channel and ESPN2 for many years before John traded in the camera for his real estate license and a position with Hayden Outdoors.
Shad’s story follows a similar passion-turned-profession trajectory. A hunter since he was just seven-years old, he killed his first deer when he was 10 or 11. Later in life, he bought a tract of land in northwest Kansas that he and his wife developed into a hunting lodge. When they went to sell the property, they turned to Hayden Outdoors for the company’s expertise in selling large acreage hunting, ranching, and recreational properties from coast to coast.
Today, both men combine their extensive hunting expertise with their work for Hayden Outdoors as recreational real estate agents. They understand the importance of optimizing your property for whitetail deer hunting, and, more importantly, how best to do it. In a recent sit-down – the wall behind Shad clad in impressive whitetail and mule deer mounts – John and Shad shared their thoughts on how best to increase the value of whitetail deer hunting property.
Understanding Whitetail Deer
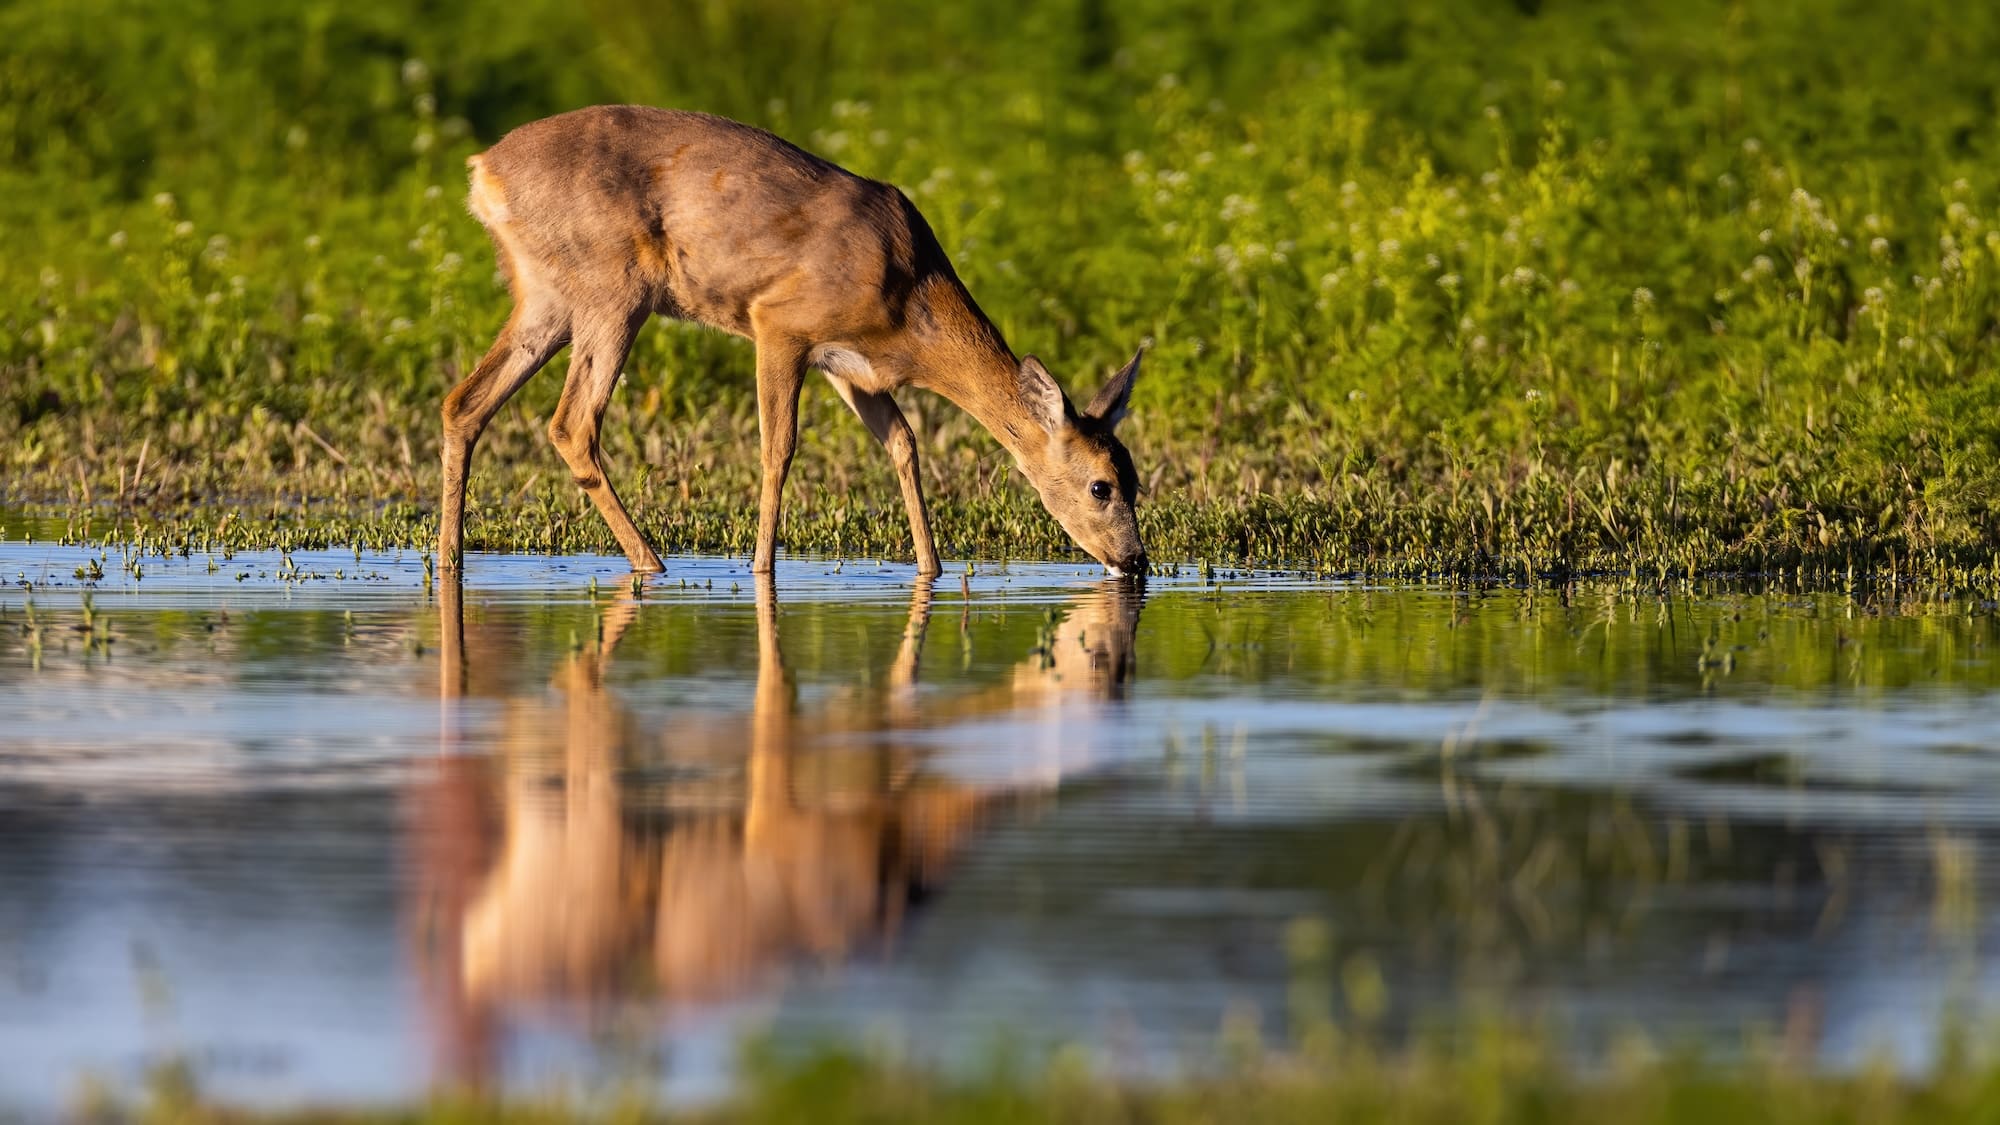
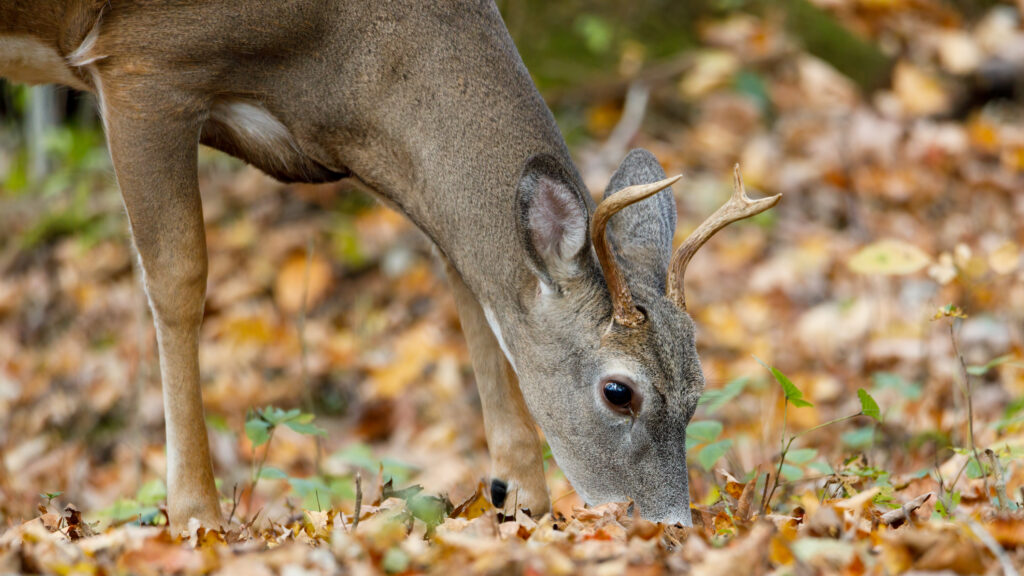
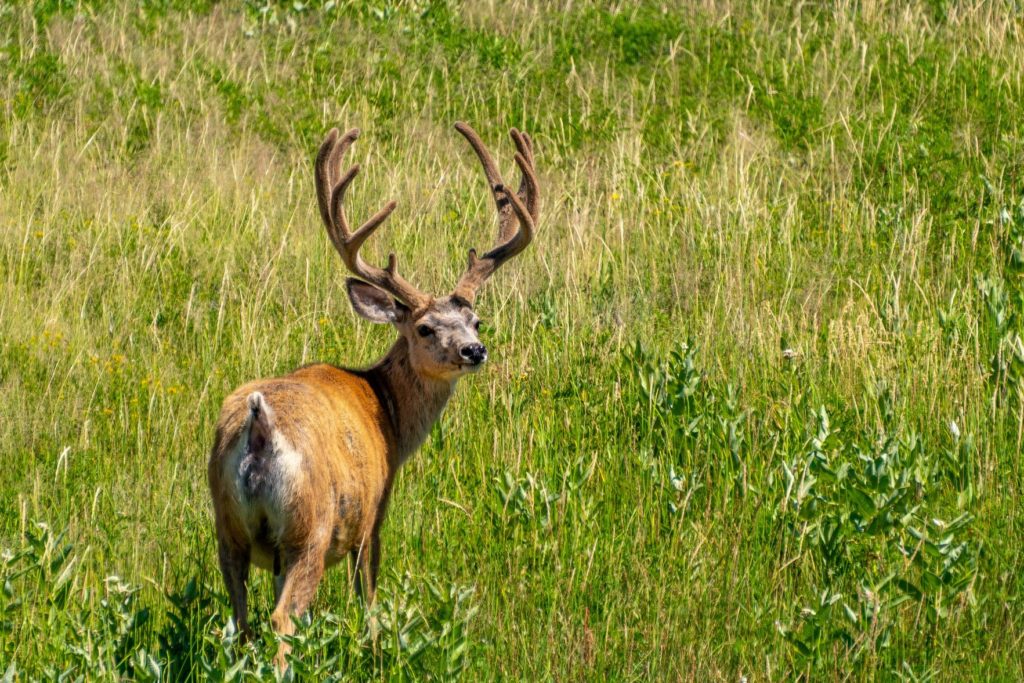
Before you optimize your hunting property for whitetail deer habitat, it’s important to understand the animals. The most notable characteristic of whitetail (or white-tailed) deer – and where they get their common name – is their “white flag” tail that stands alert anytime a deer senses trouble. They are herbivores and munch on a variety of tall grasses and plants (and your garden if you’re not careful about putting up proper fencing).
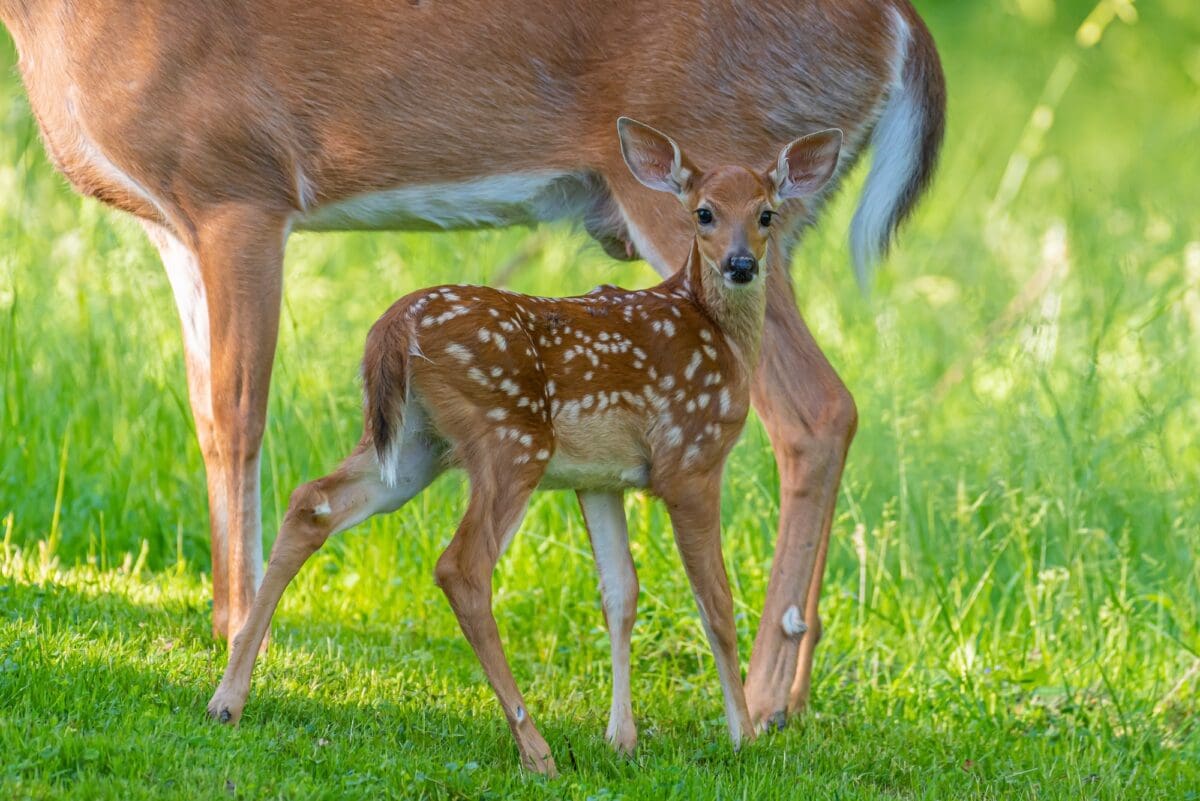
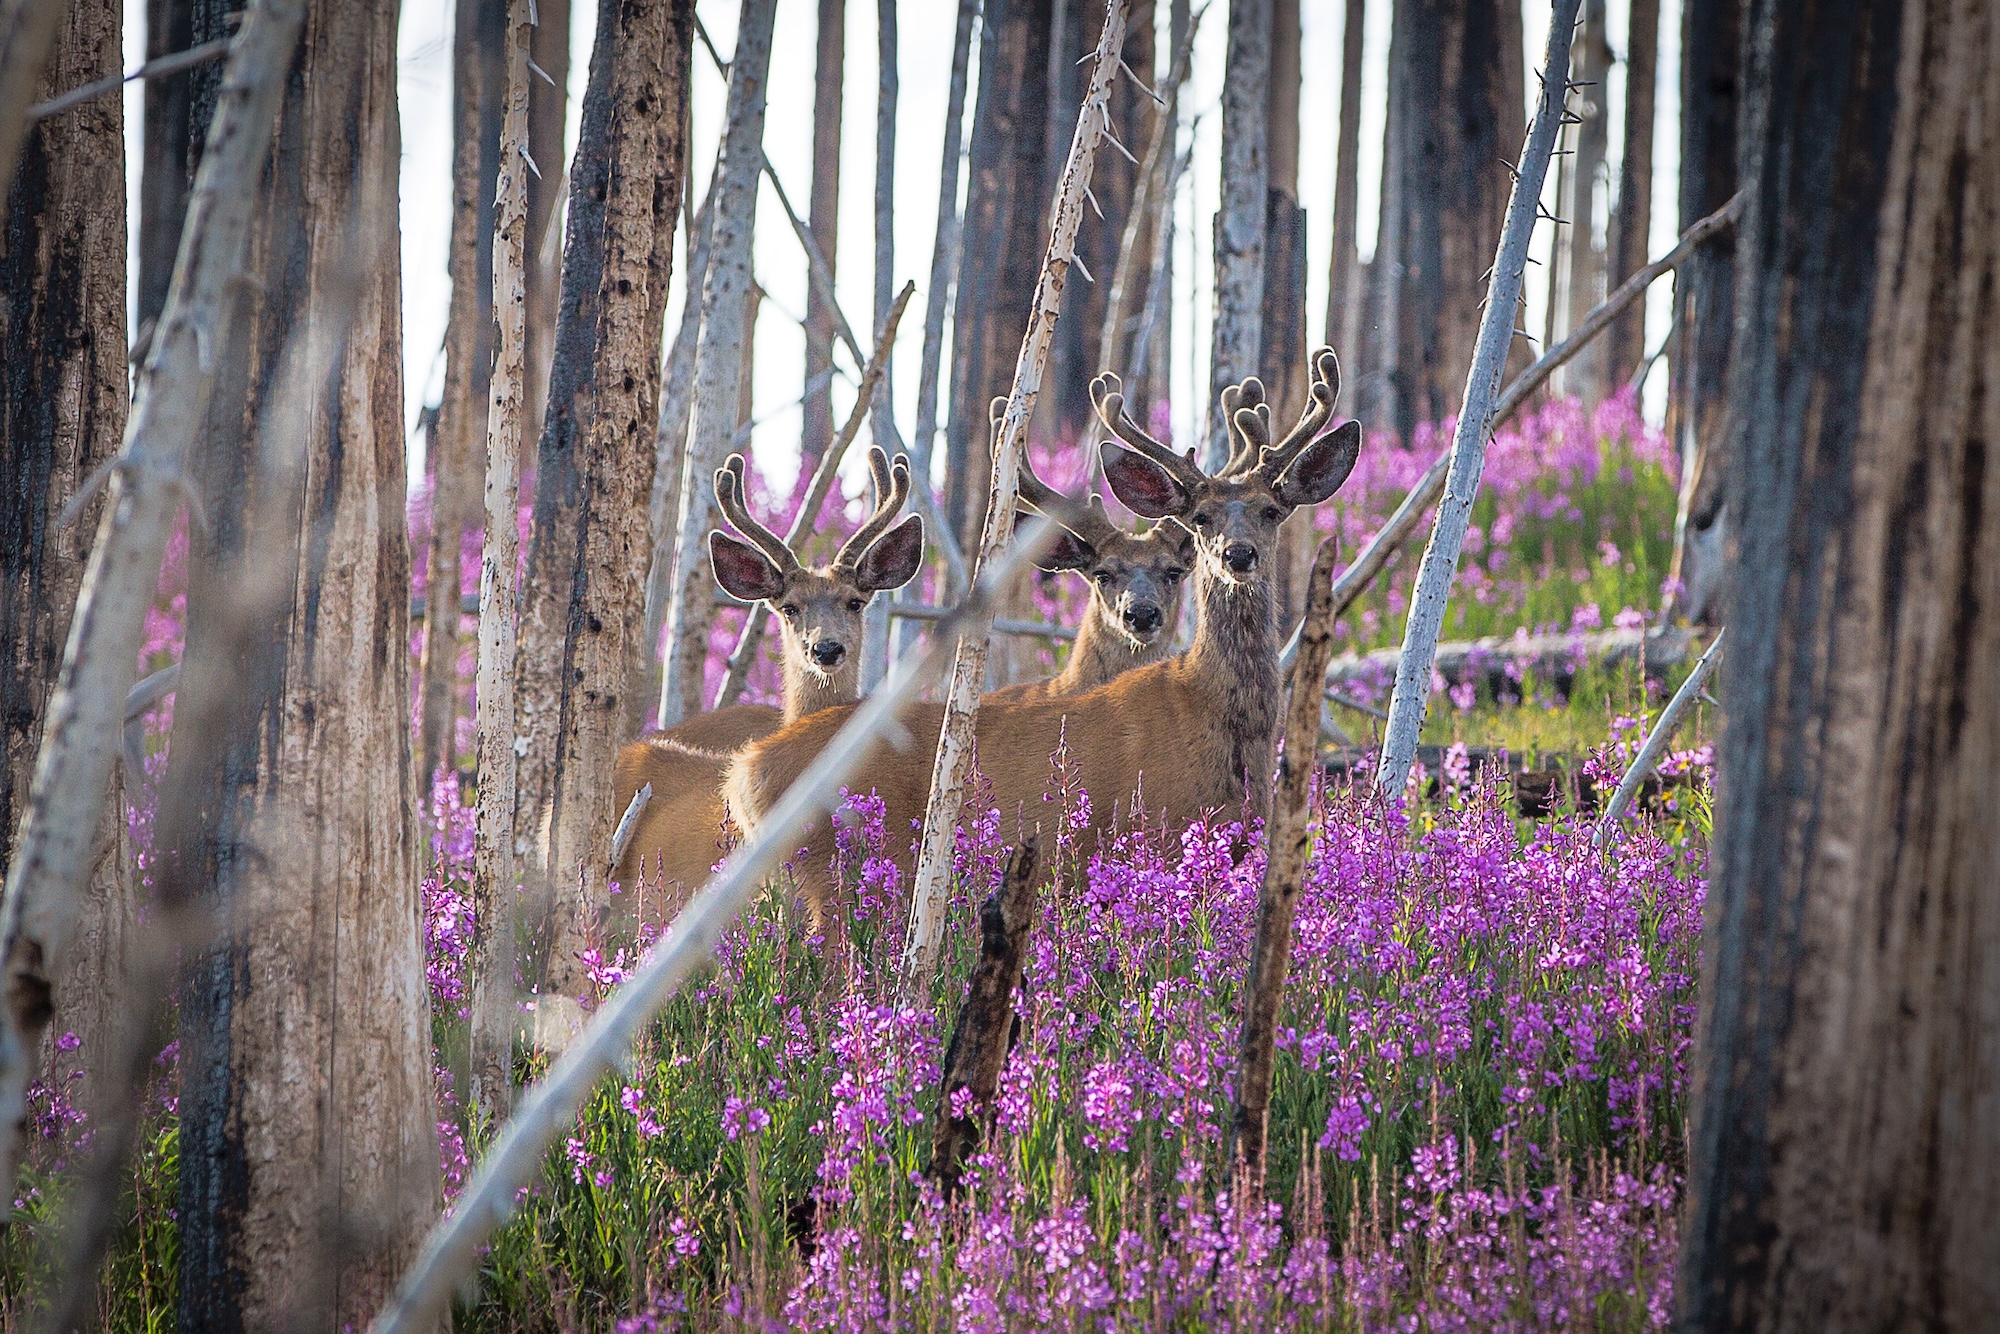
Female deer, or does, typically give birth to between one and three young (fawns) in early spring. Only male whitetail deer grow antlers, and they shed them every winter. Growth typically begins in late spring and throughout spring and summer, the antlers are covered in a fine-hair membrane that has the appearance of velvet. Antlers will grow through late summer and early fall before hardening on the animal’s head, just in time for bucks to defend their territory during the rut. Whitetail deer tend to graze mostly at dawn or dusk, and they have very good eyesight and hearing. Most live between two to three years, although whitetail deer can live up to 10 years in the wild and longer in captivity.
Whitetail Deer Behavior and Habits
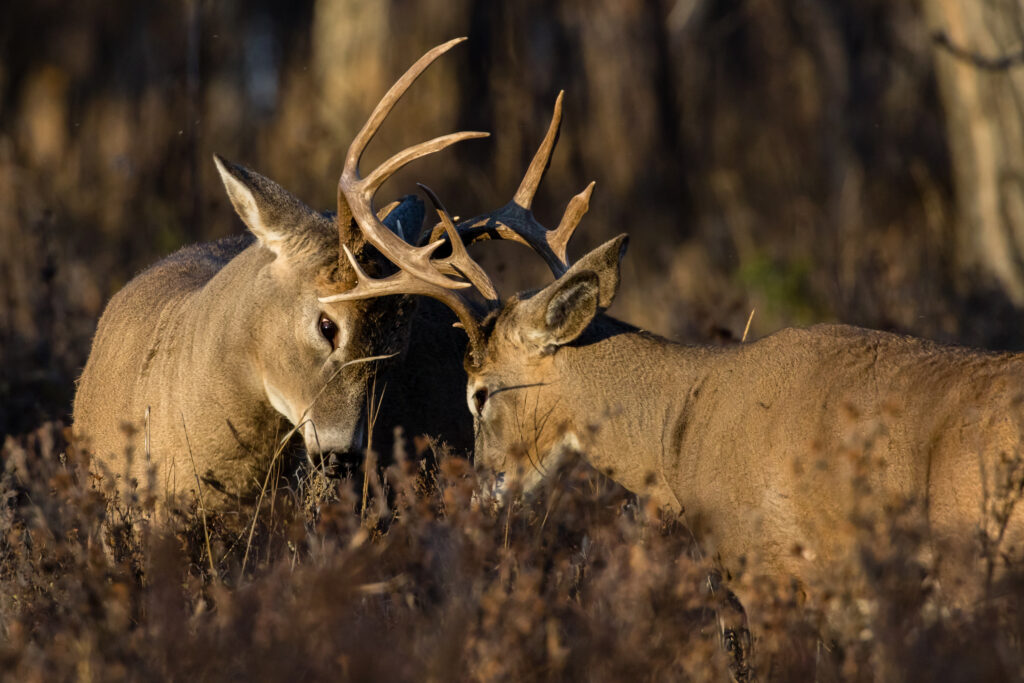
Whitetail deer are pretty solitary animals. Unlike elk, which migrate in herds, whitetail deer typically move in small family units of a doe and her fawns with the bucks living alone most of their lives. Does and fawns tend to bed close to food and water sources while bucks can be very strategic about where they bed down, especially during hunting season.
During the spring and summer, bucks will bed down at their convenience, near food and water. However, once hunting season kicks off and they become aware of hunters in the area, bucks will look for safer haven resting with their backs against a solid surface such as downed timber and large rocks, at least before the rut starts. They watch for downwind predators, listen for any nearby threats, and smell for oncoming hunters.
Does, fawns, and young bucks feel comfortable wandering into open terrain to eat. However, this is not typically the case for mature bucks. They practice safety measures to help lessen threats during hunting season, such as taking indirect routes to food sources and bedding down for large portions of the day, eating and drinking at dawn and dusk. This doesn’t mean it’s impossible to spot a buck during the day, but look for smaller food plots and water sources as opposed to the great wide open. And if you’re tracking the animals, don’t forget about water. Bucks will typically drink between three and five quarts of water a day, so if you can find their water source (keeping in mind it can be as small as a puddle or meager spring), you increase your odds of bagging the prize.
Rutting Season: A Whitetail Hunter’s Dream
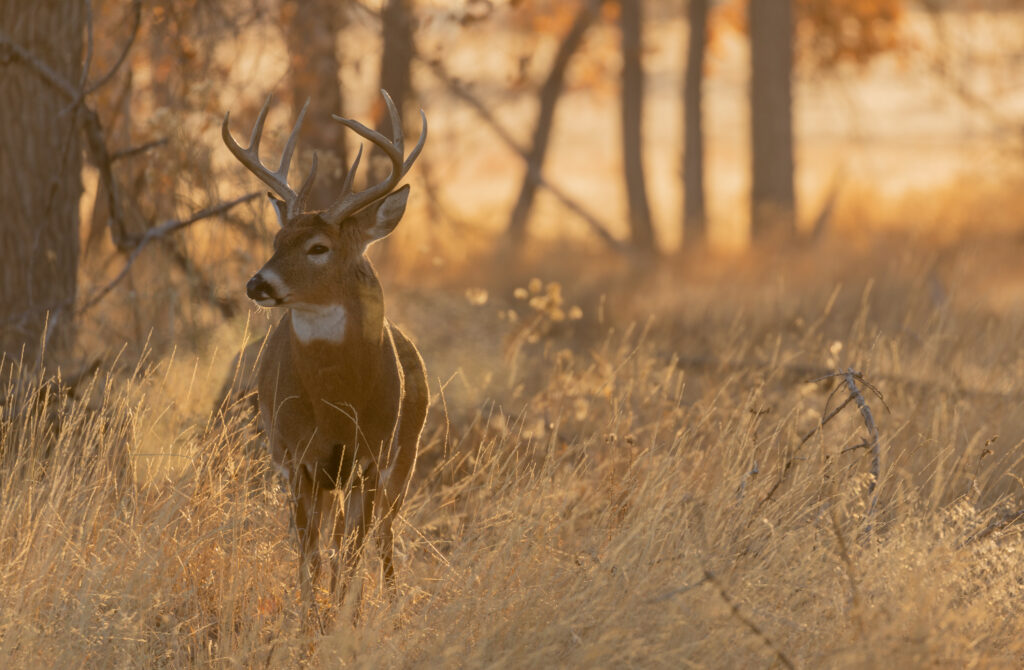
The deer rutting season – when deer mate – takes place between October and early December. Bucks become much more active during this time, venturing out more, and sometimes into more wide open terrain, in an effort to mate with a doe. It’s also a good time of year to spot a big buck during the day as they wander from more well-hidden sanctuaries.
Because of this additional daylight activity, the rut offers the best odds of a hunter bagging a buck. The male deer will go where the does go, so set up your stands and blinds within sight of bedding spots. It’s also this time of the rutting season bucks will abandon meandering trails for more direct routes to food plots and water sources.
There are phases of the rutting season, including:
Pre-rut: mid to late October
Seeking: late October to the first days of November
Chasing (also known as peak rutting): early to mid November
Tending (or lockdown): mid to late November
Post-rut: late November
Second rut: first two weeks of December
If you’re looking to manage whitetail deer behavior on your own hunting property during the rut, John offers some advice. “It all correlates back to food. If you’ve got the food, you’ve got the does. If you’ve got the does, you’ve got the bucks.”
Whitetail Deer Habitats
Food and Water Needs
To that point, what kind of food is best for whitetail deer? John continues, “It’s all situational. In the Midwest, you’ve got the crops. In Wyoming, you’ve got alfalfa. Do soil tests to make sure you’re getting the soil right and plan around crop rotations.”
Shad adds that pH levels are critical. “You want your soil to have plenty of nitrogen and phosphorus in it. Generally, you need to have both protein and minerals. Alfalfa, wheat, clover, and oats is a good mix.” Both men point out that owning whitetail deer hunting property is a 365-day endeavor. “Having a successful whitetail hunting property is a year-round job. You can’t just show up on opening day. To be successful, year-in and year-out, you need to be thinking about the land,” says John.
Shad agrees, “I want to make sure I’ve got enough mineral holes in summer and again in January. The minerals have to be in the deers’ bodies by hunting season to help grow their antlers. We make sure, no matter what time of year, they have access to plenty of minerals.”
Test your soil and establish the best mix of food for whitetail deer in your area. Common whitetail deer foods include:
Seeds and nuts: acorns, chestnuts, and pecans
Row Crops: oats, clover, alfalfa, wheat, soybeans, and corn
Other wild or cultivated plants like: apples, forb, berries, and native grasses
Like all other animals, deer also need plenty of pure, clean water. Sources will vary from state to state. If there is not an obvious natural water source on your land, such as a lake, pond, stream, creek, or spring, look for alternatives. These can include old wells, troughs, and other rain capture devices.
Cover and Shelter
Deer need to bed down and feel safe doing it. They require proper ground cover and sanctuary, but this doesn’t mean you need large amounts of established forest on your property. John offers this rule, “33/33/33 is a good balance – roughly one-third full timber, one-third edge property, and one-third open space.”
Successful whitetail deer hunting land also features tall grass. “One thing I’ve learned,” says John, “Is that you don’t have to have a lot of trees to be successful. Features like fence row and creek beds provide great cover and shelter.” During the offseason, assess your property and learn where the deer trails are and where the main corridor is.
One point of note is cattle. If you run cattle on your land or lease it to someone who does, it’s important to be mindful of when you pull the cattle off. Shad makes his rancher pull off the first of September. “This allows for a good 30 – 45 days with no cattle on the property to allow deer to get back into the land.” According to the seasoned hunters, a cow can ruin a deer hunt faster than just about anything.
Managing a Whitetail-Friendly Property
Spending plenty of time walking your whitetail hunting property is the best way to learn where the deer travel, how they navigate the land, and what they’re eating and when they’re eating it. Keep these practices in mind for maintaining a successful whitetail deer-friendly property:
Maintain built infrastructure such as stands and blinds.
Plant food deer like to eat to help keep them coming back to the property versus wandering farther afield in search of food and water.
Trim trees and hinge cut trees as necessary, but don’t overdo it. Make sure your efforts contribute to, not take away from, the whitetail deer habitat on your land.
Improving Your Property Value
Building a good environment for whitetail to thrive benefits not only the deer population on your land, but also has a positive impact on your property value. Well-maintained trails and roads, properly fertilized and cleared row crops, and good sources of water will attract deer – and help maintain your bottom line.
As always in real estate, a well-maintained, turnkey property goes a long way towards building value – and that includes all of your hunting infrastructure. In addition to any homes on a property, make sure all blinds and stands, storage buildings, and barns are clean and sound.
The most important thing to remember when you’re trying to sell or appraise a whitetail hunting property? “Pictures!” says Shad. “If we’re gonna sell it, we’ve got to have proof.” You can talk about those eight-point bucks all day long, but unless there’s actual proof they exist on your property, you might as well be convincing buyers BigFoot hangs out there, too.
Strategies for Scent Control
Whitetail bucks have a very keen sense of smell, so managing your own odors and scents is important to getting in close enough for the kill. Enlist these tips before hunting season starts or you head into the field to help yourself remain as undetected as possible:
Store blinds and stands in a controlled environment, such as a clean storage shed. Simply putting things away in the garage or stashing them behind the shed can result in unwanted contamination from other fumes and odors.
Use scent eliminator sprays on clothing and equipment. Wipe down your gear at the end of the hunt or the end of the season and then store in an air-tight tote.
Wipe down boots, including the soles, with scent eliminating products.
Make sure your truck or ATV is clean and clear of other animal and human scents.
Use unscented laundry detergents and fabric softeners during hunting season.
Avoid scented soaps, shampoos, or deodorants before you head into the field.
For the best scent control, however, Shad simply says, “Stay down wind.” And he’s not wrong. Paying close attention to wind direction while you’re hunting offers one of your biggest advantages to being on the right side of that big buck when the time comes.
John agrees, “You can use scent-free soaps and sprays, but at the end of the day, you’ve gotta hunt the wind. It’s your biggest adversary and your biggest helper. My experience is, those scent reducing techniques only help on the borderline. The only way to fool whitetail deers’ noses is to be downwind of them.”
Hunting Ethics and Conservation
When it comes to managing your whitetail deer hunting land year after year, hunting ethics and resource conservation lead the way. Make sure your visitors and guides have taken proper hunting safety courses, and understand the importance of ethical shot placement and how best to achieve it.
Working to conserve your resources prevents disease and overpopulation. It also benefits all of the species that wander your property. “The deer aren’t the only ones that benefit from these food plots and land improvements,” says Shad. “Quail do; mule deer do; turkeys do. I’ve seen disease and drought ravage deer populations, but we can, to a point, improve the land deer are living on with food plots, trimming vegetation, and hinge tree cutting so the deer aren’t stressed. It can give the herd a healthy existence for years and years to come.”
Conclusion
Whitetail deer hunting is about more than meat. It’s about more than the trophy. It’s about spending time outside with friends and family and connecting with the land. For John and Shad and so many other passionate hunters like them, it’s a lifelong journey.
“It’s a good way to get outdoors. To connect with your family. A good way to spend time not on the phone or in front of a TV,” says John. “We all want to shoot a deer like the ones on Shad’s wall, but those animals represent a story and a journey and where he came from. The five-pointer my dad shot in South Carolina when I was a kid means just as much or more to me than anything I’ve shot because I was with him. Now I’m hunting with my nephew. I’ve hunted with a lot of people over the years. Some hunts were successful; some weren’t. It’s funny how friendships are born being out in the woods together, around a whitetail deer camp.”
John continues to point out that not as many people hunt any more, and yet, it remains an important tradition and inextricable way to connect with the land, with conservation, and with whitetail. Learn more about owning your own whitetail deer hunting land in Kansas, North Carolina, Missouri, or Nebraska, and all of the magic and reward that comes with it.
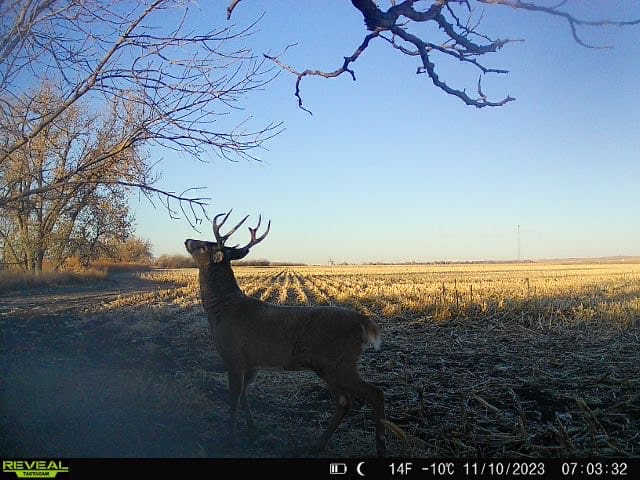
The Benefits of Setting Up Trail Cams on Your Property
Trail cameras, or more commonly, trail cams, are a helpful tool when it comes to monitoring your property.
Scouting and glassing for this year’s hunt can be thrilling – catching a glimpse of the trophies that might be waiting there as the season nears. Adding some additional eyes to the effort, including late in the evening and at night when some animals become particularly active, can help your odds even more. Trail cams are providing this kind of visibility, and gaining popularity because of it. Those are only a few of the benefits of setting up trail cams.
Trail cams are discreet cameras people position throughout property – and sometimes on public lands – to get a complete picture of animal activity. These types of cameras are triggered by a motion sensor, capturing pictures as the animal moves through the field of vision. They range from relatively basic, taking pictures that are stored on a secure digital card and retrieved later, to much more high tech. Cellular Cameras fall into the latter category, offering a mobile app that sends trail cam images to your device in real-time.
While the technology continues to get better and better, the strategy behind mounting and positioning trail cams is also important to consider. Three Hayden Outdoors recreational real estate experts recently chimed in on how they use trail cams for hunting, safety, and general wildlife management. As lifelong hunting guides and outdoor enthusiasts, Shad Sheldon, Heath Thompson, and Lonnie Gustin provided a brief master class in proper trail cam management. Hailing from the Plains, the South, and the Rocky Mountain West respectively, their insight spans a variety of purposes and touches nearly every corner of the country.
Trail Camera Basics
Quality and capabilities vary, but most cameras feature:
Power source
Make sure to see how long a camera’s battery lasts.
Detection circuit or PIR sensor
This piece detects both heat and motion, then triggers the camera.
Infrared LEDs
The small lights allows for night-vision pictures.
Protective casing
Make sure yours can stand up to the elements in your area.
Mounting apparatus
Choose a camera you can easily install
Types of Trail Cams
Modern trail cameras fall into two categories: cellular and non-cellular. Each has their benefits. Non-cellular cameras don’t allow for real-time viewing, but they are typically less expensive. Alternatively, cellular cameras allow you to keep an eye on animals without having to retrieve camera chips or disturb the area.
Shad Sheldon has been hunting since he was 7, and bagged his first deer at 10. He started bow hunting in his late teens, a passion ever since. He and his wife ran a hunting lodge in Goodland, KS until about 10 years ago, when they turned to Hayden Outdoors to help them sell it. Not long after he joined Hayden as an agent, specializing inhunting properties andfarmland.
These days, Shad and his wife spend their time in eastern Kansas, as close to the land and its rhythms as possible. He relies on trail cams for a variety of reasons, both personally and professionally when he’s helping clients list their land. We asked what he looks for in a good trail camera.
“I like good resolution and good pictures with true color. Most cameras will fire right away; you won’t get a lot of blurry moments. I like to put great pictures on our website to help clients sell property. And of course, it needs to be easy-to-use.”
Choosing a Trail Cam
Before you throw down a good chunk of change – trail cams can range from $50 – $600 – it’s good to know what you want to accomplish with your equipment. Talk with your local dealer about the features of the camera. Some important things to think about are:
Do you want a wireless camera, or will traditional work?
Do you need video capabilities as well as still shots?
What kind of image quality do you want?
What is the trigger time – the time between the animal moving across the field of vision and the picture being taken? Slower trigger times result in blurrier images.
What is the power supply and/or battery life?
Does the camera offer security features to help prevent theft?
Setting Up Trail Cams
Heath Thompson grew up on a farm in Georgia, and has a degree in Forestry. He’s been in the business a long time, hunting, guiding, and managing land. These days, Heath’s family owns 1,500 acres, row crops, and grows hay. He has a history in agricultural, hunting, timber, recreational, and farmland with Hayden Outdoors in the Southeast. He understands the importance ofthe perfect hunting property like no one else.
When it comes to trail cams, Heath doesn’t mess around. “I worry about additional scents on my cameras, so I’ll hang them outside at my house in the yard for a while to get the correct smell. When I go to place them on the property, I’ll wear rubber boots and gloves.”
Placing trail cams in the right spot is key. Our agents have some tips:
Set up near scrapes so you can see which bucks are scraping when.
Set up feeders year-round to see seasonal and yearly patterns.
If allowed, consider bait such as a mineral lick, soy, alfalfa, or scent.
Look for game trails. Mount your camera alongside them to track animal movement.
Look for water sources, and mount a camera nearby.
How many cameras you hang depends on the size of the land, your objective, and your budget. Heath offers these tips on trail cam height. “I hang mine three feet from the ground to the bottom of the camera to get a full view of the animal. I also keep the sun’s direction in mind, pointing cameras northeast or northwest to avoid over exposure.”
Look closely for nearby plants that might trigger the camera. There’s nothing worse than hoping for a great shot of that Boone-and-Crockett buck only to get hundreds of pictures of grain or a branch.
Using Trail Cams to Enhance Wildlife Observation
You might be using trail cams for hunting, or just to get an inside view of the wildlife. Lonnie Gustin is familiar with both. He’s been hunting and wandering the mountains of the West his whole life, but is quick to tell you he’s never been an outfitter. “I always said I liked hunting too much to be a guide.” Nowadays, he hunts with his boys along the Rocky Mountain Front throughout Wyoming and Colorado. He calls 4,000 acres along the Western Slope of Colorado and Wyoming home, and joined Hayden Outdoors “back in the day,” about 13 years ago. If you’re looking to buy or sell a farm, hunting property, or ranch land in the area, Lonnie is your guy.
He uses trail cams all the time, most commonly placing them near water sources where he might catch a glimpse of big game – typically elk or mule deer in his neck of the woods. And sometimes, a camera will capture something else – another big Western predator making its way across the land. Trail cams are an excellent way to learn more about the wildlife in the area. Bears, wolves, lynx, mountain lions, coyotes, fowl, and varmints – trail cams paint broad strokes of the wildlife living on your land. For Lonnie and others, trail cams also offer a unique way to understand the local wildlife population – how and where animals are moving; which water sources they rely on; and how land use shifts from one season to the next.
Using Trail Cams for a Better Hunting Experience
While trail cams can certainly enhance the hunting experience, Heath gives fair warning, “The worst thing you can do is look at trail cams. It’ll make you sick; big buck after big buck you might never see again.” And while he’s right – some of the biggest racks don’t make it onto the wall – having trail cams on the property can help you prepare.
He adds, “We use trail cams for animal counts. We count every deer we see. It lets us know what’s on the property.” Lonnie counts on trail cams for knowing the time of day animals are coming in. And Shad likes to use them to learn more about what comes after hunting season. “After last rifle season was over, we had about three to four 150-class bucks show up. We saw new deer move in.” Heath notes trail cams aren’t just for big game. “They’re great for turkey hunting, too. Trail cams let me see where the turkeys are, because down here, turkeys don’t gobble a lot. So we’re using trail cams to see where they’re traveling in and out.”
Using Trail Cams to Increase Property Value
Hayden Outdoors real estate agents are known for showcasing every aspect of a property when it comes to selling it, and cutting-edge cellular trail cams are a big part of the strategy. Shad sums it up this way: “The bigger bucks I pull off the property, the more it’s going to go for. The more good pictures I have of those bucks, the more money we can bring in.”
Lonnie agrees, “Trail cams are pretty damn important when I’m selling land. They let me prove the wildlife moving on the property. If I can actually show people some background and some shots and they can see where that huge elk was, it’s an important selling point.”
Heath goes so far as to compile entire albums for the properties he represents. “You need to have proof, and you can’t get it in just a week. Property trail cam capture takes a long time. Having historical timestamps on a lot of photos adds a lot more value than just having one good buck on a single trail cam shot.”
In addition to buying and selling, trail cams add additional value to the property by aiding in pest control and property security. Placing trail cams at a property entrance or lesser known access point is a great way to see if people are wandering in when they shouldn’t be.
Conclusion
Setting up trail cams on your property offers a variety of benefits, including:
Hunting preparation
Wildlife observation
Property security
Habitat conservation
Adding a trail cam system to your land can help bolster its value over time. It’s also an excellent way to learn the ins, outs, and animals who call your acres theirs, too. Chat with your local sporting goods dealer about the best setup for your land, or upgrade to trail cams that let you know which four-legged creatures are cruising though as soon as they’ve crossed the camera’s lens.
What to Know Before Building a Gun Range on Your Property
For the past 35 years, Clay Owens has been among the top names in big game hunting in the U.S. He was an outfitter in Western Colorado, managing three of the largest operations in the state for 20 years. Today, he still actively guides hunts near Steamboat Springs, and in 2018, he applied his deep knowledge of rangelands and Midwest hunting properties to a different endeavor – recreational real estate agent for Hayden Outdoors. Neatly put, Clay knows a lot about building a gun range on your property.
As a guide on some of the country’s most notable hunting lands, Clay became an expert in setting up long-range shooting courses. Now he puts that knowledge to good use, helping his clients find property that can accommodate a personal gun range, and he’ll be quick to note that when you’re building a gun range on your property, there are several considerations you should keep in mind. It’s also important to note these considerations are general guidelines, and the specific requirements vary depending on your location.
Clay stresses, “It’s crucial to consult with local authorities, legal professionals, and shooting range experts who can provide guidance based on your jurisdiction’s laws and regulations.” With that in mind, he also provided these key factors to consider when setting up a personal gun range.
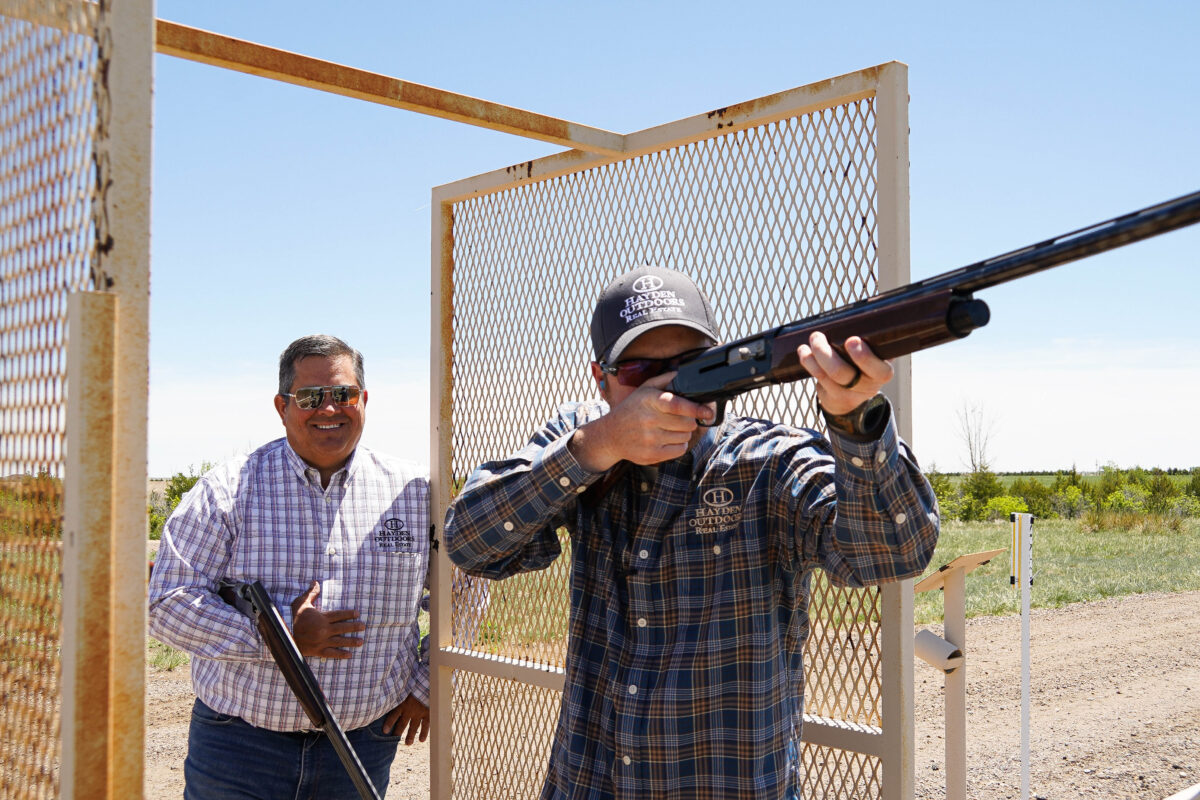
Building a shooting range on your property to practice for hunting – Hayden Outdoors agent Clay Owens guides Allen Treadwell on a predator hunt filmed for Life on the Land TV Show.
Assessing the Suitability of Your Property for a Gun Range
There are a variety of property considerations for home gun ranges, starting with size and a proper backdrop for the target area.
“The biggest safety factor is your backdrop; it needs to be big enough to prevent ricochet and bullets from flying past the target, typically 20 – 60 feet high.” Clay explains this backdrop can be an established natural feature, such as a cliff wall, or something you build, like a large dirt bank. If you’re looking to buy land that’s well suited for a home gun range or build one on land you already own, Clay recommends utilizing heavy topography, such as canyons and hills, for a backdrop. The parcel should also be a minimum of 40 acres, although simple home handgun ranges require less acreage. If your goal is long-range shooting, the number goes up, with 500 acres being the minimum land you should look for to ensure success and safety.
To put this into real world context, Clay is currently overseeing the build and installment of a long range at the Hayden Outdoors Ranch in Nebraska. About as complex and involved as a personal gun range can get, this impressive amenity will feature a five-stand shot range for sporting clays, a hand gun range with a cliff wall backdrop to prevent any escaped projectiles, and a 1,550-yard long range with steel plate targets every 100 yards. All of this is located in a canyon where shooters can practice out of the wind.
Understanding Legal and Regulatory Requirements
Once you have established a workable piece of land for building a gun range on your property, it’s important to check in with relevant county officials to ensure you’re complying with any permitting, insurance requirements, private gun range laws, and noise ordinances.
Clay suggests starting by visiting your county website to determine who the best person to talk to might be. Typically this is the county commissioner or sheriff’s office. And while it’s not necessary on private land, he also suggests putting up proper signage around the gun range so visitors know it’s an active shooting zone.
“Generally speaking, most rural areas are not going to have any kind of regulation for that type of activity. The closer you get to an urban or neighborhood setting, the more you’ll need to take noise and compliance into account.”
Safety Considerations for Your Home Gun Range
Again, Clay emphasizes the importance of implementing proper backdrops, bulletproof barriers, and safety berms to mitigate ricochet or stray bullets. It’s also key to establish clear safety protocols and range rules. “It’s important to let people know when you are having active fire on the range. For dude ranches, hunting properties, or family plots where people are doing other activities, put up a sign that designates the range is active.”
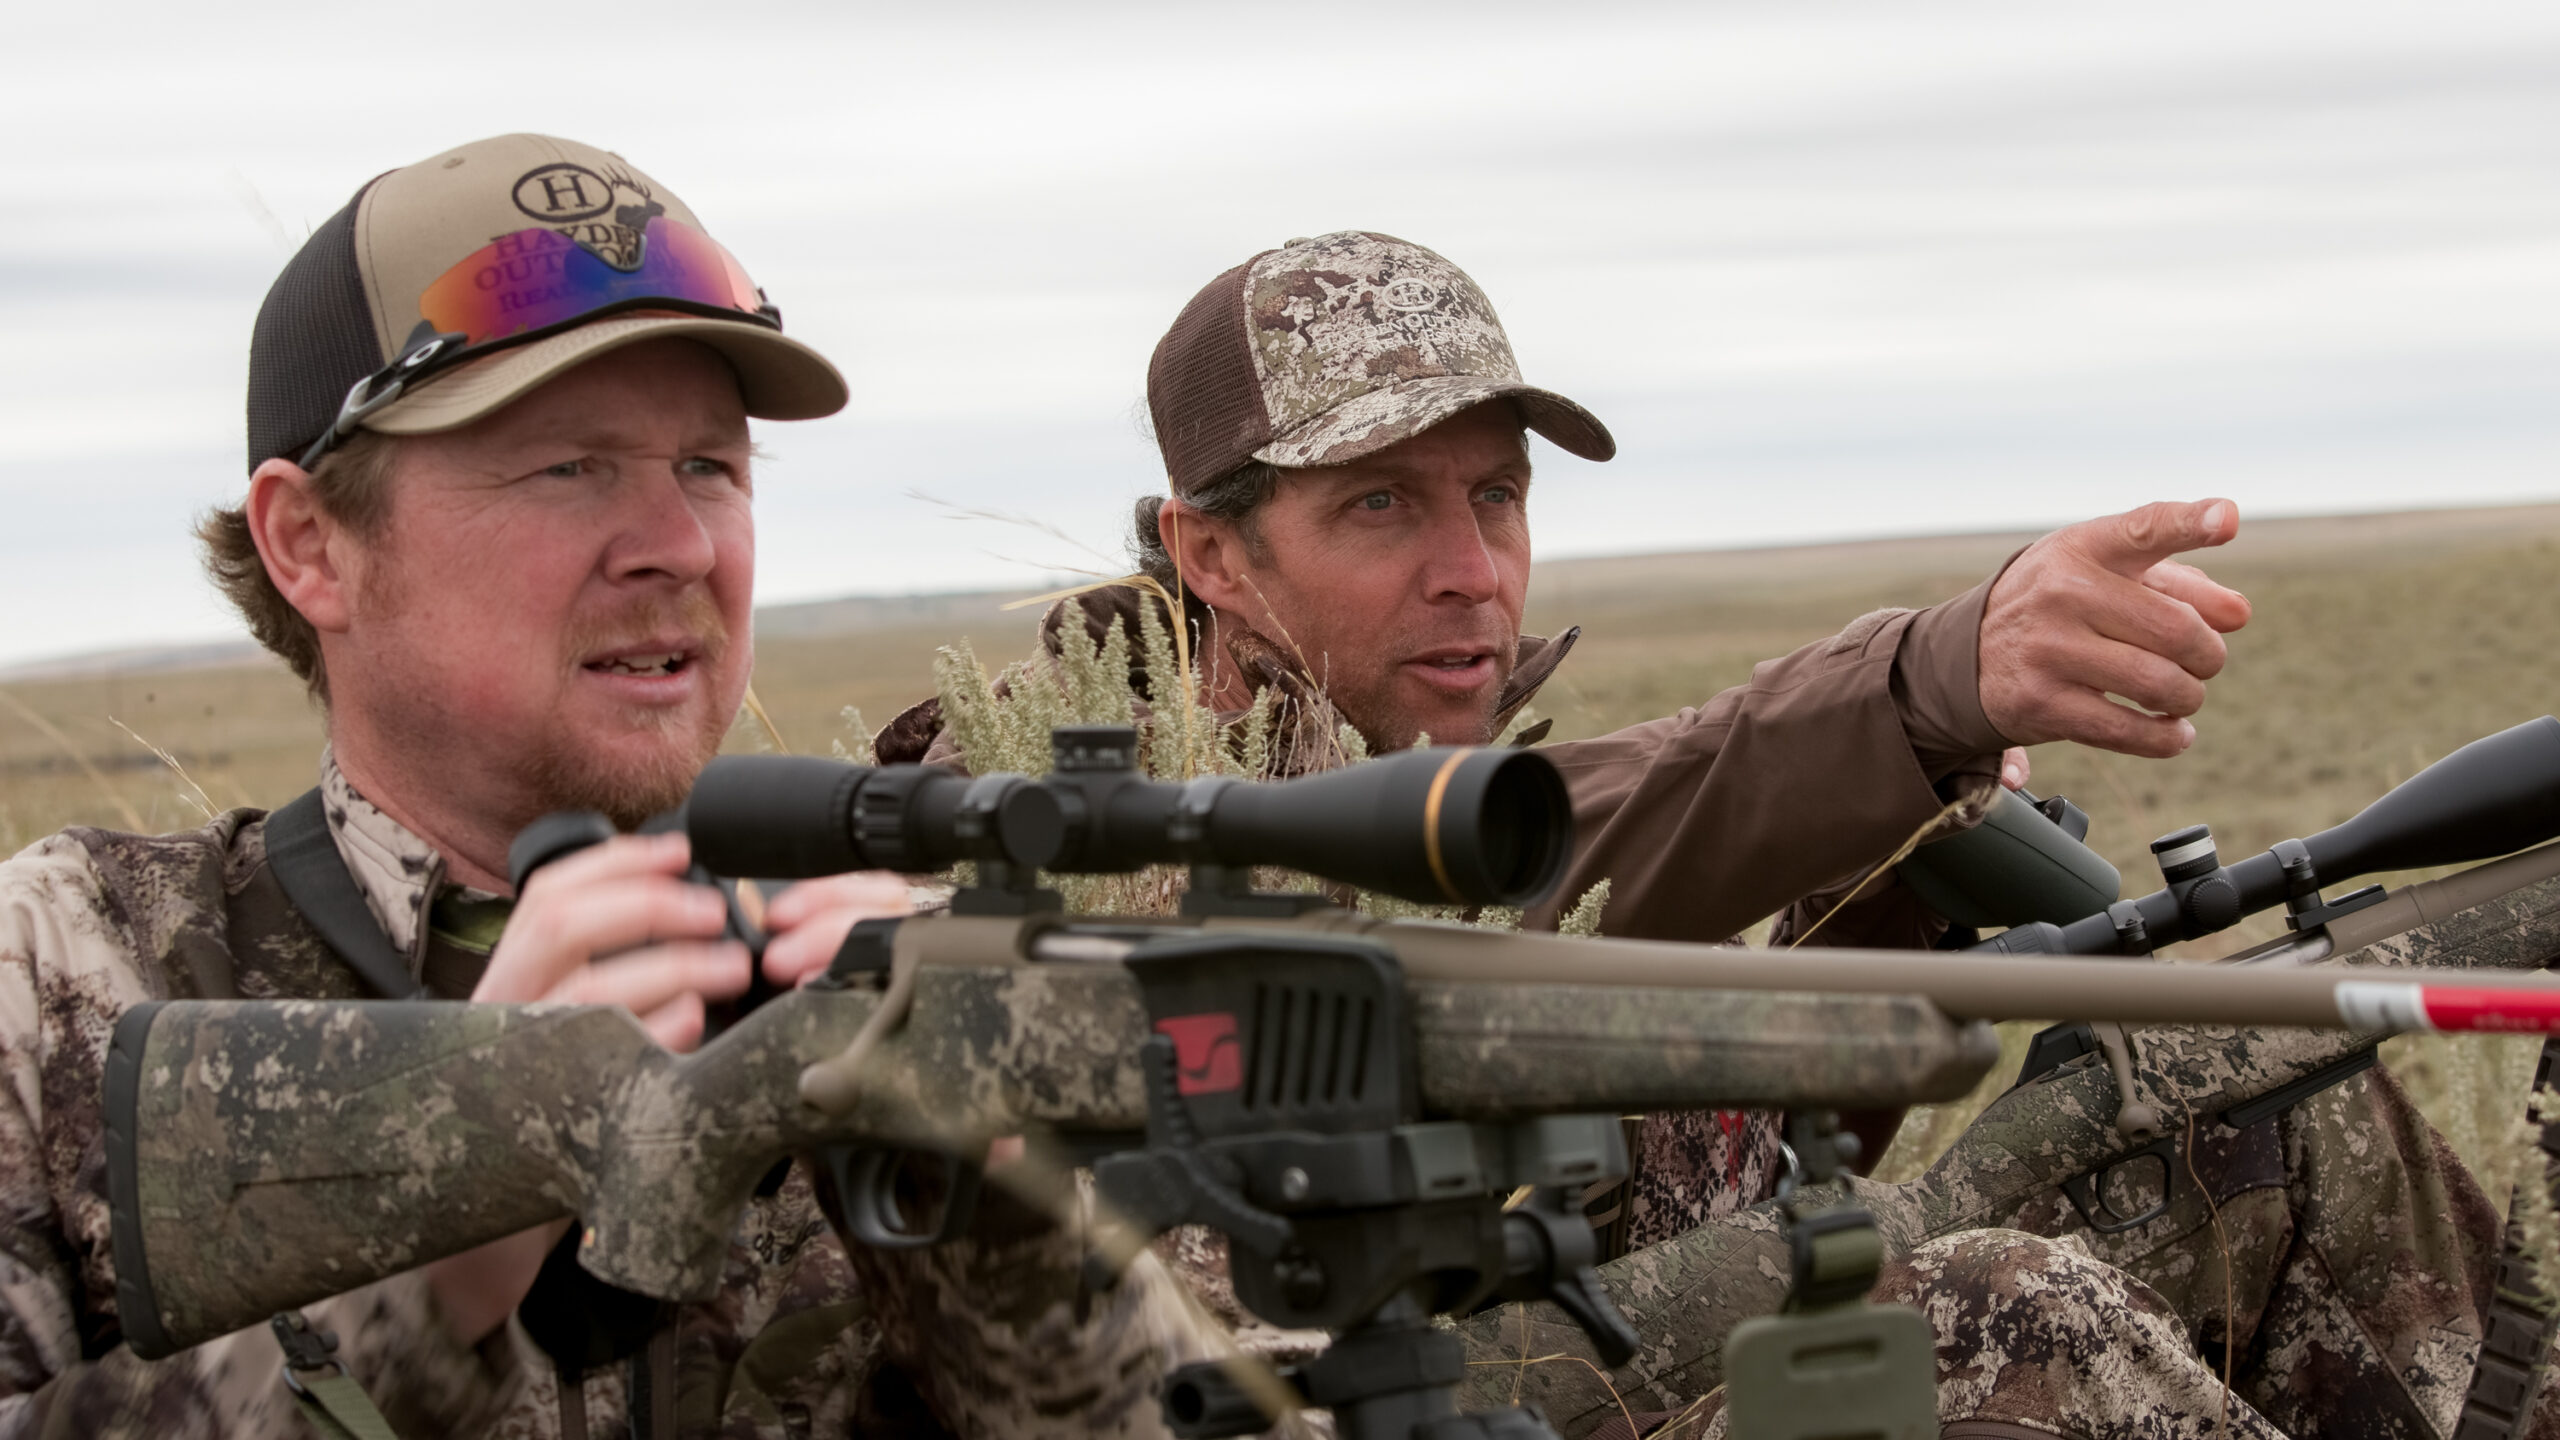
Dan Brunk, Marketing Director at Hayden Outdoors, sights in his rifle before his elk hunt.
Insurance and Liability
Clay points out that building a gun range on your property typically doesn’t require insurance riders, but it’s important to check with your insurance agent to make sure. “If you have gun range courses or start charging for use, then you’ll need to explore liability insurance and waivers.”
Whether private or part of your property’s larger revenue generation activities, understanding the risks associated with operating a gun range is imperative to its success and the safety of its users. If you’re not sure what these risks might be, talk with a gun range expert to learn more or reach out to Evan Anderson, the Hayden Outdoors’ Insurance Representative.
Private Gun Range Noise Management
If you’re lucky enough to shoot on a 1,500-acre gun range like the one Clay is building at the Hayden Outdoors Ranch, noise is most likely not an issue. The sound of shots fired will ultimately be swallowed up by the surrounding landscape or fade into the vastness of such immense acreage. But if you’re building a private gun range on less acreage and closer to neighbors, it’s important to understand – and mitigate – the impact of shooting range noise.
Start by understanding the potential noise impact on neighbors, and communicating with them your intent for the range, your frequency and hours of use, and then address any concerns they might have. Taking a few minutes to talk with your neighbors now can save you countless angry phone calls and complaints later. Also research sound-dampening techniques and materials and acoustical barriers.
Environmental Impact
The environmental impact of a home gun range is something to consider from the very beginning of the process. It can influence the design of target retrieval roads and trails, and all ranges should consider soil contamination from lead but especially those built near natural water sources, such as streams and creeks flowing through the property.
“In regards to lead, there are companies that will come and retrieve the lead out of banks and shooting ranges,” says Clay. “For folks who are really concerned about lead contamination, you can shoot copper bullets exclusively.”
Additionally, be mindful of target retrieval roads and trails, making sure they don’t disrupt wildlife habitat such as bedding, roosting, and resting areas. This is particularly important if the land doubles as a hunting property.
Know Your Neighbors
Dr. Peddicord of Environmental Range Protection has years of experience consulting private land owners and public entities on proper range environmental practices. “A fundamental objective is to keep bullets and shot off neighboring properties. For rifle/pistol ranges this requires appropriate space and terrain to place adequate backstops far enough from property boundaries that bullets ricocheted or flipped off the backstop will not reach the property boundary.” For shotgun clay target venues, recognize that shot deposits much farther downrange than often expected, especially when shooting downslope. As an initial generalization, recognize that shot may fall 300 yards and perhaps more from the shooting position, depending on terrain and site conditions.
“It is important that shot and target debris do not reach adjoining property and that they do not fall into waters or wetlands on your property. If siting a range for a business or more frequent use, the most fundamental management consideration is periodic reclaiming and recycling of bullets and shot on ranges. Keep in mind this is much more efficient on moderately slopping un-forested areas without boulder fields where the necessary equipment can operate effectively.”
As discussed, your personal shooting range is going to be specific to your property and its allowances. Before you begin, determine the layout of the range (indoor or outdoor) and the appropriate shooting lanes and target distances. This is an excellent time to consult with a shooting range expert on best practices to ensure you get the most out of yours.
It’s also important to think about orientation if you have the flexibility to do so. For example, a south-to-north range will maximize natural light on the targets while minimizing glare from natural light in the shooter’s eyes.
Select appropriate materials for construction, targets, and safe backdrops. This will vary if you’re building an indoor or outdoor range. Earth berms, log walls, and railroad ties walls work well for outdoor backdrops as do swinging steel targets that can absorb a bullet’s velocity without shattering. They also allow the shooter to hear the hit, versus having to walk long distances to confirm impact.
Equipment and Maintenance
The size and location of your home gun range will determine the equipment required to maintain it. Targets, shooting lanes, and shooting benches all require upkeep, so it’s important to keep this in mind when budgeting for your range.
Setting up a maintenance schedule can help. Consider the work required to maintain the backdrop – be it a natural one or something you’ve built. Additionally, map out what you think will be required to keep your shooting range in proper working order, including trail maintenance, materials reviews, target replacements, etc.
Clay points out, “If you’re having to construct a backdrop, you’re going to always need to add dirt. For active ranges, you’ll be replacing targets constantly.”
Safety Training and Education
Personal shooting ranges provide a lot of opportunity. There’s the thrill of shooting, the possibility to improve, and camaraderie of target practice with friends. But there’s also the benefit of learning about the sport in a safe environment, one that can promote responsible gun ownership and firearm handling.
For those looking to incorporate gun safety training and education into their home gun range, Clay recommends a few things. First, the NRA offers an abundance of gun safety and gun education resources, especially for those who are new to the sport like young children and women – the fastest growing segment of gun owners.
“I also always recommend people go to their local gun shop. Talk to them about training or people in the area who offer it locally. It’s a great way to learn the basics of gun safety as well as any local rules and regulations that might be relevant to your gun range.”
Conclusion
Adding a home gun range to your recreational property is a great way to increase the land’s versatility while also adding value. Clay concludes, “Adding a gun range to your property can absolutely increase its worth. It’ll enhance the value to a certain segment of buyers – people looking for hunting land with a range set up.”
To this point, he recommends getting in touch with a recreational real estate agent as soon as you decide you’re interested in a gun range property. Clay uses his expertise to identify and purchase legacy properties for his clients – the kind that speak to personal passions and generational family involvement.
The avid outdoorsman drives the point home. “My family loves to go out and clink at different things. My wife, daughter, and son are all shooters. It becomes a fun competition with our kids, and it’s a lifelong activity for our family. There are a lot of people buying firearms for recreational shooting, now more than ever before.”
Clay is quick to reiterate the need for encouraging responsible and safe firearm use, while also pointing out how building a gun range on your property offers an excellent opportunity to accomplish both. If you’re interested in learning more about selling property you feel is ideal for a home gun range, or you’re in the market to buy recreational land that can become the future home of one, talk with Clay Owens or a Hayden Outdoors real estate professional today. They’re the outdoor experts in the type of hunting or personal gun range property you’re looking for.
Best Practices for Wildlife Management on Western Ranches
Duncan Clark knows cattle ranching. Growing up in a ranching family in West Texas, he learned the life balance between the magic of wide open spaces and the work it takes to maintain them early on. These days, he lives along Colorado’s Front Range, just shy of the Wyoming border, a short drive from his family’s 6,500-acre cattle ranch where he spends much of his time.
After graduating from Colorado State University with a degree in finance and real estate, Duncan turned his love of the land into a full-time job as a recreational real estate agent for Hayden Outdoors. He’s gone on to help broker a number of notable ranch real estate transactions in the past decade. From summers spent mending fences to balancing the intricacies of maintaining forage in the extreme winter months for wildlife and stock alike, Duncan understands the rhythms of ranch land like few others do. At the heart of that connection is a passion for the intersection of wildlife and ranching. Duncan is an expert in managing and maintaining range and wildlife habitat in a way that elevates both.
“Wildlife management on a ranch is critical for a lot of reasons. The healthier the animal population, the more your ranch is going to be worth.” From guided hunting and fishing income to proper land and habitat management, Duncan dives into the key factors to consider when managing wildlife on ranches in the West.
Understanding Western Ranches and Wildlife
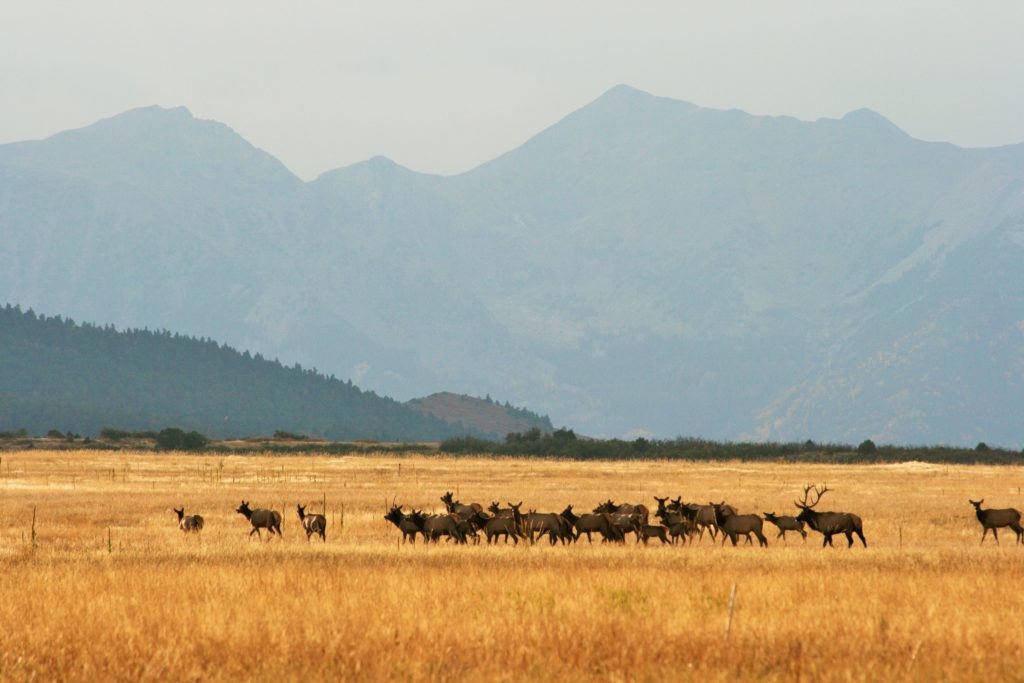
Ranches in the West provide ideal habitat for deer, elk, and antelope. Commonly, a ranch will be home to one or two of these species, but if you’re lucky enough to gain access to an expansive ranch in the western plains, you might come across all three. Additionally, ranches with viable water sources, including rivers, streams, ponds, or lakes can offer premier fishing. But as Duncan is quick to point out, you don’t have to be an avid hunter to want to manage the wildlife on your property. “The unique thing about land is that it’s an investment you can enjoy. Maybe you hunt; maybe you don’t. Regardless, driving around a ranch watching herds of elk and deer is a pretty special thing to see”
That said, hunting and fishing can be a viable income opportunity for ranchers in the West. Hunters and anglers spend an estimated $2 billion annually in Colorado alone. “Wildlife is big business in the West, and it provides incentives for landowners to manage this profitable resource, whether the focus is on cattle, farming, or recreation.” Guided elk hunts can garner anywhere from $5,000-$20,000 a hunt depending on trophy quality. If a rancher is able to work with a local outfitter or guide to lease the land for hunting, the revenue can offset a large portion of ranch expenses.
Planning and Implementing a Wildlife Management Plan
Before you begin building your wildlife management plan, it’s important to outline and understand your objectives. This includes the wildlife population objective that will dictate how many animals to harvest from the property each year in order to maintain healthy herd numbers. It’s also essential to work with an expert – local fish, wildlife, and land managers as well as nearby guides and outfitters – in order to optimize both wildlife and cattle health on the ranch. Start by evaluating how many animals you currently have on the property. Trail cams are an extremely useful tool for this. Additional considerations include the size of your property, any adjacent public lands or ranch sizes, and if there’s a well known hunting outfitter in the area. If so, how many animals are they harvesting?
Assess the habitat health, including water sources, food plots, vegetation, and landscape. From there, develop a management plan that balances your economic and conservation goals, working to maximize revenue while simultaneously catering to wildlife health and safety on the property. Manage and monitor progress throughout hunting seasons and year to year.
Wildlife Habitat Management Techniques
Duncan outlines the following guidelines for optimum wildlife habitat management on western ranches:
Water Sources:
Water is a key ingredient to any farm or ranch property and the leading factor in determining the value of the land and the quantity and variety of wildlife it can support. While many western ranches have multiple water sources, including springs, creeks, or rivers, these sources aren’t always accessible to animals and they’re susceptible to drought. “With a prolonged drought that affects groundwater sources encompassing much of the West, I’ve seen a number of different ways to maximize water resources. I’ve worked with clients to build ponds, develop spring water catchment systems, and even implement water guzzlers. If you want your ranch to maintain its value, paying close attention to the water sources on the land is step number one.”
Brush & Range Management:
Controlling the right blend of escape and bedding cover, along with the number of openings wildlife use to feed, is important for all species of wildlife. “Often, we see mountain ranches with dense deadfall of pine and aspen that provide little value to wildlife. If controlled burns are not an option – and they typically aren’t on a private ranch – a sound brush control strategy can maximize the wildlife value.”
Wildlife-friendly Fencing:
Duncan notes that this oft-overlooked aspect of wildlife management on ranches is an incredibly important one. While barbed wire might still line the perimeter of a ranch, it can be detrimental to healthy migration paths. You don’t have to pull out all of the barbed wire fencing in place, but Duncan does suggest modifying it to more modern standards. “By taking off the bottom and top strands of barbed wire and installing a smooth or high-visibility wire, you can drastically improve the viability of the fence. I recommend leaving an 18-inch space between the ground and the bottom strand of wire to allow animals to crawl underneath it.”
Rotational Grazing Strategies to Maximize Browse:
Another important tool for wildlife is balancing the grazing strategy. But as Duncan notes, this tip is particularly specific to each and every ranch. “If you were to ask a hundred different folks the best way to effectively run cattle on a property while also maximizing the hunting potential, you would likely get a hundred different answers.”
Food Plots that Attract More Animals:
Food plots have long been an important tool for farmers and ranchers in the South and Midwest who also lease the property for hunting. However, there just isn’t enough information or data available for western landowners trying to create food plots for elk and mule deer. Enter Duncan’s expertise. “I’ve done plenty of trial and error food plot tests and this is what I’ve found to work at an elevation of approximately 7,300 feet. With a disc and grain drill, we have successfully established food plots consisting of a blend of winter grain rye, annual clover, and sainfoin (a perennial drought-resistant legume). With ample rainfall and the right soil, I believe this can be done on most ranches in the western states. I’ve seen it work first-hand, especially when the native browse starts to go dormant and the winter rye and clover hold green browse late into the fall.”
Wildlife Population Management Techniques
Maintaining healthy populations, including cattle, deer, elk, and antelope, on your ranch is another pillar of ranch wildlife management. If overgrazing or overpopulation become an issue, you might need to manipulate habitat in order to draw one species to a different part of the ranch. Another important aspect of wildlife population management is the utilization of predator control. Predators are elemental to a healthy ecosystem – every ranch needs a sound predator control program to benefit both wildlife and cattle – but again, ranchers need to understand the ideal predator population for their land.
When opening your ranch land to hunting, fishing, and trapping, make sure you do so with best practices top of mind. Has everyone hunting the property taken any necessary hunter’s safety course? Know when to fish, and when doing so might stress fish populations. Talk with local outfitters, guides, and other experts about current trapping regulations. Doing so will help ensure your ranch is hunter- and angler-friendly for years to come.
Benefits of Wildlife Management
As Duncan will tell you, the primary financial goal of any ranch is to break even. Wildlife can be a key factor in doing so. “If you’re running a hunting outfitter on your ranch property, you can certainly offset a lot of your operational costs.” These regulations and opportunities vary state by state. Colorado and New Mexico are very land-owner friendly, for example. If you’re looking at ranches for sale in Montana, Wyoming, Colorado, New Mexico, or Arizona, it’s important to work with a ranch real estate specialist to learn more about the revenue opportunities for that particular property.
Of course, the benefits of having wildlife on your ranch go far beyond potential profits. Wildlife and cattle can pair perfectly when it comes to maintaining habitat health, with opposing grazing and range seasons. There’s the opportunity to watch out the truck window as herds of elk or deer or antelope make their way across your acres. Those who don’t have immediate access to wild spaces and species can find it on your land. Wildlife management on your ranch runs the right direction both ways, providing safe, healthy refuge for the animals and a balanced value-add for your property.
Conclusion
Wildlife management on western ranches is the future of this unique way of life. If you’re interested in buying ranch land where you can prioritize wildlife management, the recreational real estate agents at Hayden Outdoors are experts in the field. And if you simply want to learn more about how you can integrate healthier wildlife management practices into your ranch, give Duncan Clark a call. With a lifetime of ranching in his back pocket, he’s your guy.
What Really Makes the Best Turkey Hunting Land?
Here’s a challenge: talk with Brandon Pendergrass of Hayden Outdoors for more than two minutes and try your hardest not to fall in love with turkey hunting. And not just the idea of it, but the lifestyle of it – the actual interaction with the birds and the habitat and how it all comes together on one idyllic springtime day in Missouri. Or Nebraska. Or Tennessee. Or Texas. Take your pick of premier turkey hunting land in the US.
“Turkey hunting is a great gateway for anyone looking to learn more about hunting or just wanting to be outside, connecting with the land. It’s the perfect day because it happens in the spring, when the weather is warm. And it doesn’t take all day if you’re with someone who knows what they’re doing. So after hunting it’s time to fish in a nearby pond, river, lake, or creek where the fish will be hungry, because – again – it’s spring and all animals are. Then go scout for some mushrooms. Then fire up the grill and cook that fish or that turkey while you drink some sweet tea. Maybe in a field, maybe in a small stand of timber, maybe along some water. Sit in the sun and enjoy. That’s what it’s all about.”
Sign us up.
Meet Brandon
Brandon has been an expert on turkey hunting nearly his entire life, beginning with his morning chores on his family’s 500-acre farm in southern Missouri when he was a kid. “It was my job to feed the pigs before the bus came to take me to school, and the turkeys were always gobblin’ back there, so I spent a lot of time with them, watching them, listening to them.” From there, he started hunting turkeys with friends, became a devout turkey hunter by age 16, and he’s been all-in ever since, moving onto guiding, hunting show appearances, and competitions all over the country.
Brandon recently gave a rundown on what to consider when buying turkey hunting property. Here are some tips, including his expertise and insights.
What makes a good turkey hunting property?
When buying turkey hunting land, you should consider factors such as location, size, terrain and habitat. Look for land that has plenty of natural vegetation, water sources, and cover for turkeys. According to Brandon, a mixture of landscape is key, as is close proximity to water. “The perfect property would be 50% open space and 50% timberland. Big, mature timber will offer a lot of roost trees and food sources like acorns and berries. Look for some overgrown fields with native grasses and property that provides a variety of food sources. A majority of the time, turkeys will try to find roost sites that are close to water, so if you use the land year-round, it’s important to have a water source such as a spring, pond, lake, or other source that’s resistant to drought.”
Why is now a good time to invest in turkey hunting land in the Midwest?
Brandon cites one of the tenets and most important truths of real estate investment, “There’s never a bad time to invest in land, because there’s only so much of it.” This is particularly relevant to turkey hunting property. Luckily, the United States features a variety of states that offer premier turkey hunting land, such as Missouri, Nebraska, Tennessee, Texas, and Florida.
The time to buy is when the right property pops up, so the best thing you can do is be prepared. Make sure your financing is secured, and contact your local recreational land real estate expert. Hunting land can be a very valuable and lucrative investment – monetarily, personally, and generationally. Back to Brandon’s ideal spring day, owning your own turkey hunting land can be a great way to bond with friends and family, establishing the kinds of adventurous traditions that are harder and harder to come by in today’s busy world.
What are some ways owners can offset the cost of buying turkey hunting land?
Logging the timber on your property is a great way to generate income from the land. Selective logging can help open up food plots and create road systems. If the land is conducive to farming, you can lease the land to a producer, which is also great for turkey hunting habitat as it provides a consistent food source.
Another income opportunity to consider is leasing the land to other hunters, hunting outfits, or hunting guides. This can add to the value of your asset, demonstrating the property’s productivity and income possibilities.
What are the biggest differences between turkey hunting on private and public land?
The first part of the answer is probably the most obvious, “When you own a good piece of hunting ground, you control all of that,” says Brandon. No competing for spots on opening day, pressured birds, or other bird hunters. It also ensures your hunting experience is private, uninterrupted, and most importantly, safe. He adds, “Safety is a big point. There’s also the pressure put on the turkeys. You can control or better regulate the pressure on the flock when hunting private land. Public birds can be pressured making it harder to hear or locate them. It also allows you to better control the habitat.”
What are some effective ways to scout for quality turkey hunting land?
Start with mapping. Mapright, onX, and Google are all excellent sources of information as is aerial imagery. Look at the area as a whole to understand the location and surrounding properties. Talk with other local landowners and hunters to gain insights. Look at the habitat.
Pull on your best hiking boots and walk the property (with the current owner’s permission). This is particularly important to do right at daylight in the spring if possible. This is probably the most effective way to locate signs of turkey activity and learn more about the habitat.
Brandon’s pro tip? Bring binoculars so you can glass fields. This can help you scout and see the landscape and population or activities of the turkeys. Also consider calling the listing agent to ask about the history of the land as it relates to turkey hunting, including looking at any trail cam pictures or other documentation.
What kind of land maintenance should you consider to improve your chances of success in the field?
The beauty of owning the land is your ability and freedom to personalize it to your needs and preferences. You can design the property to attract turkeys by planting specific vegetation, building cover such as ground blinds, putting in roads or openings, and planting food plots. It’s important to understand how flocks have behaved in previous seasons, and customize the land to cater to those habits.
Brandon suggests establishing a road system and watering holes. “Turkeys rely a lot on their eyesight. They like spaces where they can feel comfortable coming out and strutting with their hens. Road systems allow you to slip around quietly as you’re turkey hunting.” He also suggests letting some old fields grow to become more dense with native grasses and flora, while cutting down other taller grasses. Consider planting chicory, clover, or other turkey-friendly food sources. In short, habitat variety is essential. And when you own the land, you can establish multiple hunting locations for cover and ground blinds based on previous flock activity for different scenarios.
What is the biggest benefit of having a turkey hunting land expert as your real estate agent?
Brandon points out that working with a recreational land real estate agent offers huge benefits. “You’re talking to someone who not only understands the business of real estate; they’re also passionate about the outdoors. As outdoorsmen and women, even if they’re not a turkey hunter, they will have been paying attention to the land, making note of when and where they see wildlife, and for how many days in a row. These details set the experience apart from working with a traditional residential or commercial agent.”
The Investment of a Lifetime
Brandon leaves us with this thought, “Purchasing turkey hunting property you can utilize in the springtime will be one of the best investments of your lifetime. It’s an all-inclusive experience that creates an immediate connection between you, the birds, the land, your friends, and your family.” It’s a pretty special thing – to have that kind of unlimited access to prime turkey hunting land, and to create the traditions and memories that come along with it.
If you’re looking to buy prime turkey hunting land, contact the recreational real estate specialists at Hayden Outdoors, where the reason you should is right there in the name. All of the agents are experts in the great outdoors. They know where to look and what to look for when it comes to buying an ideal hunting property in your neck of the woods.
Brandon Pendergrass photo below with fellow agent Jeff Lovan and Bree Lovan. Also pictured with hunters in Hawaii as a guide.
Pro Tips for Buying & Managing Duck Hunting Land
When it comes to vast swaths of land, it doesn’t seem like 300 yards affects if that land serves its purpose. Give a partial river bank here, take a slice of sand bar there. It’s all the same in the grand scheme, right? Not exactly, and according to professional recreational real estate agents, Jake Hyland and Taylor Dunnigan, definitely not when it comes to looking for prime waterfowl hunting land. Spend a moment talking with these two about finding the perfect property for duck hunting, and you’ll quickly learn how situational an effort it is. “Acre-to-acre, foot-to-foot,” according to Taylor.
Buying waterfowl hunting land for personal recreation or as an investment isn’t easy. Taylor says, “It might be once every five years that a duck hunting property in your budget comes up for sale. And you need to be ready.” It’s why Jake and Taylor are the people you want to talk to if you’re in the market for the waterfowl hunting property of your dreams. They’re both seasoned recreational real estate agents with a long history buying and selling this type of property. But their expertise extends well beyond that. Both grew up smack in the middle of some of the best duck hunting on Colorado’s Front Range. They went on to guide on some of the most coveted goose and duck hunting land in the country. Give these two a few minutes walking a potential property and they can tell you if it’s worth your time or not.
We spent some time with Jake and Taylor – goose and bird dog pictures mounted on the wall squarely behind them – to learn more about finding the ideal waterfowl property and getting their expert advice on buying duck or goose hunting land.
What are the primary attributes of quality duck hunting property?
These two agents have a four-point checklist when looking for prime duck hunting land: food, refuge, open water and location.
According to Jake and Taylor, water controls everything when you’re hunting waterfowl. It’s where birds take refuge – a spot where they can loaf and hang out. It’s why finding duck hunting land with an ideal water source is not only essential, it’s also important for the overall management and use of the property as it can affect other aspects such as flight paths and feed for waterfowl. If water doesn’t currently exist on the property, is there an opportunity to catch water and move it around? The abundance of duck- and goose-friendly water is what makes South Dakota, Nebraska and Arkansas so good for waterfowl hunting.
But there are other great regions for duck hunting property, if you’re working with a real estate agent who knows where to look and what to look for. Certain areas in the Midwest and along the Mississippi and Platte Rivers can also offer ideal waterfowl hunting land ownership opportunities.
How important are historical flyways for waterfowl land?
Very. Historical flyways are important for waterfowl hunting properties because they indicate the migration patterns of ducks and geese. And they can shift. Taylor points out that we’re starting to see shifts in the flyways wherein geese are moving much farther west. In fact, migration can shift 50 to 75 miles east or west of a particular zone. It’s why agent knowledge about the location and history of the property is so valuable in determining its potential for waterfowl hunting.
Taylor also looks at agriculture and other large bodies of water around the subject property. One of his biggest considerations on behalf of his clients is pressure. For example, 200 acres of hunting property that borders 2,000 acres of public land can be a catch 22. If you can find a collective of private landowners all managing for the same purpose – hunting waterfowl – you’ll do ten times better.
Jake notes the time of year.
“It’s easy to assume a property is ideal for duck hunting in the fall or early winter when you can see the ducks. But our knowledge shines when we visit a property mid-summer and need to paint the picture for a potential client. We might see three ducks during that time, and the client has to trust our knowledge and experience about the flyways and potential of the land.”
What are other ways owners can offset the cost of buying waterfowl land?
There are various ways to generate income from a hunting property, such as leasing it to farmers or conservation organizations. Taylor chimes in, “If you’re looking at a property that has everything – water, ag, etc. – you can rent that land out to a farmer and then reap some of the benefits of the harvest. I also know guys who will contact Denver University to put properties under conservation easements. If you’re solely a hunting property, these easements improve the habitat, which improves the hunting. These easements do come with some restrictions, so it’s important to understand those before going down this path.”
What kind of habitat maintenance do you need to attract waterfowl to your land year after year?
Habitat maintenance is important for fostering the property as a viable resource for wildlife. Land improvements such as fencing, hunting pits, ground blinds and other infrastructure also add value. Wildlife photography, videography and trail cams are an excellent way to document migration patterns and wildlife land use for future sales opportunities. Jake even tells us of a client who keeps a rolodex of duck kills, taking pictures of ducks on the property, which can come in handy when talking with potential buyers or guides.
Back to water, water management is another key way to improve the quality of your duck hunting investment or recreational property. This can include flooding or water capture that improve the habitat, but these measures will be regulated differently in different states. Colorado, for instance, can be a difficult place to move water due to irrigation restrictions, which is why it’s important to understand what it means to own land with water rights in Colorado. According to Jake and Taylor, if you can move water on your waterfowl hunting property, that’s huge. You’re maximizing improvements to your duck hunting land and what it can do.
How important is it to have a recreational agent advise you before buying waterfowl hunting land?
Very important. And Jake and Taylor can’t emphasize this enough, for good reason. Jake notes, “Duck hunting properties are the highest supply and demand right now when it comes to recreational or investment hunting land. There just aren’t that many of them per the factors we’ve talked about. There isn’t a surplus.”
Taylor adds, “There are properties that were good 20 years ago, and they’ll probably be good in 20 years. They’re just historically special properties. However, there are parts of the country where duck hunting is absolutely terrible. There are parts where it’s really good, but finding special properties comes down to working with a recreational land agent who is knowledgeable and has the expertise on waterfowl hunting in a specific regional flyway.”
If there’s still a question as to whether or not Jake and Taylor are experts on the subject of waterfowl hunting properties, Taylor puts those to rest. “We both grew up obsessing about this hobby and guiding all over the country. And now it gets to be our career. Jake and I have put in that time.”
Jake continues, “It’s a passion. It’s the pinnacle hunting property and inventory is slim. We know where to look and what to look for. We view ourselves more as advisors than traditional real estate agents when it comes to this type of property transaction. We’ll work with some clients for years finding them the right duck hunting property within their budget.”
It’s a relationship that goes beyond the exchange of cash and land. Jake and Taylor stay in touch with their clients, providing advice and counsel on how to better the land and optimize the hunting. “Reach out to us, even if it’s early on, so we can understand what you’re looking for. We have the inside track.”
Pro’s Perspective on Buying Real Estate in the West
Advice Before Buying Land in the Big West
There are the real estate agents who know the square footage, can speak to how many bathrooms are enough, and whether or not the school district fits the bill. Then there are the uncommon agents with a different kind of experience. They know cows, grazing limits, water rights, minerals rights, and irrigation systems. And if they don’t have the answer, they know the experts who do. Austin Callison with Hayden Outdoors is a mix of both – equal parts seasoned residential real estate agent and highly knowledgeable expert on buying real estate in the west.
As the West becomes a hotbed for real estate activity, Austin knows the questions clients should ask when trying to find the perfect property in Idaho, Washington, Oregon and even California, since that’s where Callison grew up ranching. Austin is a ranch kid at heart, as he grew up in a small ranch community in Northern California. He moved to Boise in 2002 after playing college football in Sioux Falls, South Dakota. He’s been in the Treasure Valley ever since, enjoying the ways of the West and tapping into the intrinsic beauty of it. He’s an expert in both real estate and the nuances that come with buying farm and ranch land in the region. He gave us a glimpse into what he’s seeing in the market right now, and what he looks for on behalf of buyers and sellers.
Two Types of Buyers and a Potential Market Correction
“We’re seeing a couple of different market drivers right now. Relocation buyers are driving the housing market in my territory, mostly those relocating from California. I also work with people who are selling property somewhere else wanting to move out here and live on a little bit of acreage. It could be a horse property or maybe they want to raise their own food. That trend has definitely driven the market up. In order to stay in business, local farmers need to step up to California prices.”
While the market continues to be one of the fastest growing in the country, Austin notes a downward trend in real estate prices. “In Ada County, prices have increased 5x in the past ten years. It’s not sustainable. But we are starting to see some sort of correction, especially with rates going up.
The Ins and Outs of Buying Ranch Land
As hit shows like Yellowstone evoke the romance of the West and ranch life, Austin notes it’s not quite as easy as simply pulling up stakes, hitching the U-Haul to your pick-up, and purchasing some ranch property. “I work closely with buyers to understand which leases are in place on the property. We’ve run into situations with gas and mineral leases. These can be a real ‘gotcha’. Purchasing ranch land should always be contingent on a title report. I also look at the productivity of the land and water with the property, which can be significantly impacted by drought.”
Austin is the first to tell you he might not have all of the answers, but when he doesn’t, he knows who to turn to. “I like to think of myself as a resource. When it’s time to bring in an expert, I know smart people I can put clients in touch with to help them with due diligence.”
Advice Selling Ranch Land
When it comes to selling your ranch, Austin has a cornerstone piece of advice.
“If you want to get top dollar for your ground, make sure fences and water are in place. Also, the ground shouldn’t be over-grazed. Whenever someone owns land and they don’t know the specifics of running cows, they can quickly ruin the land.” The same concept applies to farm land, especially if you plan to rent it out. “Make sure your tenant is set up to succeed. Clearly outline what is going to be planted and harvested, and have a good irrigation system in place.”
Key Questions to Ask When Buying Farm or Ranch Land in Idaho, Washington or Oregon
How many water rights or shares are included? Cost?
What type of fencing is on the property?
How are the neighbors?
What’s the carrying capacity of the land?
How many cows has the owner run on it in the past?
For farm ground, what is the productivity of the land? For example, if the farmer is growing alfalfa, how many tons to the acre are they getting, and how many cuttings are they getting?
What are the power costs?
Are there any easements?
How a Real Estate Agent Helps in Development Projects
For buyers searching for development projects in his region, Austin says due diligence needs to be front and center. “In most cases, there is a significant amount of due diligence required for development projects. Make sure you understand which hoops you’ll have to jump through.” So, what are some of those hoops? Austin quickly rattled off a list, just to name a few. “Understand water rights, soil types, how deep the water is, where the utilities are located and whether or not you’ll need to bring utilities to the property. Is the project high or low density? Does it have a private septic system or is it on a public county or city sewer system? Are the neighbors going to push back?”
Developing land in the West has gone from luxury to necessity as rural areas absorb larger populations. “Once again, I’m a resource for my clients. I connect them with the engineers, county planners, water rights specialists, and architects to make sure the development is a successful one.”
Conclusion
Austin calls Idaho’s Treasure Valley home because he knows they call it the Treasure Valley for a reason. He hunts, fishes, ATVs, and snowmobiles. He adventures through the foothills and sage-lands with his wife and two kids. He’s a family man, a ranch kid, an outdoor enthusiast, and a real estate agent. Austin gets the West in the same way the West gets him. His career is built on sharing that connection with his clients, helping them find their own tillable, ranch-able, or development acreage. Learn more about large acreage real estate in Idaho, Washington, Oregon, and California by visiting our website or getting in touch with a Hayden Outdoors real estate professional today.