Sign in to save favorite properties and equipment, save your search parameters and more
Don’t have an account yet? Sign Up Now
Sign up
Already have an account? Login Now
Login
×
Sign in
Sign in to save favorite properties and equipment, save your search parameters and more
Don’t have an account yet? Sign Up Now
Sign up
Already have an account? Login Now
How Do Cattle Guards Work And Are These Grates Better Than A Cattle Gate?
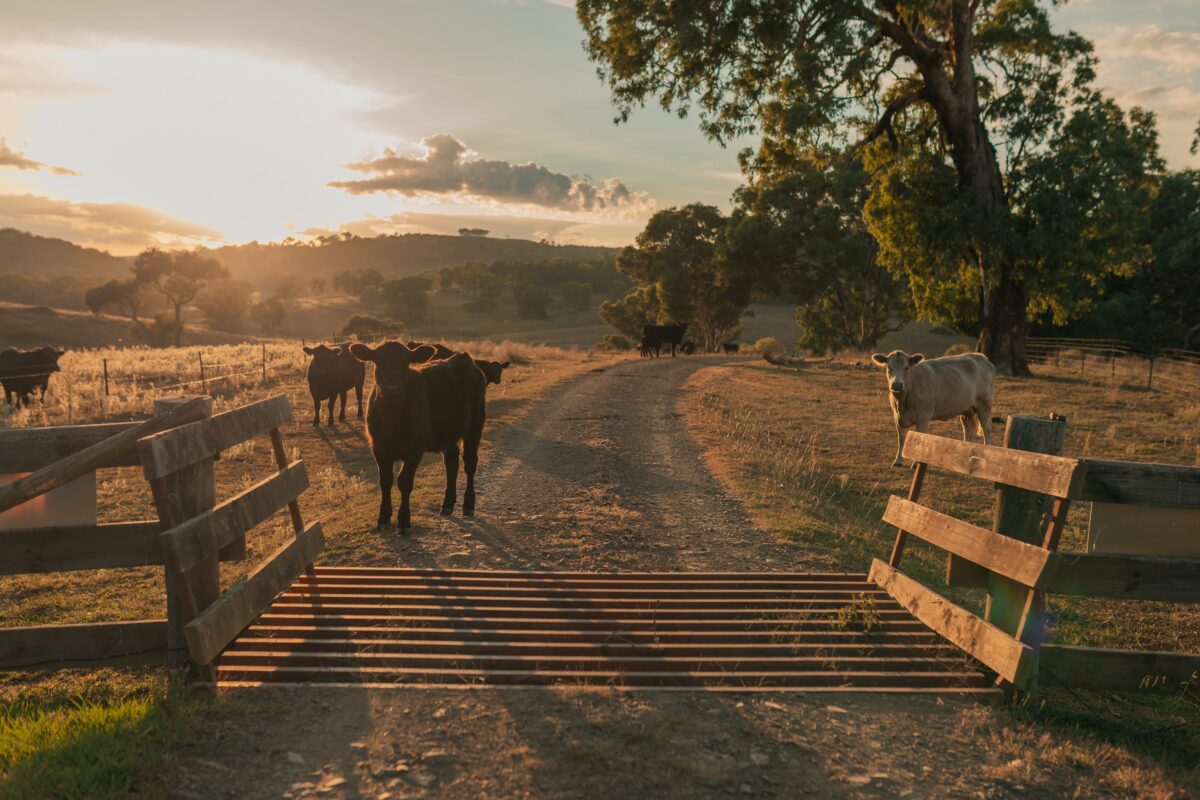
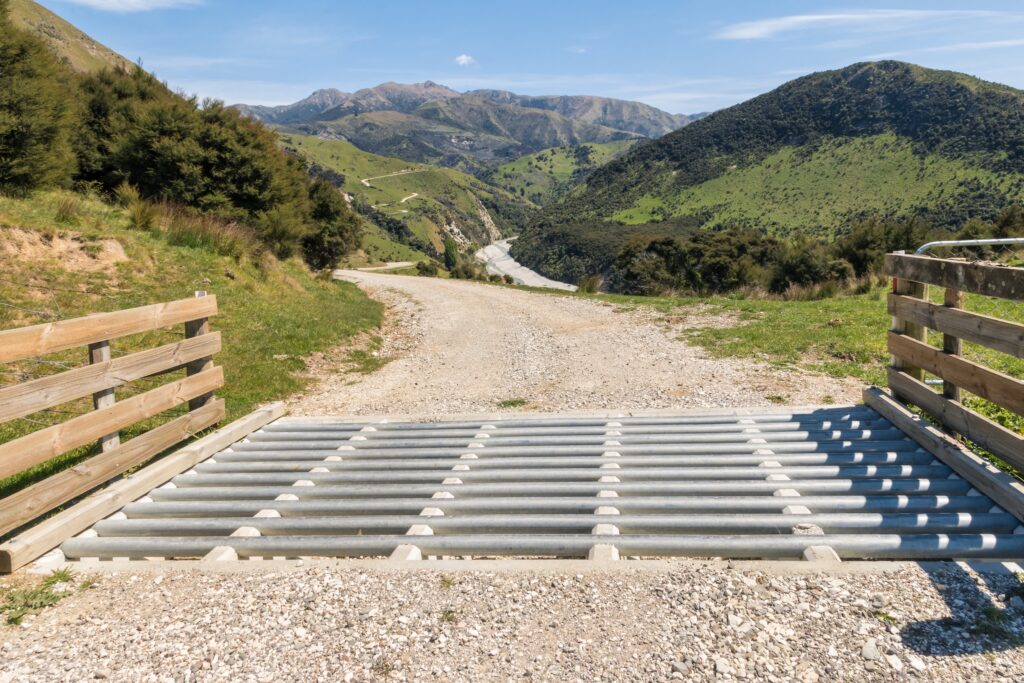
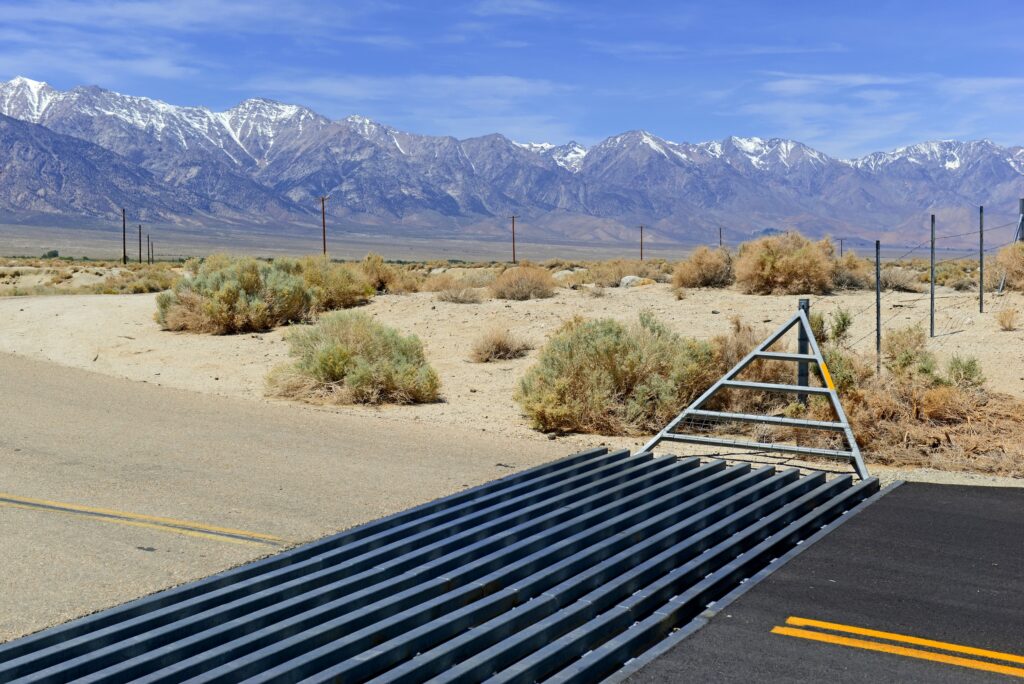
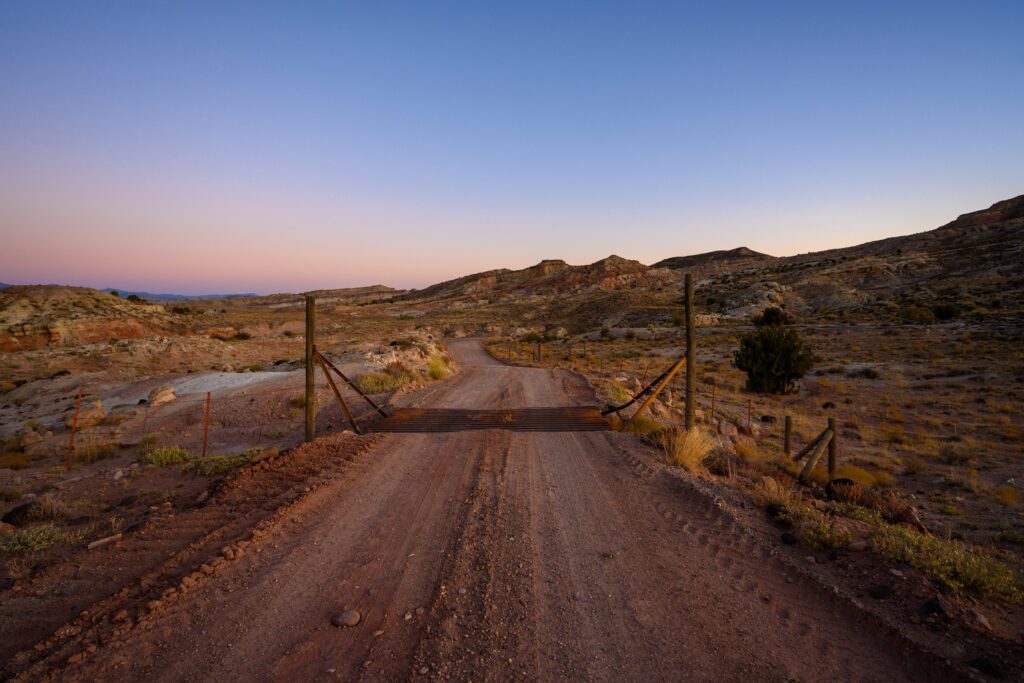
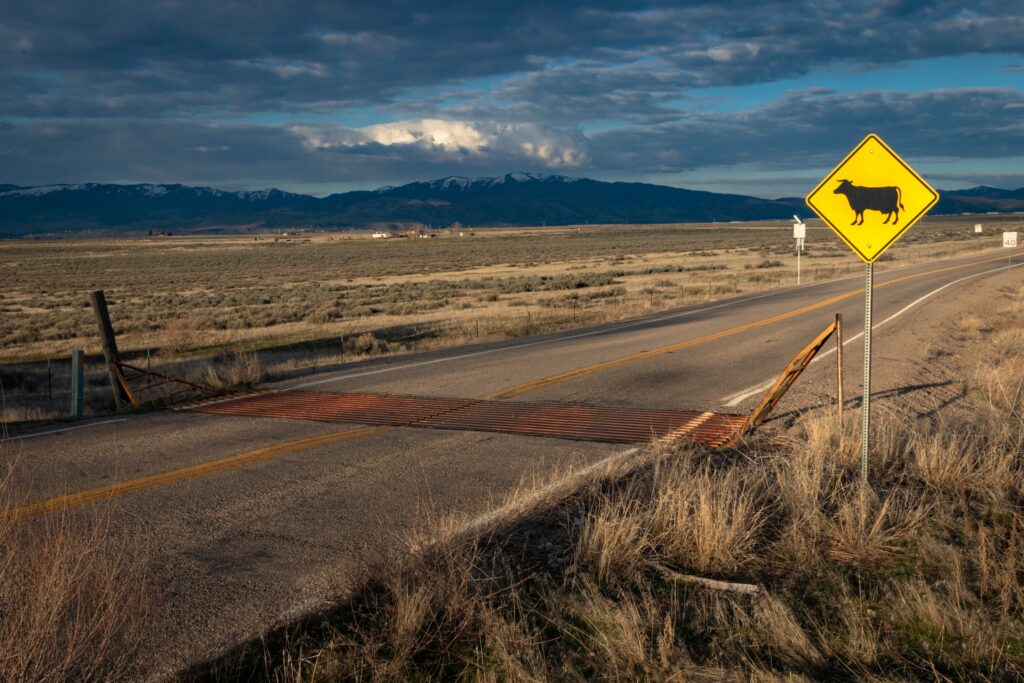
If you’ve ever stopped a loaded truck, climbed out to swing a cattle gate open, pulled through, and climbed back out to latch it behind you, you’ve probably wished for a way through that fence without leaving the cab. How do cattle guards work, and could one save you the trouble? A cattle guard, also called a cattle grate, is a set of rails laid across a shallow pit where a road meets a fence line. Most cattle won’t step onto it, while your pickup, stock trailer, and hay truck can roll right across without stopping.
At Hayden Outdoors, we spend a lot of time on working ranches and with the families who run them, and this question comes up often. So we put together a landowner’s guide that walks through how cattle guards work, what they do well (and what they don’t), why cows tend to respect these grates, and how to decide between a cattle guard and a good old-fashioned cattle gate.
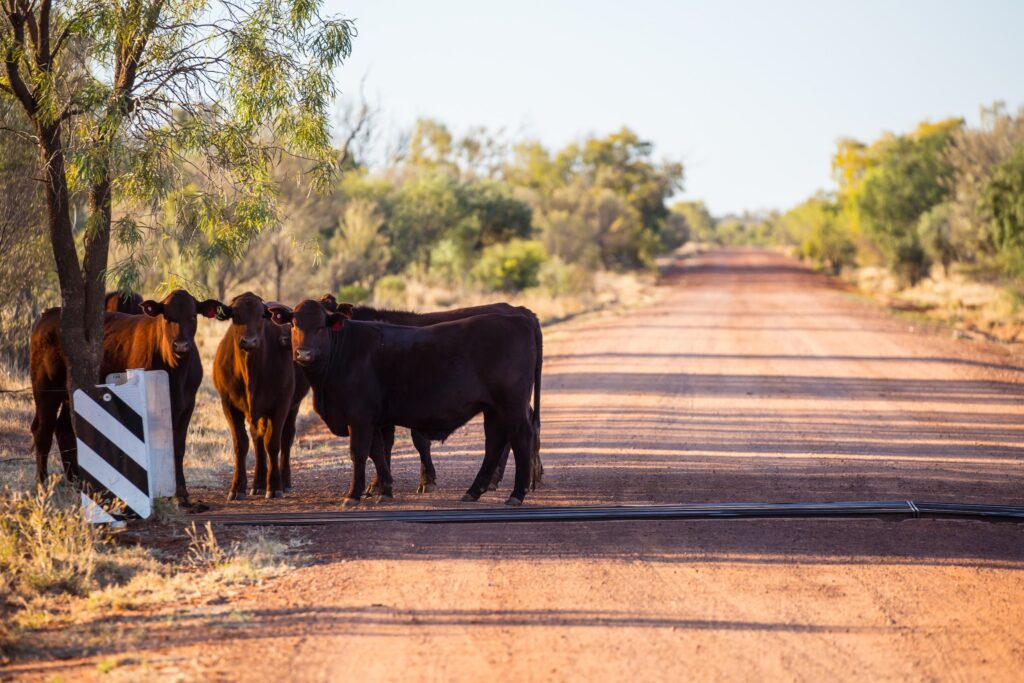
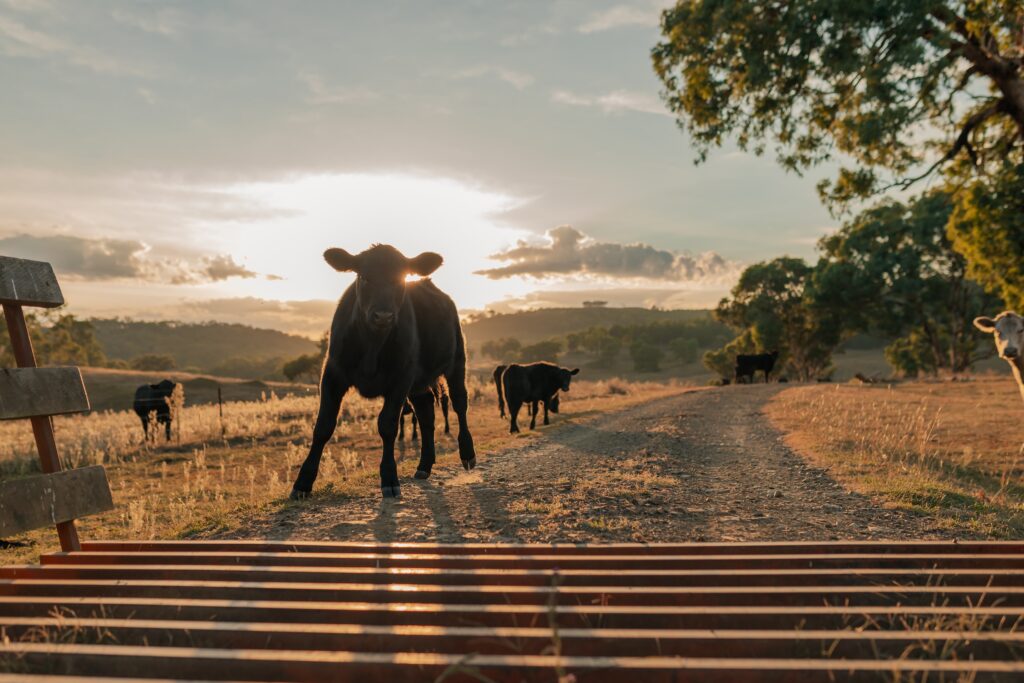
Cattle guards rely on two cow traits: limited depth perception and a flat hoof that needs solid footing. A row of rails runs across the road, perpendicular to traffic, with open gaps between them and a shallow pit underneath. To a cow standing at the edge, that pattern looks like uncertain footing over a drop, so she usually turns back and looks for grass somewhere else. To a tire, it’s just a slightly rumbly stretch of road.
The idea’s been around for a long time. Kansas author James F. Hoy wrote an entire book on the subject, and the University Press of Kansas notes that it traces the first U.S. cattle guard patent back to 1837. Early versions were simply poles or logs laid over a ditch, and they held cattle back in much the same way that modern steel guards do.
Ranchers kept refining the design, and today you’ll find everything from simple pipe grids on private lanes to heavy precast units on state highways.
What Exactly Is A Cattle Guard And How Do These Grates Work Without Moving Parts?
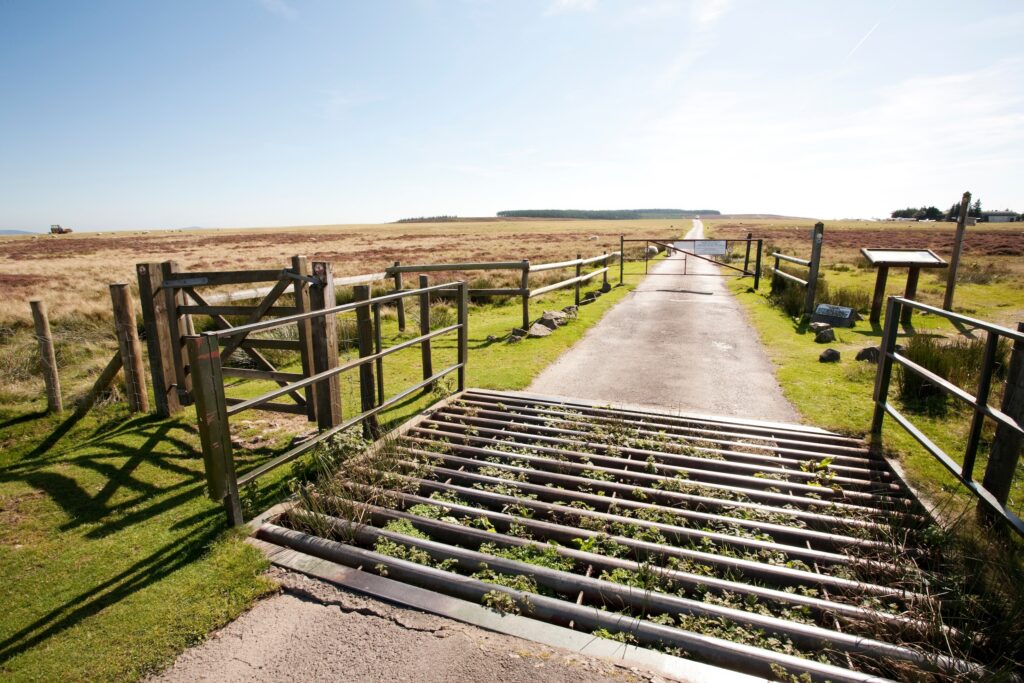
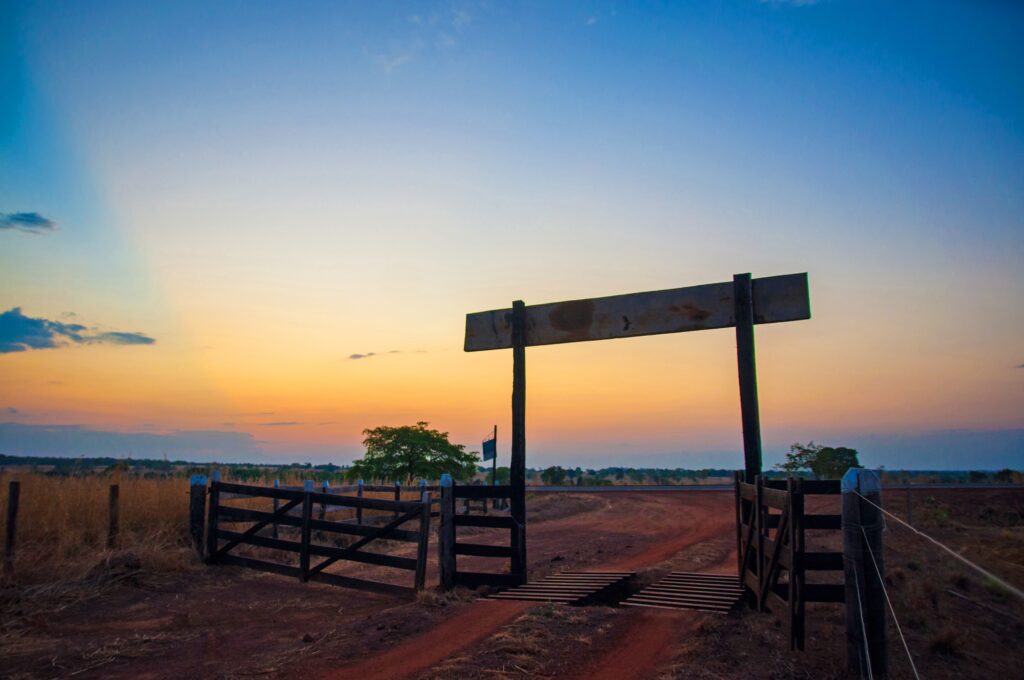
What is a cattle guard, in plain terms? It’s a grid of steel pipes, rails, or concrete ridges set over a shallow pit or raised frame where a road crosses a fence line. It lets vehicles pass freely while discouraging cattle from crossing. Depending on where you live, you may hear it called a cattle grate, cattle grid, stock guard, or a Texas gate.
Most modern cattle guards or grates are built from steel pipe or rail on a concrete or steel foundation, and plenty of ranchers go with precast concrete bases that drop into place without pouring on site.
Part of the appeal of the cattle grate is its simplicity. A cattle guard has no hinges, latches, chains, or springs. And it’s not like a gate that can be accidentally left open when you’re in a hurry to get off the ranch. Because there aren’t any moving parts on a cattle grate, there’s very little to wear out, which is why many ranchers call a cattle guard the lowest-maintenance “gate” on the place.
That said, there is a little upkeep involved. You’ll still want to clean out the pit now and then, touch up paint on steel rails, and keep an eye on the wings and fence ties. Compared with a swinging cattle gate that sags, drags, and eventually needs new hinges, most ranchers find the maintenance for a cattle guard to be quite light.
Why A Cattle Gate Isn’t Always The Right Choice For A Working Ranch
A cattle gate does its job well when everyone who uses it actually closes it. The nuisance is the time it takes (and what happens when someone forgets to close the gate after themselves).
If each gate stop takes about two minutes, and you pass through ten times a day, that’s about 120 hours a year spent opening and closing one cattle gate. Add a second gate, a hired hand, a feed truck, and a hunting lease, and those minutes add up. In winter, when you’re breaking ice and feeding in the wind, these gate stops feel even more challenging.
Then there’s the cattle gate that gets left open. Ranch visitors who don’t regularly handle livestock can easily forget, and even careful hands can slip up during a busy week on the ranch. Cattle guards work as an excellent solution for these types of situations.
The Way It Works: How Do Cows Know Not To Cross Cattle Guards?
Most cattle respect a guard the first time they see one, without really needing any training. But how exactly do cattle guards work on a cow that’s never seen one? Three things are at play: the cow’s eyesight, footing, and experience.
The Role Of Cattle Eyesight In Whether The Cattle Grates Work
Cattle are prey animals, and their eyes are built to spot movement from almost any direction. According to the Penn State Extension, their wide-set eyes give them close to 300 degrees of vision, but their depth perception is poor. Cattle may treat a shallow or shaded spot as a pit they can’t cross.
The University of Wisconsin Extension explains that because cattle rely mostly on vision from one eye at a time, with only a narrow band of binocular vision straight ahead, they have a hard time judging depth and often balk at shadows. The contrast between the bright rails of a cattle grate and the dark gaps below looks like a hole with no clear bottom, and most cows would rather not find out how deep it is.
You can often see this same thing play out when a cow stops when it stumbles across a puddle or a shadow. Handling specialists design corrals with this in mind, and a cattle guard uses the same trait to hold cattle back with nothing more than steel rails and open space.
How Are Cattle Hooves Impacted?
A cow’s eyesight limitations are what cause it to hesitate when it stumbles upon a cattle guard. But the unstable footing is the added layer that further deters cattle from crossing the grate.
A cow’s hooves are fairly flat, and the round rails on a cattle grate give that hoof very little to grip. If the cow does test it, their hoof tends to rock forward or back, and it can feel right away that the footing isn’t stable. Most cattle back off after that first try, having decided that the grate is an unstable route.
But this begs the question: if a cow does decide to traverse the grate, can the cattle guard hurt the cow? A guard that is built to a good design, sized correctly, and kept clean typically doesn’t cause trouble for cattle, because most animals turn away before testing their weight on it (that said, injury can in some instances happen, but we’ll get into that later).
Problems tend to show up with guards that are too short, have worn or broken rails, or have a pit packed with dirt that lets a hoof sink partway in. That’s why a good design and regular upkeep are important parts of having a cattle guard on your property.
The Long-Term Picture: How Do Cattle Guards Work Over Time?
Do cattle guards work for a lifetime? Mostly, though, how long they last really depends on how you build and care for them. Cattle are curious and, given enough reason, persistent. And there are a few elements that can cause your cows to test the boundaries:
Short guards invite jumping: A big, athletic bull under pressure can clear a short guard, so length in the direction of travel matters.
Filled pits look like solid ground: When mud, gravel, or snow fills in the gaps of the grate, the visual trick fades, and the footing firms up, making crossing the cattle guard more enticing.
Hunger and herd pressure: Cattle pushed hard from behind (or staring at green grass on the other side of a dry pasture) may take chances they’d normally skip.
Leaders teaching followers: If one cow figures out a way across, others may follow her lead.
You may also have seen painted lines on highways that mimic cattle guards. How do cattle grates work when they’re only paint on asphalt? Many transportation departments and ranchers have tried them. And painted stripes can work for a while, especially with cattle that have already learned how real guards feel underfoot. With these types of guards, many cows do hold off at first.
Over time, though, many cattle test the stripes and discover the road is flat. The U.S. Forest Service even suggests bold painted stripes as a backup near recreation sites, noting that some horses and mules hesitate to cross them, but it treats them as a temporary deterrent rather than a replacement for a real barrier. That’s why a physical guard with a clean pit tends to be a better long-term solution.
How Do Cattle Guards Work For And Impact Horses And Wildlife?
Plenty of ranches have horses, sheep, or goats alongside their herd of cattle, and many ranches share ground with wildlife. So, how well do cattle guards work on other animals? Each one responds a little differently, and a few are better served by their own crossing.
Horses and mules: The Forest Service’s Equestrian Design Guidebook says cattle guards are dangerous for horses and mules, whether they’re loose or under saddle, because a horse may try to walk or jump across and can trap a hoof or leg between the rails. Horses have smaller hooves and more slender lower legs than cattle, and a trapped horse that panics can do serious damage. If horses share a pasture served by a cattle guard, many ranchers will add a bypass gate right beside it so riders and loose horses have a safe way through.
Sheep and goats: Small, sure-footed animals may pick their way across the rails of a cattle grate, and goats in particular seem to treat the guard as a puzzle rather than a barrier. A cattle gate or tighter fencing usually does a better job for small ruminants.
Deer and elk: How well do cattle guards work on deer and elk? Not very. Both can clear most standard guards with ease. If keeping deer off a garden or out of a hay yard is the goal, you’ll likely need taller fencing along with a longer guard.
Small wildlife in the pit: A research note in California Fish and Wildlife Journal found that the pit under a cattle guard can act like a pitfall trap for rodents, amphibians, and reptiles that fall in and can’t climb out. The authors describe designs with open sides or drain pipes that let small animals walk out, and they encourage retrofitting older cattle guards where protected species live. A simple escape ramp in a corner of the pit beneath your cattle grate is an easy weekend project that helps both wildlife and the cleanliness of your guard, and it doesn’t change how cattle guards work on cows.
So how do cattle guards work in a mixed operation? Quite well, as long as you plan for the animals that shouldn’t be on them.
Cattle Guards vs Cattle Gate: What Ranchers Should Know
So which is the right choice, the guard or the gate? The answer really depends on your traffic, your animals, and your budget. Regardless of whether you choose a cattle guard or a cattle gate, both options have their particular strengths on a ranching operation. Let’s break it down.
Factor
Cattle Guard
Cattle Gate
Upfront cost
Higher, especially with a concrete foundation
Lower for most standard gates
Installation
Excavation, foundation, wings, and fence ties
Posts, hinges, and a latch
Daily use
Drive straight through
Stop, open, pull through, close
Upkeep
Pit cleanout, paint, periodic inspection
Hinges, latches, sagging and dragging
Horses
Needs a bypass gate
Works well
Sheep and goats
Often unreliable
Works well
Human error
Nothing to leave open
Only as good as the last person through
How Do Cattle Guards Work Better Than A Cattle Gate For Daily Traffic?
If the entrance to your ranch receives a good bit of traffic, a cattle guard tends to be a solid option. Main ranch entrances, the road to the calving barn, feedlot lanes, and any crossing used by employees, contractors, or hunters are all good candidates for a grate.
How much do cattle guards cost, and does the math work out? Prices vary a lot depending on width, load rating, material, and whether you buy new or used, so it’s smart to get quotes from a few fabricators and check the used market before you commit.
If the cattle guard is going on a county road, local fees may apply too. For example, Union County, New Mexico lists a $50 administration fee and a $300 installation fee, and the applicant supplies the guard. But even with those additional fees, when many ranchers compare those numbers to the hours they’d spend at a cattle gate opening and closing up behind them, a cattle guard at a busy entry point may be worth the investment.
With that said, there’s still a place for the traditional cattle gate. Low-traffic pasture crossings, horse operations, leased ground you may not farm next year, and spots where you need to sort or move cattle all tend to favor a cattle gate over a guard. Many ranchers use both, pairing a cattle guard with a walk-through or vehicle gate beside it, so they have options for horses, cattle drives, and oversized equipment.
How Load Capacity Factors Into What Type Of Cattle Guard You Should Install
A cattle guard is part fence and part bridge, so the weight it can hold matters just as much as its ability to hold cattle back. When you size one, think about the heaviest vehicle that’ll cross it: a loaded semi hauling calves, a grain truck at harvest, a fuel truck, or a fire engine responding to a grass fire.
Many public agencies spell out load requirements. Fremont County, Colorado’s cattle guard policy requires cattle guards on county roads to meet or exceed an HS20 rating with a concrete base, and state departments of transportation, such as Montana DOT, publish standard drawings built around HS20 highway loading. On a private lane that only sees pickups and tractors, you may not need a highway-rated unit, but a manufacturer can help you match the rating to what type of weight your cattle guard needs to bear.
Material use is an important consideration as well. A steel cattle grate is strong and easy to transport and set. Concrete guards resist rust and can use deep beams that give a stuck hoof room to slide back out. Round-top rails do the most to unsettle a hoof, while flat-top rails ride more smoothly at speed. You’ll want to select the rail shape based on whether ride quality or deterrence matters more at that crossing.
Pro Tip: Make sure you always check your local requirements and choose a rating based on the heaviest expected vehicle to cross your cattle guard.
Is It Worth Considering A Cattle Grate Without A Pit?
Not every piece of land is suitable for digging, and in those cases a cattle guard without a pit is worth considering. But how do cattle grates work without a pit underneath them? A flat or box-style cattle grate sits on top of the ground on a raised frame, often with skirts around the sides to keep dirt and gravel from creeping underneath. Some are light enough to move between fence openings, which works well on rented ground or seasonal pastures.
The tradeoff here is depth. A guard over a true pit or a tall foundation gives cattle a more convincing gap to look at, and many ranchers find cattle grow more willing to test guards set close to ground level. Do flat cattle guards work as well as ones set over a pit? Usually not quite as well, though how your herd responds in the first few weeks can tell you a lot. If you go with an above-ground design, choose a generous length, keep the underside clean, and watch how your herd responds during those first few weeks.
Are There Best Practices On How Wide And Long A Cattle Guard Should Be?
Yes, and they depend on who and what will cross the grate. There’s no single national size, but agency standards and extension guidance provide a few rules of thumb. Width decides which vehicles can cross, and length decides whether or not cattle attempt to jump or cross.
Width runs across the road, side to side. You’ll want to choose a size that accommodates your widest regular vehicle or implement, with some room to spare. Private ranch lanes often use guards in the 12 to 16 foot range, while county roads may require more. Powder River County, Montana sets a 24-foot minimum for cattle guards on its roads, for example, and asks landowners to install a bypass gate of at least 16 feet on or next to the county right-of-way. At the other end of the scale, the Forest Service’s trail cattle guard report describes guards just 4 to 5 feet wide and notes that widths of 52 to 60 inches will let most ATVs squeeze through.
Length runs in the direction of travel. This is what deters cattle from jumping. How long do cattle guards need to be to work well? Many highway standards land around 8 feet. The British Columbia Ministry of Transportation, for example, specifies a standard length of 2,500 millimeters, a little over 8 feet. The Forest Service trail guards ranged from about 5.6 to 13 feet long, and the report notes that cattle avoided them even when bunched up. If you run big, athletic bulls or cattle that get pushed hard at the crossing, leaning toward the longer end is often going to be the best move.
Rail spacing and pipe size vary by manufacturer and by the cattle you have on your ranch. On any cattle grate, the goal is gaps that look uninviting and don’t give a hoof comfortable footing, paired with rails strong enough for your loads. Ask your supplier what spacing their cattle guard design uses and what livestock it was built for.
Due Diligence Before The Installation
Getting the guard in the ground is only part of the job. Where you put it, how you tie it into the fence, and how you care for it all affect how well the cattle guard holds up over time.
You’ll likely need to start with paperwork if your cattle guard will touch a public road or shared access. Different counties handle this in different ways. For example, in Grand County, Colorado, a cattle guard application goes to the Board of County Commissioners for approval, and the applicant covers the cost of the guard and blocks.
On grazing allotments or roads crossing Bureau of Land Management or Forest Service ground, you’ll want to talk with the local office before you order anything for your cattle guard, since they often have their own specifications.
Working With Wing Fences
Cattle typically won’t cross a well-built guard, but they’ll walk around one if the ends are open. Wings are short panels or fence sections that angle from each end of the guard to the nearest fence posts, closing the gap. The Forest Service lists suitable wings or side barriers among the must-haves for a trail guard that works.
Keep the wings clean and simple. The Forest Service’s equestrian guide shows how clutter and barbed wire in the angled wings can create hazards for everyone, especially horses, so smooth panels or well-built fence ties are usually a better choice.
How Cattle Guards Are Impacted By The Snow And Mud
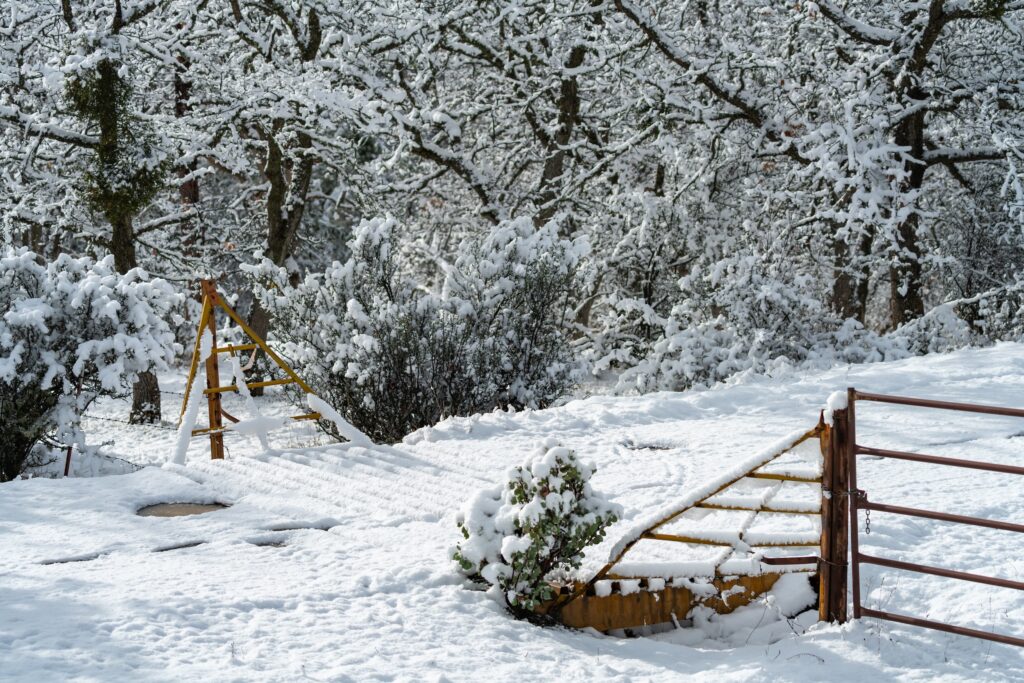
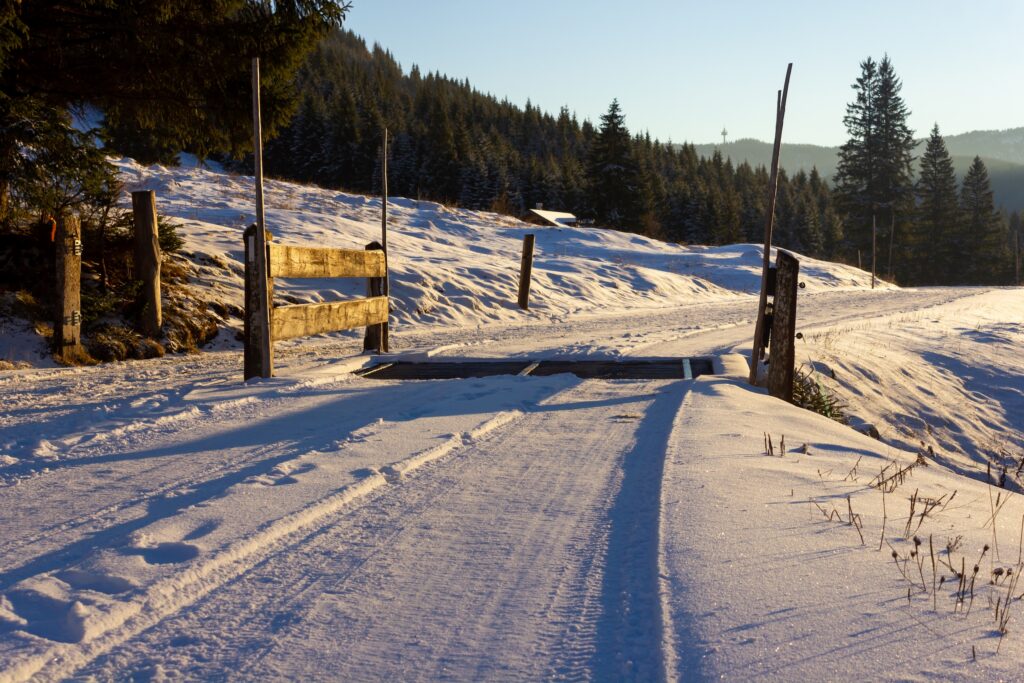
How well do cattle guards work in winter? This really depends mostly on keeping the pit clear. Mud, gravel, and blowing snow can pack the pit until it forms a bridge, and cattle notice.
A few things help:
Choose a cattle grate with a cleanout section or easy access to the pit.
Set the guard slightly higher than the surrounding road so water drains away.
Check it after big storms and during spring thaw.
Clear the grate before moving cattle nearby, especially in winter.
What Kind Of Issues Can Arise When You Have A Cattle Guard?
Many of the problems ranchers have with their cattle guards can be traced back to how the grate was sized and set. A cattle guard that’s too short may get jumped. One rated too light can bend under a loaded truck. Missing wings let cattle walk around the ends of the cattle guard, and a packed pit turns the whole thing into a bridge. In a horse pasture without a bypass gate, the risk of injury goes up.
This is why you’ll want to size the guard for your animals and your heaviest load, add wings and a bypass gate, and give the pit some attention a few times a year.
Cattle can get hurt on a guard too, though it happens less often with one that’s built well and properly maintained. Most injuries come when an animal tries to cross anyway, such as a spooked cow, a calf trailing close behind its mother, or cattle crowded hard from behind, and a hoof slips down between the rails.
A few simple habits lower those odds. Keep rail spacing to the manufacturer’s spec, choose a pit deep enough that a slipped hoof can pull back out, and clear the guard after storms. During a gather, move cattle through a gate instead of pushing them toward the guard, and give pairs a gate to use so calves aren’t tempted to follow their mothers across.
Find The Equipment You Need To Keep Your Ranch Running Smoothly
With the right cattle guard in place, you pull up to your main entrance with a load of hay, roll straight past where the cattle gate used to be, and see the herd in the mirror still grazing right where you left them. Because of this, plenty of ranchers call a cattle guard one of the best upgrades they’ve made. It’s part of what makes for a smooth ranching operation.
At Hayden Outdoors, we know ranch life because we live it and work alongside the people who make it happen every day. When you’re ready to shop, browse the Hayden Outdoors equipment marketplace for ranching gear from sellers across the country. If you’ve got equipment sitting idle after an upgrade, you can list it there too and help a neighbor find exactly what they need to keep their ranch running smoothly.
White Crappie vs Black Crappie: The Core Differences Between These Fish Types
If you’ve ever pulled two crappie out of the same cove and wondered why one had bars and the other had speckles, you’ve already noticed one of the core differences between white crappie vs black crappie. White crappie and black crappie get lumped together as “crappie” so often that many anglers don’t learn there’s a difference between the two types of fish until someone points it out on the dock. For landowners thinking about ponds, lakes, or recreational property, that difference matters even more, since it shapes how a fishery grows and whether stocking crappie makes sense for your water at all.
Plenty of Hayden Outdoors agents are anglers themselves, and quite a few grew up fishing creeks and farm ponds long before they ever got into land. Needless to say, they know a thing or two about the difference between white crappie vs black crappie.
We’ve teamed up with them to walk you through what separates white crappie and black crappie, physically and behaviorally. Then, we get into what each species means for stocking and maintaining a private fishing pond on your land, using information from state wildlife agencies and university fisheries programs rather than guesswork.
Types Of Crappie: Where White And Black Crappie Fit In
Crappie belong to the sunfish family, and across North America, the two different crappie types anglers run into most are white crappie (Pomoxis annularis) and black crappie (Pomoxis nigromaculatus).
According to Texas Parks and Wildlife, the genus name Pomoxis comes from Greek words meaning “opercle sharp,” a nod to the spines on the fish’s gill covers, while annularis is Latin for “having rings,” referring to the vertical bars on a white crappie’s sides. Nigromaculatus is Latin for “black spotted,” which is a pretty good description of a black crappie at a glance.
Hybrid crappie, a cross of white crappie and black crappie, also turn up in stocked ponds, and we’ll get into that a bit later. Outside of hybrids, most of the other names you’ll hear for crappie, like speck, papermouth, calico bass, or sac-a-lait, are regional nicknames for one of these same two species rather than truly separate types of crappie fish.
White Crappie vs Black Crappie: Quick Comparison Chart
Once you know these fish by name, the fastest way to actually tell white crappie vs black crappie apart on the bank or in the boat is to see the traits side by side. The chart below pulls together the markings, spine counts, body shape, habitat, and size differences covered throughout this guide into one quick reference. Bookmark it or screenshot it, since it’s the kind of thing worth having handy the next time you’re second-guessing the crappie you’ve caught.
Trait
White Crappie
Black Crappie
Markings
Vertical bars
Irregular blotches
Dorsal spines
5 to 6
7 to 8
Body shape
More elongated
Deeper bodied
Preferred water
Tolerates murkier water
Prefers clearer water
Typical lifespan
Up to 8 years
Up to 8 years
Common length
9 to 10 inches
Around 10 to 11 inches
How To Tell White Crappie vs Black Crappie Apart: Coloring, Fins, And Body Shape
Once you know what to look for when comparing these two fish types, telling white crappie and black crappie apart gets a good bit easier. If you only have a few seconds with a fish in hand, counting dorsal spines is a fast way to separate the two. Coloring and body shape are useful too, and using more than one feature at a time helps, since coloring alone can be misleading.
Coloration And Body Markings For White Crappie vs Black Crappie
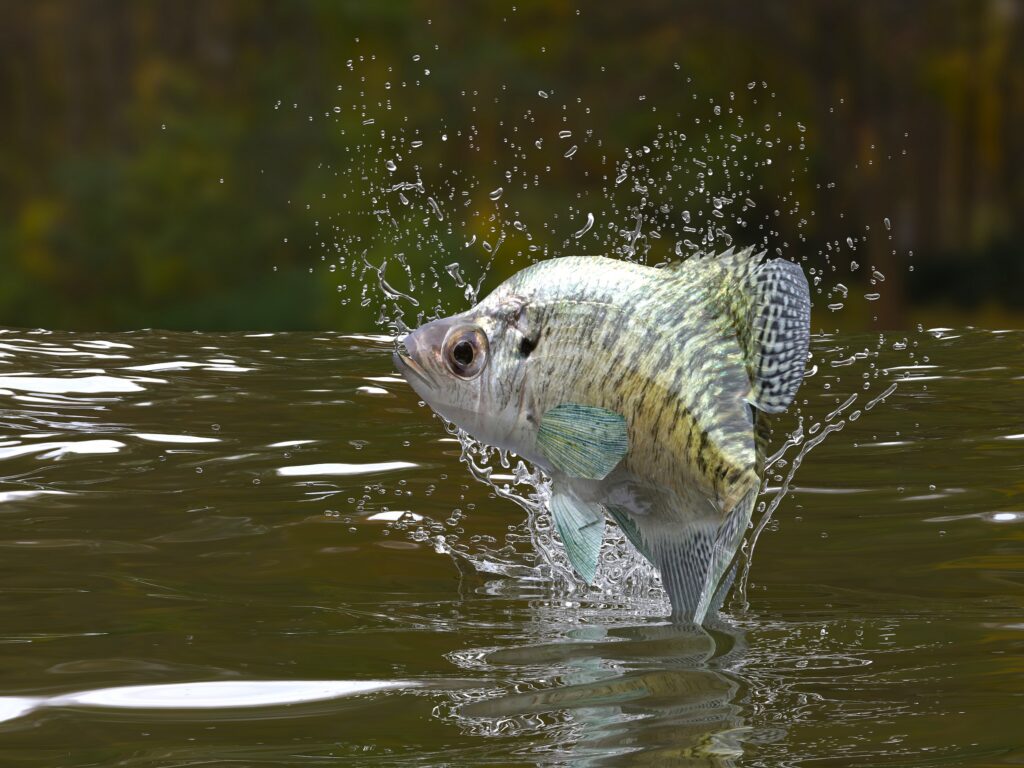
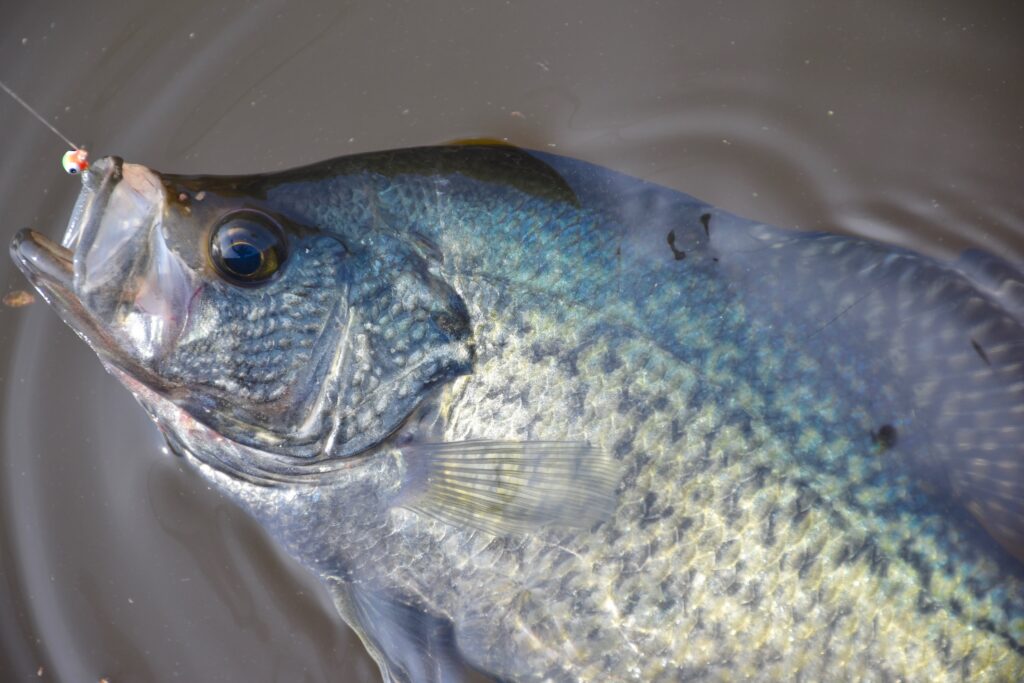
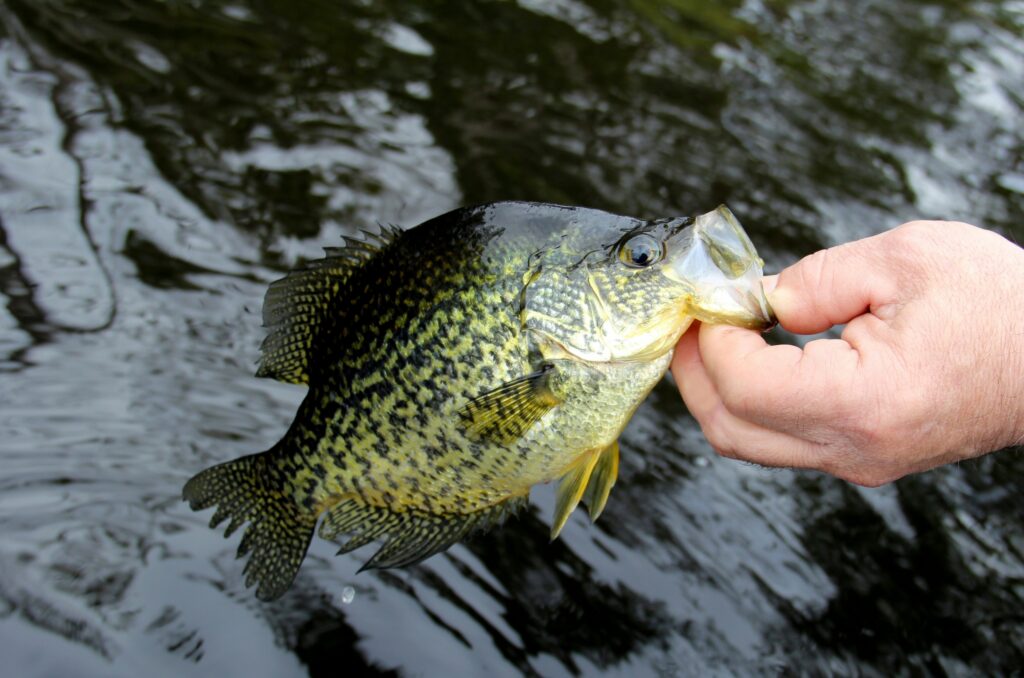
White crappie run silvery, ranging from a silvery-white belly up to silvery-green or dark green along the back, with several vertical bars down each side. Black crappie are silvery-green overall with no real bar pattern at all. Instead, you’ll see irregular black blotches scattered across the body.
Texas Parks and Wildlife notes that both white crappie and black crappie males darken up during spawning season, which is when a lot of anglers start second-guessing themselves and calling a dark male white crappie a black crappie by mistake.
Dorsal Spine Count On White Crappie vs Black Crappie
If the coloring doesn’t settle the white crappie vs black crappie debate, count the spines at the front of the dorsal fin. Generally speaking, you can expect white crappie to carry five to six spines vs black crappie, that carry seven to eight. This is one of the most reliable ways to separate white crappie from black crappie, and it holds up even on fish that are dark from spawning or faded from muddy water.
Body Shape And Mouth Structure Differences
Black crappie run a bit deeper-bodied than white crappie, giving them a slightly more compact look. White crappie tend to be more elongated for their size. It’s a subtle difference and not something you’d want to rely on by itself, but paired with spine count and markings, it can help you more easily identify white crappie vs black crappie.
Habitat And Range Of White Crappie vs Black Crappie
White crappie and black crappie are both native to a wide swath of the eastern and central United States, and both have been introduced well beyond their original range through more than a century of stocking efforts by state and federal agencies. Today, black crappie can be found in all of the lower 48 states, and white crappie have a similarly broad footprint.
They’re regularly found in turbid water even though it isn’t their preferred condition, which is part of why white crappie often hold their own in muddier reservoirs and river systems where black crappie struggle. They tend to congregate around submerged trees, stumps, brush, and boulders, feeding mostly in the evening and early morning.
Black Crappie Habitat Preferences
Black crappie lean toward clearer water with more aquatic vegetation and structure (vs white crappie being fine with muddier waters). Black crappie favor lakes, reservoirs, ponds, and slow streams with cover such as vegetation, fallen trees, or boulders, and that they often form large schools in clear water over mud or sand bottoms.
White Crappie vs Black Crappie: Feeding Behavior
Beyond looks and habitat, white crappie and black crappie have some differences in their day-to-day habits that matter if you’re trying to catch them or manage a population.
Texas Parks and Wildlife’s comparison of white crappie and black crappie notes that black crappie stick closer to insects and crustaceans, while white crappie put more fish in the belly, especially once they’re grown. Young fish of both species start out filtering zooplankton with fine gill rakers, but white crappie shift hard toward shad and shiners as adults, using that big mouth to run down baitfish instead of picking at bugs.
Anglers have talked about this at the cleaning table for ages, whether or not they were aware of the biology behind it. Plenty of crappie fishermen swear black crappie taste a touch cleaner and milder, and chalk it up to a diet that leans more on insects and crustaceans, while white crappie, especially bigger fish that have been eating heavy on shad, get called a little “fishier” by comparison.
White Crappie vs Black Crappie: Size, Growth, And Record Catches
Size-wise, these two types of crappie are close enough that bragging rights come down to inches, not pounds. The U.S. Fish and Wildlife Service puts the common length for black crappie around 10.8 inches, with the biggest ones on record stretching to 19.3 inches and topping out at 6 pounds. Weight gain tracks pretty evenly between the two, though white crappie tend to add length a bit faster while black crappie pack on a stockier build.
The record books back that up. According to Outdoor Life’s rundown of IGFA-certified records, the all-tackle world record white crappie went 5 pounds, 3 ounces, pulled from Enid Dam in Mississippi back in 1957. The black crappie record is close behind at 5 pounds, 7 ounces, caught out of a private pond in Tennessee in 2018. Both records have stood for years, so if you’re chasing a trophy crappie of either type, know you’re chasing something pretty rare.
Crappie Types And Taste: Which Is Better To Eat?
White crappie and black crappie both have a well-earned reputation as some of the best-eating freshwater fish around. The meat’s light, flaky, and mild, without the muddy or “fishy” edge some other panfish carry.
Most anglers who’ve cooked up a mess of both crappie types will tell you they taste close to identical once they hit the pan, and that lines up with the biology, since both white and black crappie share a similar body composition.
That said, some anglers do notice a slight edge toward “cleaner” on black crappie and a touch “fishier” on bigger white crappie, and that’s likely tied to the diet difference we discussed earlier.
Bigger picture, the taste difference you’ll actually notice between white crappie vs black crappie comes down to the individual fish, not the species. A smaller crappie cleaned and cooked quickly beats a larger, overcrowded, slow-growing fish that sat in a cooler too long, whichever species you caught. That’s one more reason good pond management pays off if putting fish in the fryer is part of the plan.
White Crappie vs Black Crappie For Pond Stocking: What Landowners Should Know
If you own, or you’re considering buying, land with a pond or small lake, this next part’s for you. While it’s worth contemplating whether white crappie vs black crappie will thrive in the type of water you have on the property, you’ll also need to think through what size and setup gives you the best shot at a crappie fishery in the first place.
What It Takes To Build A Healthy Crappie Population
State fisheries, agencies, and university extension programs have done solid research into what makes a crappie pond thrive, and pond size is a great place to start. Either of the two types of crappie can do well in the right pond, with clear water, rooted plants, and a healthy largemouth bass population to help keep things balanced.
The exact pond size recommendations shift a bit by state, but the end game’s the same: both white and black crappie spawn early and often, so a strong, harvestable bass population is what keeps that energy in balance and turns it into a pond full of quality, slab-sized crappie rather than a lot of small ones.
Stocking crappie is allowed in most states, and for the right pond, it’s a solid option. Rules do shift a bit by state and by county, and they can change over time, so a quick check with your state wildlife agency is the best way to confirm current regulations before you stock your pond with black or white crappie.
One thing worth knowing if you’re pond-shopping: these acreage numbers are about the water itself, not the property around it. A 200-acre ranch with a 3-acre pond is working with 3 acres for stocking purposes, not 200, so it’s worth sizing up the water specifically when you’re weighing your options.
Black Crappie vs White Crappie: Which Handles Pond Life Better?
Where a pond is set up well for crappie, black crappie often gets the nod. Texas A&M AgriLife Extension favors black crappie for smaller ponds thanks to their lower reproductive rate, which helps keep the population easy to manage.
Oklahoma Department of Wildlife Conservation backs that up, noting black crappie tend to grow well and handle the move to a new pond smoothly, which supports strong survival rates.
Missouri takes a more even-handed view, pointing out that black crappie tend to carry a bit more body mass at a given length and often do well even if a pond turns a little muddy, while noting that both species can perform well in a well-managed Missouri pond.
Hybrid Crappie: A Great Option For Smaller Waters
White crappie and black crappie interbreed on their own, and they’re also crossed on purpose for pond stocking. If you like the idea of crappie fishing in a smaller pond, ask a fisheries biologist about hybrid crappie. They carry a lower reproductive rate than either parent, which makes them a smart fit for keeping a smaller pond’s population easy to manage.
As with any type of crappie, getting a professional opinion first is a great way to set your pond up for success, since every pond has its own personality depending on water clarity, existing fish, and habitat.
Best Practices If You Decide To Stock Crappie
Whichever type of crappie you opt for, a few habits show up again and again in state guidance for building a great crappie fishery:
Stock adult fish right before spawning season, usually April or May, instead of fingerlings, to get the population established faster.
Keep a strong, harvestable bass population in the pond. Bass are your best tool for keeping the crappie population balanced and productive.
Keep an eye on water clarity, since it plays a big role in how well bass can do their job of keeping the population in check.
Talk to a local fisheries biologist or your state wildlife agency before you stock anything. A quick conversation up front sets you up for a fishery you’ll enjoy for years.
Pro Tip: Thinking about selling crappie out of your own pond? It’s worth knowing that selling wild-caught or pond-raised game fish, crappie included, is closely regulated in most states, and usually calls for a commercial fishing license or dealer permit to do it legally. Your regular fishing license won’t cover it. Rules vary quite a bit state to state, so always check current regulations with your state wildlife agency if selling fish is part of your plan.
Avoiding Misidentification: Crappie vs. Similar Panfish
Crappie get confused with a handful of other panfish from time to time, especially by newer anglers still working out the differences in white crappie vs black crappie identification.
White bass, for example, have a similarly silvery body with horizontal stripes rather than the vertical bars or blotches you’d see on crappie, and a double dorsal fin rather than the single dorsal fin crappie carry.
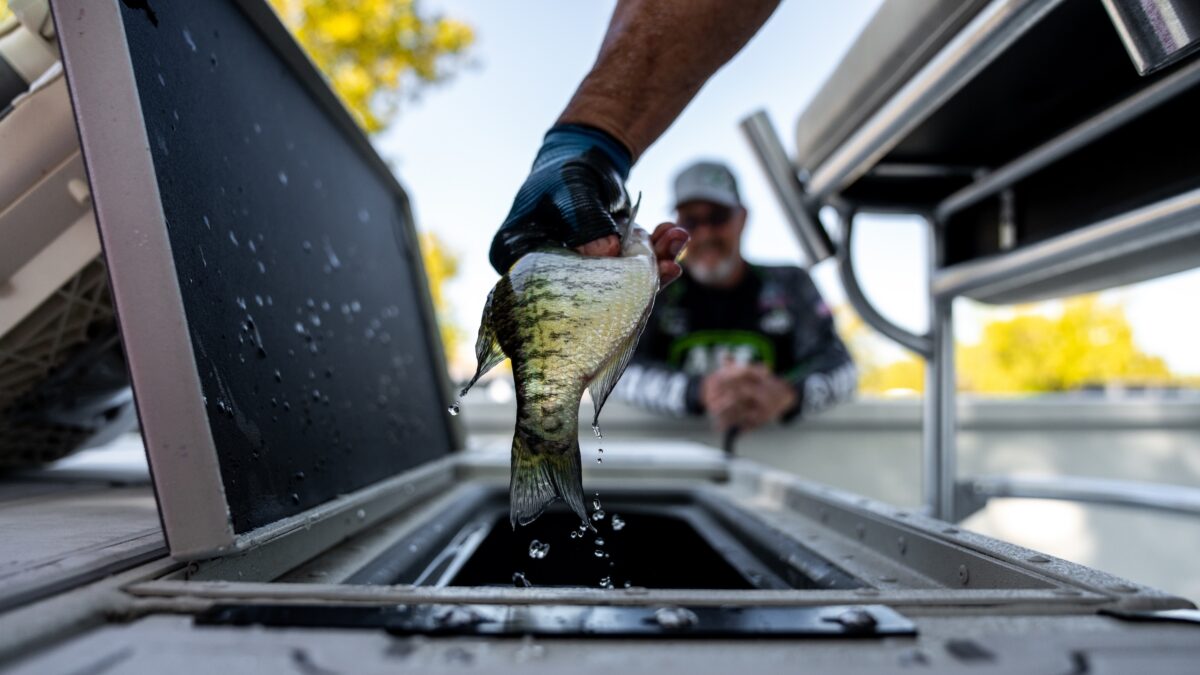
Bluegill (in the above image) and other true sunfish are rounder and much smaller-mouthed than either crappie species, without the large, protrusible mouth crappie use to ambush small fish and zooplankton.
The dorsal spine count is a reliable tiebreaker any time coloring alone doesn’t settle the question, whether you’re comparing white crappie vs black crappie or trying to rule out a different type of fish altogether.
Find Your Next Waterfront Property
Understanding white crappie vs black crappie, and knowing the difference between the types well enough to manage either one, is useful information on its own. For a lot of landowners, though, it’s really part of a bigger question: what kind of water do you want on your own property, and what will it take to keep it healthy for years to come?
If that question has you thinking about buying land with a pond, lake, or river frontage of your own, Hayden Outdoors lists waterfront properties across the country, from small farm ponds to larger lakes built for serious fishing. Browse our current waterfront listings to find a property that fits the kind of fishery (and the kind of life) you’re after.
The Sustainable Farmer’s Guide To No Till Farming Equipment
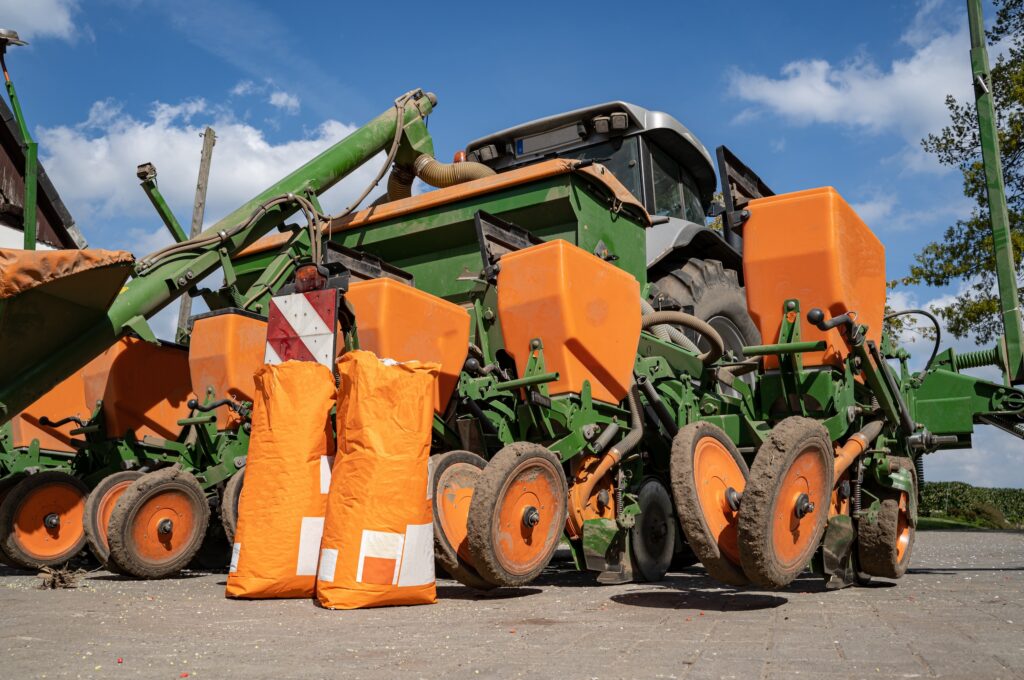
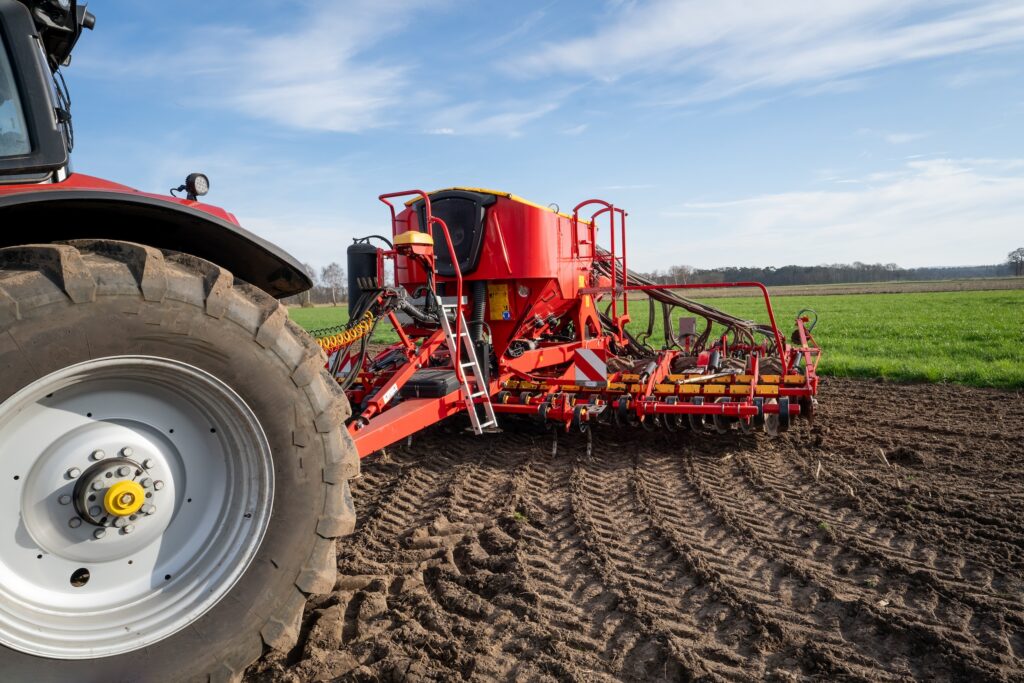
There’s a quiet revolution happening across American farmland. Farmers who once measured their success by how thoroughly they turned the soil are rethinking everything, reaching instead for no till farming equipment as a path toward a more productive, more resilient, and more sustainable operation.
Input costs are climbing. Soil quality on intensively tilled ground is declining over time. And the pressure on farmers to produce consistently, year after year, without degrading the land beneath their feet, has never been greater. If you’ve been asking whether there’s a better way, no till farming equipment is worth looking into.
This guide covers what no till farming is, which farming operations are best suited for it, the honest pros and cons, the core equipment involved, how to acquire and adapt that equipment, and what it takes to keep it running well.
Whether you’re a seasoned farmer exploring a transition or a land buyer evaluating a property’s agricultural potential, we’ll give you a grounded, practical understanding of no till farm equipment and what it means for the land you work.
No till farming, sometimes called zero tillage or direct seeding, is an approach to crop production that eliminates the need to mechanically disturb the soil before planting.
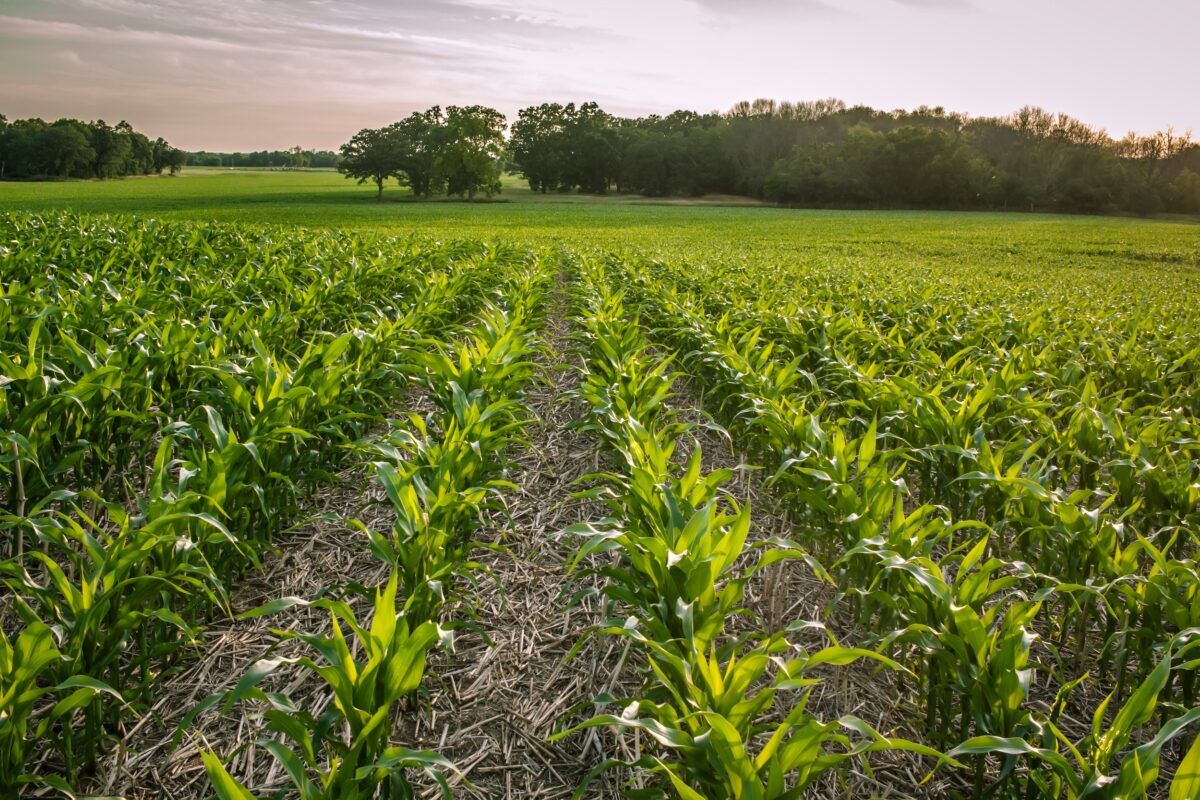
In a conventional system, farmers plow, disc, and work the ground repeatedly to prepare a seedbed, kill existing weeds, and incorporate residue from the previous crop. No till farming skips those passes entirely. Instead, specialized no till farming equipment places seeds directly into undisturbed soil, cutting through crop residue and surface material with minimal ground disturbance.
The idea isn’t new. No till farming gained significant momentum in the United States starting in the 1970s, when broad-spectrum herbicides became widely available and gave farmers an alternative tool for weed control that didn’t rely on tillage. Since then, adoption has grown substantially.
Today, roughly a quarter of US cropland is managed using zero tillage methods and equipment, and the practice has been described in agricultural literature as one of the most significant shifts in modern farming.
How No Till Farm Equipment Differs From Conventional Tillage Tools
The equipment that makes no till farming possible is purpose-built for a very different task than conventional tillage tools. In conventional farming, a plow, disc harrow, or field cultivator is designed to aggressively disturb the soil across a wide swath.
No till farm equipment, by contrast, is engineered to do the opposite: open a precise, narrow slot in undisturbed ground, place seed at the correct depth, and close the furrow behind it, all while leaving the surrounding soil structure intact.
This fundamental difference in purpose drives every design decision. No till drills and planters are heavier than their conventional farming equipment counterparts because they must push through crop residue and firm, untilled soil. Their coulters, openers, and press wheels are built to take on tougher conditions than machines designed for a freshly worked seedbed.
And the way these pieces of no till farming equipment interact with the land is categorically different. Where a conventional tillage tool is meant to destroy existing structure, no till farming equipment is built to work with it.
This difference is important because the structure of undisturbed soil is one of its most valuable assets. When soil is tilled repeatedly, it loses the network of pores, channels, and aggregates that allow water to move through it, oxygen to reach plant roots, and microorganisms to do their work. No till farm equipment preserves that structure season after season, which is a central reason why the long-term trajectory of zero tillage fields tends to look very different from conventionally tilled ground.
The soil health and land value benefits of no till farming are well-documented. Fields managed over several years with zero tillage equipment generally develop higher water-holding capacity than conventionally tilled fields, which matters enormously in drought-prone regions where water availability is tied directly to crop survival.
No till farming and the equipment that’s used for it can also reduce soil erosion, which helps keep sediment out of nearby waterways and protects water quality. Organic matter from previous crops stays on and in the soil rather than being buried or dispersed, feeding microbial life and building long-term fertility.
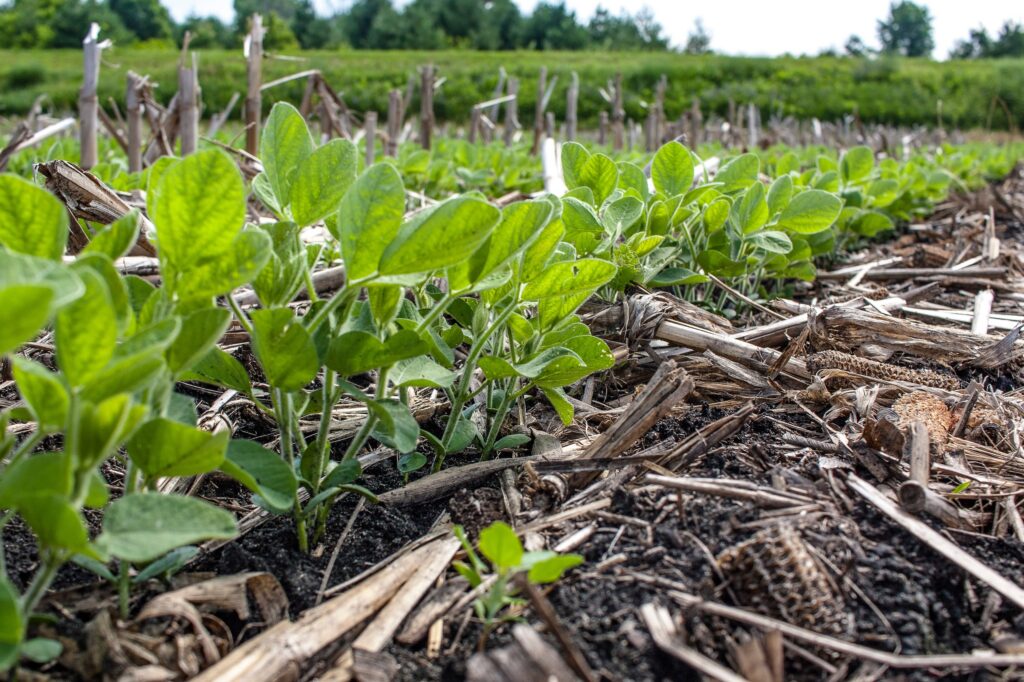
For landowners and hunters, the wildlife habitat benefits of no till farming are quite compelling. The residue and cover left on the soil surface by no till farming systems provide year-round habitat for birds, beneficial insects, and small mammals. Research has found that zero tillage fields support significantly more bird species and earthworm populations than conventionally tilled ground, making no till farm equipment a genuine tool for land stewardship, not just crop production.
Types Of Farms That Are Best Suited For No Till Farming Equipment
No till farming equipment is not a universal fit for every operation, and understanding where it performs best will help you determine whether it makes sense to implement zero tillage on your land.
Soil type plays a significant role. Well-drained soils with good natural structure tend to transition to no till farming systems more smoothly than heavy clay soils that are prone to compaction and slow to drain. That said, no till farming equipment has been successfully implemented across a wide range of soil types when managed carefully. In clay-heavy ground, the transition to zero tillage may require more patience and a stronger emphasis on cover crops to build the biological activity needed to maintain pore structure without mechanical intervention.
Crop rotation is another key factor. No till farming equipment performs well in diverse rotations that break pest and disease cycles and reduce weed pressure over time. Corn and soybean rotations, small grains like wheat and barley, and forage crops are all commonly grown with no till farm equipment. Monoculture systems, on the other hand, can make weed and residue management more challenging without tillage as a reset tool.
Terrain matters too. Sloped, erosion-prone ground is often where no till farming equipment provides the most visible benefits, since the residue cover and undisturbed soil structure dramatically reduce the movement of soil and nutrients during rain events. Flat, highly productive ground may see subtler benefits from no till farming equipment use in the short term, but still gains in the long run through the improved soil health of a zero tillage process. Extremely rocky or irregular terrain can create challenges for some types of zero tillage equipment, particularly equipment with rigid coulter or opener configurations that struggle to follow uneven ground closely.
Farm scale is less of a limiting factor than many assume. No till farm equipment is available in configurations suited to small operations, mid-size family farms, and large commercial producers. Smaller operations may find that renting no till farming equipment or working with a custom hire operator is a practical entry point, while larger operations may justify dedicated equipment more quickly. The key is matching the equipment’s capacity and configuration to your specific acreage, row spacing requirements, and the crops you grow.
Finally, consider your willingness to manage a transition period to zero tillage. No till farming does not always deliver its full benefits immediately. In the first one to three years after switching to zero tillage, some farmers see modest yield reductions as soil biology adjusts to the new system and management practices evolve. This is a normal part of the transition to no till farming equipment and should be factored into any decision to adopt a zero tillage approach.
Pros And Cons Of No Till Farming Equipment
The Real Advantages
The case for no till farm equipment is built on a foundation of well-documented, long-term benefits that compound over time.
Fuel and labor savings are among the most immediate and tangible benefits of zero tillage. Conventional tillage requires multiple passes over a field before planting, each one burning fuel and logging hours on equipment. No till farming equipment eliminates most or all of those passes. The USDA has noted that continuous no till requires a fraction of the diesel fuel per acre compared to conventional tillage systems, and that labor savings from eliminating pre-plant tillage passes can be substantial on large acreage operations.
Soil health improvement is the most consequential long-term advantage of using no till farming equipment. No till farming preserves soil structure, reduces erosion, and builds organic matter over time. Fields that have been managed with no till farm equipment for years tend to have greater water-holding capacity, better infiltration, higher levels of biological activity, and more earthworm populations than tilled fields. This translates into greater resilience during drought, better nutrient cycling, and a more productive soil ecosystem over the long run.
From a land value standpoint, well-managed no till fields with improving soil health are increasingly attractive to buyers. As awareness of soil health’s role in long-term land productivity grows among agricultural land investors and farmers alike, a documented history of using no till farming equipment and improving soil organic matter can be a meaningful asset.
For landowners with wildlife and hunting interests, the habitat benefits of no till farming practices and equipment usage add another layer of value. The surface residue and cover that zero tillage equipment leaves behind creates food and shelter for game birds, pollinators, and the full range of wildlife that makes a property thrive.
The Honest Challenges Of Zero Tillage Equipment
Any thorough guide to no till farming equipment requires diving into the challenges and obstacles.
The upfront equipment investment is one of the most commonly cited barriers to implementing zero tillage. Quality no till farming equipment is typically more expensive than conventional planting equipment because of the heavier construction, more complex opener systems, and additional components required to handle residue and undisturbed soil. Farmers who already own conventional planters may find that converting or adding components is a cost-effective option, but those starting from scratch should expect a substantial equipment investment choosing no till farming.
Weed management becomes more complex without tillage as a tool. Tillage has historically served as a primary method of weed control, physically destroying germinating weeds and disrupting seed banks. No till farming replaces that function with a combination of crop rotation, cover crops (e.g., cereals, grasses, and legumes), and herbicide programs. Managing herbicide-resistant weeds is one of the most significant challenges in no till systems, and it requires active, thoughtful management rather than a set-it-and-forget-it approach.
Residue management can also add complexity, particularly in high-yield corn systems where stalk residue is heavy and dense. Too much residue can interfere with seed placement, slow soil warming in spring, and create slug-friendly conditions. Row cleaners on no till farming equipment help address this, but residue management remains an ongoing consideration that influences both equipment selection and agronomic decisions.
Lastly, there’s the transition period. Yields in the first one to three years after switching to no till farm equipment can dip modestly as the soil adjusts. Farmers who enter the transition expecting immediate gains from adopting a zero tillage approach may be disappointed, while those who understand the longer arc of the system tend to stick with it and reap the rewards.
Core Types Of No Till Farming Equipment
No Till Drills And Planters
Ask any farmer who has made the switch to no till farming equipment and they’ll tell you the same thing: the drill or planter is where it all starts. Get that piece of no till farming equipment right, and everything else becomes manageable. Get it wrong, and you will be fighting the system all season.
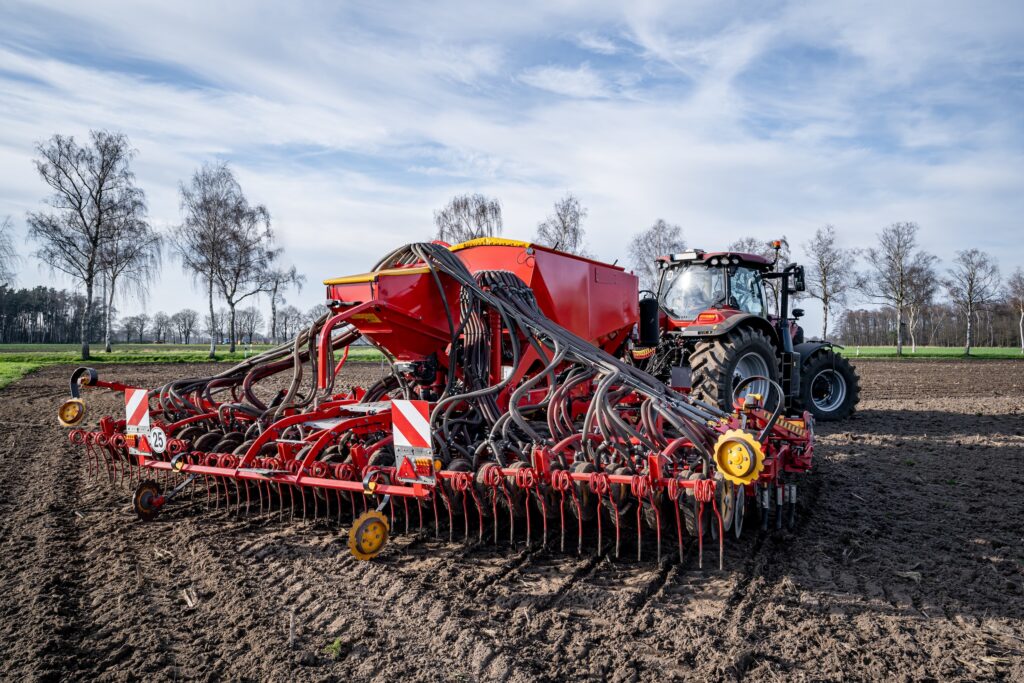
A no till drill is the go-to choice for small grains like wheat, oats, barley, and rye, as well as cover crops and forage species. It works in closely spaced rows, covering a wide swath of ground in a single pass.
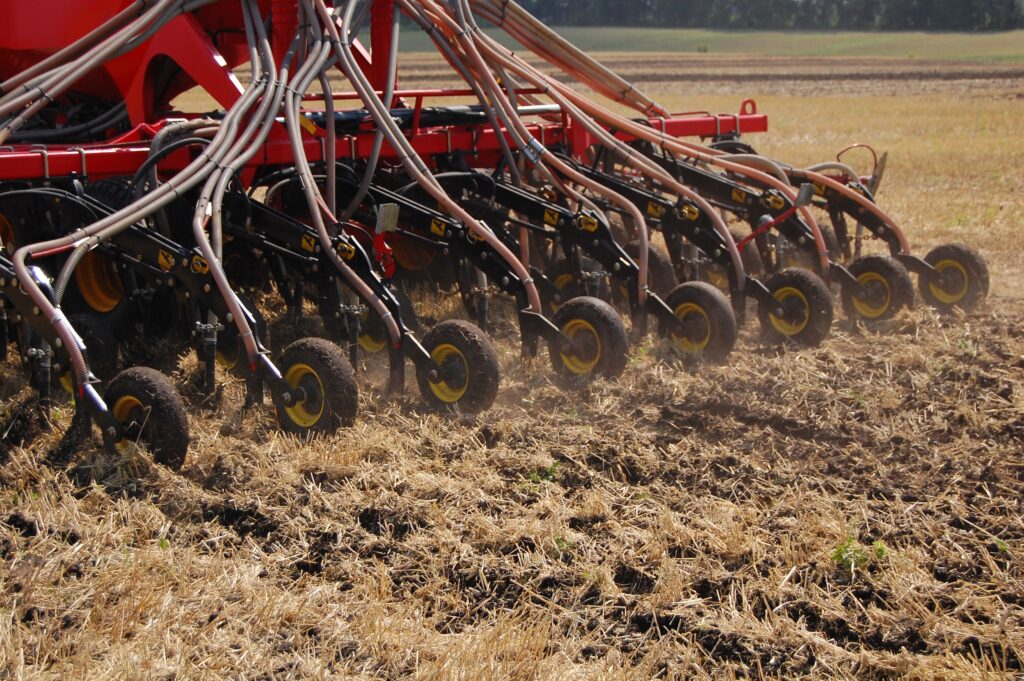
What sets a no till drill apart from a conventional grain drill is what happens at the front of this piece of farming equipment. In heavy residue conditions, aggressive coulters lead the way, slicing through last year’s crop material before the seed opener ever touches the soil. The sequence matters more than most people realize. The coulter opens a path, the disc opener places the seed at the right depth, and the press wheel or closing wheel seals everything behind it. If you get the order wrong or run worn-down components, you’re planting into a mess instead of a clean furrow.
No till planting equipment works differently because farming row crops like corn and soybeans demand a different approach. Each row unit operates on its own, placing individual seeds at precise spacing and depth.
In a no till system, those row units are heavier and carry stronger down-pressure systems than what you would find on a conventional planter. They have to be. Firm, undisturbed ground doesn’t give way easily, and consistent planting depth is critical when it comes to emergence. Most no till planters also run row cleaners ahead of each unit to move residue out of the path before the opener gets there, which makes a noticeable difference in heavy corn stalks or thick cover crop biomass.
Calibration is where experience pays off with any no till farming equipment. Seed depth, down pressure, row cleaner aggressiveness, closing wheel tension, all of it shifts depending on soil conditions, residue levels, and what you’re planting. Dialing in those settings takes time, and frankly, it takes a few seasons of paying close attention to what the ground is telling you.
No Till Farm Equipment For Residue And Cover Crop Management
A no till drill or planter gets the seed in the ground, but the rest of your farm equipment lineup is what keeps the system working throughout the year.
Row cleaners are a good example. They mount ahead of each row unit on the planter and do the unglamorous work of sweeping residue out of the planting zone before the opener arrives. In a corn-on-corn rotation or after a high-yield year with heavy stalks, a row cleaner is not an optional piece of equipment in a no till farming lineup. Without one, you’re asking the opener to fight through material it was not designed to handle, which leads to skips, hairpinning, and uneven emergence. The design varies, from finger-style units to basket-style to coulter-based, and the right fit depends on your residue, your soil, and the specific planter you’re running.
Cover crop seeding equipment has become a bigger part of the zero tillage conversation as more farmers pair cover crops with their no till systems. The combination makes sense. Cover crops suppress weeds, hold soil in place over winter, add organic matter, and, in the case of legumes, fix nitrogen from the air. They can be seeded with a dedicated drill, broadcast from a high-clearance applicator into a standing cash crop, or interseeded between rows during the growing season. Each approach has its own timing considerations and establishment trade-offs, and most farmers end up finding what works through some trial and error. Terminating those cover crops before planting is its own equipment question. Herbicide is still the most common method, but roller-crimpers have drawn real interest in recent years.
A roller-crimper lays the cover crop flat and crimps the stems, killing the plant and leaving a thick mat of biomass on the surface that suppresses weeds and holds moisture. For farmers moving toward organic or reduced-input systems, it is a compelling option worth understanding.
Rounding out the no till farm equipment picture is the sprayer. Herbicide does more heavy lifting in a no till system than in a conventional one, because tillage equipment is no longer there to serve as a mechanical weed control pass.
Whether you’re running a pull-type sprayer or a self-propelled unit, calibration and timing matter. A late or off-target application in a no till system can set weed pressure back weeks, and in a bad year, that pressure is hard to recover from without reaching for the tillage tool you’re trying to avoid.
Buying, Adapting, Or Renting No Till Farming Equipment
Getting into no till farming doesn’t have to require writing a big check on day one. There are a few different ways to get access to the no till equipment you need, and the right approach depends less on what is ideal and more on what fits your farm right now.
The most common no till starting point for farmers who already have a planter is adapting the farming equipment they already own for a zero tillage approach. Adding row cleaners, upgrading to heavier down-pressure springs, and bolting on a no till coulter package can make a conventional planter functional in lighter residue conditions without a full equipment replacement.
It’s not a perfect solution, and experienced no till farmers will be quick to tell you that a converted planter is not the same as a purpose-built machine. In heavy corn stalks or very hard, dry ground in late spring, a converted planter will have some limitations. But it gets you started, it lets you learn the system, and it keeps the entry cost manageable.
Buying dedicated no till farming equipment, whether new or used, is the right call for farmers who are committed to the zero tillage approach and farming enough acres to justify it. Purpose-built zero tillage equipment is engineered from the frame up for undisturbed soil, with heavier construction, more aggressive coulter systems, and down-pressure mechanisms that conventional machines simply don’t have.
New no till farming equipment comes with current technology and dealer support. Used no till farm equipment can be a smart buy, especially if you’re buying equipment that’s already experienced a substantial amount of its depreciation. Pay attention to coulter diameter and condition, the wear on disc openers, the integrity of press wheels and closing wheels, and the overall condition of seed tubes and the frame. Those are the components of no till farming equipment that take the hardest beating and the ones most likely to need attention on a used zero tillage machine.
For smaller operations, landowners farming limited acreage, or anyone who wants to test no till on part of their ground before going all in, renting farming equipment or hiring a custom operator is worth considering.
Equipment rental arrangements through co-operatives or dealers, and custom hire operators who will come in and do the planting for a per-acre fee, lower the barrier to entry considerably. Plenty of farmers have planted no till for years through custom hire while they build experience with the system and decide whether full equipment ownership makes sense for their situation.
Maintaining Your No Till Farm Equipment
No till farming equipment takes a beating that most conventional tillage tools typically don’t see. Coulters, disc openers, row cleaners, and closing wheels are working through undisturbed ground and heavy residue every single pass, and the wear can add up. The farmers who get the most out of their no till equipment are the ones who treat pre-season maintenance as seriously as planting day itself.
Coulters are the first to experience some wear. They hit the soil before anything else does, slicing through residue and opening the initial slot. When a coulter wears down past its serviceable diameter, it stops cutting and starts pushing. That means residue getting folded into the seed furrow instead of being cut away from it, inconsistent slot depth, and the hairpinning problem that causes seeds to germinate in a pocket of plant material rather than soil. Pull a tape measure on your coulters before the season starts. If they’re worn below spec, replace them. It’s one of the highest-return equipment maintenance calls you can make on a no till drill or farming planter.
Disc openers are next. They wear gradually with every acre, and once they drop below their minimum diameter, they stop forming a clean V-slot. The result is variable seed depth and poor seed-to-soil contact, two things that could cost you in the stand and in your yield. Many farmers check opener disc diameter as a routine pre-season task, the same way they check tire pressure and grease fittings, and replace or adjust as needed before the first field.
Row cleaners, press wheels, and closing wheels all belong on the same inspection checklist. Worn row cleaner fingers lose their ability to move residue cleanly and start leaving material in the path of the opener. Damaged or misaligned closing wheels leave the seed furrow open instead of sealed, which affects emergence in both wet and dry conditions. These are not glamorous parts of the machine, but their condition shows up directly in your stand.
Beyond the components that contact the soil, the rest of the maintenance picture for no till farming equipment is straightforward: grease everything on schedule, check gauge wheel and transport tire pressure, inspect seed tubes for blockages or wear, calibrate seed meters before you plant, and store the equipment somewhere dry where rodents can’t get to the wiring and plastic tubes over winter.
One thing worth calling out specifically for no till equipment is coulter-to-opener alignment. These components need to track in line with one another for the system to work the way it was designed. If the opener is not following the slot the coulter cut, you lose the whole benefit of having a coulter out front. It’s a quick check before the season and the kind of thing that’s easy to overlook until you’re trying to figure out why emergence is uneven across the field.
The Economics Of No Till Farming Equipment Over Time
Anyone who tells you no till farming equipment pays for itself in year one isn’t presenting the full picture. The honest version of this conversation starts with acknowledging that the upfront costs are real, the transition takes time, and the payoff is not linear.
Purpose-built no till drills and planters cost more than comparable conventional seeding equipment, and there’s a reason for that. They’re heavier, more complex, and built to work in conditions that would stop a conventional planter in its tracks. Farmers who adapt existing equipment lower that initial cost, and those who start with rental or custom hire arrangements lower it further. But for anyone committed to no till farming as a long-term management approach, equipment investment is part of the picture.
What makes zero tillage farming equipment worth that investment over time is what stops happening when you go no till. Pre-plant tillage passes disappear from the schedule, which means less fuel burned, fewer hours logged on aging tractors, and less maintenance on the plows and cultivators that no longer need to run. The USDA has documented that continuous no till farming requires significantly less fuel per acre than conventional tillage, and those eliminated tillage passes also free up meaningful labor hours during the busiest stretch of the year.
Soil health is where the economics of no till farming equipment get interesting in ways that are harder to see at first. No till farm equipment, used consistently over the years, builds water-holding capacity, organic matter, and biological activity in the soil. Those improvements translate to greater yield stability during dry years, reduced inputs as soil fertility improves, and land that holds its productivity over the long run. For farmers who own their ground, that has real bearing on land value too. Agricultural land buyers increasingly pay attention to soil health, and a documented history of no till management is not invisible to the market.
The transition period is where farmers sometimes lose faith in the system before it has had a chance to show what it can do. A modest yield dip in the first season or two after switching to no till farming equipment is common. The soil is adjusting, management practices are evolving, and the full biological benefit of undisturbed ground takes time to develop. Farmers who stick with it past that window are typically the ones who look back years later and wonder why they waited so long to make the switch.
Ready To Buy Or Sell Your No Till Farming Equipment?
The farmers who get no till farming right are not necessarily the ones with the newest equipment or the most acres. They’re the ones who found the right tools, learned their ground, and stayed with the zero tillage system long enough to see what it can do.
Getting there starts with getting your hands on the right no till farming equipment, whether that means buying, selling, or finding the right connection to make it happen.
Here at Hayden Outdoors, we work with farmers, landowners, and agricultural land buyers across the country. Our equipment marketplace is built to connect people who have quality no till equipment with the people who need it, and to make that transaction straightforward on both ends. If you’re looking to buy no till farm equipment, you’ll find listings from real sellers. If you have no till equipment to move, we can help you find the right buyer.
Browse current farming equipment listings or get your tools in front of the right audience. The land is worth farming well. We’re here to help make that possible.
How To Create A Wildfire Mitigation Plan For Your Property: Examples And Strategies
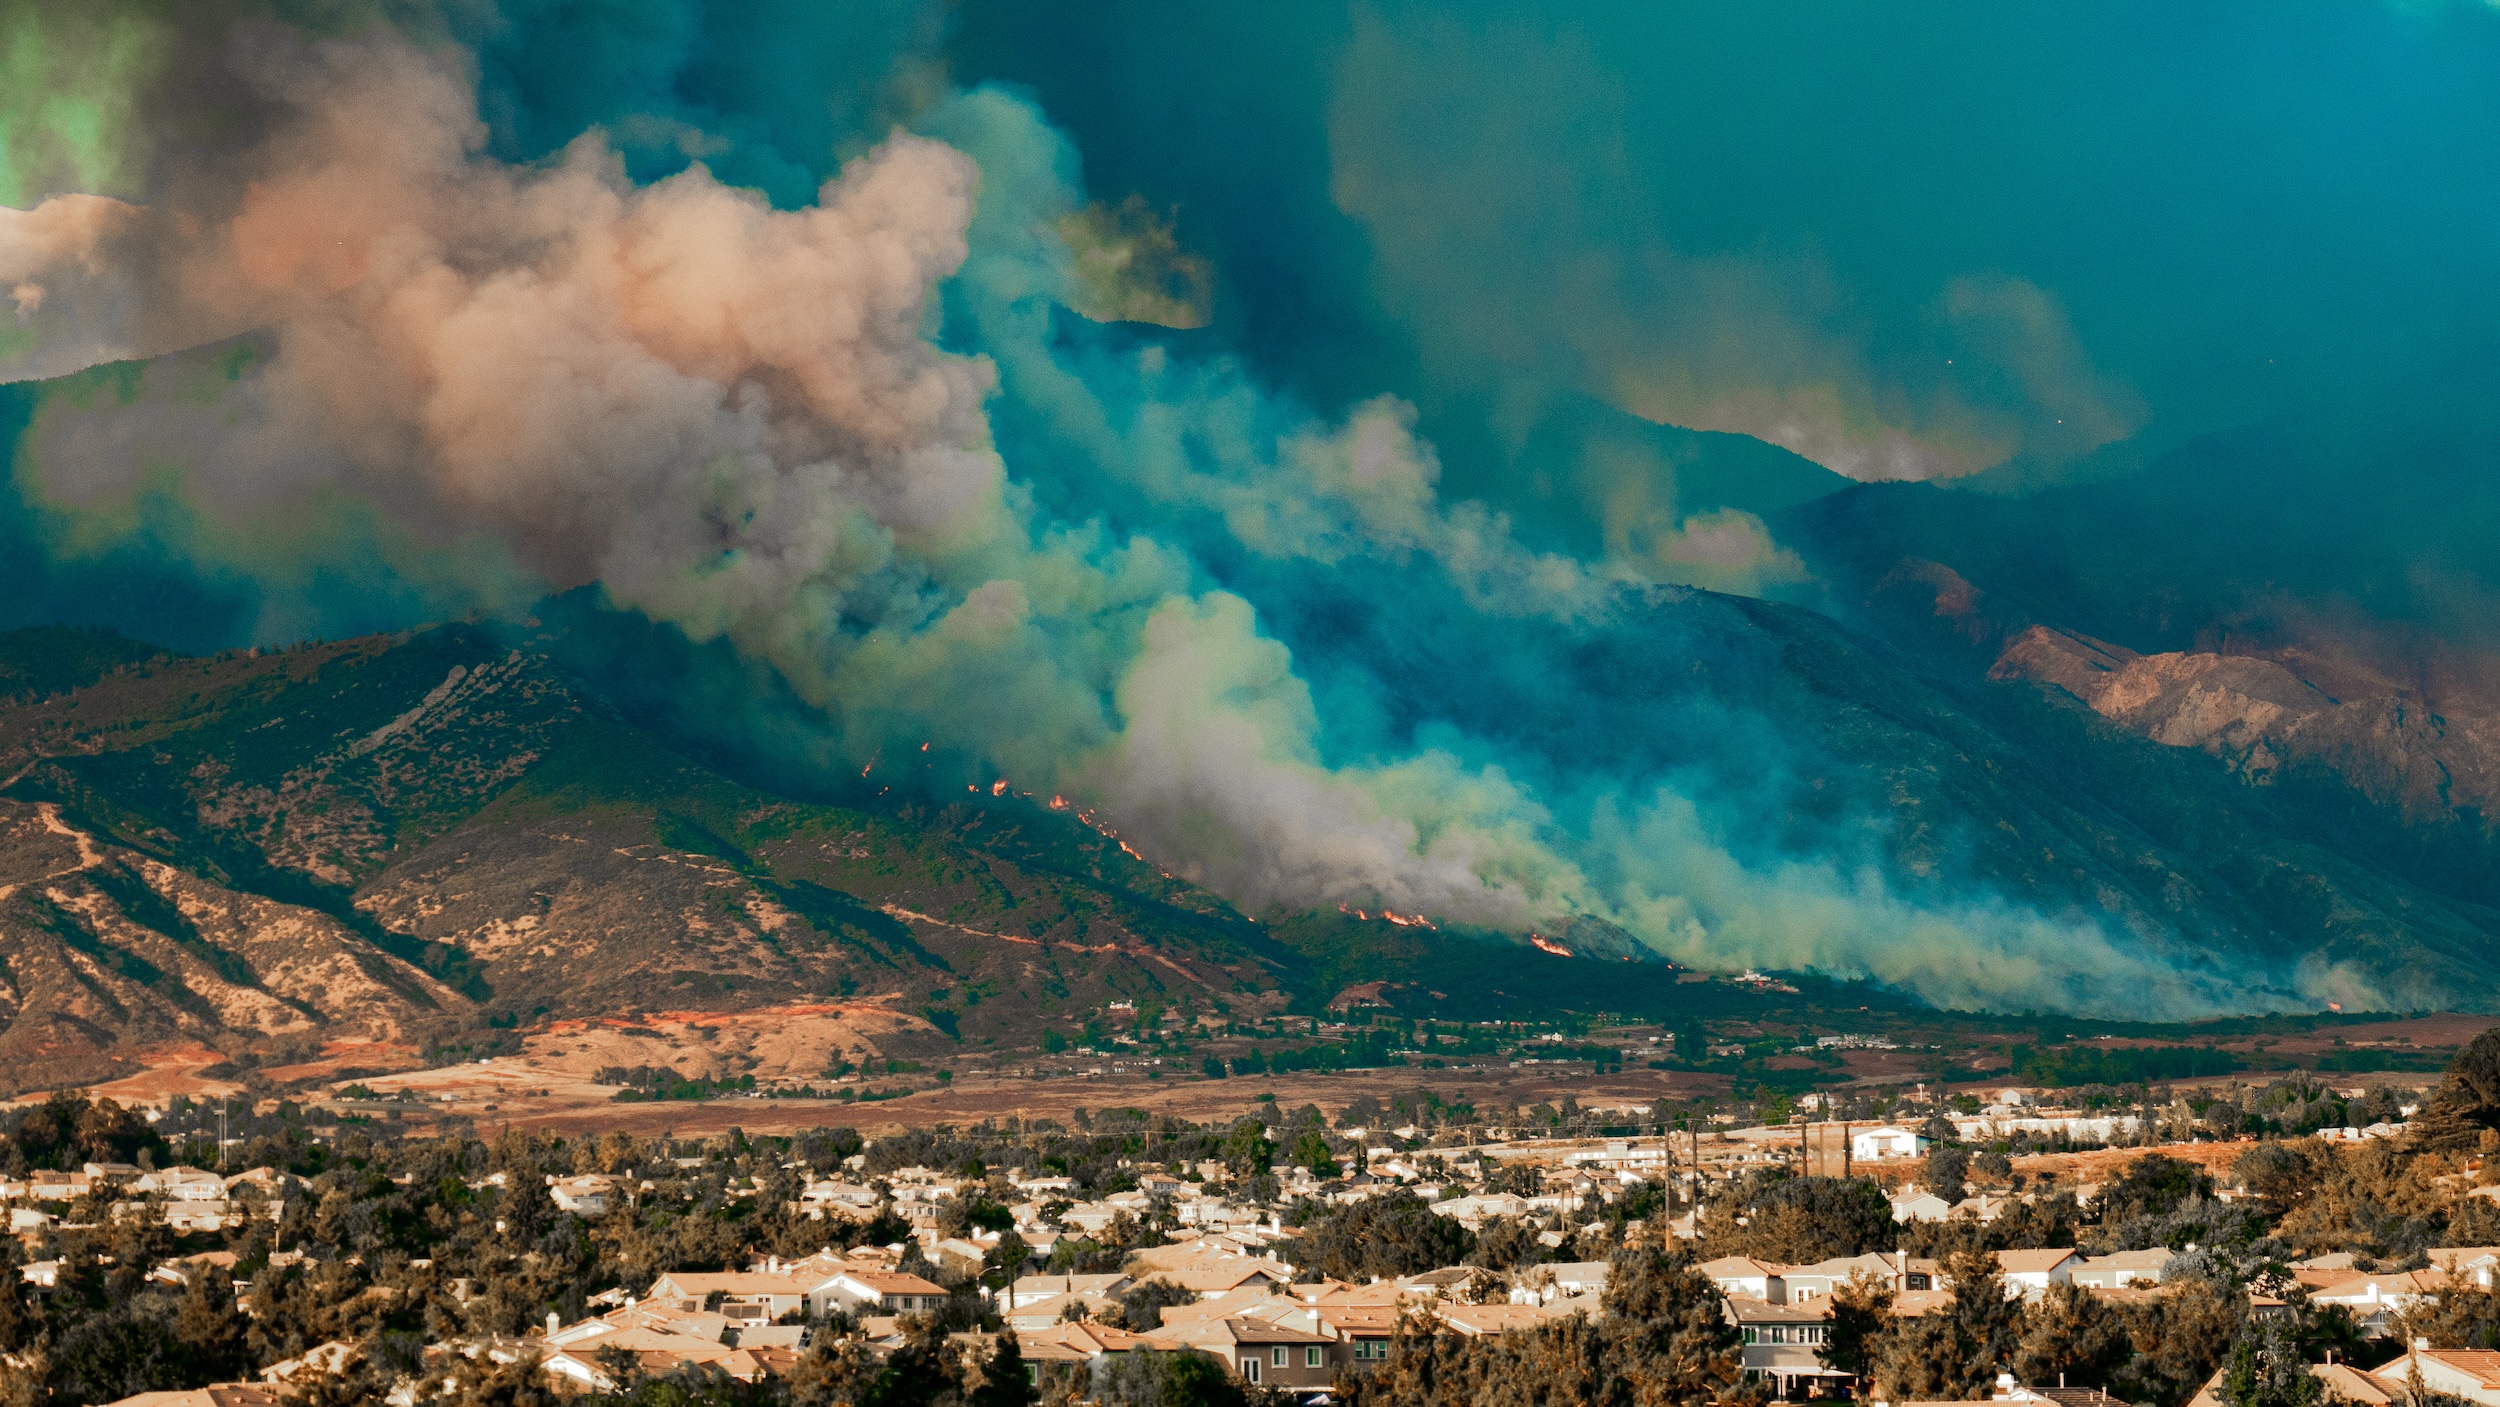
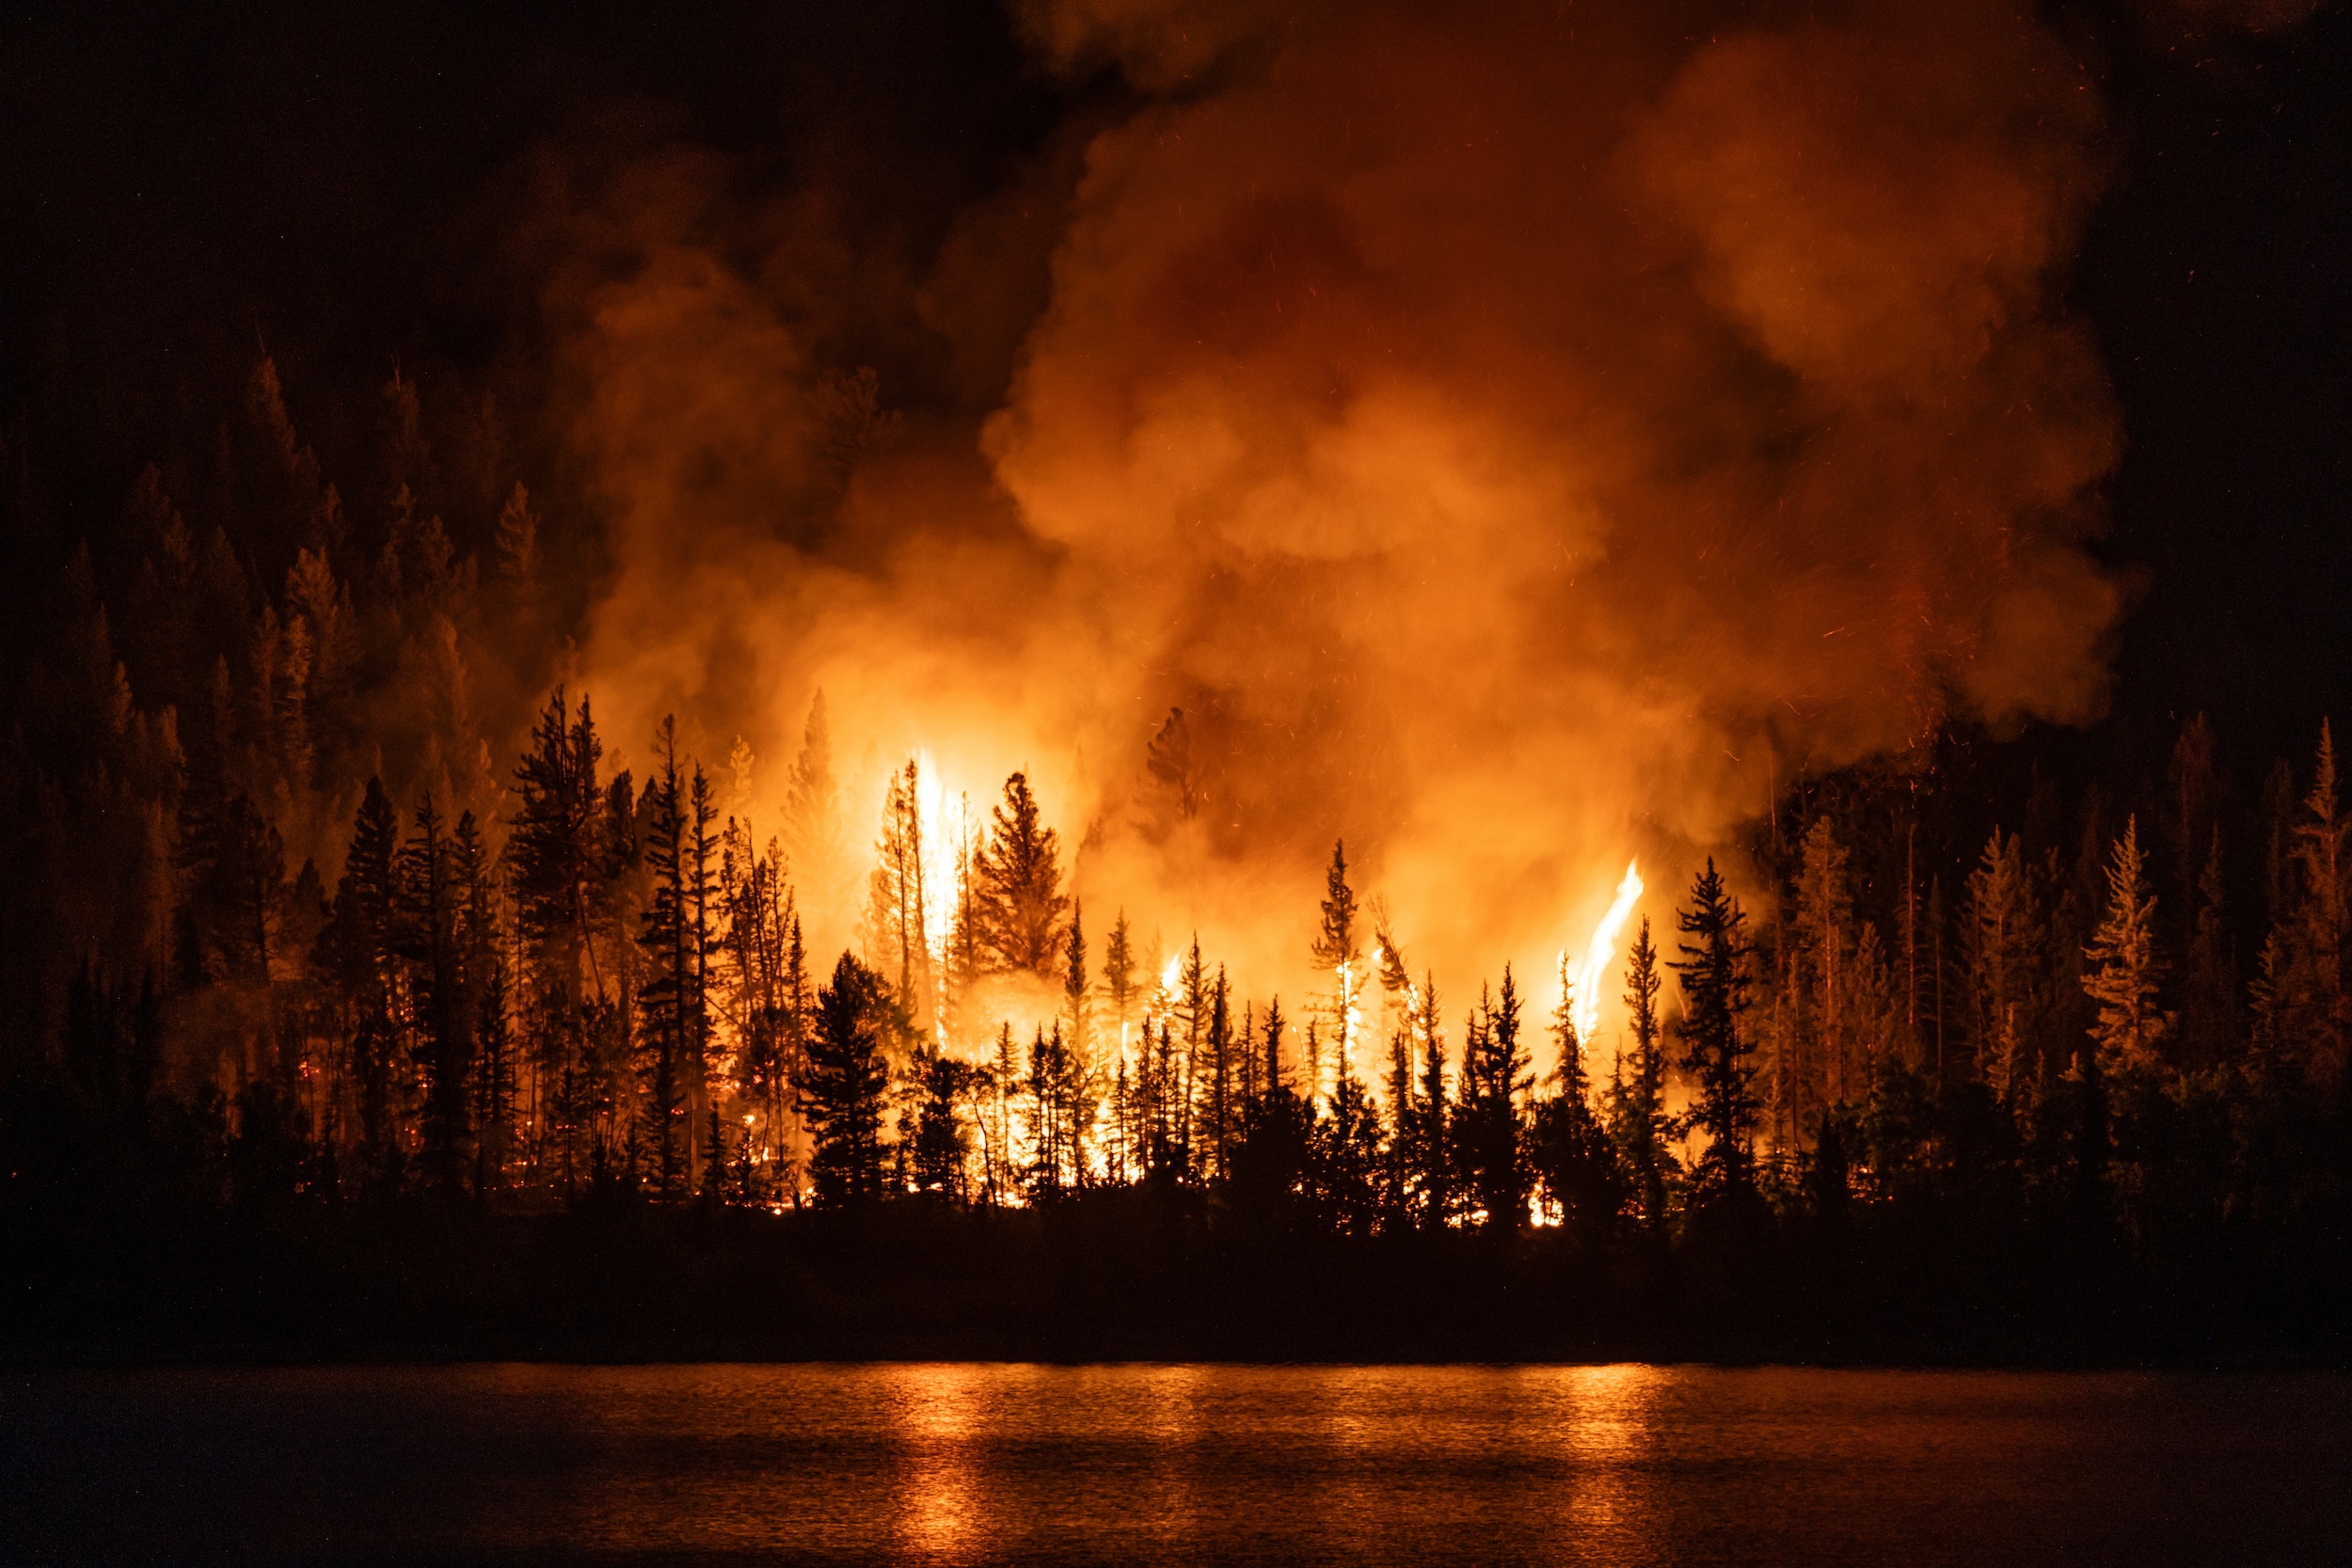
If you own land in the American West, including a ranch, a farm, or an acreage with a home and outbuildings, wildfire is not a distant threat; it’s a neighbor. The question is not whether fire will test your property, but whether your property will be ready when it does, which is why fire preparedness through a wildfire mitigation plan is a critical part of living on the land.
The good news: according to the International Association of Fire Chiefs, as many as 80 percent of homes destroyed by wildfires could have been saved through basic risk-reduction and preparedness measures. That means most losses are not inevitable. They are the product of intentional wildfire mitigation and preparation (or the lack of it).
This wildfire mitigation guide is written specifically for landowners managing rural properties with multiple structures. If you run cattle, store hay, keep horses, or operate any kind of agricultural business from your land, your situation is fundamentally different from that of a subdivision homeowner. You have more to protect, more ground to cover, and in many cases, less time to act when fire moves.
What follows is a practical wildfire mitigation plan built around three layers: prevention, fire mitigation strategies, and preparedness. Let’s get into it.
Before diving into any wildfire mitigation strategies and plans, it’s worth noting the specific challenges that make ranch and farm properties harder to protect from fire than residential lots.
The first challenge is scale. A ranch or acreage property may have a main residence, a barn, hay storage, equipment sheds, corrals, and propane infrastructure spread across dozens or hundreds of acres. Each structure is its own fire ignition point and needs its own wildfire mitigation and protection plan.
The second challenge is fuel type. Grass and rangeland ignite fast and carry fire across open ground faster than most people expect. Ranch and farm properties face compounded exposure: more remote settings mean longer emergency response times, and the dry, continuous grass fuels common to grazing land can push a fire front across a property in minutes. A grass fire in dry, windy conditions can outrun a person on foot.
The third challenge is time. Evacuating a family takes minutes. Evacuating horses, cattle, and livestock can take hours and requires trailers, open gates, and a plan that has been rehearsed before the smoke appears on the horizon.
None of this is meant to alarm you. It’s meant to be honest with you. The honest truth is that landowners who understand the risks of wildfires and create a mitigation plan accordingly have an enormous advantage over those who don’t.
Before The Fires: The Pre-Wildfire Preparedness Checklist
Take these preparedness measures at the start of each wildfire season, well before any threat develops. If a wildfire damages your property, a thorough record made in advance is one of the most valuable things you can give your insurance adjuster.
Document your property:
Photograph every structure (home, barn, sheds, equipment storage) from all four sides, inside and out.
Capture roofing, siding, windows, and any recent improvements that affect replacement value.
Photograph all fencing, corrals, irrigation infrastructure, and fixed assets across the property.
Document your equipment and livestock:
Photograph all vehicles, trailers, and major equipment with serial numbers or VINs visible.
Photograph livestock with brands and ear tags clearly visible.
Ensure brand certificates, registration papers, and veterinary records are current.
Store everything offsite:
Upload all photos and key documents to secure cloud storage so they are accessible from any device, in case you can’t return to the property.
Keep physical copies of insurance policies, deeds, and livestock registration in a fireproof safe or off-site location.
Pro Tip: Review Your Wildfire Insurance Coverage Before Fire Season
The wildfire insurance market has shifted dramatically in recent years. Across fire-prone states, insurers have pulled back from high-risk properties, raised premiums, or added wildfire-specific exclusions to existing policies. Before fire season, pull out your current policy and confirm what is covered, what is excluded, and whether your replacement cost limits reflect current rebuild costs for every structure on your property.
If your carrier has non-renewed your coverage, contact your state’s insurance commissioner’s office or look into your state’s FAIR Plan, which exists as a last-resort option for property owners who cannot secure standard market coverage. This is a crucial, yet often overlooked, part of any effective wildfire mitigation plan.
Your Wildfire Mitigation Plan: A Three-Part Strategic Framework
A wildfire mitigation plan is not a single checklist. It is a layered strategy that works at three levels simultaneously.
Part 1: Wildfire Prevention. Stop ignition from starting on or reaching your property in the first place.
Part 2: Fire Mitigation. Harden your structures and manage your land so that fire has less to consume if it does arrive.
Part 3: Wildfire Preparedness. Protect your family, animals, and livelihood when you have minutes, not hours, to act.
The sections below cover each part of this wildfire mitigation plan in depth.
Mitigation Part 1: Wildfire Prevention Plan: Keep Fire From Starting Or Reaching Your Property
One of the most underappreciated facts about wildfire is how frequently people are the source of it. The National Interagency Fire Center reports that human activity accounts for the vast majority of wildfire ignitions across the country every year. That means wildfire prevention and preparedness start with the people on the land: their practices, their equipment, and their day-to-day decisions during fire season.
Know Your Property’s Fire Risk Before Wildfire Season
Start crafting your wildfire mitigation plan by first understanding your specific fire risk profile. The Wildfire Risk to Communities tool is a free resource from the USDA Forest Service that provides interactive maps, fire history data, and community-level risk assessments.
Enter your address, and you can see how your land ranks in terms of wildfire risk, including where fire has historically moved in your area. Concentrate your preparations on the approaches where fire is most likely to arrive, factoring in prevailing winds and slope orientation.
Fuel Management Across Your Land
Everything dry and burnable on your property is fuel. Managing that fuel strategically and consistently is the foundation of wildfire prevention and functions as an integral part of any wildfire mitigation plan.
For ranchers specifically, there’s a dual-purpose tool that most wildfire guides never mention: targeted grazing. USDA Agricultural Research Service scientists have documented that moving cattle through strategic strips of rangeland in early spring grazes flammable vegetation down to short stubble before it dries out and becomes a fire risk. When a fire does encounter one of these grazed corridors, its intensity drops and its spread slows, which gives firefighters time and space to respond. As a part of your wildfire mitigation plan, rotating cattle through pastures adjacent to your home site and barns gives you the same benefit on a ranch scale: a natural, low-cost fuel break that also serves as productive grazing management.
Beyond grazing, consider these fuel management practices as part of your mitigation for wildfires strategy:
Mow or disk-till mechanical firebreaks around the perimeter of your structures and along pasture boundaries
Manage invasive annual grasses like cheatgrass, which dry out weeks before native grasses and carry fire aggressively across rangeland
Use existing road networks as natural firebreaks where possible
Keep a clear buffer around all fuel storage (propane tanks, diesel, and gasoline) by removing any vegetation within that zone
Fire-Safe Ranch Operations Day To Day
Some of the best wildfire mitigation strategies start from routine ranch work. Build these disciplines into your operation before fire season begins.
Open burning and agricultural burns. Know your state’s agricultural burn exemptions, the current fire restriction level for your area, and your county’s permitting requirements before striking a match. Always notify your local fire district and neighboring landowners before performing a prescribed burn. Even a legal, well-managed ditch burn can become an uncontrollable grass fire in minutes when conditions are dry. Check current fire restrictions at NIFC’s fire information page before any open burning.
Equipment maintenance. The NIFC notes that poorly maintained vehicles and equipment are a genuine ignition risk on ranch properties. A solid wildfire mitigation plan involves keeping all vehicles and tow equipment in good working order throughout fire season, particularly chains, undercarriage components, tires, and braking systems. Use spark arrestors on all power equipment, including chainsaws, tractors, and mowers, and avoid operating machinery in cured grass during red-flag conditions (high heat, low humidity, high winds).
Hay storage. Always dry hay thoroughly before storing it. Wet hay generates heat internally and can spontaneously combust. It’s also worth storing hay in a separate location on your property as a preventative measure.
Mitigation Part 2: Wildfire Preparedness Strategies: Harden Your Structures And Land Against Fires
If wildfire prevention is about keeping fire off your property, fire mitigation is about making a plan to be sure your property can survive contact with a wildfire if it arrives. This is where defensible space, home hardening, and smart construction decisions make the difference between a structure that survives and one that doesn’t.
Defensible Space: The Foundation Of Any Wildfire Mitigation Plan
Defensible space is the managed buffer of vegetation and materials between your structures and the surrounding wildland. When it comes to wildfire mitigation, it serves two functions: it slows or interrupts fire before it reaches your buildings, and it gives firefighters a safer working position when defending your property.
Defensible space applies to every structure on your property independently, including the house, the barn, the hay shed, and equipment storage.
CAL FIRE emphasizes that the zone immediately surrounding any structure is the most critical place to start, because embers landing near walls, decks, and vents are the leading cause of structure ignition during a wildfire. Managing what sits in that perimeter area is one of the highest-impact steps a landowner can take in their wildfire mitigation plan.
The zone framework works as follows.
Zone 0: 0 to 5 Feet (The Ember-Resistant Zone)
This is the immediate perimeter of every structure. In this zone, the goal is ember resistance, because embers carried on wind ahead of a fire front are the primary cause of home ignition. Eliminate anything combustible here:
Replace wood mulch or bark with gravel, pavers, or concrete
Remove all dead vegetation, leaves, pine needles, and debris from roofs, gutters, decks, stairs, and the area beneath decks
Remove all woodpiles, propane cylinders, combustible furniture, and stored materials from this zone
Trim tree branches to at least 10 feet away from chimneys
Zone 1: 5 to 30 Feet (Fuel Reduction Zone)
This zone is designed to reduce the density and combustibility of vegetation around your structures so that any approaching fire has less fuel to carry it forward.
Trim tree branches to at least 6 feet from the ground to remove ladder fuels that allow a ground fire to climb into the canopy
Maintain spacing between individual trees and shrubs so fire cannot travel continuously from plant to plant
Remove dead plants, dry grasses, and accumulated debris
Keep propane/LPG tanks away from flammable vegetation (10 feet or more is a best practice)
Zone 2: 30 to 100 Feet (Fire-Slowing Buffer)
The outermost required zone reduces fire intensity before a wildfire actually reaches your structures.
Keep your grass mowed to a maximum 4-inch height before fire season
Space out your shrubs and trees so wildfires have a more difficult time traversing your property
Clear out fallen leaves, needles, twigs, and bark accumulations
Wood piles should be at least 10 feet from any buildings or other structures on your property
Keep low tree branches pruned throughout this zone
A ranch-specific note on outbuildings: defensible space applies to every structure on your property, not just the house. Apply the same zone framework to your barn, hay shed, and equipment storage independently. If a hay barn ignites, it can take your house with it, so it is essential to consider all structures when crafting your wildfire mitigation plan.
Wildfire Mitigation Plan Example: A rancher in the intermountain West maintains a 30-foot gravel and bare-soil perimeter around a hay barn, keeps the adjacent corral grazed short through early summer, and stores no combustible materials on the barn’s south and west walls (the directions from which prevailing fire weather typically arrives). The barn has survived two nearby fires in the past decade.
Home Hardening: Wildfire Mitigation Strategies For Existing Structures
Defensible space buys your structures time when a wildfire shows up. Home hardening gives them the best chance of surviving the ember attack that accompanies any significant wildfire, making this step a critical part of any fire mitigation plan. The NIFC notes that structure loss in wildfires is driven primarily by ember intrusion rather than direct flame contact, making it critical to identify and eliminate the small gaps and vulnerable materials that give embers a foothold. Here is where to focus when crafting your wildfire mitigation plan, in order of vulnerability.
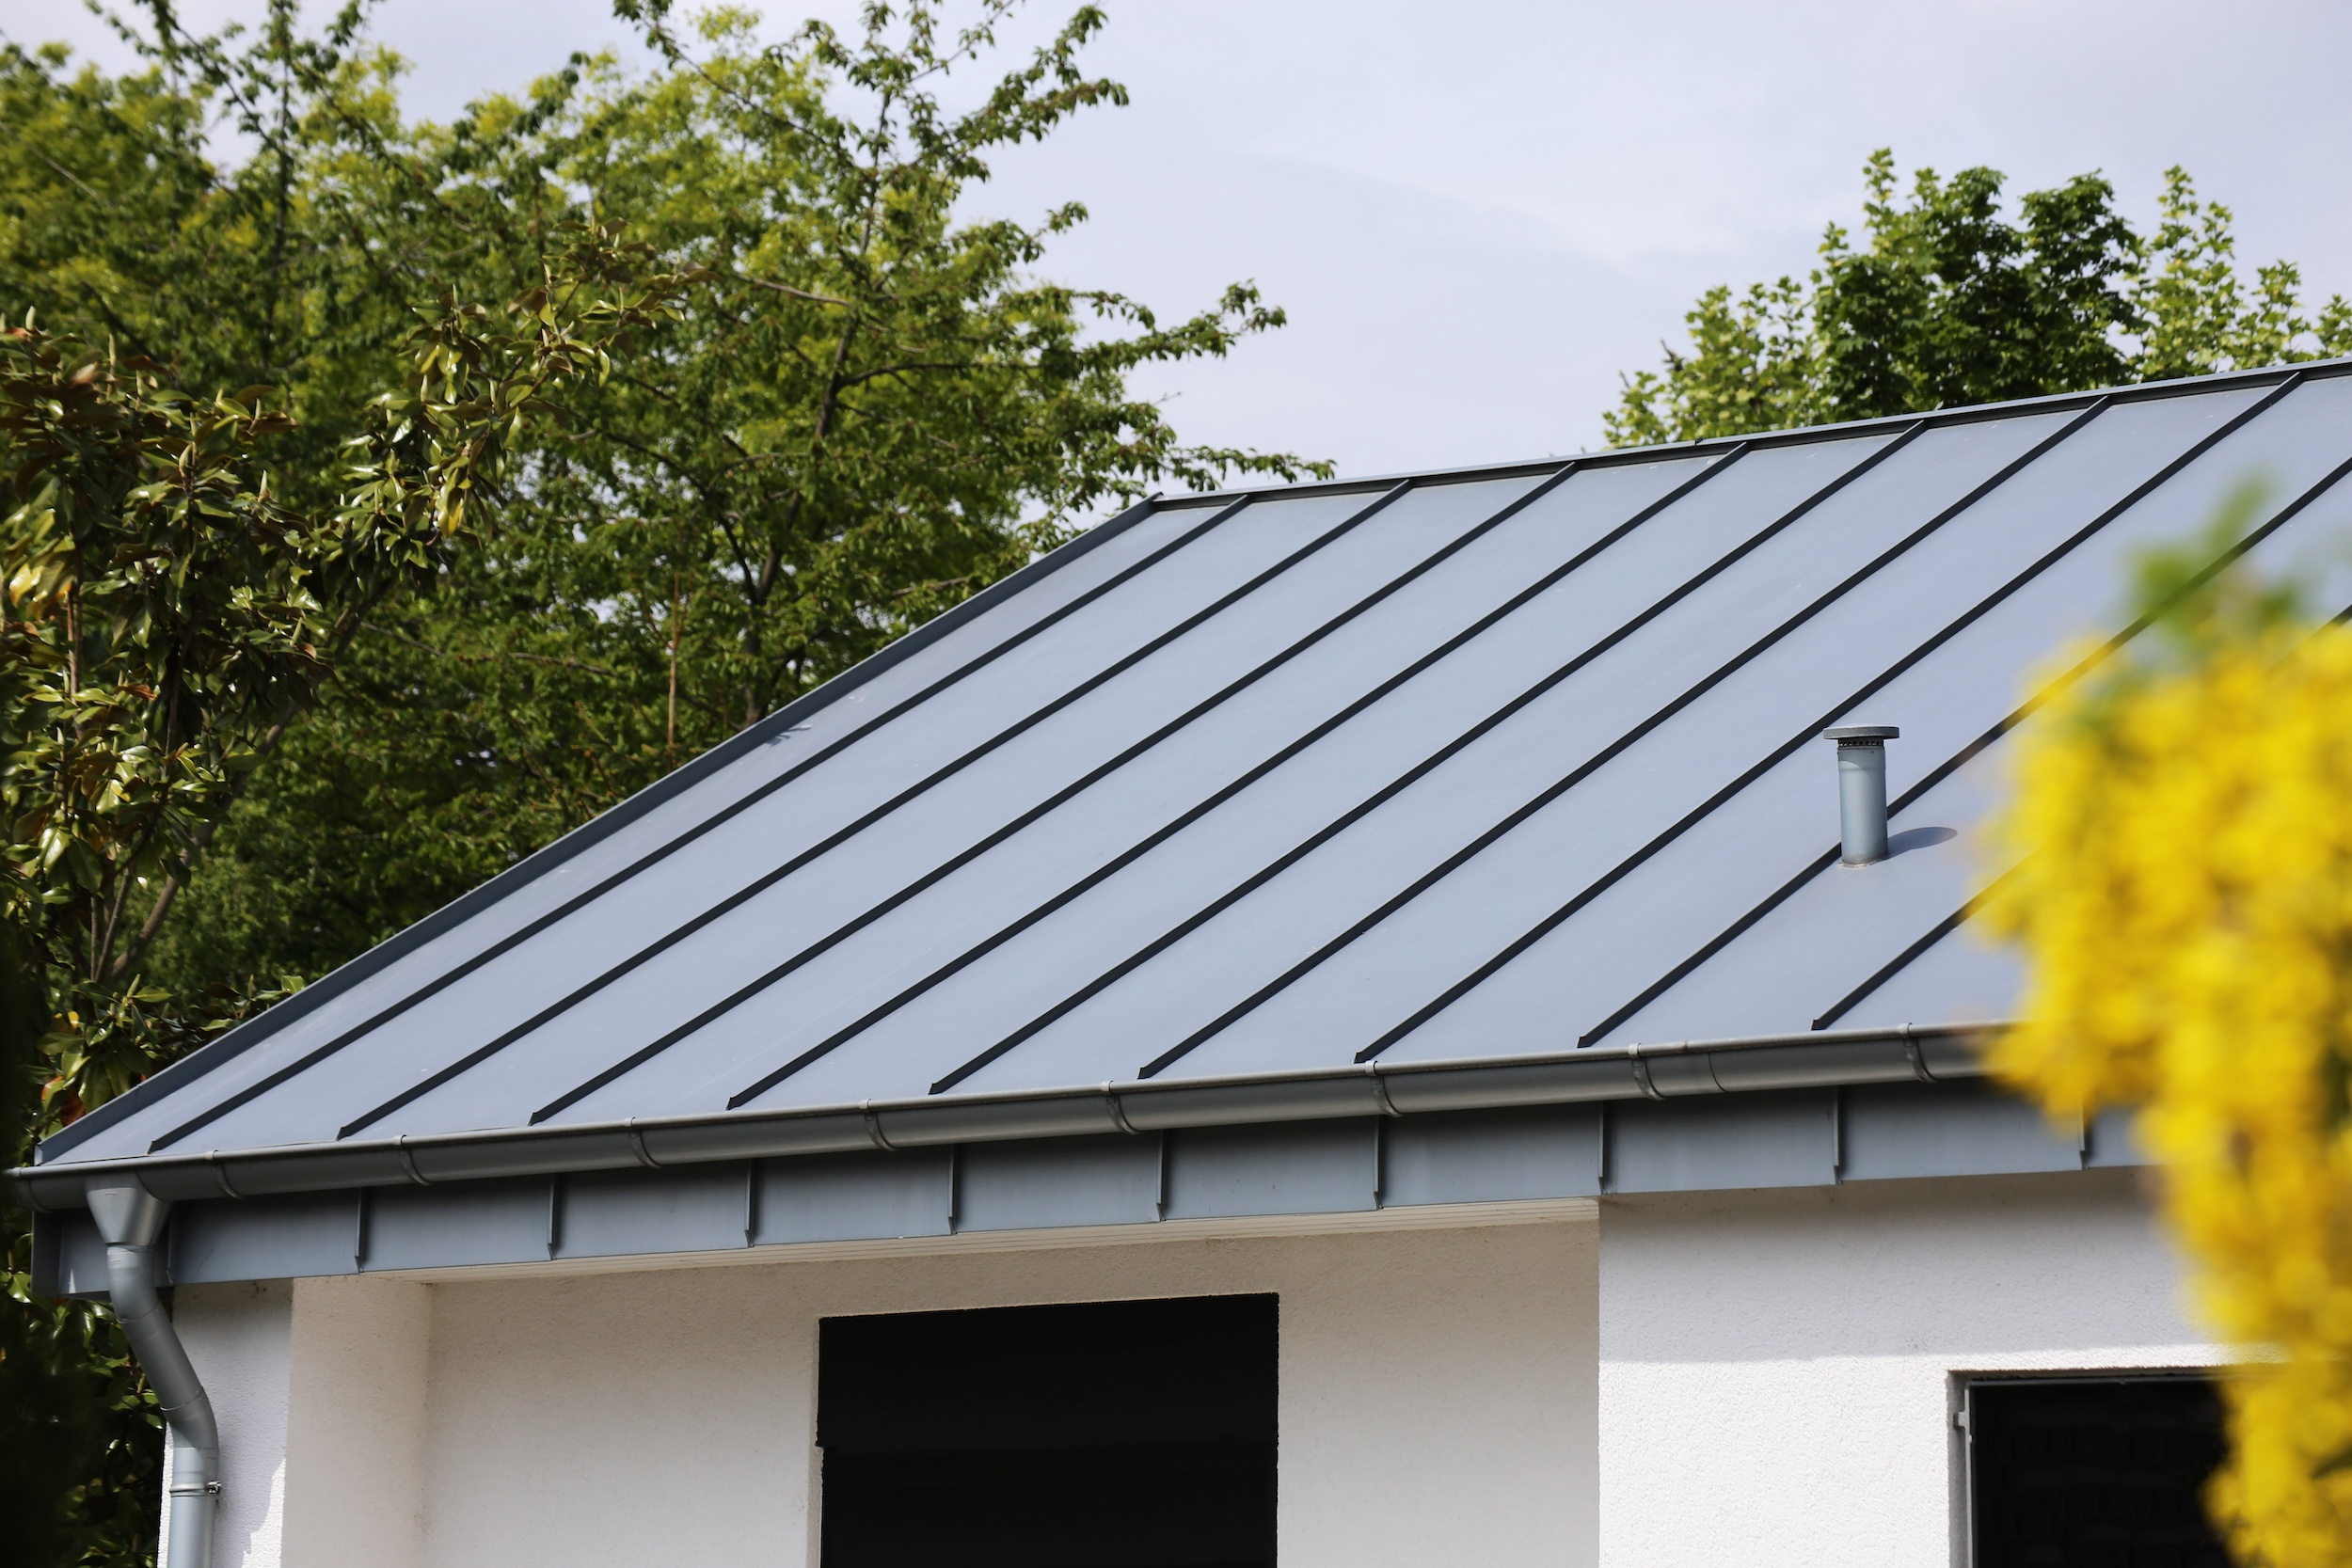
Roof. Because it covers the most surface area on any structure, the roof is also the most common place a wildfire claims a building. Choose materials that resist ignition: metal, slate, tile, and fire-rated asphalt composite are all solid options. Avoid cedar shake, which carries fire readily.
Vents. Attic, soffit, and foundation vents are ember entry points. Screen all vents with 1/8-inch metal mesh. It is one of the lowest-cost hardening improvements you can make and one of the highest-impact wildfire preparedness actions. Soffited and enclosed eave construction is strongly preferred over open-eave construction.
Windows. Single-pane glass is a liability. During the 2017 Tubbs Fire, homes with multi-pane tempered glass windows and solid-core or metal doors fared significantly better. If you’re replacing windows on a structure in fire country, specify dual-pane tempered glass. For exterior doors, specify solid-core or metal construction to reduce the impact of fire.
Siding and exterior walls. Fiber cement, stucco, brick, and stone are your allies. Wood siding and vinyl siding are not. Enclosed soffits using non-combustible material are preferable to open eaves.
Decks. Decks are both an ignition point and a pathway for fire to reach the structure. Remove all stored combustibles from beneath decks. If replacing decking material, non-combustible or ignition-resistant options are available at comparable cost.
Gutters. Metal gutters are more fire-resistant than plastic equivalents. Clean them before fire season and consider installing metal gutter guards to reduce debris accumulation.
Fire-Resistant Building Materials For New Construction
If you are planning to build a new home, barn, or outbuilding on your property, you have an opportunity that existing structure owners do not: you can build fire resistance in from the start, and it may cost less than you expect.
Research cited by Headwaters Economics found that building to wildfire-resistant standards actually ran slightly cheaper overall than conventional construction in one analysis, largely because fire-resistant fiber cement siding undercut the cost of cedar plank. Roof assemblies did cost more, but that premium looks modest against the potential cost of rebuilding after a loss.
Key decisions to make at the design stage:
Roof: Specify Class A fire-resistant roofing material. It may already be required by your county’s building code in the Wildland-Urban Interface (WUI).
Siding: Specify fiber cement, stucco, or metal over wood or vinyl.
Vents: Specify 1/8-inch mesh screening at the design stage. It is far simpler than retrofitting.
Windows: Specify dual-pane tempered glass and solid-core or metal exterior doors.
Soffits: Specify enclosed eave construction. The International Wildland-Urban Interface Code identifies open eaves as an ember entry risk.
Site layout: Position outbuildings at least 30 feet from the main residence. Plan access roads with adequate width and turnaround space for emergency vehicles.
Access Roads, Water Sources, And Infrastructure
Rural landowners are often better positioned to address emergency access than most, and it matters for both your own evacuation and a fire crew’s ability to defend your property.
Maintain at least 14 feet of overhead clearance and 10 feet of lateral clearance from vegetation along all access roads. Fire apparatus needs room to move and turn.
Identify and clearly mark all on-site water sources (ponds, stock tanks, and water hydrants) so incoming fire crews can locate them without delay.
Ensure hose bibs are accessible on the front and rear of all primary structures.
Review gate security. Locked gates should be accessible to emergency responders or clearly marked with contact information so they can be opened quickly.
Mitigation Part 3: Plan For Wildfire Preparedness: Protecting Your Family, Animals, And Operation
Wildfire preparedness is what happens when prevention and your wildfire mitigation plan have done all they can, and fire is now a real and immediate threat. This is where the plan you built in the quiet months pays off in the urgent ones.
Build Your Fire Evacuation Plan Before You Need It
All members of your household should understand the fire evacuation plan before they need it. Designate a family meeting point and an out-of-area contact who can serve as a communications hub if local cell networks are overloaded.
Plan at least two evacuation routes from your property and drive both of them. Routes can be cut off by fire, and discovering a road is blocked when you have livestock in a trailer is not a situation you want to navigate under pressure.
Sign up for your county’s emergency alert system. Most counties provide one through the county sheriff or emergency management office. Pay attention to Red Flag Warnings issued by the National Weather Service, which signal the specific combination of heat, low humidity, and wind that makes fire behavior most extreme and most unpredictable.
Preparing Your Livestock And Animals During A Wildfire: The Ranch Landowner’s Unique Challenge
This is where most wildfire preparedness and wildfire mitigation plan guides fall short for ranch and farm landowners. The time required to move large animals is a hard logistical constraint that must be planned for before fire season, not improvised during it.
Before fire season:
As a part of your wildfire preparedness plan, ensure all animals are properly identified through brands, ear tags, and registration documents. Keep copies of livestock identification records in cloud storage so they are accessible from anywhere if you cannot return to your property.
Practice loading livestock into trailers regularly so animals are familiar with the process. An animal that has never been loaded will not cooperate under stress.
Confirm you have sufficient trailer capacity for your high-priority animals. If you don’t, establish mutual aid agreements with neighbors or local haulers now, before fire season arrives.
Establish a contingency plan for where evacuated animals will go and who will receive them.
At the first sign of threat (the “Ready” stage):
Unlock and swing open gates throughout your property so animals can move away from advancing fire and incoming emergency crews have unobstructed access.
Hook up and load stock trailers. Prioritize highest-value animals (breeding stock and horses) for evacuation.
Move all equipment to a safe, non-vegetated staging area.
If full evacuation is not possible:
Ranchers face a reality that most wildfire preparedness guides don’t acknowledge plainly: it’s often not feasible to evacuate large numbers of livestock. If that is your situation, you have options that are better than leaving animals confined in a barn.
Releasing livestock rather than leaving them locked in structures gives them a fighting chance. Before turning them out, remove any nylon halters, since synthetic materials can melt against an animal’s skin if fire gets close. Close gates behind them so they cannot circle back into a barn or structure.
Consider grazed pastures or irrigated areas as relatively safe zones where animals can be directed.
Intensive grazing management near structures throughout the season creates areas where remaining vegetation will not carry a fire. These become natural shelter-in-place zones for livestock during an emergency.
When Fire Is On Or Near Your Property: The Action Checklist
If a wildfire enters your property or is approaching rapidly, every action you take should move you toward either protecting the structure or evacuating. Work through this list in order, and leave the moment conditions make staying unsafe.
Shut off all propane tanks at the source.
Close all windows, doors, and vents, but do not lock exterior doors so firefighters can access the structure if needed.
Turn on exterior lights to make the structure visible through smoke.
Move all combustible patio furniture, doormats, and lightweight items away from structures or bring them inside.
Stage all vehicles in the driveway pointed toward the exit, with doors unlocked and ready to move.
If time permits, patrol your property’s perimeter for spot fires started by windborne embers.
Monitor manure piles and hay storage, both of which can smolder and reignite long after the fire front passes.
Look inside attic spaces for any embers that may have entered through vents, and seal up accessible vents if time allows.
Keep your phone charged and text rather than call. Text messages get through on congested networks when voice calls will not.
Evacuate immediately when directed by local authorities.
Wildfire Preparedness and Mitigation Plan Example: A family running a cow-calf operation in fire-prone rangeland keeps a laminated card in the barn listing every gate combination on the property, all water source locations, and emergency contact numbers. A copy goes to the local fire district at the start of each fire season. During a 2022 fire event, incoming crews used that card to locate a stock pond and establish a water supply that helped protect the main structures.
Your Emergency Go-Bag And Documentation Kit
For ranch and farm landowners, your wildfire preparedness go-bag is more complex than the standard household version and needs to be woven into your mitigation plan. Build yours now and store it where you can grab it in under two minutes.
For your family:
Copies of all important documents (property deeds, insurance policies, and personal IDs) stored both in a waterproof bag and in cloud-based storage accessible from any device
Medications and first aid supplies
N95 masks for smoke exposure, as wildfire smoke is a serious respiratory hazard
Phone chargers and a backup battery power bank
A printed map with at least two evacuation routes marked
For your animals:
Feed and water supplies for 72 hours
Veterinary records, vaccination documentation, and prescription medications
Livestock identification records (brands, registration papers, and photographs)
Your veterinarian’s contact information and the contact for the nearest large animal emergency veterinary facility
After the Fire: Wildfire Recovery Resources For Ranch And Farm Landowners
If fire does impact your property, document everything before you touch it. Photograph all property damage thoroughly before beginning any cleanup. Your insurance company and any federal assistance programs will need that documentation.
The USDA administers several programs that agricultural landowners can draw on after a wildfire. These are worth understanding before you need them, not after:
Livestock Indemnity Program (LIP): If you lose animals to wildfire above what would be considered normal attrition, LIP is the program to know. It is designed to help ranchers recover some financial footing after disaster-related herd losses. Contact your local USDA Farm Service Agency office to understand eligibility and filing deadlines.
Emergency Assistance for Livestock (ELAP): When a wildfire forces you to haul water or feed to your animals or creates other emergency costs that fall outside what standard programs cover, ELAP is intended to fill that gap. Again, your local FSA office is the right starting point.
Emergency Conservation Program: Burned fences and damaged pasture ground are among the most common post-fire headaches for ranch operations. This program directs financial and technical resources toward getting that infrastructure back in working order.
Environmental Quality Incentives Program (EQIP): Getting burned range and pastureland back to productive condition takes time and investment. EQIP can help fund the reseeding, replanting, and erosion control work that follows a significant fire on agricultural land.
Before returning animals to the property after a fire, perform a careful inspection. Identify any unstable trees, downed power lines, smoldering ash pits, and structurally compromised outbuildings before bringing livestock back. Animals returning to a burned property are already stressed, so getting clean water and quality forage in front of them quickly, along with appropriate protein and mineral supplementation, supports recovery.
Contact your local county extension office as well. Most state land-grant universities have extension specialists in fire recovery who can advise on pasture rehabilitation, soil stabilization, and fencing restoration.
How Wildfire Risk Should Factor Into Your Mitigation Plan For Your Land
Every point in this wildfire mitigation guide applies whether you’ve owned your land for thirty years or you’re in the process of buying it. For buyers, wildfire risk is a land characteristic that deserves the same scrutiny as water rights, access, and soil quality. It directly affects what the property will cost to insure, maintain, and protect over time.
At Hayden Outdoors, our team works with landowners and land buyers across 31 states, many of them in fire-prone ranch country. Our agents understand the fire history and landscape dynamics of the markets they serve, and they can help you evaluate a property’s wildfire risk profile before you close, not after.
Whether you’re looking for your next ranch or assessing the defensibility of land you already own, the right agent makes wildfire risk and preparedness part of the conversation from day one.
Browse Hayden Outdoors ranch and land listings across the West and beyond. When you’re ready to talk about a specific property, connect with a Hayden land specialist who knows the ground and can help you think through what it means to own, protect, and steward land in fire country.
Wildfire Mitigation And Preparedness: The Bottom Line
The landowner who comes through wildfire season well is rarely the one who got lucky; it’s the one who had a proper fire mitigation plan in place. They’re the one who mowed the pastures in May, cleared the gutters in June, rehearsed the trailer-loading in March, and had their documents in the cloud before any smoke appeared on the horizon.
Wildfire mitigation is not a single project; it’s a strategy and action-oriented plan. It’s a practice, seasonal, habitual, and built into how you manage your land. The stakes are high: your home, your operation, your animals, and your family. But so is your capacity to protect them.
Start with one zone. Start with one structure. Start today.
Hayden Outdoors is a real estate brokerage and does not provide emergency management or fire prevention services. Always follow the direction of your local fire department and county emergency management office.
The Complete Guide To The Family Land Trust – How to Pass Down Property
There’s something profound about standing on land that’s been in your family for generations. The worn path to your favorite fishing hole. The ridge where your grandfather taught you to look for elk. The pasture where four generations of cattle have grazed. This isn’t just property. It’s your family’s living history, which is why establishing a family land trust is such a critical part of estate planning; because ensuring that property can be passed down means keeping that legacy intact.
But without proper planning, that legacy can disappear in a single generation. Probate courts, family disputes, and forced sales tear apart family land holdings every year. Research shows that 70% of wealth transfers fail by the second generation, and 90% fail by the third, often due to poor communication and inadequate planning.
A family land trust offers a powerful solution to protect what matters most. Whether you own 40 acres of hunting land, a legacy ranching property, or pristine timberland, understanding how property trusts work can mean the difference between preserving and passing down your legacy and watching it slip away.
A family land trust is a legal arrangement specifically designed to hold and transfer real property within families across generations. Think of this type of trust as a protective wrapper around your property—the land trust holds the legal title while you retain all the benefits of ownership.
You can still hunt it, farm it, lease it, or simply enjoy it. The difference is in who appears on public records and how the property transfers when you’re gone.
Here’s what might surprise you: establishing a family land trust doesn’t mean giving up control of your property. When you create a family land trust, you typically serve as the trustee during your lifetime, which means you maintain complete authority.
You make all the decisions. You collect the income. You decide when and if to sell. Nothing changes in your day-to-day management, but everything changes in terms of privacy, estate planning, and protecting your family’s future.
Land trusts have a rich history in America. They originated in Illinois in the 1890s, primarily as a tool for wealthy Chicagoans who wanted to keep their property holdings private. Today, family land trusts are used in all 50 states, though only eight states (Florida, Georgia, Hawaii, Illinois, Indiana, Montana, South Dakota, and Virginia) have specific statutory laws governing them.
It’s important to distinguish between different types of property trusts, though.
Title-holding land trusts (what this article focuses on) are private arrangements for estate planning and privacy, and thus are commonly used by families.
Conservation property trusts are nonprofit organizations dedicated to preserving natural areas.
Community property trusts hold land for affordable housing purposes.
How Does A Family Land Trust Work?
Understanding how a family land trust operates requires knowing the three key players:
The Grantor (or Settlor) is the person creating the trust and transferring property into it.
The Trustee is the person who holds legal title and manages the trust property. In most cases, you serve as your own trustee for the family land trust during your lifetime, retaining complete control. When you pass away, a successor trustee you’ve named takes over and distributes the property according to your wishes.
The Beneficiary is the individual (or group of individuals) who is benefiting from the trust. During your lifetime, you’re typically the beneficiary. After your death, your children, grandchildren, or other heirs become beneficiaries and inherit the property without going through probate.
You can, however, wear all three hats simultaneously—grantor, trustee, and beneficiary.
Let’s look at a theoretical example. Consider the Wilson Ranch—370 acres of prime grazing and hunting land in Wyoming. When Tom Wilson purchased the property in 1965, he placed it directly into a family land trust, with himself as both trustee and beneficiary. He ranched that land for 44 years. When Tom passed away in 2009, his daughter Sarah automatically became the successor trustee. There was no probate, no court involvement, no public record of the transfer. Three generations have now benefited from that single family land trust document.
The timeline for putting land in a family land trust is straightforward. The entire process typically takes 3-4 weeks (although we recommend anticipating 2-3 months before everything is fully ready): initial consultation, document preparation, review and signing, and finally recording the deed with the county.
When title to real estate is held in a title-holding trust, courts have held that the beneficial interest is considered personal property rather than real property, which can simplify certain transfers.
The Different Types Of Land Trust
There are three main types of land trusts, each with different core objectives and benefits. Before establishing a trust for your property, it’s critical to understand what your options are.
Revocable Land Trust (Title-Holding Land Trust)
This is the most common type of family land trust. With a revocable property trust, you maintain complete control during your lifetime. You can change the terms, add or remove beneficiaries, sell the property, or even dissolve the trust entirely.
The trust is tax-neutral while you’re alive—you still report all income and expenses on your personal tax return. There’s no separate tax return required. The trust automatically becomes irrevocable when you pass away, triggering the succession plan you’ve established.
One limitation: revocable land trusts provide limited asset protection from creditors during your lifetime. An LLC is typically required for substantial liability protection, especially for rental properties or hunting leases.
Irrevocable Land Trust
An irrevocable land trust represents a permanent transfer. Once established, you generally cannot change the terms or remove the property. This loss of control is what makes irrevocable trusts less popular for family legacy planning.
The primary benefit is estate tax reduction for very large estates. When you transfer property into an irrevocable trust, it’s removed from your taxable estate, potentially saving substantial money if your estate exceeds the federal exemption (currently $13.99 million in 2025).
For most families preserving hunting land or working ranches, a revocable land trust offers better balance.
Conservation Land Trust/Easement
Here’s where many landowners get confused: conservation easements are not the same thing as family land trusts for estate planning.
A conservation easement is a permanent legal restriction on how your land can be developed. You’re preserving the land’s natural character forever in exchange for tax benefits. Under Section 170(h) of the Internal Revenue Code, qualifying easements can provide substantial income tax deductions—up to 100% of adjusted gross income for farmers and ranchers.
Critical distinction: conservation easements significantly reduce property value, typically by 25-60%. This makes sense—development rights have value, and surrendering them permanently reduces what buyers will pay.
Conservation easements are enrolled with qualified organizations, cannot be reversed, and involve ongoing monitoring. Many families use both tools together: a family land trust holds title for estate planning while a conservation easement restricts use for conservation purposes.
Why Putting Land In A Trust Is A Good Idea
After working with thousands of families buying and selling land, we’ve seen how proper planning makes all the difference in passing down property (and your legacy).
Estate Planning Benefits Of The Family Land Trust
Avoiding probate is the single biggest advantage of putting land in a trust. Probate takes 6-18 months, costs thousands in legal fees, and requires complete public disclosure. A family land trust bypasses all of this. Your successor trustee steps in immediately—no waiting, no court approval required.
Family land trusts prevent court-ordered partition sales—one of the most heartbreaking outcomes in family land disputes. When multiple heirs inherit property without proper planning, any one can petition the court to force a sale. A properly structured family land trust prevents this by clearly defining management and distribution.
For families with land in multiple states, a land trust is almost essential. Without one, heirs face separate probate proceedings in each state.
Privacy Benefits
Your personal name stays off public property records when putting land in a trust. The trustee name appears on records, which can simply be the trust name itself. This privacy eliminates unwanted solicitation from developers and marketers.
Walt Disney used Florida property trusts to acquire all the land for Disney World before anyone knew his plans. If his name had appeared on property records, prices would have skyrocketed.
Tax Considerations Of Family Land Trusts
Revocable property trusts are completely tax-neutral during your lifetime. You continue reporting all income and expenses on your personal tax return. There’s no separate trust tax return to file. Property taxes also remain unchanged in most states. Your agricultural exemptions and other tax benefits generally continue unaffected.
For large estates exceeding the federal exemption ($13.99 million in 2025), family land trusts can provide estate tax benefits. The step-up in basis still applies—when heirs inherit, they receive the property at current fair market value, eliminating decades of capital gains taxes.
Family Harmony And Legacy Preservation
A family land trust creates a clear succession plan that prevents disputes from tearing families apart. We’ve seen siblings who grew up hunting the same land end up in court battles because their parents never clarified their wishes.
A family land trust allows multiple beneficiaries with specified ownership percentages. You can set terms for responsible stewardship extending beyond your lifetime—preventing subdivision, requiring supermajority approval for sales, or ensuring grandchildren get hunting rights.
How To Know If You Should Establish A Family Land Trust
Family land trusts aren’t necessarily for everyone, but there are a few key scenarios where establishing one is a solid long-term strategy for keeping property in the family and passing on generational wealth.
Consider A Family Land Trust If You:
Own significant recreational, agricultural, or investment land you want to keep in the family
Want to pass land to multiple heirs without physical subdivision
Value privacy in property ownership
Are concerned about estate taxes (estates over $13.99 million in 2025)
Want to avoid probate delays and costs
Have family members who might contest your will
Own land in multiple states
Are remarried and want to ensure your property goes to your children
Have specific wishes about land use you want to enforce long-term
A Family Land Trust May Not Be Necessary If:
Your estate is small and under your state’s probate thresholds
You’re comfortable with public ownership records
You only own a primary residence
You anticipate frequent buying and selling of properties
You can’t afford setup costs (typically $800-$3,000)
Your heirs all agree on property disposition (although, this can change, so it’s best not to assume all heirs agree)
The Mortgaged Land Question: How To Put Land In A Trust When You’re Borrowing
One of the most common questions when it comes to family land trusts is this: “Can I put my land in a trust if I still owe money on it?” The answer is yes.
Thanks to the Garn-St. Germain Depository Institutions Act of 1982, you can transfer mortgaged property into a revocable living trust without triggering the “due-on-sale” clause. This federal law specifically protects borrowers transferring property into a family land trust where they remain a beneficiary.
What this means:
You don’t need lender approval (though notifying them is courteous)
Your mortgage terms don’t change
You continue making payments as usual
The lender cannot demand full repayment
You do not need to own the land outright
Important considerations:
The mortgage obligation continues
If refinancing later, some lenders may ask you to temporarily transfer the property back, then re-transfer after refinancing
Irrevocable trusts are more complex with mortgaged property—stick with revocable trusts
Always notify your title insurance company
Bottom line: Having a mortgage should not prevent you from establishing a family land trust.
Agricultural And Recreational Property Considerations
Hunting leases generally transfer with the property when putting land in a trust. Review your lease terms, but most family-arranged leases present no issues.
Timber rights and mineral rightsrequire special attention if severed from surface rights. A family land trust can hold surface rights, mineral rights, or both—but separate conveyance documents are needed for each.
Conservation easements work beautifully alongside family land trusts. The trust holds title for estate planning while the easement restricts development for conservation purposes.
When Should You Establish A Family Land Trust?
The honest answer? As soon as you own significant land you want to protect for future generations, it’s best to begin the process of establishing a family land trust.
Ideal Timing For A Family Land Trust
When you acquire significant land, build estate and legacy planning into your purchase from day one. Have the deed recorded directly into your trust’s name rather than personally, then transferring later.
Before major health issues arise. Once incapacity sets in, transferring property becomes complicated and may require guardianship proceedings.
When you’re over 50 and thinking about legacy, even if healthy, procrastination has cost countless families their heritage.
Before marriage or during divorce planning, family land trusts protect assets you own before entering a new marriage.
Life Events That Trigger A Need
The following are core events that warrant considering establishing a trust: birth of children or grandchildren, divorce or remarriage, retirement and succession planning, serious illness, sale of business creating wealth to invest in land, or inheritance received that you want to preserve.
When To Involve An Attorney
Schedule an initial consultation as soon as you’re seriously considering putting land in a trust. Many estate planning attorneys offer complimentary consultations. Come prepared with property information and goals. Once you’ve established a working relationship with an attorney who specializes in property trusts, allow at least 2-3 months before you want the trust active (the more complex the case, the longer the timeline).
What to look for:
Estate planning attorneys specializing in real estate and agricultural law
Licensed in the state where your property is located
Experience with family land trusts specifically
Understanding of agricultural/recreational land issues
Budget: $1,500-$3,000 for comprehensive setup
Pro Tip: The best time to establish your family land trust is when you first acquire that dream property. Build legacy planning into your land purchase from day one, just like you’d purchase title insurance or survey the property lines.
Family Land Trust vs Living Trust – Breaking Down The Differences
With so many avenues for estate planning, it’s a common question: what’s the difference between a land trust vs living trust?
Here’s the key insight: a family land trust is actually a type of living trust, but it’s specifically designed for real estate. Many families use both: a comprehensive living trust for overall estate planning, and separate land trusts for specific parcels that demand extra privacy.
Think of it this way: A living trust is a toolbox for your entire estate—holding bank accounts, investments, and personal property. A land trust is a specialized tool designed specifically for real property.
When comparing a family land trust vs living trust for your estate planning, it’s important to consider your purpose. A family land trust holds title to real estate only, while a living trust holds all types of assets, including cash, investments, land, personal property, and business interests.
In terms of privacy, a family land trust offers a very high level of protection since only the trustee name appears on public records, whereas a living trust provides moderate privacy by avoiding probate publicity.
Family land trusts are simpler in complexity, while living trusts are more comprehensive estate planning tools. When it comes to the cost of a family land trust vs a living trust, you’ll likely pay more for setup of the living trust, due to its more comprehensive nature and the various assets it covers.
The reality is, both living trusts and land trusts provide probate avoidance and allow you to retain full control during your lifetime if structured as revocable trusts. The key is understanding which tool—or combination of tools—best serves your specific situation. Most established landowners are typically looking at incorporating both into their estate planning process.
When To Use A Land Trust vs A Living Trust
Use a land trust alone for privacy-focused landowners, investment properties, or properties with multiple unrelated owners.
Use a living trust alone for comprehensive estate planning with diverse assets and modest land holdings where privacy isn’t paramount.
Use a land trust and a living trust together for complex estates with significant land holdings and other substantial assets, multiple parcels requiring different management, or working ranches with operational businesses.
You can transfer land from a living trust into a separate family land trust for added privacy, or consolidate land trusts into a comprehensive living trust for simplification.
The Impact Of A Family Land Trust On Property Resale Value
Let’s address this directly: a title-holding family land trust for estate planning purposes should have zero impact on your property’s actual market value. The land itself doesn’t change; only the name on the title changes.
Critical Distinction: Family Land Trusts vs Conservation Easements
There are two completely different types of property trusts, and understanding the difference can significantly impact your property’s resale value:
Title-holding family land trusts are used for estate planning and privacy. They do not reduce property value, do not restrict land use, can be revoked or changed anytime if revocable, and simplify transfer to heirs.
Conservation easements (very different) permanently restrict development. They do significantly reduce property value by 25-60%, cannot be reversed, and provide tax deductions in exchange.
When you hear someone say “land trusts reduce property value,” they’re talking about conservation easements, not title-holding family land trusts.
Practical Considerations
Some buyers unfamiliar with trusts may initially hesitate or have questions. Their lender might require additional documentation. However, these concerns are easily managed with proper Certificate of Trust documentation and experienced land specialists who understand trust transactions.
The selling process is straightforward: You, as trustee, have legal authority to sell. The sales contract names the trust as seller. The title company handles it like any other transaction with proper documentation.
Advantages when selling: If multiple beneficiaries exist, trust terms control the sale process, avoiding the need for all heirs to sign separately. For estate situations, successor trustees can sell without probate.
Market Perception
In high-value land markets, establishing a family land trust is common and expected. Sophisticated buyers view it as a sign of proper estate planning. Beneficial interests in title-holding trusts are considered personal property, which can simplify some transfers.
When you work with land specialists like Hayden Outdoors, trust-held properties are completely routine. Our agents handle these transactions regularly and know exactly how to market your legacy land effectively. Many of the highest-value recreational and agricultural properties are held in trusts, and sophisticated buyers respect it.
A well-structured family land trust signals to buyers that the property has been professionally managed as part of a long-term family legacy. That’s attractive to buyers looking for quality land they’ll cherish for generations.
Bottom line: Title-holding family land trusts don’t reduce property value. Conservation easements do (25-60%), but that’s a different tool. Trust ownership may add 1-2 weeks to the transaction timeline for documentation. In the long term, the estate planning benefits far outweigh minor paperwork additions on the front-end.
Find The Land That Could Be Your Family’s Legacy
Legacy isn’t just about preserving what you have; it’s about creating something lasting for the generations to come.
Whether you’re searching for that perfect hunting property to pass down via a family land trust, a working ranch that will support your family for decades, pristine timberland that will grow in value, or recreational land where your family will build memories for generations, Hayden Outdoors specializes in helping families find land that becomes their legacy.
We understand that buying land isn’t just a transaction; it’s the beginning of your family’s story on that property. That first sunrise over your new ridge. The first deer your grandson hunts. The first cattle turned out on your own pasture. These moments become the fabric of your family’s heritage.
Our land experts guide you through the entire process of legacy building, from identifying land that matches your vision, to connecting you with estate planning professionals who can help you protect it through a family land trust for generations.
The information in this article is for educational purposes only and should not be considered legal or tax advice. Always consult with qualified estate planning attorneys, tax professionals, and financial advisors before making decisions about trusts.
Enhancing Pheasant Hunting with Effective Habitat Management
Drew Larsen knows a thing or two about pheasant hunting – the calls and cackles, the flush, the sweeping prairie lands that beckon hunters and their dogs to walk this way. He knows it all like it’s his backyard. Maybe that’s because, at least for most of his life, prime pheasant hunting has been Drew’s backyard. “I grew up in South Central Nebraska, a town called Minden, a small town of about 2,000 people, in what they call the rainwater basin of the state. I cut my teeth pheasant hunting in those areas.” Enhancing Pheasant Hunting Through Effective Habitat Management
Drew’s early days chasing birds through the Nebraska wetlands was the beginning of a life-long love story with pheasant hunting. Today, he’s Vice President of Conservation Delivery at Pheasants Forever, a non-profit organization dedicated to conserving pheasants, quail, and other wildlife through habitat improvements, public access, education, and conservation advocacy. He’s been with the organization for nearly 20 years working his way from regional biologist to the person who now oversees 400 wildlife biologists in 41 states across the country. It’s fair to say Drew understands the importance of habitat management for sustainable pheasant populations.
Drew recently sat down to talk all things pheasant hunting and habitat. Here, Drew provides some insight into the optimization of land for pheasant hunting and habitat.
The Pheasant’s Habitat Requirements
Drew points out that pheasants thrive in a mix of habitats including grasslands, croplands, wetlands, and shrub areas. This provides pheasants with food sources, nesting sites, and cover. “Pheasants spend a vast majority of their time on the ground foraging for seeds, so they like weedy types of cover, like sunflowers and things that provide really good aerial protection from predators above.” Here are four key factors that affect a pheasant’s survival and reproduction:
Nesting Cover: Undisturbed low- to medium-high grasses and legumes for nesting and brood rearing.
Brood Cover: Undisturbed native forbs and annual weeds that provide bare ground and aerial protection.
Winter Cover: Tree windbreaks and dense covers of cattails or switchgrass to protect the birds from heavy snow and cold winds.
Food sources: Pheasants enjoy a dietary mix of insects, grains, berries, seeds, and flora with nutrient-dense grains making up the bulk of the adult diet in the winter.
Creating a Favorable Pheasant Habitat
Habitat Diversity
When it comes to creating the ideal bird hunting habitat, Drew boils it down to one key concept: diversity. “Pheasants are really an agricultural bird,” he says. “So what you’re looking for is a good mix of ag lands and perennial grass and wildflower cover.” This serves multiple purposes. “A weedy-type habitat attracts the insects chicks and adult birds are feeding on in the spring and summertime of the year. In the fall, those crops are harvested and the birds have an opportunity to switch to a more crop-based diet.” A varied habitat also affords the birds plenty of places to nest and find cover. Successful pheasant habitat includes grasslands, croplands, wetlands, and shrub areas.
Native Vegetation
When optimizing pheasant habitat, native vegetation provides natural food sources and cover. These plants are adapted to the local climate and soil conditions, and won’t disrupt the birds’ ability to attain proper nutrition and shelter and nest.
Food Plots
When it comes to food, Drew reiterates the importance of a weedy habitat for pheasants. “Pheasants will key in on grains in the winter, such as corn, soy beans, and winter wheat, but you’ve gotta remember, in the spring and summer months, they’re primarily feeding on insects and weed seeds. That’s why a weedy habitat is so important.” Maximize your property’s pheasant food opportunities by creating food plots with crops like corn, sorghum, millet, sunflowers, and wheat, which rotate through seasons to provide a consistent diet.
Cover, Shelter, and Nesting Habitat
Pheasants need quality cover and shelter year-round. Colder temperatures will push birds into more thermal cover and winter cover while warmer climes allow them to spread out and thermoregulate in lighter cover. You can improve pheasant cover by planting a mixture of native grasses and shrubs that can withstand a warmer and colder season. Grasses should be at least 15 inches tall – the magical number for nesting habitat. Winter wheat can provide excellent nesting habitat while forbes and annual weeds make for good brood cover, which should allow for bare ground so chicks can move around and still remain unseen by aerial predators.
Cattail wetland sleuths offer good thermal cover in the winter and can hold up to snow storms and then there’s the shelter belt. A proper pheasant shelter belt combines tree rows, thickets, and woody vegetation, reducing predation.
Pheasant Habitat Management Practices
Water Sources
Pheasants require easy access to clean water for drinking and bathing. If your property doesn’t have a water source, consider installing small ponds or water troughs.
Preserving Riparian Zones
To help maintain a viable pheasant habitat, it’s important to protect and enhance riparian zones – lands that abut streams, rivers, and wetlands. This unique environment interface provides a variety of elements, including clean water, vegetation, ground cover, and food.
Landowners can enhance riparian areas on pheasant hunting property by limiting stock access, mitigating development, removing any levees or small dams, and controlling invasive plants and animals.
Minimizing Chemical Use
Pesticides and herbicides can be very harmful to pheasant populations and their food sources. When it comes to effective pheasant habitat management, strictly limit the use of these chemicals near pheasant habitat.
Predator Management
Maintaining a balanced ecosystem is essential to all healthy habitats, however, excessive predator populations can impact pheasant survival. Bird hunting landowners should consider responsible predator management as necessary.
Sustainable Hunting Practices
Selective Hunting
As a devout pheasant hunter, Drew has chased his passion for upland birds all over the country. “Since I started working for Pheasants Forever, I’ve broadened my hunting horizons quite a bit. Now I get to take advantage of some other upland bird hunting opportunities beyond Nebraska. Last year, I got to hunt out West in Arizona. I’ve also hunted sage grouse and ruffed grouse out that way. And then I’ve had the opportunity to do quite a bit of sharp tailed grouse and prairie chicken hunting in Nebraska, South Dakota, and North Dakota.”
Which is all to say he understands the importance of sustainable hunting practices that ensure population longevity and hunting success into the future. Avoid excessive hunting pressure that could negatively affect pheasant populations and practice selective harvesting of birds. This can mean harvesting only males to allow hens to breed the following year.
Hunting Ethics and Regulations
Even on private hunting property, hunters need to adhere to regional hunting laws and guidelines. Talk with your guides and visiting hunters about hunting ethics and rules for your property.
Collaborative Conservation Efforts
You might say Drew is a wildlife biologist first and a hunter second, acknowledging that he understands a successful pheasant hunt starts with healthy habitat and habitat management. “A lot of the country that’s producing pheasant and quail is part of the CRP – Conservation Reserve Program. This is a USDA program that pays landowners to take crops out of production and plant perennial cover instead. So the areas where we have our best feathered populations in the country are areas where there’s a really good mix of row crop, CRP, and native grasslands. That’s where we have the highest bird numbers.”
It can be daunting to create such a successful bird hunting habitat alone, which is why it’s important to work with local conservation groups, like Pheasants Forever, and wildlife agencies to define specific improvements you can make to your property. Talk with local wildlife experts and professionals about tailoring habitat modifications to the local ecosystems.
Conclusion
Owning your dream hunting property can be a generationally rewarding endeavor. Working with local wildlife management entities and conservation groups to ensure long-term habitat wellness is key to providing pheasants and sportsmen sanctuary for years to come.
It’s important to keep in mind that producing proper pheasant habitat doesn’t happen overnight; it takes time, possibly several seasons until you realize the full benefits. Creating a diverse and suitable habitat enhances land for pheasant hunting while also contributing to the health of overall wildlife populations.
“Any passionate hunter knows the importance of land conservation and improvement,” says Hayden Outdoors Managing Partner Dax Hayden. “As someone who spends the majority of my time walking some of the country’s last great swaths of ranching, farming, recreational, and hunting land, I can tell you first-hand – conservation matters. At Hayden, we’re proud to partner with Drew and the dedicated folks at Pheasants Forever; they understand what it takes to keep these great places of ours healthy for wildlife and productive for those of us who live, work, and play on them.”
Pheasants Forever: An Amazing Resource
Becoming a member of Pheasants Forever is a great way to stay in the know about bird hunting and managing of your property for pheasant hunting. Visit the website and simply enter your ZIP code to find the chapter nearest you. Landowners can find their nearest farm bill wildlife biologist for a one-on-one consultation about habitat management. Volunteers can help with local habitat projects and participate in youth or adult hunts.
Pheasants Forever is vital to the health of the country’s pheasant hunting. Drew drives the point home. “If you’ve hunted pheasants, you’ve most likely hunted in an area that we’ve either helped put on the ground, or advocated for in Washington, D.C., like CRP. If you hunt pheasants, we’ve absolutely had an impact in helping provide areas for people to hunt.”
Pheasant in flight
Secure Exclusive Private Land Access For Pheasant Hunting
Hayden Outdoors Hunt For Habitat 2025 kicks off on November 7th in Goodland, KS. Hunter tickets include two days of exclusive private land access for pheasant hunting, along with live music performances featuring Aiden Logsdon and Grand Ole Opry artist Chancey Williams.
How to Set Up a Trail Cam for Success: Regional Strategies Across the United States
Trail cameras have transformed wildlife observation, hunting preparation, and property monitoring. Success requires understanding both fundamental principles and regional variations across diverse US landscapes. From Pacific Northwest forests to Southwest deserts, each region presents unique challenges and opportunities. The key to success is understanding how to set up a trail cam in each unique region to achieve the maximum benefits of having a trail camera on your property.
Understanding Your Environment
Trail cam set up success depends on wildlife patterns, weather conditions, terrain features, and human activity. Each US region presents distinct combinations requiring tailored approaches. The key lies in adapting strategy to match specific area conditions while maintaining core principles.
Weather patterns, vegetation density, wildlife migration routes, and seasonal behaviors vary dramatically nationwide. Regional knowledge becomes essential for optimal results. Understanding local conditions separates successful deployments from disappointing outcomes.
The Northeast: Navigating Dense Forests and Seasonal Extremes
The Northeast’s dense deciduous and mixed forests create both opportunities and challenges. Dramatic seasonal changes require cameras withstanding temperature extremes and moisture. Harsh winters and humid summers demand robust equipment selection.
Focus on natural funnels created by dense forest structure. Deer trails, creek crossings, and ridge lines become wildlife highways. Position cameras along these corridors, particularly where multiple trails converge for maximum activity.
Thick canopy creates darker conditions even during daylight hours. Ensure cameras have strong infrared capabilities for nighttime photography. Winter snow loads can shift camera positions, so secure mounting proves crucial.
Use heavy-duty straps and consider mounting slightly higher than normal. Account for snowfall when positioning equipment. The region’s hunting pressure makes wildlife more nocturnal during hunting seasons.
Consider the Northeast’s abundant water sources when positioning cameras. Stream crossings, pond edges, and seasonal wetlands attract diverse wildlife. Be mindful of spring flooding that can damage or relocate equipment.
The Southeast: Dealing with Heat, Humidity, and Dense Vegetation
The Southeast’s hot, humid climate and dense vegetation create unique challenges. High humidity can fog lenses and damage electronics. Lush growth can quickly obscure camera views, requiring frequent maintenance. Check cameras frequently for moisture damage and clear vegetation growth.
The Southeast’s abundant food sources and water create more dispersed wildlife patterns. Focus on travel corridors between bedding areas and food sources. Target early morning and late evening hours when animals are most active.
Swamp edges, hardwood bottoms, and pine plantation borders create excellent edge habitat. These transition zones often funnel animals along predictable routes. Be prepared for seasonal flooding in low-lying areas. Elevated positions near water sources provide excellent vantage points while protecting equipment.
The Midwest: Mastering Agricultural Landscapes
The Midwest’s agricultural landscape offers unique opportunities for trail camera success. The region’s mix of farmland, woodlots, and waterways creates distinct wildlife movement patterns. These patterns change with farming cycles and seasons.
Position cameras along fence lines, creek bottoms, and woodland edges bordering agricultural fields. These areas serve as natural highways for wildlife moving between cover and food.
The Midwest’s relatively flat terrain means wind can significantly impact camera stability. Use robust mounting systems and consider prevailing wind direction when positioning cameras.
Seasonal agricultural activities dramatically influence wildlife patterns. Corn and soybean harvest times create temporary food source abundance. Tillage operations can disrupt normal movement patterns throughout the region.
The Mountain West: Altitude, Weather, and Terrain Challenges
The Mountain West’s extreme elevation changes and harsh weather conditions present unique challenges. The temperature can swing dramatically between day and night. Equipment must withstand summer heat and winter blizzards.
At higher elevations, focus on natural travel corridors. Saddles, ridge lines, and valley bottoms become animal highways. Animals follow these routes to conserve energy while moving through mountainous terrain.
Water sources become even more critical in this environment. Springs, streams, and seasonal water holes are prime camera locations. Battery performance decreases significantly in cold conditions, so consider lithium batteries.
Animals move to higher elevations in summer and lower elevations in winter. Position cameras along these migration routes for seasonal success. Be prepared to relocate equipment as animals move between zones.
The Southwest: Water Sources and Extreme Conditions
The Southwest’s arid climate makes water sources the key to success. Unlike other regions, water becomes the critical factor for wildlife activity. Food sources take secondary importance in desert environments.
Focus camera placement around springs, seasonal water holes, stock tanks, and permanent water sources. These locations concentrate wildlife activity and provide predictable patterns for successful photography. Water sources attract both wildlife and livestock.
The region’s extreme temperature variations between day and night can stress electronics. Choose cameras rated for these conditions and consider positioning away from direct sunlight. Natural shade from rocks or vegetation can extend equipment life.
The Pacific Northwest: Rain, Dense Forests, and Unique Wildlife
The Pacific Northwest’s heavy rainfall, dense forest cover, and diverse wildlife create distinct requirements. The region’s wet climate demands cameras with superior weather sealing and moisture resistance.
Position cameras along ancient game trails winding through dense forest understory. You can easily identify these well-established routes by their worn paths. The region’s thick canopy creates darker conditions requiring superior low-light performance.
The Pacific Northwest’s abundant water sources mean wildlife is less concentrated around specific holes. Instead, focus on travel corridors, feeding areas, and seasonal gathering spots. Berry patches and salmon streams during spawning seasons provide excellent opportunities.
Consider the region’s diverse wildlife when selecting camera settings. Everything from black bears and elk to smaller species like martens and lynx abound. Varied fauna may require different trigger sensitivities and camera heights.
Universal Best Practices for All Regions
Certain principles apply to successful trail camera deployment across the United States. Understanding these fundamentals provides the foundation for regional adaptations and consistent results.
Camera height and angle significantly impact success rates. Generally, position cameras 3-4 feet high and angle them slightly downward to capture movement. However, adjust this based on target species and local terrain features.
Use gloves when handling cameras and consider scent-eliminating sprays to minimize human odor. This is especially crucial during hunting seasons when animals are more alert.
Above all, ensure you perform regular maintenance on your cameras. Check cameras monthly at minimum, more frequently in harsh conditions. Clear vegetation, check battery levels, ensure secure mounting, and verify appropriate camera settings.
Seasonal Adjustments and Strategies
Each season brings unique opportunities and challenges for trail camera deployment across all regions. Spring offers opportunities to capture animals with young, but changing weather patterns require adjustments.
Summer’s longer daylight hours and predictable weather patterns often provide the most consistent results nationwide. However, heat can stress equipment and batteries in many regions.
Fall hunting seasons can disrupt normal wildlife patterns, but they also concentrate animals in security cover. Adjust camera positions to focus on heavy cover areas and nighttime activity patterns.
Winter presents equipment challenges but can provide unique photography opportunities across most regions. Snow cover can reveal animal tracks and travel patterns while creating stunning backgrounds. However, cold temperatures and snow require more frequent maintenance visits.
Finding the Best Trail Cams
When it comes to reliable trail camera equipment that can handle the diverse challenges across America’s landscapes, Hayden Outdoors partners with Moultrie to bring you proven performance in the field.
From the humid Southeast to the harsh Mountain West winters, Moultrie’s trail cameras are engineered to deliver consistent results in every region we’ve covered. Their cameras feature:
Weather-resistant construction – Built to withstand endure Pacific Northwest rainfall to Southwest desert heat
Superior battery life – Critical for remote monitoring across vast properties
Advanced trigger technology – Ensuring you capture the wildlife activity that matters most
Easy setup and maintenance – Perfect for landowners managing multiple camera sites
Whether you’re monitoring wildlife on your hunting property, conducting habitat management, or keeping an eye on remote areas of your land, Moultrie’s reliable technology helps you make informed decisions about your property.
Ready to upgrade your trail camera setup? Visit our partner Moultrie to explore their full range of trail cameras designed for serious land management and wildlife observation.
Conclusion
Successful trail camera deployment requires understanding both universal principles and regional variations across the United States. Each region presents unique challenges and opportunities that demand tailored approaches to camera placement and maintenance.
The key to success lies in adapting these strategies to your specific location. Maintain consistent monitoring and adjustment practices regardless of your region. Whether dealing with Northeast forests, Midwest agricultural landscapes, or Southwest arid conditions, understanding regional patterns improves success.
With proper planning, appropriate equipment selection, and regional awareness, you can glean many benefits of setting up trail cams. The investment in time and effort to understand your specific region’s requirements pays dividends. Success comes through understanding diverse landscapes of the United States and adapting accordingly.
The Complete Guide to Investing in Lakefront Property
Like all Hayden Outdoors real estate professionals, Kevin Doyle knows land. Kevin is the oldest of the four Doyle Boys, while growing up on the Tri-Lakes in Mecosta County, Michigan. His genuine love of the outdoors started at a very young age and most of his adult life while living on Lake Mecosta, where he and his brothers embraced every water sport imagined, plus fishing and hunting, while ice fishing and snowmobiling in the wintertime. Kevin’s passion for lake living is evident while sharing his experience and knowledge with friends and clients alike who are considering investing in lakefront property.
If you’re dreaming of lakefront property, imagining afternoons spent relaxing in the screened-in porch room or evenings on the deck that overlooks your dock as the sun sinks low, Kevin has some tips. Here, he walks through important things to consider when buying a lakefront home or property.
Types of Lakefront Properties
Private vs. Public
When it comes to talking about lakeside real estate, there are really two important types to consider: public and private lakes. While owning property on a public lake still ensures you are the homeowner, the main difference is access. Public lakes offer public access points while private lakes are for home and landowners only. “If you’re a private owner of lakefront property on a public lake, you just need to know the lake will get busier, compared to a private lake,” says Kevin. Public lakes do typically offer blanket regulations, such as no overnight mooring, but they can lack the sanctity of a private lake.
Seasonal vs. Year-round
And these days, lake living isn’t always a summer-only endeavour. Many people who buy do so planning to live on the lake year-round. If you’re buying a seasonal property, you’ll need to keep winterizing in mind – making sure your property is properly shuttered and maintained for the colder winter months. However, according to Kevin, many newer lakefront homes provide plenty of amenities. “These days, it’s easy to settle into year-round lake life in homes that feature vaulted ceilings, a lakeside wall of windows, sliding glass doors out to a patio or deck, three- and four-season rooms.” Yes, please.
Developed vs. Undeveloped Shoreline
To this point, it’s important to consider how developed and modernized you want your property to be. For some, the appeal of a knotty pine, rustic lakefront cottage with a natural rocky shoreline is the ideal. Others prefer more developed features, such as steel seawalls and permanent docks, firepits and sand volleyball courts.
Finally, keep in mind that not all lakefront property is right on the lake. Important distinctions include:
Waterfront: The property line adjoins the water and homeowners have direct access to the lake.
Water access: The property might share a path or a dock that provides access to the water.
Water view: As the name suggests, this type of lakefront property offers views of the water, but does not have direct access, although many lakeview neighborhoods and homeowners associations do offer a shared private beach or dock.
Ask Kevin about the price trends for lakefront property and he’s quick to point out the supply-demand aspect of this unique type of land ownership. “A lot of family cottages will stay in families for generations. I just listed one on a springfed lake. This cottage has a beautiful 169 feet of beachfront; been in the same family for 55 years.” This type of generational ownership plays a big part in lakefront properties continuing to appreciate year after year. If you’re looking to buy, prepare your pocketbook for premium pricing in waterfront locations.
An additional annual expense is property tax. While all home and landowners pay property tax, it is a tax that is assessed based on the value of the property. In short, the more the property is worth, the higher you can anticipate your property taxes to be.
Given its unique waterfront location, your lakeside property might require additional insurance coverage, but this is dependent on location. Says Kevin, “Here in our area, in most of Western Michigan actually, most of the lakefront properties are not in any type of floodplain, so no additional insurance is required.” Flood insurance might not be applicable in many areas, but talk with your insurance provider to make sure you have adequate coverage for the following:
Liability or umbrella insurance, especially if you have a lot of water toys, boats, a dock or any other feature that could result in additional risk or injury.
Hurricane and storm surge coverage, while more important for those who live in coastal areas, large lakes can still experience storm surges large enough to cause property damage.
Windstorm coverage
Boat insurance (if you have one)
Covering Your Bases
When buying any type of property, it’s important to talk with your real estate professional about all of the financing challenges you might face and possible solutions. Lakefront property can come with unique obstacles, namely higher property values and costs that require higher loan amounts, the potential for increased insurance costs, county and HOA property restrictions and specialized appraisals. Work with your real estate agent to establish the best path forward. If you’ll need to finance the property, explore all of your options, including fixed and adjustable mortgage rates, USDA and VA loan programs if applicable and seller financing.
If your dream property is still out of your financial reach, don’t give up. There is always the option to explore smaller properties and lakeview properties. In Kevin’s home state of Michigan, for example, there are 11,037 inland lakes that are five acres or bigger, according to the Michigan Lakes and Streams Association. While you can’t buy or build on all of these lakes, that number does lend itself to plenty of possibilities.
And it’s worth keeping in mind that lakefront property will almost always be a winning proposition. Kevin confirms, “Lakefront properties hold their value strongly.” They are highly sought after real estate. “On some of the most desirable lakes, I have several buyers who are just waiting for the right property to come available. Lakefronts have appreciated at a greater amount than some of rural property types. Lakefront properties are just a wonderful investment for making memories with your family and friends. You can not put a value on that. And that’s what lakefront living is all about.”
Beautiful Lake Mecosta at twilight.
Environmental and Regulatory Factors
Buying a lakefront property can bring with it a variety of environmental considerations. One of the big ones, according to Kevin, is whether the lake is spring-fed or not. “Most of our lakes in Michigan are considered spring-fed lakes. There are good natural groundwater springs throughout the lakes themselves that replenish every year, or daily. These lakes are going to be the healthiest. They’ll typically have better water clarity. The water quality is better and healthier for aquatic life; they tend to have fewer invasive species.”
In addition to the water source, consider these key environmental restrictions.
Shoreline regulations and building restrictions:
Setbacks – the minimum distance homes and other structures must be from the shoreline
Shoreline alterations – look to local agencies and authorities before removing vegetation or doing any major excavation
Structure restrictions
Erosion control
View impediment
Riparian rights
Riparian rights refer to access rights associated with the ownership of land that directly borders a natural watercourse. In short, riparian rights allow property owners the use of water for various purposes so long as that use is reasonable and does not impede or harm other riparian owners or the public. In short, if your lakefront property is in close quarters to your neighbors, a public boat launch or other natural, personal or community infrastructure, it’s on you as the property owner to be respectful of general boundaries.
Flood zones and FEMA considerations
It’s worth working with your real estate professional to understand any FEMA flood zone designations that might affect your property. The FEMA Flood Insurance Rate Maps (FIRM) designate areas of varying flood risk levels. Ensuring you’re compliant with any potential flood zones will help keep people and structures safe, preserve the natural beauty of the property and maintain the best flood insurance rates possible. Note that homes on natural lakes are often not in flood zones – the topography of the land ensures it!
Environmental protection requirements
If you’re investing in lakefront property, you most likely want to preserve its natural beauty as much as anyone. There are some essential environmental considerations and ongoing maintenance and management to think about before diving in, so to speak.
Erosion control
No dumping in water policies and protocols
Slope protection
Pollution prevention
Stormwater and wastewater management
Zoning laws
Building and shoreline modification permits
Water level fluctuations and management
Whether you find yourself on a natural spring-fed lake or a vast expanse of dam-controlled fresh water, make sure to consider how much water levels might fluctuate throughout a season. Will you need to pull your dock every fall, or is it permanent and able to weather ice and long winter months? Do you have shore stations for boats and other watercraft or will you need to pull your boat out of the water completely and store it? Is the lake prone to large swings in water levels due to irrigation factors, dam releases or spring run off? Keep these important questions in mind when planning for time and maintenance costs.
Dogs enjoying their day out on the boat.
Property Evaluation
In addition to extraordinary sunsets, prime fishing, lazing on a sunny dock or mixing up some mid-afternoon water games, the beauty of finding your perfect escape extends to properly evaluating the property before you buy. By all lakefront lifestyle measures, Kevin is an expert. Here ares some of the key points he likes to walk clients through before signing on the dotted line:
Perform a complete water quality assessment to make sure your shoreline is healthy and swimmable.
Work with an expert to test shoreline stability and establish proper, natural erosion control.
Make sure you understand your personal lakefront access, public access and riparian rights as they relate to your property as well as nearby services, such as boat gas stations, marinas and docks.
Walk your property line to get a complete idea of how much privacy your lakefront land will afford you and your family.
Talk through dock and boat storage options, especially if you don’t plan to stay through the winter.
If you’ll only be enjoying your lakefront home during the summer months, make sure it is properly winterized and shuttered by the time winter comes to avoid property damage or theft.
Ownership Responsibilities
Again, the ownership responsibilities of lakefront property are unique, and working with someone who fully understands the joy and implications of the task is important to the success and longevity of your investment. Before you buy, talk with your real estate professional about the time commitment and other responsibilities of owning lakefront property, including:
Special maintenance requirements
Shoreline preservation
Community obligations and restrictions, and whether or not your property is part of a homeowners’ association or lake association
Seasonal preparations and weatherproofing
Wildlife management, including contributing to and preserving a healthy aquatic ecosystem
Kevin refers to the “lakefront lifestyle” often and with the type of appreciation you only find in a kindred spirit who knows. He gets it and understands the literal and figurative ebbs and flows of a life spent on fresh water. It’s his inherent knowledge that sets him apart from other real estate agents when talking about lakefront living.
It’s important, according to Kevin, to know the ins and outs of your lake, including what type of lake it is. “All-sports lakes are big bodies of water – large enough where you can waterski, wakeboard, do some high speed boating, those types of activities. If an all-sports lake is under 400 acres in size, it will typically have a no-wake time, typically between 7:30 p.m. and 11:30 a.m., to give fishermen and people time to enjoy the lake without high speed boating and personal watercraft.”
He continues, “If you’re on a smaller lake that’s considered a no-wake lake, there’s usually also a restriction on horsepower, usually 10 hp or below. Some lakes have restrictions on electric motors altogether.”
Know Your Goals
This is all to say, think about what kind of enjoyment you’re seeking in buying lakefront property, including:
Recreational opportunities, such as boating, fishing, kayaking, paddleboarding and swimming.
Community aspects of lake living, knowing you’ll need to share your big blue front yard with others, which can be fun and highly rewarding. Just ask Kevin; he loves a good boat poker run!
Seasonal changes and accessibility
Work-from-home viability and whether or not this factors in. As work-from-home options become more popular, many have flocked to more secluded parts of the country to clock in. Make sure your lakefront home or cottage offers sustainable resources if you choose this path, including high-speed internet and phone options.
Family considerations, including your family’s interests and how long you hope to own the property.
The Buying Process
Buying a lakefront cottage or home can be a lifelong dream realized. It can become a legacy property, passing from one generation to the next, and a place where generations come together to celebrate, relax and play. Given all of this, it’s important to work with someone who understands the special aspects and specific requirements of buying and selling lakefront. “Try to find someone who really knows what they’re talking about,” says Kevin. “Someone who has lived it and has a passion for it. When you find someone who knows what lakefront lifestyle is all about, that makes a big difference.”
Make sure to talk with your real estate professional about key inspection points that are unique to lakefront properties, negotiation strategies and due diligence specific to waterfront. Doing the legwork upfront will mean you’ll get to sit back and relax once you close on your shoreline dream home.
Conclusion
There are a lot of things that set a lakefront property apart, but to Kevin, it comes down to one very important element. “With my background, growing up living the lake lifestyle, it’s all about the view and the setting. To me, that’s just as important as what the cottage or home has to offer on the inside.” If you’ve spent time jumping off the end of a dock into crystal clear blue water, recounted a sun-soaked day with family and friends overlooking the lake at sunset, or found sanctuary on the boat in the middle of the lake, you know what Kevin’s talking about. And if you’ve always dreamed of doing these things from your very own stretch of shoreline, give Kevin a call, because he can talk lakefront living – in all of its wild fun, peaceful solitude and vibrant beauty – all lake day long.
The four Doyle boys and their father after a successful day on the lake. Photo courtesy of Kevin Doyle.
Finding the Right Ranch in Colorado, Montana, Idaho, and Wyoming
There’s a certain allure to owning a ranch in the American West. It’s a call to freedom, space, and a deep connection to nature. If you’re a farm and ranch lover yearning for a retreat from modern life, the appeal of finding a ranch for sale is undeniable. The vast landscapes of Colorado, Montana, Idaho, and Wyoming offer a unique opportunity to live out this dream.
Each state presents its own unique charm. From the Rocky Mountains of Colorado to the “Big Sky Country” of Montana, the secluded retreats of Idaho to the iconic western heritage of Wyoming, there’s a ranch out there that’s just right for you. But finding the perfect ranch isn’t just about the view. It’s about understanding the land, the local wildlife, and the potential for outdoor recreational activities like hunting and fishing.
In this guide, we’ll explore what to look for when considering ranches for sale in these states. We’ll delve into the unique aspects of each location, and provide practical advice to help you find your perfect ranch. So saddle up, and let’s embark on this journey together. The perfect ranch is waiting for you, right over the horizon.
The Allure of Owning a Western Ranch
There’s a magical quality to Western ranches that captivates the soul. It’s the wide-open spaces and the sense of boundless freedom that they offer. For many, it’s a chance to escape the hustle of urban life. Ranches embody a lifestyle steeped in tradition. They offer a chance to reconnect with the land and embrace a slower pace. There’s something deeply satisfying about cultivating the land, managing livestock, and nurturing wildlife. With modern technology, running a ranch has become more efficient. However, the timeless rhythm of nature still dictates daily life. You rise with the sun and retire as the stars blanket the sky.
For outdoor enthusiasts, ranches open a world of adventure. Hunting, fishing, horseback riding, and hiking are just the beginning. The land becomes your playground, and the opportunities are endless. Ranch ownership is also a legacy investment, bringing families together across generations. It’s a chance to create memories that last a lifetime. Plus, there’s peace of mind in knowing you’re contributing to conservation efforts. Through responsible stewardship, ranch owners help maintain the natural beauty and ecological balance of their land.
Colorado ranches stand as testament to natural splendor. Nestled among the mighty Rockies, they offer breathtaking vistas and rich wildlife. The diverse landscapes range from rugged mountains to sweeping plains. Water rights are critical in Colorado. With arid conditions, controlling water access can make or break a ranch. Prospective buyers should delve into water rights agreements and availability.
A ranch here can serve as a hub for endless outdoor activities. Imagine fishing in pristine mountain streams or hunting in the vast backcountry. Each season brings new opportunities for adventure. Buyers should also consider the ranch’s proximity to local towns. Access to amenities without losing the charm of seclusion is a balance worth finding. Colorado ranches are more than just a haven for recreation. They offer a chance to live sustainably and steward the land responsibly.
Montana: Big Sky Country and Conservation Opportunities
Montana’s nickname, “Big Sky Country,” perfectly captures its essence. The expansive sky stretches endlessly, lending an aura of grandeur to the landscape. This feeling draws many to Montana’s ranches, seeking solace beneath its vastness. Montana’s landscape is diverse and offers rich hunting and fishing experiences. In vast wilderness areas, these outdoor activities are both tradition and pastime.
Ranches in Montana often play a pivotal role in conservation. They maintain local ecosystems while supporting native wildlife habitats. Buyers contribute to preservation efforts when investing here. The state’s ranch economy relies heavily on agriculture and livestock. Owners can find a rewarding balance in sustainable practices that benefit the environment and provide income. With wide-open spaces, Montana ranches offer more than a home; they offer a way of life. It’s an investment in tranquility and unspoiled nature.
Idaho offers ranches that serve as hidden gems. Seclusion and privacy are key characteristics of its properties. These retreats promise quietude away from the crowded modern world. Idaho’s landscapes vary from picturesque mountains to dense forests. This diversity offers unique opportunities for hunting and other outdoor adventures. The state’s rich wildlife enhances these experiences. For fishing enthusiasts, Idaho’s riverfront ranches are paradise. Serene waterways teem with fish, drawing anglers from far and wide. Imagine casting a line into crystal-clear rivers, surrounded by nature.
Buyers can expect to find a strong sense of community in Idaho. Neighbors often share a commitment to preserving their beloved landscapes. In owning an Idaho ranch, individuals not only gain property, but they also join a close-knit community. It’s an investment that enriches their lives beyond the boundaries of the land.
Wyoming: Western Heritage and Tax Benefits
Wyoming’s ranches resonate with iconic Western culture. Steeped in cowboy heritage, they offer a living link to America’s past. This history is part of the appeal for many buyers. Wyoming boasts vast open spaces, perfect for a host of outdoor activities. Hunt the expansive plains or ride horseback across rolling hills. The land feels limitless, encouraging adventure.
Ranchers here often embrace sustainable practices. Stewardship is about preserving land for future generations. This commitment benefits both ranchers and the broader ecosystem. One of Wyoming’s unique draws is its tax benefits. The state has no income tax, making ranch ownership financially appealing. This advantage can be significant over time. The spirit of Wyoming is one of self-sufficiency and community. Owning a ranch here means embracing both the challenges and rewards of this rugged lifestyle.
Purchasing a ranch is a sizable commitment. Prospective buyers need to delve into key aspects that can influence their decision. Understanding these can guide you in finding your dream property.
First familiarize yourself with zoning laws, hunting and fishing laws and land use regulations. These determine what you can do with the property. They vary significantly between states and regions. If your main goal is wanting to hunt a certain species year after year, then you ought to be able to in that hunting unit!
Then, assess the land size and topography. A ranch’s terrain can greatly affect its usability and aesthetic appeal. Different topographies suit different farming and recreational needs.
Next, look at the existing infrastructure on the ranch. This includes buildings, fencing, and roads. Consider how these align with your vision for future development.
Access to water rights and live water on the property is crucial. Water is essential for livestock, irrigation, wildlife and personal use. Ensure you fully understand the property’s water rights and sources.
Ultimately, selecting the right ranch is about matching the property’s potential with your goals. Clarity on these factors aids in making an informed choice.
Zoning Laws and Land Use Regulations
Zoning laws govern how land can be used. Regulations in that region allow you to do various activities in that region on private lands. Each region has specific guidelines, affecting everything from building permissions to hunting and fishing rules to livestock management. Know these laws before buying a ranch. Land use regulations can influence business operations. Farming, guest lodging, and recreational activities may have different restrictions. Understanding these helps plan suitable ranch activities. Consult with local authorities or experts familiar with ranch regulations. They can offer insights into how regulations impact your plans. This knowledge will aid in making informed buying decisions.
Land Size and Topography
When considering a ranch, reflect on the size and the terrain. Large tracts offer privacy and potential for diverse activities. However, they also require more management and resources. Evaluate the terrain, as it influences land use. Flat lands may be ideal for crops or grazing. Meanwhile, hilly or forested areas provide better settings for recreational activities. Landscapes and precipitation directly affect cattle grazing and carrying capacities. Understand how the landscape affects accessibility and potential hazards. Steeper areas may have limited access but could hold breathtaking views. Ensure the land complements your needs and pursuits.
Existing Operations and Potential for Development
Existing infrastructure and operations can significantly impact the value of a ranch. Buildings, fences, and roads contribute to the property’s readiness for use. Cattle pens and working facilities that are in place are ready for use and can save on infrastructure costs. Producing hay and alfalfa operations can be a source of feed and income. What are the annual hay yields for the last 5 years? Consider the potential for further development on the property. Some buyers may want to build or expand facilities. Existing infrastructure sets the foundation for future improvements. Investigate local regulations that may affect building plans. Ensure your vision aligns with these rules. This foresight will aid smooth development in the future.
Some properties in regions around the country include subsurface rights and mineral rights that can be of high value. What minerals are available with the purchase? Are they already leased or owned by someone else? If they transfer with the title, what is the output, existing income or potential for development?
Water is vital on any ranch and comes in many ways, from live water streams and springs to ponds, lakes or well and irrigation supply. It supports livestock, irrigation, wildlife and daily needs. When purchasing, confirm what water rights come with the property. Understanding water rights means knowing how much water you can access and from where. Sources may include wells, rivers, or irrigation systems and can be quite complex. Secure water is a key aspect of sustainable ranch operations. Check local water regulations and any existing agreements. These can influence usage limits and affect long-term viability. Proper management ensures a dependable water supply for years to come.
The Role of Ranches in Outdoor Recreation
Ranches offer an ideal setting for a variety of outdoor activities. These sprawling landscapes encourage both adventure and relaxation. They serve as a sanctuary for nature lovers and outdoor enthusiasts alike. Whether it’s hunting, fishing, or horseback riding, ranch properties provide ample opportunities to engage with nature. Each activity brings its own set of rewards, enhancing life on the ranch. The sense of freedom and connection to the land is unmatched.
Furthermore, these lands play a crucial role in wildlife management. Responsible landowners can contribute to conservation efforts. This balance supports both ecological health and recreational uses. The open spaces of a ranch invite exploration. Trails weaving through varied terrain beckon to be roamed. They offer a welcome escape from the bustle of modern life. Ultimately, ranches are not just places to live—they are playgrounds for the soul. They invite residents and visitors to embrace a lifestyle rich in outdoor pursuits.
Hunting on a ranch adds a dynamic layer to ranch life. These lands offer hunters the thrill of pursuing game amidst stunning natural beauty. It’s a pursuit of skill, patience, and respect for wildlife. In addition, ranches are integral to wildlife management. Proper habitat maintenance ensures healthy animal populations. Landowners play a key role in conserving diverse species. By balancing hunting with conservation efforts, ranches support sustainable ecosystems. This partnership with nature enriches the land and fosters a thriving environment.
Fishing and Riverfront Properties
Riverfront ranches offer a paradise for fishing enthusiasts. They boast streams and lakes teeming with fish, making every cast an adventure. Anglers can enjoy the peace and challenge of pursuing various species. Access to clean, flowing waters is a privilege. It ensures a thriving aquatic ecosystem. Owners must consider sustainable practices to preserve these vital resources. In these tranquil settings, fishing becomes more than a pastime. It’s a link to nature, inviting moments of reflection and relaxation. The rhythmic cast and catch create a meditative experience, connecting anglers to the water and land.
Horseback Riding and Trail Access
Horseback riding is a cherished activity on many ranches. It epitomizes the spirit of the American West, where open land invites exploration. Riding through such vastness offers a unique perspective on the land. Trails winding through diverse terrains present endless possibilities for adventure. Riders can traverse meadows, forests, and hills, all on horseback. This connection to nature is both invigorating and grounding. For those looking to escape, horseback riding trails are an ideal retreat. They foster a bond between rider and horse, land and sky. Ranches with extensive trail networks ensure every ride offers new experiences and unforgettable moments.
Owning a ranch can offer profound rewards. It often transforms into a cherished family legacy. The land becomes a canvas for shared memories and future hopes. Ranches serve as long-term investments, providing financial security. Families passing them down through generations retain wealth and heritage. This continuity strengthens both familial bonds and land stewardship. A ranch naturally nurtures stewardship. It teaches respect for the environment and responsibility for sustainability. This legacy of care extends beyond the family, benefiting future generations.
Additionally, ranching provides a unique connection to the past. It embraces history while adapting to contemporary needs. This balance ensures its relevance and value. Ultimately, investing in a ranch is about more than money. It’s about embracing a lifestyle that honors tradition and celebrates the future. It enriches both owners’ lives and the communities they inhabit.
Generational Investment and Stewardship
A ranch offers more than just a living space. It can become a family heirloom, passed from one generation to the next. This continuity provides a sense of belonging and purpose. Stewardship is at the core of ranching. It demands attention to the land and its needs. Each generation nurtures the environment, offering lessons in conservation and responsibility. As a generational investment, a ranch aligns with long-term goals. Families can create enduring legacies, fostering a deep connection with the land. This commitment transcends financial considerations, nurturing a shared identity.
Income Generation and Sustainable Practices
A ranch’s potential for income can be substantial but with today’s input costs, usually rely on multiple revenue streams to reach financially independent operations. Many ranches support cattle operations or agricultural ventures, but these include high levels of experience, training, knowledge and education. These activities not only yield profits but also sustain the land. Sustainable practices are crucial for long-term success. They help maintain the health of both the ecosystem and the business. This approach minimizes environmental impact while maximizing productivity. Engaging in hunting and fishing leases, and tourism and agri-tourism, also offers revenue streams. Visitors experience ranch life, drawing income and creating awareness of sustainable practices. Each visitor becomes part of the ranch’s wider community.
Conservation easements provide ranches with long-term protection. They safeguard land from development while offering environmental benefits. These agreements ensure that the natural state of the land endures. Ranches with conservation easements often qualify for tax benefits. These include reductions in property taxes and eligibility for federal incentives. This financial relief supports ranch owners in their stewardship efforts. Engagement with conservation easements aligns economic interests with ecological values. It reflects a commitment to preserving open spaces for future generations. This dual advantage enhances the ranch’s worth and preserves its natural beauty.
Working with the Right Real Estate Agent
Choosing the right real estate agent is vital when buying a ranch. This decision can greatly influence your purchasing process. A knowledgeable agent from Hayden Outdoors streamlines your journey, ensuring success. Ranch properties require specialized knowledge. Not all agents have the expertise needed for such purchases. Finding an agent who knows ranches well is crucial. A good agent acts as a guide and advocate. They help you navigate complexities and answer questions. This support makes the buying process clearer and more manageable.
Expertise in Ranch Properties
Expertise in ranch properties means understanding unique challenges. These include zoning laws, water rights, hunting and fishing laws, local land market knowledge and land use regulations. Your agent should have deep knowledge of these specifics. Experience is key in ranch transactions. Look for an agent with a proven track record in the rural property market. They should offer insights into market trends and property value. An expert agent understands the lifestyle and values associated with ranching. They align your needs with the right property options. This alignment ensures satisfaction and long-term happiness.
Due diligence is a critical step in buying a ranch. It involves thorough inspections and assessments. This process uncovers potential issues with the property. An experienced agent will guide you through due diligence. They coordinate inspections and gather vital information. This diligence helps you make an informed decision. Ensuring clear titles, legal compliance, water sources, and environmental assessments are part of this. Completing due diligence protects your investment. It ensures that you enter the purchase with clarity.
Building Relationships with Local Communities
A strong relationship with local communities enhances ranch ownership. A real estate agent with community ties offers added value. They introduce you to local farmers, ranchers, game wardens and service providers. Building these connections benefits your ranch experience. Community relationships provide support, advice, and camaraderie. They enrich your ranching lifestyle with shared knowledge. A well-connected agent helps integrate you into the community. This integration fosters a sense of belonging and community trust. It lays the foundation for a fulfilling ranch ownership experience.
Embracing the Ranch Lifestyle
Owning a ranch offers more than just property—it’s a lifestyle choice, and it’s not for everyone. It embodies freedom, adventure, hard work and a deep connection to nature. Each day brings new possibilities, challenges and unique experiences. The decision to purchase a ranch is both significant and transformative. It invites you to embrace a self-sustaining lifestyle. This journey fosters personal growth and fulfillment. Ranches hold the promise of legacy, family bonding, and stewardship. They provide spaces for recreation, relaxation, and reflection. Embrace the ranch lifestyle and unlock the serenity and satisfaction it offers.
An Expert Shares Things to Consider When Buying Oceanfront Property
Lauren Fichtl describes herself as a southern girl, now living out West. Indeed, her roots stretch from Georgia to the Florida panhandle to the Rocky Mountains and the Southwest. She’s an adventurous mountain towner who loves the beach; a hunter and cowgirl who’s not afraid to swim with great white sharks; and a passionate real estate agent who devotes her career to helping clients find the perfect place to call home.
Lauren currently splits her time between Santa Fe, New Mexico and coastal Florida where she specializes in buying and selling oceanfront property. For many, living on the water is a dream, one she works hard to make come true in her current role as a Hayden Outdoors real estate agent. But in order to achieve the dream, there are a variety of considerations and pitfalls to avoid. Oceanfront property can be unique in a variety of ways. Here, Lauren walks through the dos and don’ts of buying land or homes near the water.
Sunset in Destin, Florida. Photo courtesy of Lauren Fichtl.
Location Matters: Not All Oceanfronts Are Equal
Before diving in, so to speak, Lauren cautions that each oceanfront property is different in structure, access, coastline, and maintenance. “Depending on where you are, you don’t always own all the way to the ocean. Every county is different as to where that property line is, so it’s important to be mindful of what you’re buying. Most people buying oceanfront have the understanding that the majority of the property line will go to the high tide water line. This means others can walk near your property.”
If you’re looking for a completely private beach, talk with your real estate professional about what that means to you and how realistic it is within your budget. Lauren outlines these considerations:
Learn where the property line is – the high tide water mark, which can fluctuate, or another landmark.
Does the property line extend into the water?
Do you own surfer’s rights?
Does the county have an easement that allows public access across the beachfront near your home?
What are the HOA regulations associated with the property?
Is there one access point, or are there multiple places homeowners and the public can walk onto the beach?
Proximity & Climate
It’s also important to think about proximity to urban areas. If seclusion is what you’re after, private beachfront can offer that, however, you might also find yourself farther away from local community amenities such as hospitals, school systems, grocery stores, and dining establishments and nightlife.
While climate and surrounding environment are always an important consideration when investing in real estate, it is an elemental aspect of buying oceanfront property. There is the obvious threat of hurricanes, which can batter poorly built homes into disrepair. But oceanfront property homeowners also need to consider:
Humidity
Rain
Wind
Severe storms
Flooding
Pure white sand and blue water on the coastline of Destin, Florida. Photo Courtesy of Lauren Fichtl.
Know the Risks: Erosion and Flooding
When you’re looking for the ideal beachfront property, two key factors to consider are coastal erosion and flooding. Both can decrease the value of your home and contribute to significant safety hazards. If your house is level with the ocean, this is particularly important. Coastal erosion can affect property values and personal safety by:
Causing structural damage, such as structural instability, foundational damage, and faltering utilities
Increasing flood risk by lowering the land elevation
Driving up homeowner’s insurance costs
Increasing the possibility of landslides
Decreasing the market appeal and value of a property
Make sure you thoroughly understand flood zones as they relate to your property’s location. FEMA defines a flood zone as a geographic area with a specific level of flood risk. Flood zones can be anything from high-risk to minimal flood hazard. Flood zones can also affect your options for building as well as securing adequate flood insurance. Talk with your real estate agent about how flooding might impact your oceanfront property and the flood zones in and around your area.
Along those water lines, flood insurance goes hand-in-hand with flood zones, and is an elemental aspect of any successful beachfront property purchase. Flood insurance protects your property, helps you recover more quickly in case of flooding, and helps you avoid financial loss and replace damaged goods.
Maintenance Costs: It’s More Than Just the View
The ocean can be a beautiful, warm, sunny, inviting place to live. But it also presents a variety of maintenance challenges. Salty air can be hard and corrosive on exterior materials. Wind and water can batter a house over decades, increasing the cost of upkeep. Says Lauren, “It’s one thing to see a big, beautiful house, but you definitely want to look into the age of the property. Most of the properties that get completely wiped out in a hurricane are older construction.”
Lauren’s list of materials and construction items to consider when buying on the beach include:
The age of the home
How it was constructed
If any updates have been made
Hurricane-proof windows
Exterior materials, e.g. paint versus concrete versus metal siding or stucco
Additionally, take into mind the angle of the home – whether it faces the on-shore winds and water or is slightly askew to them. Buyers will want to look closely at landscaping and, if there is none, put in trees and shrubs that can withstand high winds, such as palms and heavy bushes. Stucco is a good alternative to paint or stain if you want to avoid having to reapply materials every few years. Passive homes also tend to better withstand the harsher, constant elements of coastal climate.
Take all of these maintenance costs into consideration before you buy. Oceanfront property can require long-term financial commitments for repairs and maintenance.
Dolphins swimming in teal blue water. Photo courtesy of Lauren Fichtl.
Seasonal Considerations: Off-Peak vs. Peak Periods
You might be someone looking to spend all of your days watching the sun rise and set over the coastal horizon, or you might simply be seeking a warm-weather getaway for part of the year. If you’re buying oceanfront property in a heavily touristed area that enjoys periods of ideal weather and other times of less tempting temps, make sure to account for how often you plan to be at the property and if it will be usable when you want to be there.
Seasonal considerations include:
Temperature fluctuations
Hurricane season
Tourist season (if you’re looking to escape the crowds, or join them)
Water temperature
Amenity availability
To understand the area’s high and low seasons, talk with your real estate professional, but also ask around. Pop into local shops and restaurants and chat with people who live in the area. If you’ll be flying commercially into the local airport, check seasonal ticket prices to make sure you can afford to get to your property when you want to. Think about if you’ll want to visit during high visitation periods (summer or winter depending on the area, spring break, holidays, etc.) and if so, how those costs might impact your decision to buy.
Insurance Essentials: Beyond the Basics
When it comes to properly insuring your beachfront home, Lauren doesn’t equivocate. “Insurance is essential. Make sure your insurance is adequate and you have the right approval. Find a good insurance agent you have a good relationship with, someone who is looking out for your best interests.” Her top homeowner’s insurance tips for oceanfront property include:
Don’t stop at hurricane or flood insurance. Get wind, fire, and storm insurance as well.
Set calendar alerts or set up a yearly call with your insurance agent to make sure your insurance doesn’t lapse or get cancelled.
Consider an endorsement or add-on to your policy that provides coverage for mold, which can become extremely problematic and systemic in oceanside homes.
Spend time with a trusted insurance agent to fully understand the cost of your homeowner’s insurance. Talk about expected annual increases if your area is hit by a hurricane, flood, or other natural disaster. If you plan on renting your home either short-term or long-term, include that coverage in your homeowner’s policy (this can drastically increase your premium cost, doubling it in some cases). Compare insurance quotes across companies, policies, and agents. If you’re a veteran or active military service member, you might be able to secure specific rates that can help lower the annual cost of your insurance.
Maintaining proper insurance coverage for your oceanfront property is key to maintaining the property’s value and ensuring your peace of mind.
Rental Potential and ROI for Oceanfront Homes
If you don’t plan on living in your beachfront home year-round, turning it into a rental property part of the year is an excellent way to offset ownership and maintenance costs and increase the home’s value. “When you’re getting a loan for an oceanfront property, the lender will look at the rental income because it will affect how much you can afford. Properties that rent for higher and more have higher purchase demand.”
While this can be a great way to save money in the long run, don’t discount the costs associated with establishing a property as a rental, such as:
Furnishings
Amenities
Landscaping and maintenance
Utilities
Housekeeping and property management fees
Insurance
Before you put down a down payment, assess the rental demand in the area and any legal requirements.
Is your property zoned for short-term rentals?
If other properties in the area are rented, how much do they charge and what is the average length of stay?
Do you want to put any limitations on potential renters, such as number in the party, pets, parking, etc.?
Expert Advice: What to Ask Before You Buy
Lauren encourages potential beachfront buyers to approach the process with a checklist in mind, including key questions to ask real estate agents, inspectors, and local authorities, including:
How old is the house?
Where is the property line?
Has it had any recent updates?
Has it been tested for mold?
What are the property taxes?
How much are the HOA fees if there are any?
Will you have the beach access you want?
Are you zoned for short-term rentals?
What are the environmental influences, including storms, hurricane season, flood zones, natural land barriers, etc.?
How old is the roof?
Are the windows hurricane-proof?
Some of these answers are obvious, others less so, which is why consulting with a professional is non-negotiable. Lauren and agents like her know which questions to ask and who to turn to for the most informed answers. She relies on long-established networks of reliable local authorities and inspectors to help her clients find their dream property within their budget.
The Fichtl family on a fishing trip in Florida. Photo courtesy of Lauren Fichtl.
Conclusion: Making Your Oceanfront Dream a Reality
In a world where remote or hybrid work is now a reality for many, oceanfront living has become a possibility for those looking to escape to their own slice of beach. Lauren appreciates that. Growing up in Destin, Florida engrained a love of salty air and coastal life, one she’s happy to share with those looking to fulfill their own oceanfront dreams.
Lauren with her husband and fellow Hayden Outdoors agent, Chris. Photo Courtesy of Lauren Fichtl.


 866-741-8323