Steps for Creating a Successful Ranch Management Plan
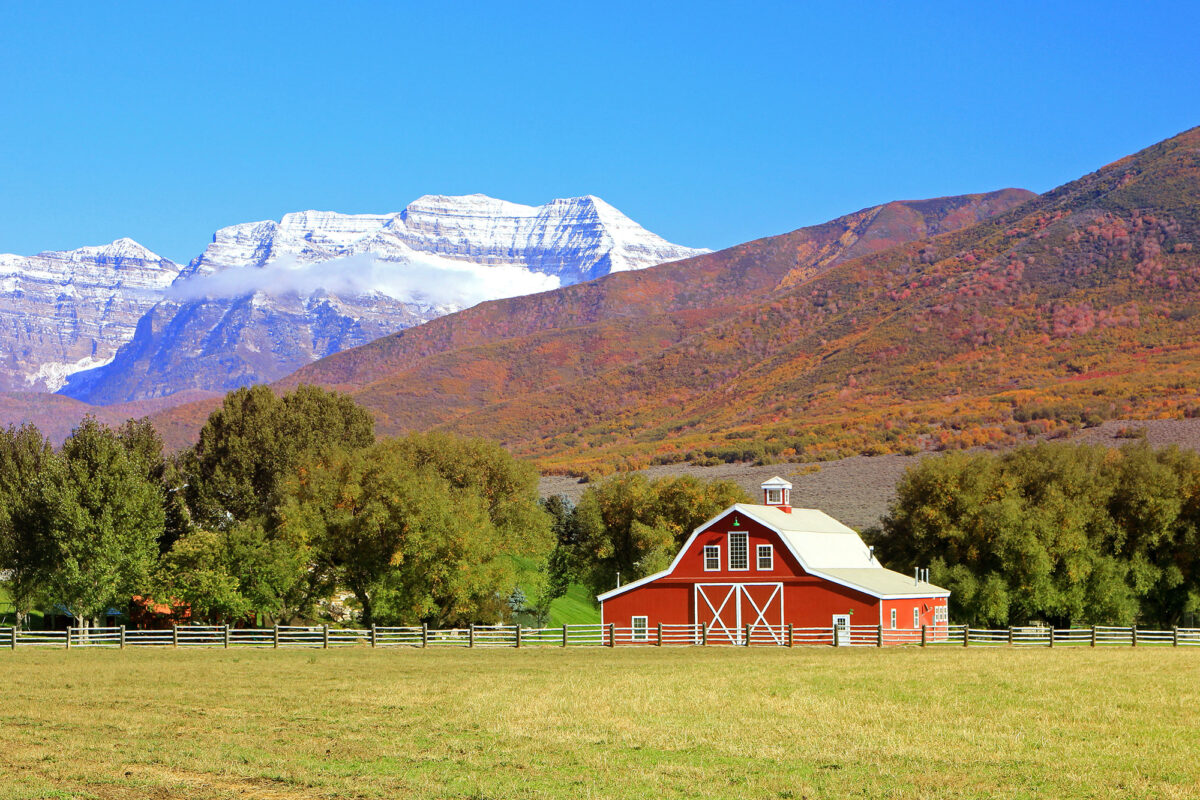
The relationship between ranchland and its landowner is one of America’s oldest love stories, complete with romance, reward, heartache, hard work and unending commitment to living a life on the land. Ranch ownership offers plenty of allure, but before you purchase your own ranch property, it’s imperative to create a comprehensive ranch management plan to ensure healthy land, profitable seasons and longevity.
Follow these Ten Steps for a Holistic Approach to Properly Managing Your Ranch.
1. Establish the “Big Picture” or Mission Statement for Your Ranch
Start by specifically defining the Ranch’s land use and general purpose. Do you dream of raising commercial cattle? Or is your ranch intended for your family’s sustainable living only, offering a collective means of living off the land?
Before you purchase your dream ranch property, it’s important to clarify what you want to do with it. This guiding philosophy provides a road (or trail) map for ranch operations, management, marketing, upkeep and profitability.
2. Qualify Your Key Resources
These can be the land itself. From pastures to quality soil and natural water sources – your livestock and other animals, and the people who manage the property.
It’s important to understand the unique aspects of your ranch and enhance them over time with special attention paid to natural resource management, proper equipment maintenance and providing a fun, engaging work environment for ranch managers.
3. Create a Management and Business Plan
Treating your ranch like a business is important to its long-term viability & sustainability.
Determine your goals and objectives. Establish key performance indicators you can track from season to season. Then revisit the plan frequently throughout the year.
4. Develop a Pasture Management Plan
Understand your soils, water sources, forages and potential for erosion to ensure your pastures remain productive and your cattle are happy.
5. And a Cattle Management Plan
Ranches are most productive when every element of them work in harmony – and this is certainly the case with cattle and the land.
Things to consider are which types of cows are best for your land, how you will keep them healthy and well nourished, and how they’ve been bred or if you will breed them.
6. Make Sure Your Bookkeeping is Organized and Up-to-date
Toss the shoebox full of old receipts and invest in proper bookkeeping software. You’ll want to keep track of revenue streams, spending, employee wages, invoicing and profits and losses. Being diligent about your bookkeeping throughout the year is an important way to ensure you’re working toward your ranch’s mission statement and it will save you time, energy and headaches come tax season. It’s also worth noting that profitable ranches are much more likely to be passed down from one generation to the next, ensuring their legacy in your family’s history.
7. Consider If and How You Want to Market Your Ranch
Is it family-owned and operated? Do you focus on raising organic cattle or does your ranch support speciality breeds? Establishing your ranch’s unique aspects and competitive advantages is elemental to a successful marketing plan. From there, consider how you want to communicate that message. These days, effective marketing can range from sponsorship opportunities at your local livestock auction to highly targeted social media advertising.
8. Keep Personnel Management in Mind
Happy employees stick around. It’s important to create a fun and inviting work environment for your ranch management team.
9. Continue to Observe and Adjust Accordingly
Ultimately, ranches are complex living entities at the cross-section of humans, animals and nature. It’s important to learn your ranch inside and out. Continually look for ways to improve soil and water sources. Stay up-to-date on emerging ranch and farm technologies and equipment. Tap into local scientists and land managers to better understand the environment around you. Then apply your learnings to your ranch management plan.
10. Enjoy the Process!
Owning your own ranch can be a dream realized. It offers an incredible amount of freedom and responsibility, independence and teamwork and an undeniable connection to the land.
The ranch property experts at Hayden Outdoors are an excellent resource in helping you find a ranch that meets your needs and aligns with your ranch management goals.
Industrial Hemp

Despite its stigma and confusing legal status, industrial hemp enjoys worldwide demand
Industrial hemp is a surprisingly common agricultural product, despite a complicated legal status.
About Growing Hemp
Nutrient-rich hemp seed can be found in health foods, and hemp oil is used in various organic health-care products. Hemp fiber is used to manufacture clothing, biofuel and rope. (BMW lines the doors of some of its vehicle models with hemp fiber.) In terms of both environmental benefits and efficiency, hemp has proven to be a great alternative to timber as a source of paper and fiber, as hemp plants mature in as little as four months, whereas trees might take decades.
The global market for hemp, in fact, encompasses some 25,000 products. Depending on the specific market being targeted, a hemp crop can generate for a farmer $300-$1,800 per acre in revenue.
Nevertheless, the crop is technically illegal in the United States, at least at the federal level. Hemp comes from the same plant species as marijuana, but is non-intoxicating, as it contains next to none of the “mind-altering” chemical compound THC. The crop is legally grown in Canada and in parts of Europe, Asia and South America – some 30 countries in all – but despite the fact it can’t produce a marijuana high, hemp’s association with cannabis kept it strictly prohibited in the United States for more than 50 years.
Hemp’s Legal Status is Starting to Shift
In the wake of Colorado’s legalization of marijuana, a farmer in the state’s southeast corner made national headlines by sewing seeds for the first American commercial hemp crop to be planted in 70 years. The following year, the Agricultural Act of 2014 authorized states and universities to grow the crop for research purposes. Thirty-four states have legalized commercial hemp cultivation, in spite of remaining federal prohibitions.
Understandably, hemp’s profit potential has drawn the interest of farmers seeking to increase revenues and revamp operations. Hemp pairs well with other crops, such as grain and hay, and can be grown throughout corn- and soybean-producing regions. And, hemp is a dependable phytoremediation crop, offering a natural means of cleaning up soil contaminated or polluted by hazardous substances.
Still, in spite of market demand and an increasingly mainstream profile, industrial hemp continues to have a complicated legal outlook. The Industrial Hemp Farming Act, an updated version of previous pro-hemp legislation, introduced in July 2017 by Rep. James Comer (R-Kentucky), is under review in the U.S. House of Representatives, and would sever hemp’s legal association with marijuana, redefining it as a legitimate agricultural product and positioning U.S. farmers to more fully capitalize on the $700 million U.S. market for hemp. With 39 cosponsors, the bill enjoys bipartisan support. However, actions by current U.S. Attorney General Jeff Sessions, and his cancellation of several Obama-era policies regarding marijuana-related prosecution guidelines, suggest an interest on the part of the Justice Department in maintaining a federal prohibition on hemp production.
To learn more about industrial hemp, and to stay up to date on legislative actions and the product’s regulatory status, visit www.thehia.org, the site for the Hemp Industries Association.
Purchasing a First Horse

For the inexperienced horseman, some simple guidelines can mitigate risks.
For many real estate buyers, a land purchase fulfills just one piece of what could be a lifelong ambition to adopt a rural lifestyle. After closing on that ideal parcel, a new landowner might contemplate other trappings of country life, including the purchase of a saddle horse.
There are few potential transactions as fraught with risk as buying a horse. How can one be sure a horse is suitable for a particular use? Or that a horse is healthy and sound? Or properly trained? Or even safe to handle and ride? For a neophyte, finding a suitable mount can be overwhelming. But even an inexperienced horseman can successfully navigate the process with some simple guidelines.
First, Get Help
Ever since the creation of the concept of buying and selling animals, horse traders have had a well-deserved reputation for stretching the truth about a given horse’s background, health and potential. And, any veteran breeder, trainer or trader can sniff out an inexperienced horseman in the first moments of an initial conversation. Before a first-time horse buyer even contemplates looking at a horse, he or she should connect with a more experienced horseman who can help identify trustworthy sellers and evaluate prospects.
Have Goals
Selective breeding has largely made the “all-around” horse an endangered species. A buyer planning to use the same mount for trail riding, team roping, hunting and barrel racing is working with unrealistic expectations. A more viable picture: pick a discipline and narrow your search to horses suited to that activity; traits to consider will include bloodlines, conformation (body type), temperament, and a horse’s past experiences and training. A buyer intending on pursuing more than one horseback discipline ought to consider purchasing more than one horse.
Avoid Colts
Often, first-time horse buyers entertain fantasies about acquiring young horses and training those colts themselves; they’re seeking a “full” experience. The reality is that starting a colt under saddle is a complicated, physically demanding, time-consuming process that carries the constant risk of serious physical injury to human and horse alike. Bottom line: it’s best left to more experienced riders. Instead, first-time horse owners should aspire to own a seasoned animal – one that’s at least several years old and that’s “been around the block,” in use on a ranch or in competition and ready for a slower, easier life.
Avoid Mustangs
Another common fantasy among would-be horse owners: adopting a wild horse. In spite of any connections (however dubious) to the “untamed spirit of the West,” mustangs, with their feral nature, come with even more risks than domesticated colts. It takes a gifted equestrian to transform a wild horse into a safe, dependable saddle horse.
Avoid Auctions
There are some horse auctions that carefully screen consignments and build reputations based on the quality of the stock put in front of the public. Still, it takes an experienced horseman to “read” horses on offer at such events. And, a generic local livestock auction will have much lower standards for stock and fewer buyer protections, and will be unlikely to draw horses suited for first-time owners.
Shop for a Gelding
Due to their aggressive natures, stallions are entirely unsuitable for first-time horse owners – full stop. Mares have their advocates, and in some cases can be great saddle horses, but their heat cycles can lead to unpredictability – a dangerous trait. Geldings, by contrast, are generally more even-tempered and consistent; as a rule of thumb, quiet, lazy geldings tend to make the safest, most dependable saddle horses.
Consider Rescue Horses
Horse-rescue operations used to be depositories for the strictly unwanted and unrideable. In the last decade, though, an equine population explosion filled rescue stables to capacity. Now, it isn’t uncommon to find great riding horses – likely surrendered by former owners in economic distress – mixed in among less appealing candidates. As added benefits, the cost of acquiring a rescue horse can be next to nothing, and doing so frees up space for another animal.
Value Registration Papers
Being registered with a breed association – the American Quarter Horse Association, for example – qualifies a horse to compete in registry-approved events. Even if an owner has no interest in such events, though, registration has other benefits: a registered horse’s pedigree can be researched easily, as can past performance records. And, registered horses hold greater monetary value vs. unregistered, or “grade,” horses.
Get a Vet Check
Once a buyer has found a horse, he or she should insist on a pre-purchase vet check. The buyer’s vet will give the horse a thorough once-over and check for any lameness issues.
Get Equine Educated
The last 25 years brought on widespread interest in horsemanship education, with a seemingly endless list of “clinicians,” traveling educators who tour the country offering hands-on instruction for riders at all levels. There’s no real certification process for such educators, so new riders less familiar with the equestrian culture should again plan on tapping into insight from more experienced horsemen; this will help separate the true hands among those clinicians from the charlatans. The value of ongoing education for a rider can’t be overstated. In fact, a prospective buyer might want to spectate at a few horsemanship clinics before beginning the process of searching for a horse; insight gained might help add focus to the horse-buying effort.
Varmint Calibers: The Best Options for Landowning Utility

Ownership of rural property requires plenty of self-reliance, as well as a commitment to stewardship, including the management of pests and varmints.
A great rifle can be one of a landowner’s most effective tools for keeping in check populations of destructive wildlife. Here, we’ll offer a rundown of some of the most popular calibers for this utility.
First, though, let’s define our potential targets. Definitions of terms like pest and varmint will vary depending on who you’re talking to, but in general these labels apply to animals such as ground squirrels, gophers, porcupines, skunks and coyotes. When it comes to caliber selection, impassioned opinions abound, but the following options tend to dominate conversations:
.17 Hornady Magnum Rimfire
Developed by modifying the .22 Magnum casing to accommodate a .17-caliber bullet, this round is known for its flat trajectory and its utility at longer small-game ranges, around 150 yards. While .17 HMR ammo tends to be expensive for a rimfire round, it can still be appreciably more affordable than centerfire ammunition. The .17 HMR developed what many shooters considered an undeserved reputation as a coyote gun; conventional wisdom suggests the round is likely best suited for nothing larger than a jackrabbit.

.22 Long Rifle
Easily one of the most common and most popular rounds of all time, the .22 LR offers numerous advantages, chief among them the easy availability of cheap ammunition and the seemingly endless variety of rifles chambered for this caliber. A .22 is also quiet, with next to no recoil. Drawbacks: shorter effective ranges
(well under 100 yards) and performance that’s best suited to smaller pests rather than a larger animal like a coyote.

.22 Hornet
Faster and more powerful than the .17 HMR or the .22 LR, the .22 Hornet, dating back to the 1930s, has a long history as a small-game and varmint round, known for its accuracy, light recoil, relatively quiet report, and effectiveness with a wide range of small game (including wild turkey), as well as javelina and coyotes. The .22 Hornet is powerful enough to have a following among deer hunters, but the round is generally regarded as too weak for that purpose, barring a perfect kill shot. In many American states, the round falls short of the minimum caliber for deer hunting.
.22-250
A classic varmint, small-game and coyote round, the .22-250 (like the .17 HMR) got its start as an experimental “wildcat cartridge” before catching on in the mainstream market. Known for its high velocities, long effective range, and ability to overcome troublesome wind speeds, the round is a favorite for use on prairie dogs. A consistent criticism: a “hot” round, offering up high speeds and a powerful punch, the .22-250 can shorten the lifespan of a rifle barrel; plenty of shooters, though, contend that common sense (i.e., not letting a barrel get too hot) can eliminate this concern.

.223 Remington
Developed as a military round and still in use by fighting forces across the globe, the .223 caught on with the civilian market in the 1960s and quickly became not only one of the most popular varmint cartridges – with a rep of being a great choice on small game up to 200 yards – but also one of the most popular rifle rounds, period. The .223 often gets grouped among deer rifles – and there are plenty of .223 advocates who will defend its abilities on deer – but the round is best suited for much smaller game.
.243 Winchester
Created with small game and varmints in mind, the .243 packs enough of a punch to be a legitimate (or at least adequate) deer rifle. That versatility – shooters can use lightweight rounds (under 90 grains) for varminting, and heavier rounds for deer – has earned the .243 widespread popularity. Its flat trajectory rivals that of the .22-250, but the .243 does a better job of fighting the wind.
When Evaluating a Caliber
It’s a good idea to contemplate all of your potential uses – are you simply trying to keep the jackrabbit population under control, or are you looking for a round that could also be put to use on deer? And, remember to think of a rifle purchase as an investment; budget for a scope, a sling, and a means of safely and legally transporting your gun in a vehicle.
Above all, before zeroing in on pests, varmints and other targets, be sure to consult your state and local regulations regarding hunting and shooting any type of game.
Latitude & Longitude: Using This Valuable Navigation Tool

Learning Latitude & Longitude is Valuable Navigation Tool – No Matter Where You Are in The World
When buyers begin a land search, they’re often surprised to learn that an undeveloped parcel might not yet have a US Postal Service address associated with it. Identifying a parcel might mean relying on its legal description, and navigating to the property might require GPS coordinates, most commonly formatted as latitude and longitude.
What Does Latitude & Longitude Represent?
In basic terms, latitude denotes a specific location’s position north or south of the equator, measured in degrees. Longitude denotes a position east or west of the Prime Meridian, an imaginary line (like the equator) running north-south through the Royal Observatory in Greenwich, England. Any location on Earth can be precisely identified by the intersection of its latitude and longitude coordinates.
The ability to precisely note any given physical location with latitude and longitude has endless utility: noting locations of property corners, buildings, creek crossings, trailheads or any other landmarks; sharing rendezvous points with guests or hunting companions; or just offering a more precise means of location than an address.
Understanding Lat/Long Coordinates
Latitude and longitude coordinates are most commonly expressed in one of two formats: degrees, minutes, and seconds – for example, 38° 53′ 23.2404” -77° 0′ 32.583” – or decimals – for example, 38.889789, -77.009051; those coordinates, in either format, identify the location of the U.S. Capitol building in Washington, D.C. That “minus” sign in the longitude coordinate is important, and comes into use in defining the hemisphere in which a point is located; negative latitudes are south of the equator, while negative longitudes are west of the Prime Meridian. Using the coordinates above without the minus sign for longitude specifies a location in western China.
Coordinates can easily be converted between formats. The Federal Communications Commission has a handy online conversion tool at www.fcc.gov/media/radio/dms-decimal.
The latitude and longitude of a location can be found with any of several commonly available tech tools.
Set your browser to maps.google.com. Click any location on the map. At the bottom of the screen, you’ll see details on the location you’ve selected, including an address (or an approximation of one) and the latitude and longitude coordinates for that spot.
Open Google Earth on your desktop. Simply move your mouse over the map. Look in the lower right corner of the Google Maps window and you’ll see latitude and longitude for the map location that’s under your mouse pointer. (You’ll also see the altitude for the location.)
Google Maps App
Open your Google Maps app on your smartphone. Hold your thumb on a location on the map. A red pin should appear at that location, and at the bottom of your screen you should see a heading reading “Dropped Pin.” Beneath that heading, you’ll find details about that location you’ve specified, including latitude and longitude coordinates. The iPhone Maps app works similarly: Hold your thumb on a map location and details, including coordinates, will appear at the bottom of your screen under the heading “Marked Location.”
Google Earth App
This is one of the simpler interfaces available for obtaining latitude and longitude. Open the Google Earth app and simply navigate (spinning the on-screen globe with your thumb) to any location. Latitude and longitude will be displayed at the lower right of your screen.
Additional Lat/long Resources
There are numerous other smartphone apps, free and paid, that can provide coordinates. One, called simply “Coordinates,” brings up a basic map. As you navigate with your thumb, latitude and longitude update at the bottom of the screen.
Wildfire Mitigation: The Basics of Property Protection
The risk of wildfire has become an unfortunate reality throughout rural North America. Risks can be reduced dramatically, though, through mitigation efforts.
Mitigation includes removing potentially flammable debris and vegetation from areas immediately surrounding structures, and thinning vegetation elsewhere on a property. Local fire departments, state extension services, county governments, and insurance companies can generally provide guidelines to assist property owners in forming a mitigation strategy.
Wildfire Protection Points Points
The Roof
A property owner should keep a roof free of debris, and have a roof professionally inspected to determine its combustibility rating.
Property Fences
Check fences, especially those close to structures, to be sure debris has not gathered along the bottom of the fence. (Imagine a hard wind pushing tumbleweeds up against a fence, creating abundant fuel for a fire.) Clear any such debris and regularly inspect fences to ensure flammable material doesn’t collect against fencelines. Consider building any new fences from noncombustible material, such as concrete, stone or metal.
Defensible Spaces
Always consult with your local fire department to correctly define defensible spaces specific to your property. In general, though, property owners should create two zones around a structure.
The first will extend at least 30 feet in every direction; inside this zone, combustible materials – including wood piles – should be removed; vegetation should be aggressively thinned; trees close to the structure might need to be removed altogether; and vehicles, trailers and the like should be removed. Close to a home, owners might consider landscaping with fire-resistant plants; extension services, landscapers or nurseries can offer insight on plant species ideal for a given climate and environment.
A second zone might extend past that 30-foot mark to a distance of 100 feet from the structure. Dead vegetation, including tree branches, should be removed from this zone, and trees inside the area should be kept trimmed and maintained.
Mitigation experts recommend removing tree branches that are six feet or less from the ground, and ensuring there’s abundant space between trees. Specific guidelines may depend on the types of trees (and bushes) on the property, and the property’s topography. Again, consult local fire authorities for guidance.
Mitigation is labor-intensive, but makes immediate sense as an investment of time and money. Efforts can be handed off to professionals who specialize in such work.
Property buyers might assume that, if a property currently has a homeowner’s policy, further mitigation efforts shouldn’t be necessary to maintain coverage. In reality, a new owner might have to follow updated mitigation guidelines (rules the former owner might not have been required to follow) in order to obtain insurance coverage. In extreme cases, a property might not be insurable at all for a new owner without aggressive mitigation work. When it comes to any rural property, particularly one that’s wooded or that has abundant grass, a buyer should make a conversation with an insurance company a key part of early due-diligence efforts.
Land Surveys to Document Your Property’s Characteristics

When to Consider a Land Survey?
A land purchase often requires a survey of the parcel being bought, assuming a current survey doesn’t already exist. A survey – which is essentially a map of the property, illustrating boundaries and other features – can help a lender document the nature of the property on which its providing funding, and can provide a title company assurance as to what it’s protecting. For a buyer, of course, a survey can offer peace of mind, confirmation as to what exactly is being bought.
Who is Responsible for Hiring a Surveyor?
The responsibility for hiring a surveyor can fall on either the buyer or seller, depending on the language in the purchase contract. Regardless of who must hire the surveyor, arrangements should be made soon after the purchase contract is in place, as surveyors are often booked weeks in advance; in busy markets, procrastinating on hiring a surveyor can be problematic, potentially requiring amendments to the contract calendar.
What Does a Land Survey Report Look Like?
Using existing documents, as well as data and measurements collected on site, a surveyor will produce a document – the survey – that accurately depicts the property’s size and shape, with corners and boundary lines marked, as well as the precise locations of other features, such as roads and buildings.
It’s important to note that mapping programs, including online platforms offered by many county assessors’ offices, provide parcel maps, but these aren’t surveys, might not be as accurate, and won’t meet lenders’ or title companies’ survey requirements. Assessors’ offices might have on file surveys produced when large tracts of ground were subdivided; it’s worth a buyer’s time to acquire and study these surveys, but they’ll often be too out of date to meet the survey requirements for a purchase, even if the property’s characteristics haven’t changed.
What Happens Once the Survey Report is Generated?
In lieu of a survey, an improvement location certificate, or ILC, might suffice, depending on the terms of a purchase contract and the needs of the title company and lender. Like a survey, an ILC is prepared by a surveyor, but shows only the position of improvements – buildings, roads – in relation to property boundaries, and generally serves to provide assurance that such features aren’t encroaching on neighboring properties. As it’s simpler than a survey, an ILC is also generally much less expensive; while a survey on 35 acres might cost $1,500, an ILC might run only $500. (Actual pricing on surveys and ILCs will, of course, vary by market and will be affected by the complexity of a given property.)
Even after meeting the needs of a lender or title company, a survey has obvious ongoing value, serving as a valuable reference when it comes to selecting future building sites, documenting little-used easements that might otherwise fade from memory, and equipping a property owner to handle any potential disagreements as to property lines. And, should an owner opt to put the property back on the market, that existing survey might meet lender and title company requirements for that next purchase. A surveyor can often update and re-certify an existing survey, provided the survey doesn’t become outdated.
Reclaimed Barn Wood: Bring a Rustic Feel into Your Home
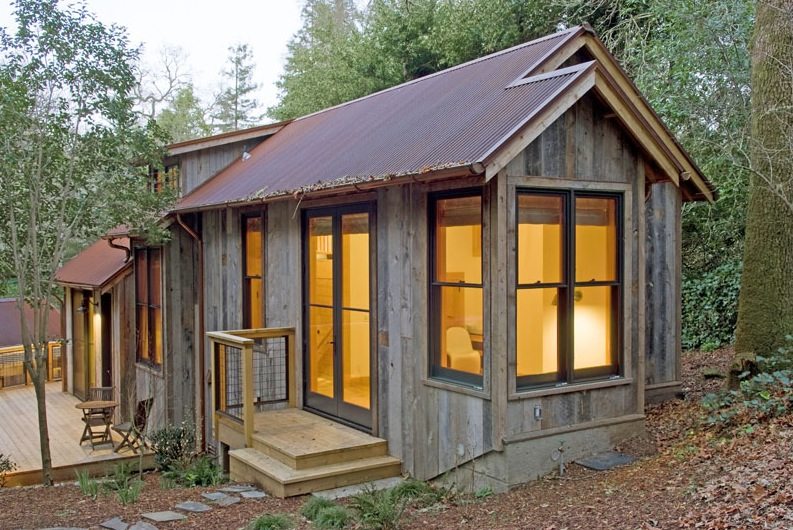
This Coveted Naturally-aged Material Can Tastefully Bring a Rustic, Rural and Warm Feel to Your Home’s Interior Design
Take a drive through virtually any part of the American West’s farm and ranch country, and you’ll encounter aging farmsteads with weathered barns built in the 19th and early 20th centuries. Often, these barns are no longer as useful as they once were, but their chief material – weathered wood, rich in frontier character – is finding new life in contemporary interior designs meant to evoke a rural spirit. Captivated by its history and rustic appearance, homeowners are sourcing old barn wood for interior walls and doors, and for decorative elements that give off a “homestead” vibe. These traits, paired with the environmentally friendly notion of re-using existing materials, have made reclaimed barn wood a hot commodity.
Suitable barn wood is a limited resource, and high demand has erased many of those old farmsteads from the landscape, but the material can still be sourced directly from farmers and ranchers. In best-case scenarios, those landowners might welcome an offer to clear aging, perhaps non-functional, structures from their properties, but it’s a safe bet that they’ll expect to be paid for a product they know is in high demand. Salvaged wood from a sizable barn might easily be worth thousands.
Some Points to Consider When Looking for Reclaimed Wood
It can be difficult to confirm the species of old barn wood
A barn’s original builders generally used materials that were easily accessed. Rare, old-growth timber will be worth more than pine or spruce. Species confirmation might require consulting a timber expert.
Some barn wood might not be worth reclaiming
Not every board salvaged from an old barn will find its way into an interior-design strategy. Some boards will be rotten, or have insect damage.
Barn wood may come with no shortage of metal (old nails & screws)
In addition to posing a safety hazard during the salvage process, those nails and screws will need to be removed before the wood can be prepped for its second life inside a home.
Once sourced, it should be transported in dry conditions
Boards should be given the once-over with a stiff brush (again, watch for nails), then cleaned; some experts recommend spraying off loose grime and dirt, then scrubbing with a mixture of 1/2 cup dishwashing detergent in 5 gallons of water; a toothbrush might come in handy for getting dirt from the deep grain of old wood. Once boards have been rinsed, they can be leaned against a wall or fence to dry, but shouldn’t stay exposed for more than two to six hours, as longer exposure time can lead to warping and bowing. Cleaned boards should be stored inside, in a dry environment.
The Increased Demand for Reclaimed Barn Wood
High demand has created a category of retailers who deal in reclaimed barn wood, so consumers lacking the time or energy to explore the countryside in search of aging farm buildings, and then transport and clean their acquisitions, can simply seek out dealers in their area. Such retailers range from no-frills warehouse operations dealing in stacks of lumber, to more artisanal offerings, with more selective, higher-end inventories. One caveat: wood available from such retailers isn’t always what it’s represented to be; buyers can prep themselves by researching the traits of reclaimed wood.
Adding Authenticity to Your Country Home
Homeowners hiring professionals to work with reclaimed wood should lean toward contractors with experience working with such material. Some reclaimed-wood suppliers can recommend specialist contractors, many of whom fall into the “artisan” category, and might have portfolios of previous work to share with potential clients.
Reclaimed barn wood offers a unique opportunity for a homeowner in any setting – rural, suburban, city – to create an interior that’s not only inspired by farm country, but also constructed from physical materials and textures directly associated with such an environment. The result can be a one-of-a-kind home design with a story to tell.
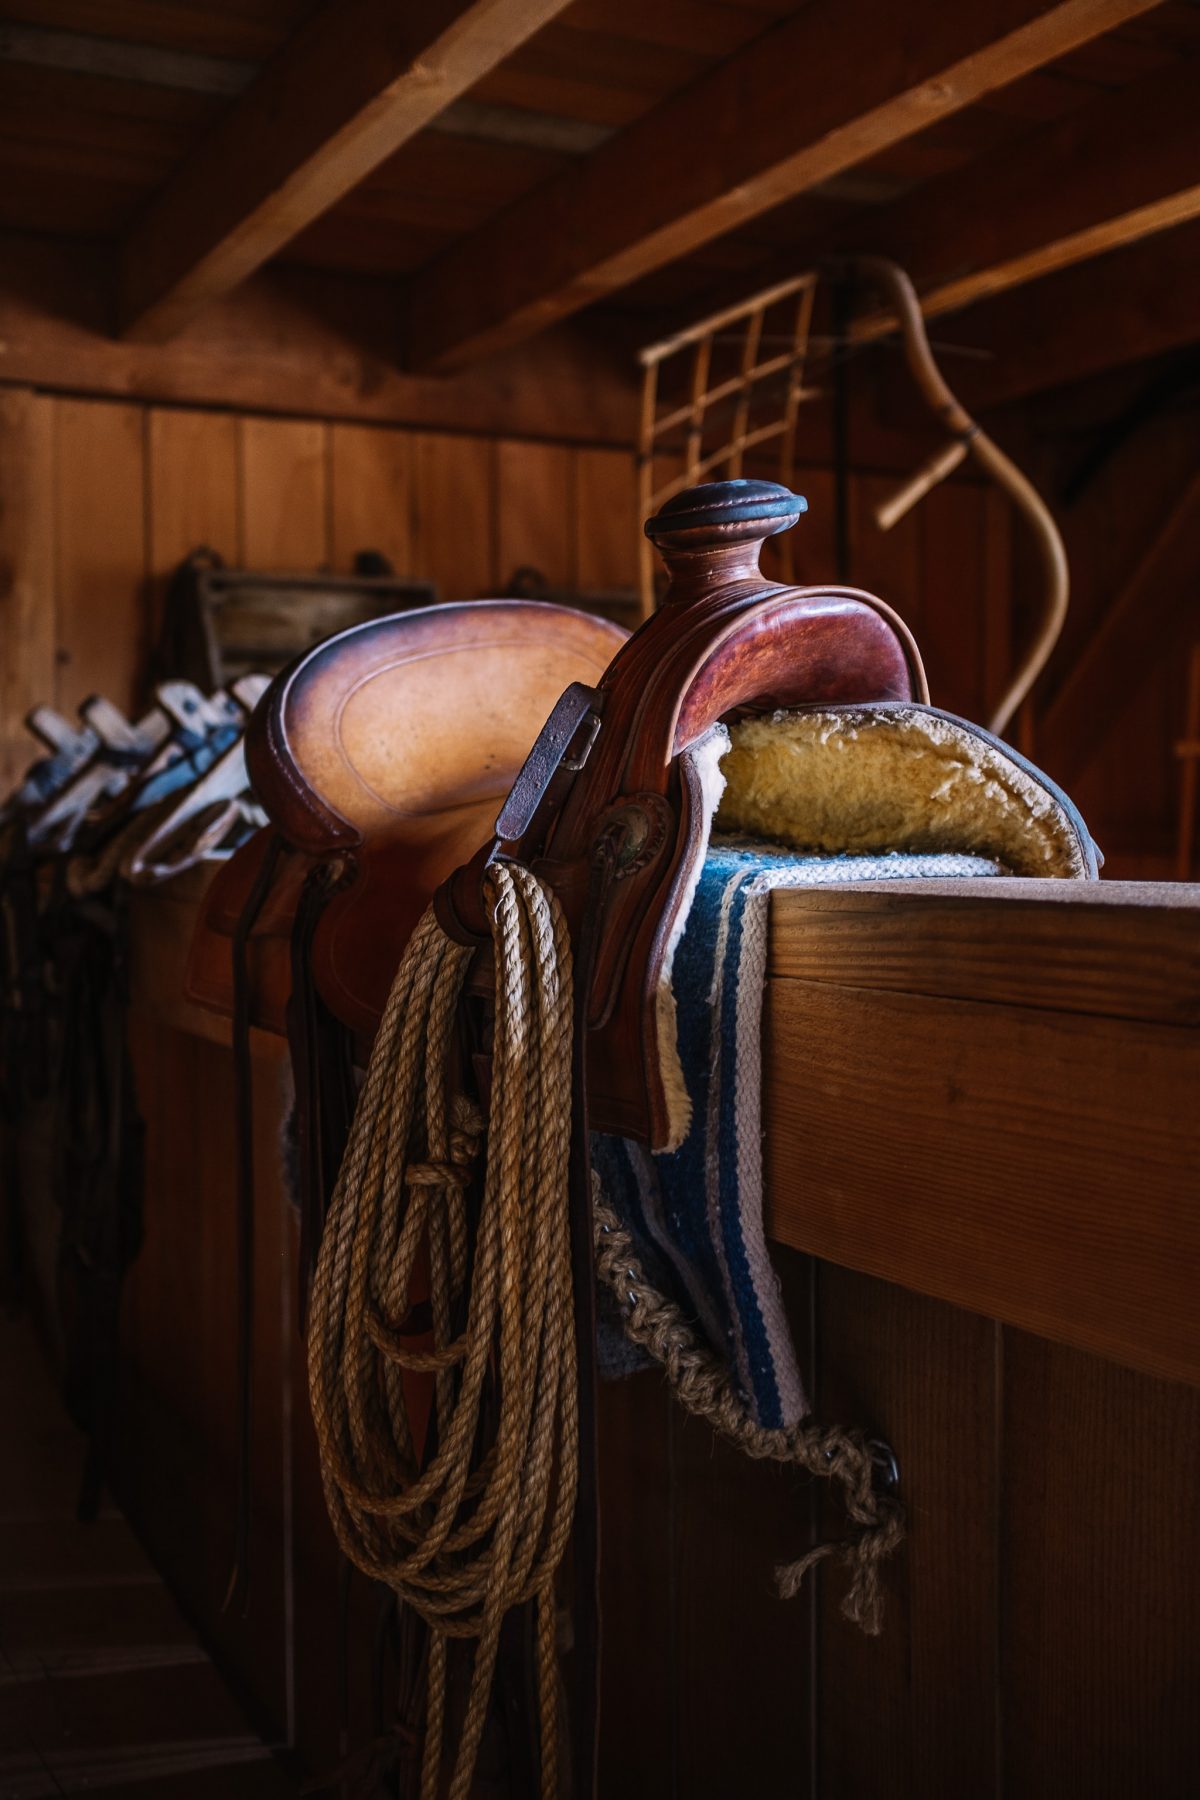
The Tack Room: Get Outfitted For an Equestrian Lifestyle
Establishing the Perfect Tack Room
For many land buyers, investments in rural properties represent the fulfillment of longtime ambitions to adopt rural, ranch-based lifestyles. That often includes the purchase of horse. For first-time horse owners – or those returning to an equestrian lifestyle after a long absence – getting fully equipped for day-to-day horse ownership can be overwhelming, even confusing.
For those new horse owners, here are some guidelines for setting up a tack room and ensuring it includes the essentials.
Tack Room Essentials
Designate a specific area in the barn for use as a tack room
Don’t settle for an open area at the end of a barn breezeway; a tack room should have four walls, a ceiling, a locking door and – ideally – a cement floor that can be easily swept.
Barns attract mice and other rodents
In constructing the tack room, strive to close all gaps in the walls. If you’ll store feed in the tack room, use containers that seal tightly.
Install saddle racks
Freestanding or wall-mounted saddle racks allow riders to easily stow saddles off the floor, and help keep the tack room orderly.
Install bridle racks
Nothing contributes to tack-room disorder quite like a tangled mess of bridles and reins. Bridle racks help keep headgear organized, and help bridles maintain their proper shapes.
Set aside room for tack trunks, and install shelving
Smart, versatile storage options make a tack room useful and keep it from becoming a cluttered space. Make an effort to plan your tack room with the future in mind; in the years to come, you might deal with more horses, and therefore more gear, or you might share that tack room with other riders.
Secure your tack room
Saddles and bits are prime targets for thieves who understand the dollar value of such items; even a modest collection of saddles, bits and spurs can easily be valued in five-figure territory. Lock and control access to your tack room. Some horsemen go so far as to install video-security systems in their barns, in part to help monitor the tack room.
Tack: Stable & Riding Gear for Your Horses
Invest in a good saddle, whether custom or mass-produced
A custom saddle will be of higher-quality than factory-made options, and can be an heirloom item that could potentially gain value. Custom saddles aren’t cheap, though; expect to pay several thousand dollars for a fairly basic saddle from a known maker. And, the best saddlemakers have waiting lists that can represent years of back orders. For most riders, a high-end, factory-made option will suffice. Always buy saddles from makers or from retailers who specialize in saddles (don’t buy a saddle at a feed store); or look at a secondhand purchase from an experienced horseman you trust.
Only buy the saddles you need
Some riders operate on the theory that they need a wide collection of saddles to accommodate different horses. In reality, a well-made saddle should fit the vast majority of horses.
Invest in saddle pads
Building on the theme above, fine-tuning a saddle’s fit for a particular horse is often a matter of experimenting with different saddle pads. Building a collection of several saddle-pad options will help ensure that a single saddle can be used on a wide variety of mounts.
Don’t forget the back cinch and breast collar
For the sake of simplicity, many riders will opt to use only a single, front cinch. A back cinch and breast collar will provide additional stability, keeping a saddle in place in a variety of riding conditions. This isn’t just a matter of comfort or convenience, but is also a safety issue.
When it comes to bridles, be realistic
For all-around, general riding, it’s tough to beat a good snaffle bit. There’s a certain prestige associated with spade bits – they represent an advanced level of horsemanship and the refinement of a bridle horse – but the reality is that very (very) few horses ever reach a level of training that would make a spade bit appropriate. Likewise, few riders understand how to safely use a spade bit. A snaffle, on the other hand, is a safe and simple option that’s appropriate for virtually all horses, from colts to seasoned cow horses.
Learn to use spurs properly
Spurs are intended to offer a horse a clearer set of signals; they’re meant to be used gently, with the slight turn of a rider’s ankle touching a rowel to the horse’s side. Riders unaccustomed to spurs, or unfamiliar with their correct use, simply shouldn’t bother with them.
Round out your tack collection with the essentials
This should include a variety of halters and lead ropes; hoof picks; and brushes, curry combs and other grooming supplies.
Fads & Gimmicks in the Horse World
Be skeptical of unfamiliar equipment and look to trusted horsemen for guidance on the tack that might or might not be the right fit for you and your horse. In general, it’s best to stick to simple, straightforward tools.
Drilling a Well: Developing a New Water Source On-Property

Developing a water source for your property shouldn’t be a daunting experience.
Once a buyer has purchased a parcel of land, one of the most likely first steps in developing the property is drilling a well. For the first-time landowner, the prospect can be daunting, but it needn’t be. Wells are simply part of rural life and, while not inexpensive, they provide both reliable water sources and a sense of self-sufficiency for property owners.
What to Expect When Drilling a Well?
So, what can a new property owner expect when it comes to drilling a well? Public records (likely available through a state’s water division) offer a good source of usable intel. By examining well permits and pump tests for neighboring properties, one can gather data on common well depths and pump rates in the area. It’s important to remember that each property’s drilling conditions can be unique; a neighbors’ experiences might not reflect the reality encountered on a particular parcel.
Planning a Well Location on Your Property
A landowner will need to investigate the well-permit application process. A state will generally offer different permit types, which regulate how water can be used. In Colorado, for example, a “domestic” permit typically limits usage to household use, the watering of livestock, and the irrigation of up to one acre; “household” permits are available for in-home use; higher-volume uses require irrigation or commercial permits.
A drilling contractor will consult with a landowner on potential well locations, taking into account the contours of the land and the parcel’s geology. A well driller will work to avoid geologic barriers, like bedrock, and low spots in which surface water could pool, potentially contaminating a well. A well should be located away from other potential contamination sources, such as septic fields or ag ground on which pesticides and fertilizers will be applied.
The contractor will drill the well. If all goes according to plan – and the process generally does go according to plan – the driller will hit a productive aquifer, then line the hole with steel casing. A well pump will be installed, most likely in the well itself. A pump test can then be performed, providing data on water quality, pumping rate, and well performance. It’s a good idea for a property owner to have a well test performed regularly (some suggest on an annual basis) to monitor both a well’s functionality and the nature of the water being output.
As for the cost of drilling a well, this will depend on geography, geology (the degree of difficulty in hitting water, the depth a contractor will need to drill), and the regional market. A very general guideline often cited is $15 to $30 per foot. A contractor, though, might charge a set fee that covers fixed costs and drilling to predetermined depth at which water is commonly hit, then charge per foot after that point, if further drilling is necessary to reach an aquifer. A well pump, a pressure tank, and remaining water-supply infrastructure are additional expenses.
Well Maintenance & Water Source Management
Once a well is in place, protecting that water source, particularly from potential contaminants, should be among a landowner’s chief priorities. A well pump won’t last forever, but quality equipment can typically be expected to last 10 to 15 years before requiring replacement; in the event the well pump shuts down, have a contractor’s number handy. Some landowners install cistern systems as backup measures; water contractors can generally outline such options and their costs.